butter loves company

new york food blogger and lifestyle influencer

  • home
  • Recipes
  • travel
  • lifestyle
  • cookie orders
  • about
  • contact

hong kong style bubble egg waffles (eggettes)

July 9, 2015 by Butter Loves Company

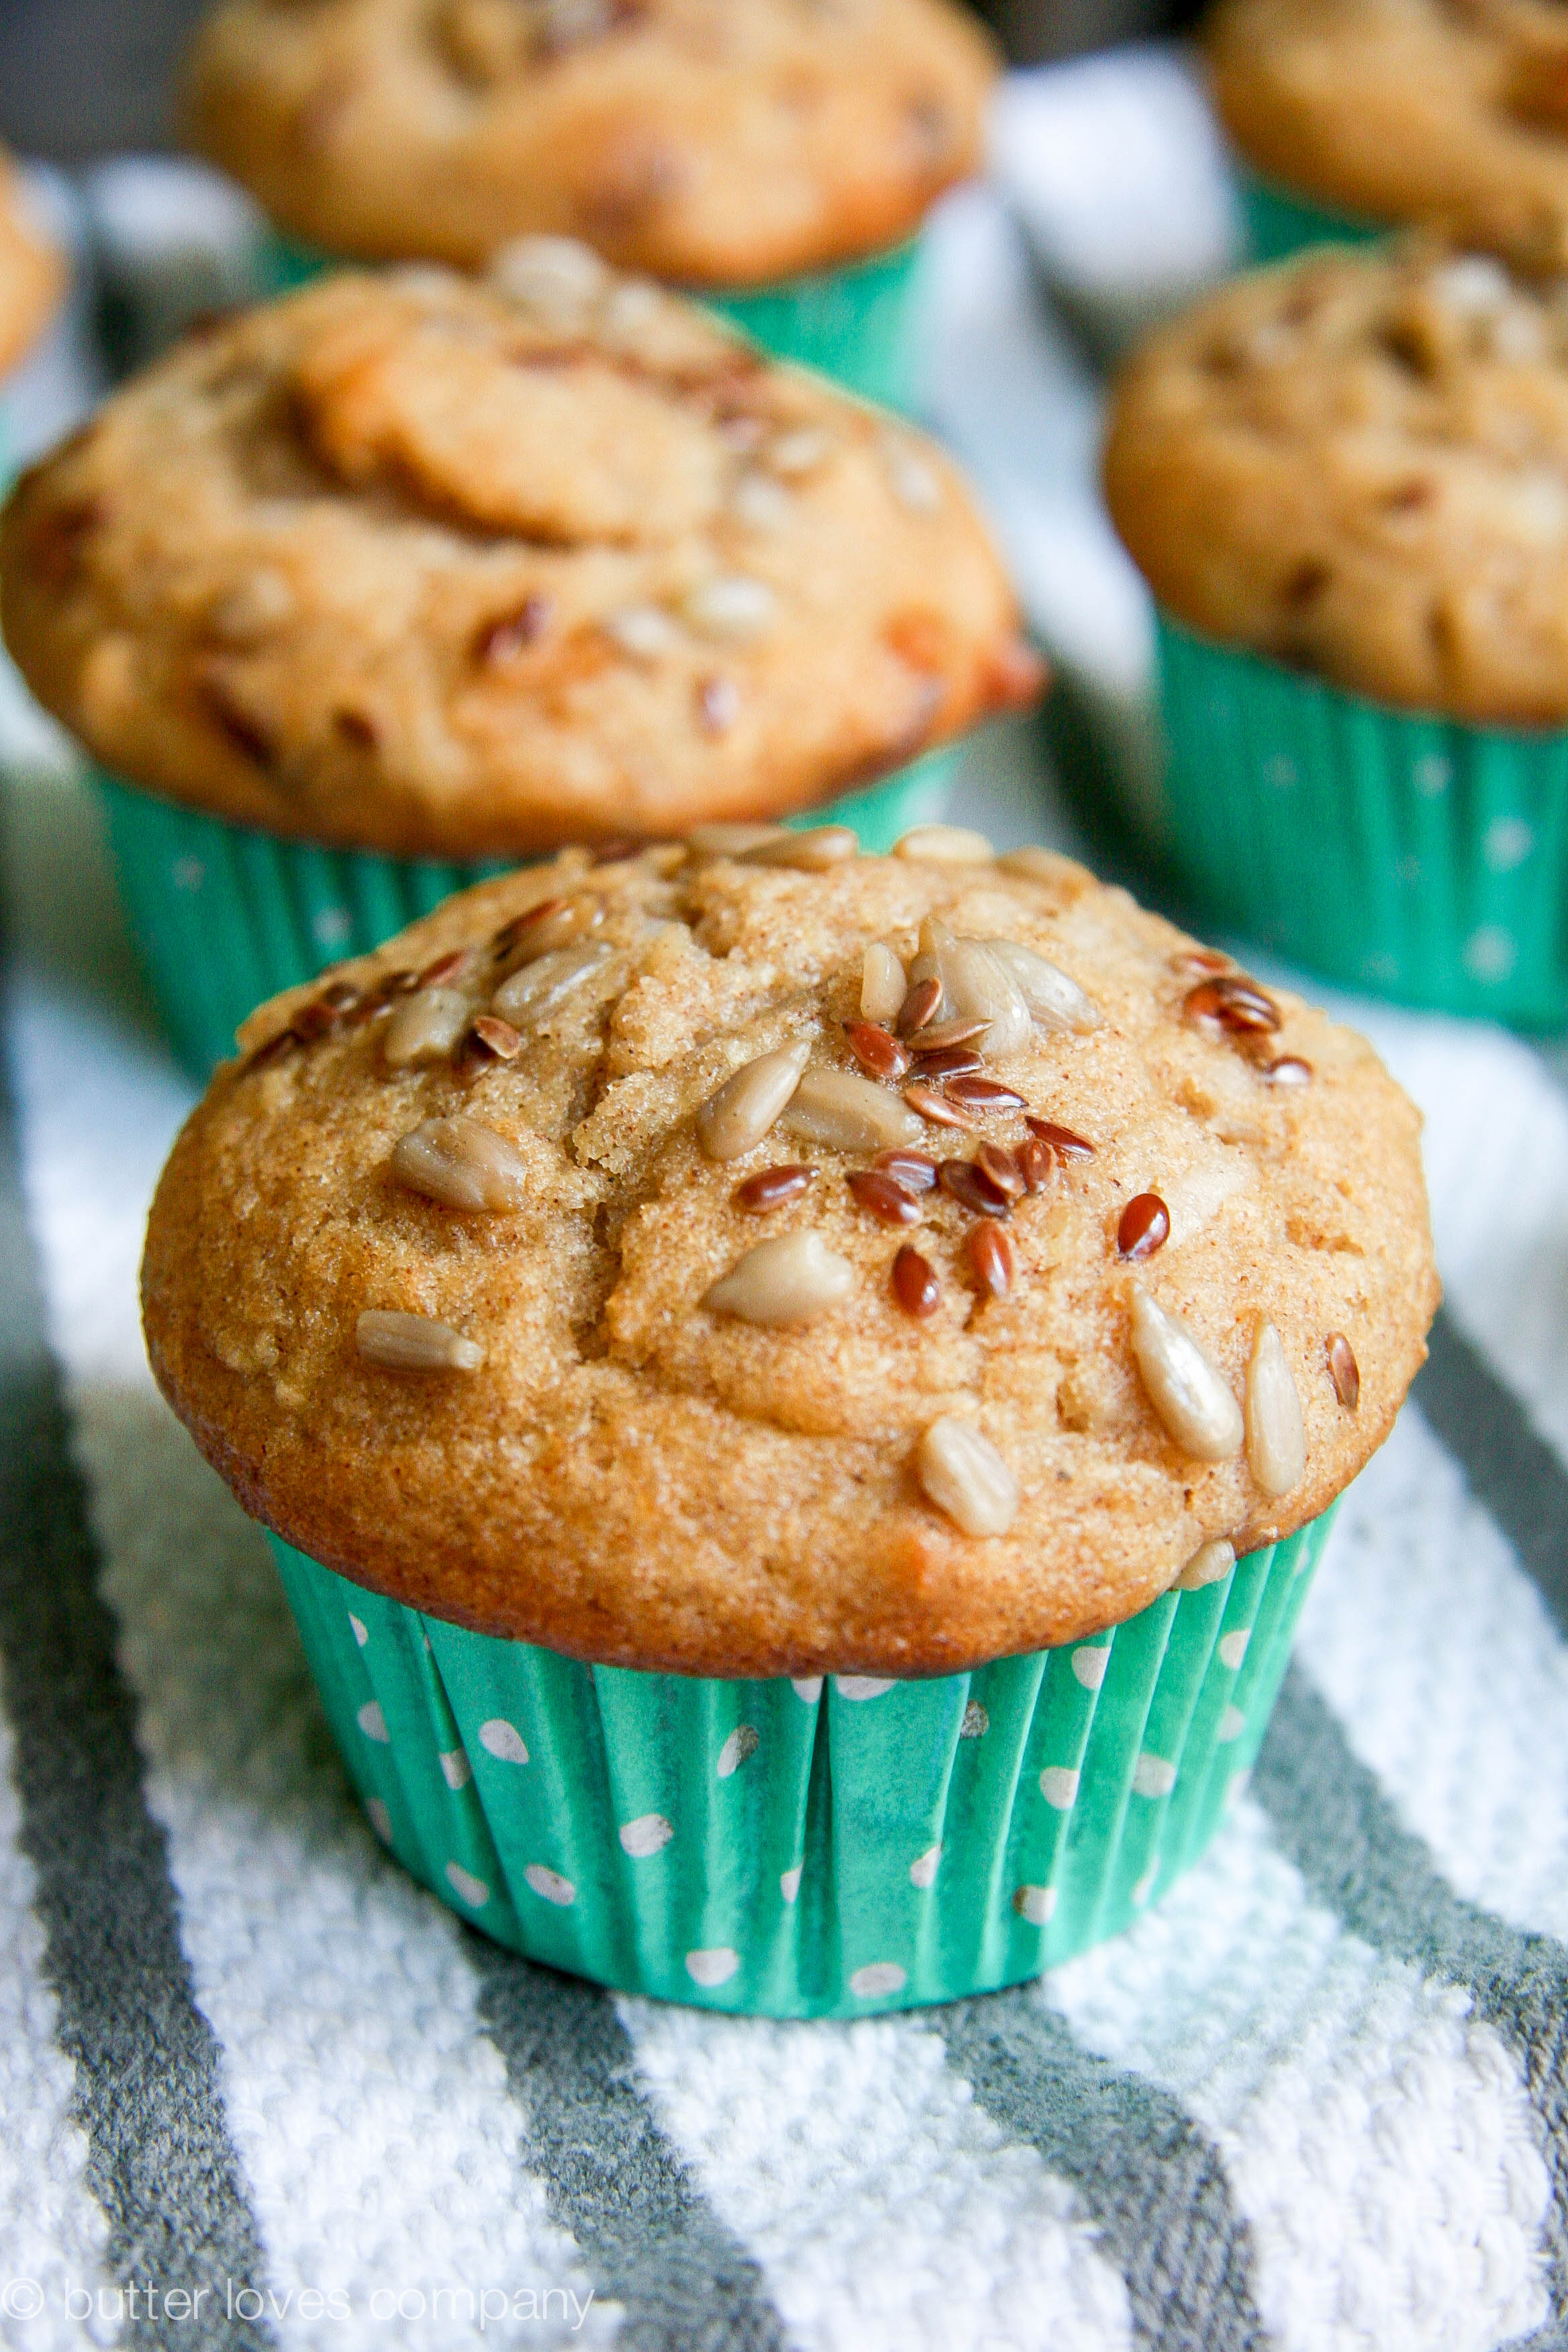
Bubbly for breakfast? Yes, please. No, not mimosas. This time, we’re talking about bubbly waffles!! These funky looking, egg-y waffles are a classic Hong Kong street food and with the magic of this bubble waffle iron plus the below recipe, you can make them at home.

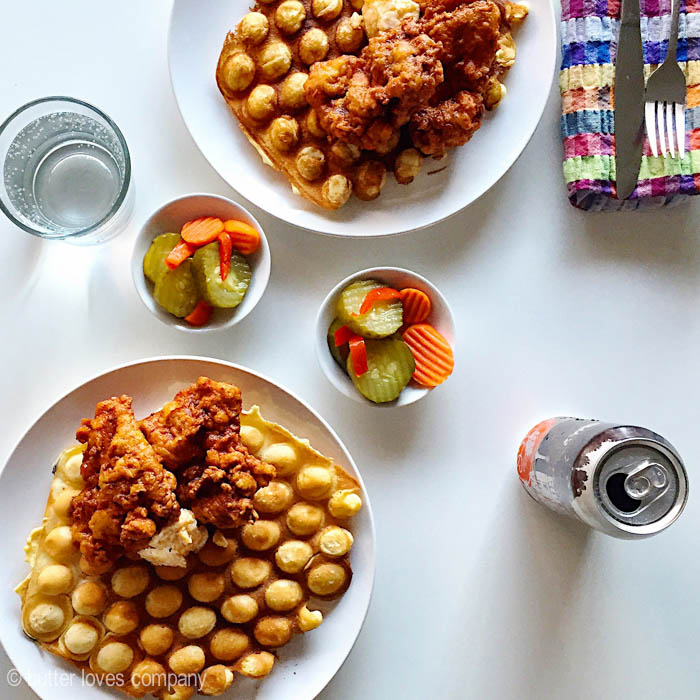
Greg and I first had bubble waffles at this great restaurant Shojo in Boston’s Chinatown where they were served with fried chicken and Szechuan peppercorn maple syrup, alongside tiki drinks and old kung fu movies (I mean, amazing). As soon as we popped off our first bubbles, we were immediately hooked. The chew of the puffed bubbles paired perfectly with the crispy parts of the batter dividing them.

One of the main differences between these bubble waffles, sometimes called eggettes, and traditional waffles is the addition of sweetened condensed milk. I think this is what gives the waffle its lightly sweet custard flavor.

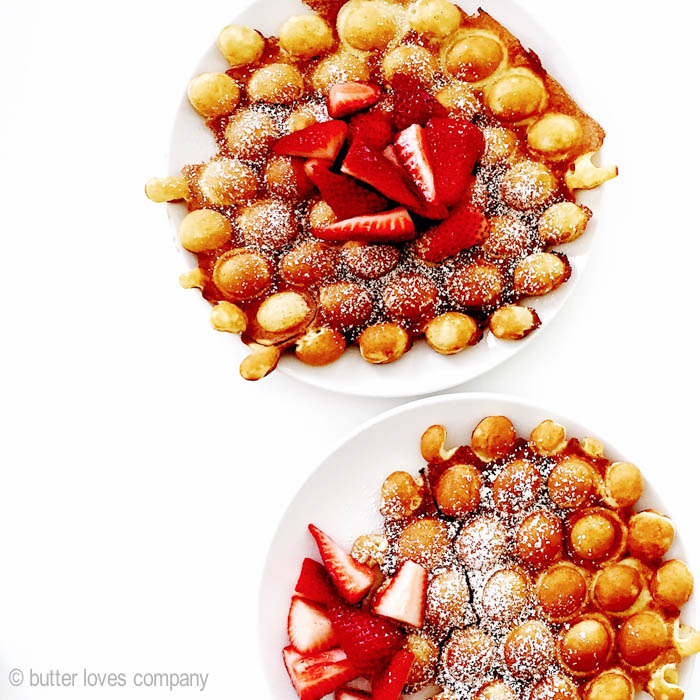
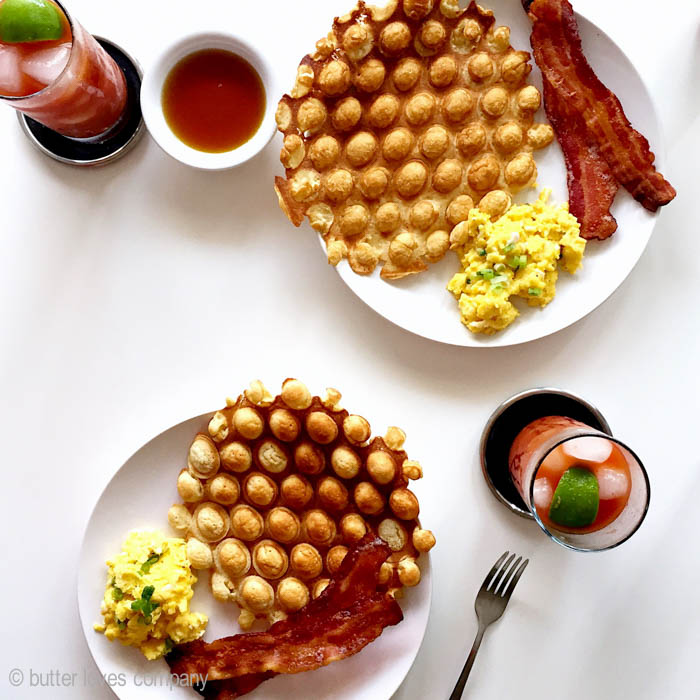
Pair the waffles with sliced berries and a sprinkling of confectioners sugar, some syrup, or go savory with fried chicken. They are great eaten warm but I even like to make a big batch and pick at them throughout the day at room temperature. They are the perfect whimsical treat for your brunch table!

hong kong style bubble egg waffles (eggettes)
adapted from Ginger and Scotch

special equipment: bubble waffle iron

prep time: 10 minutes
cook time: 15 minutes
total time: about 30 minutes
makes 4-5 bubble waffles

Ingredients:

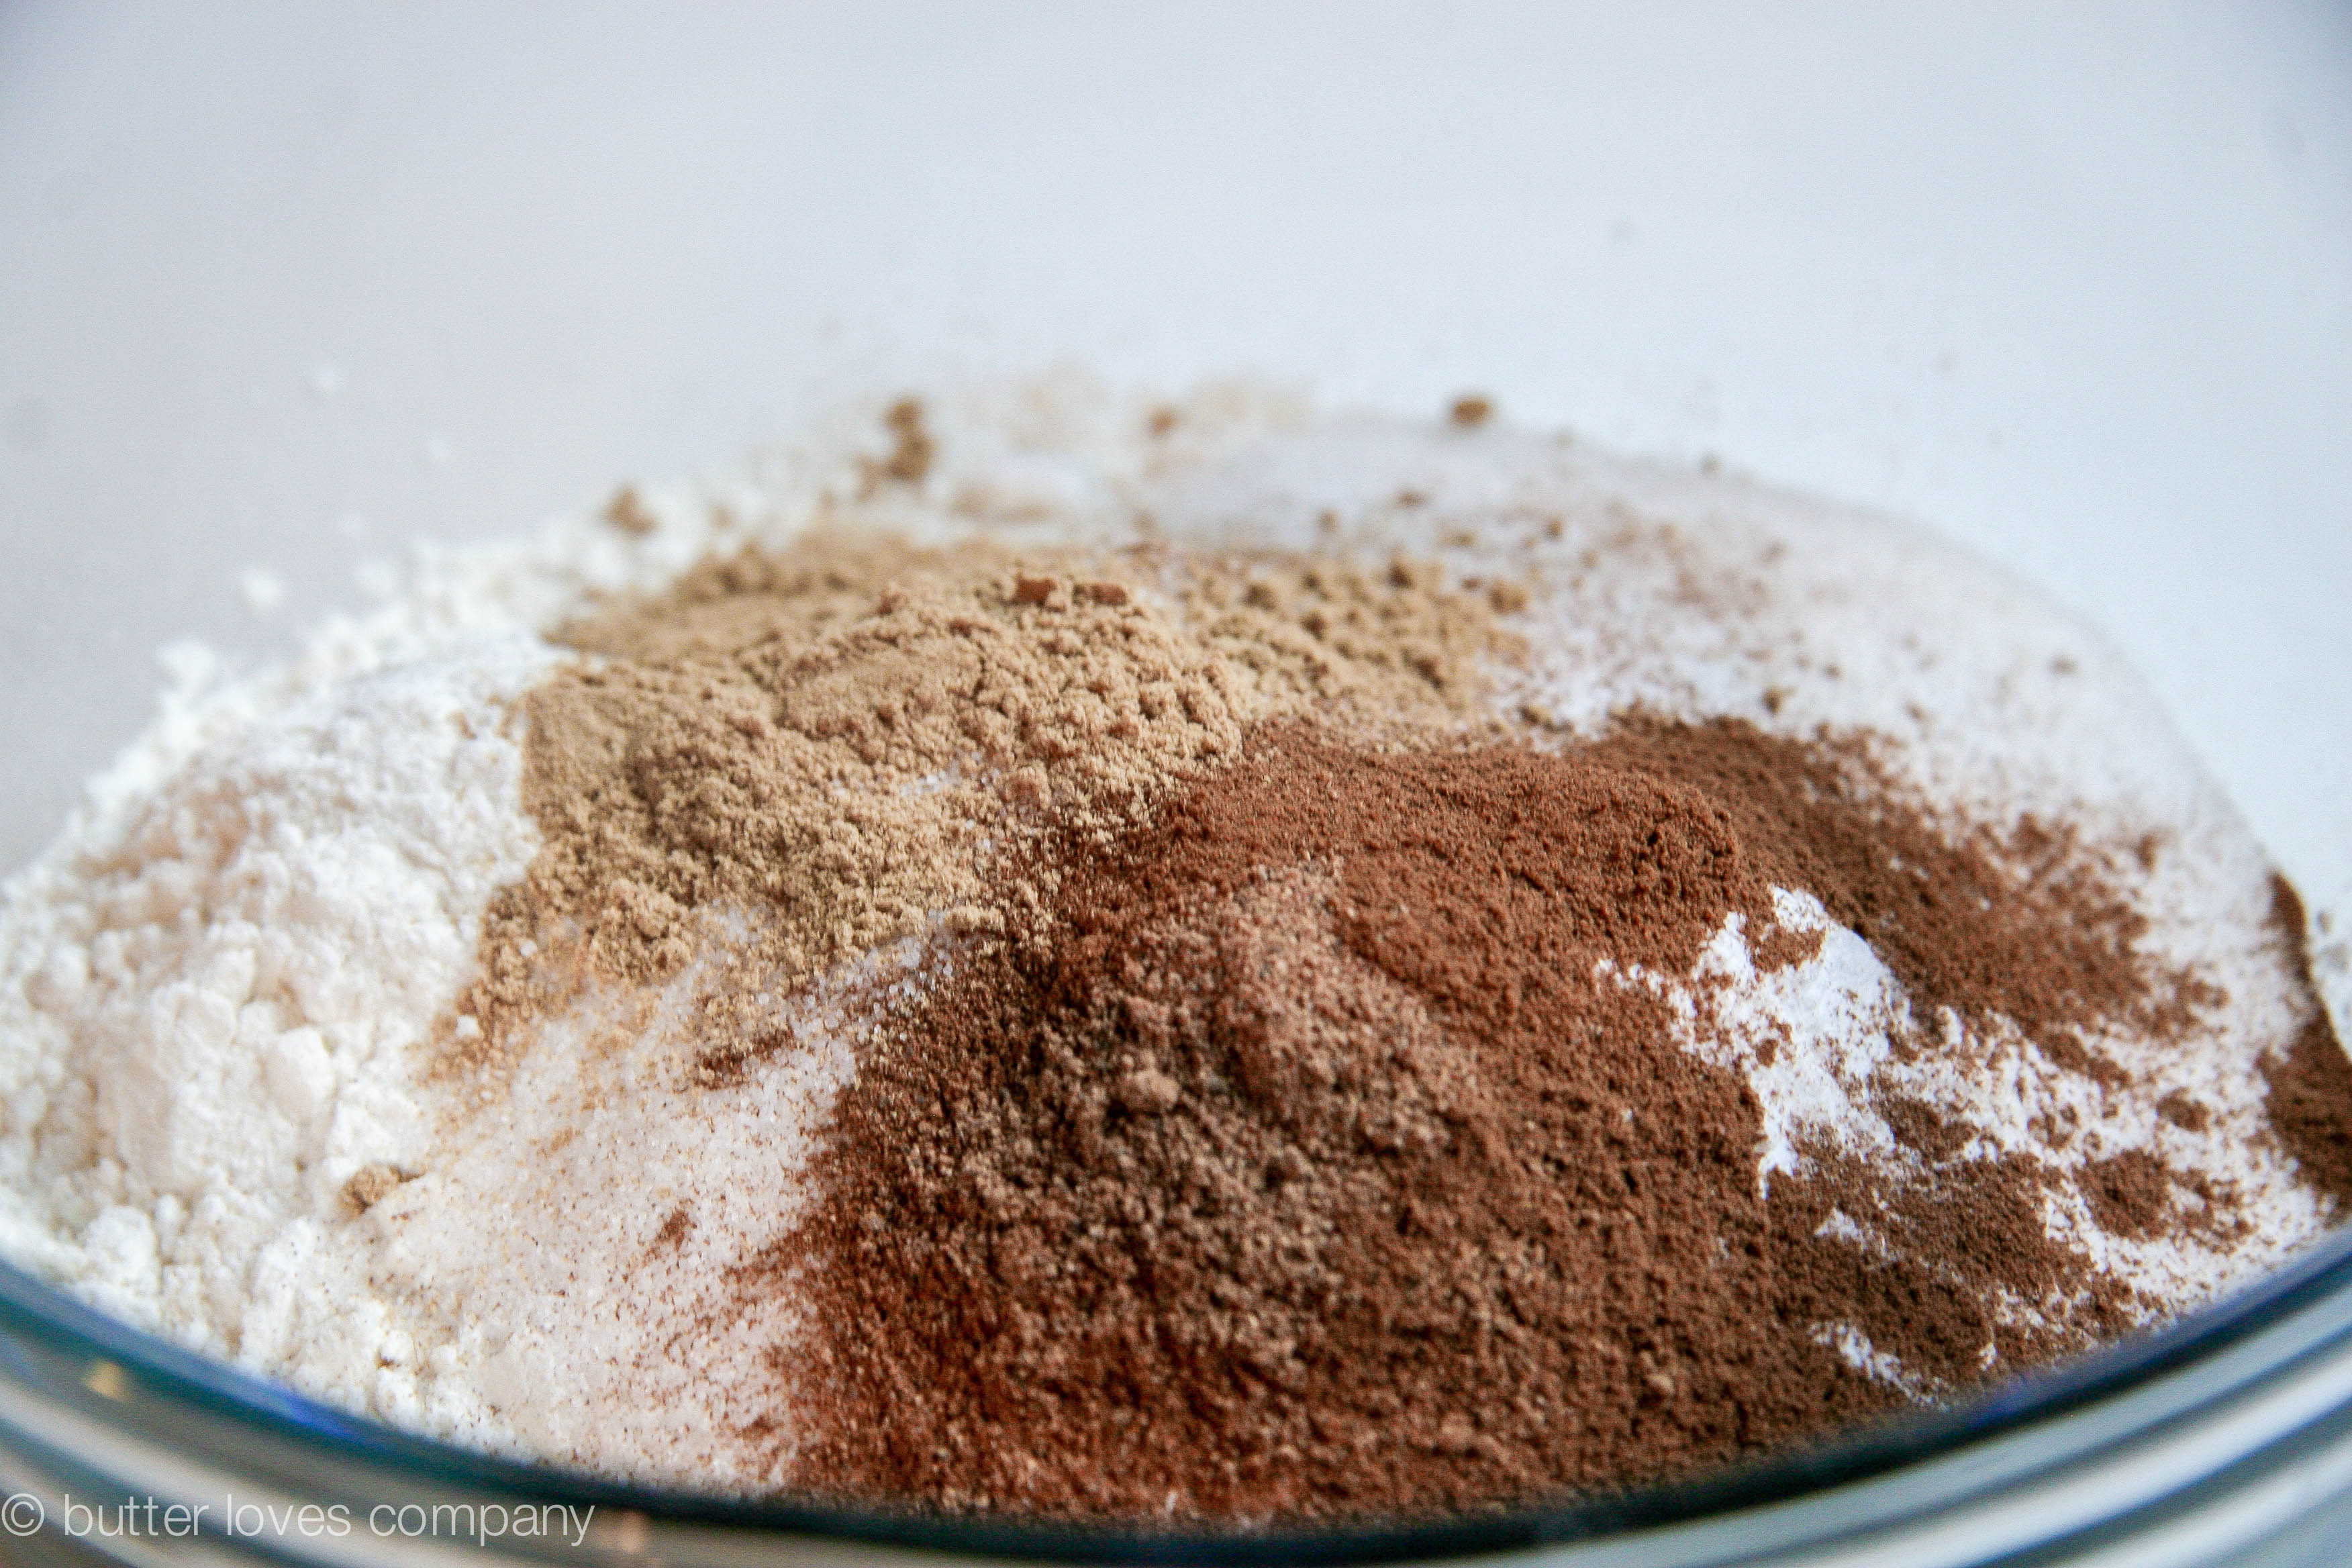
1 cup (4 oz or 120 g) all-purpose flour
1 teaspoon baking powder
1 teaspoon tapioca starch or corn starch
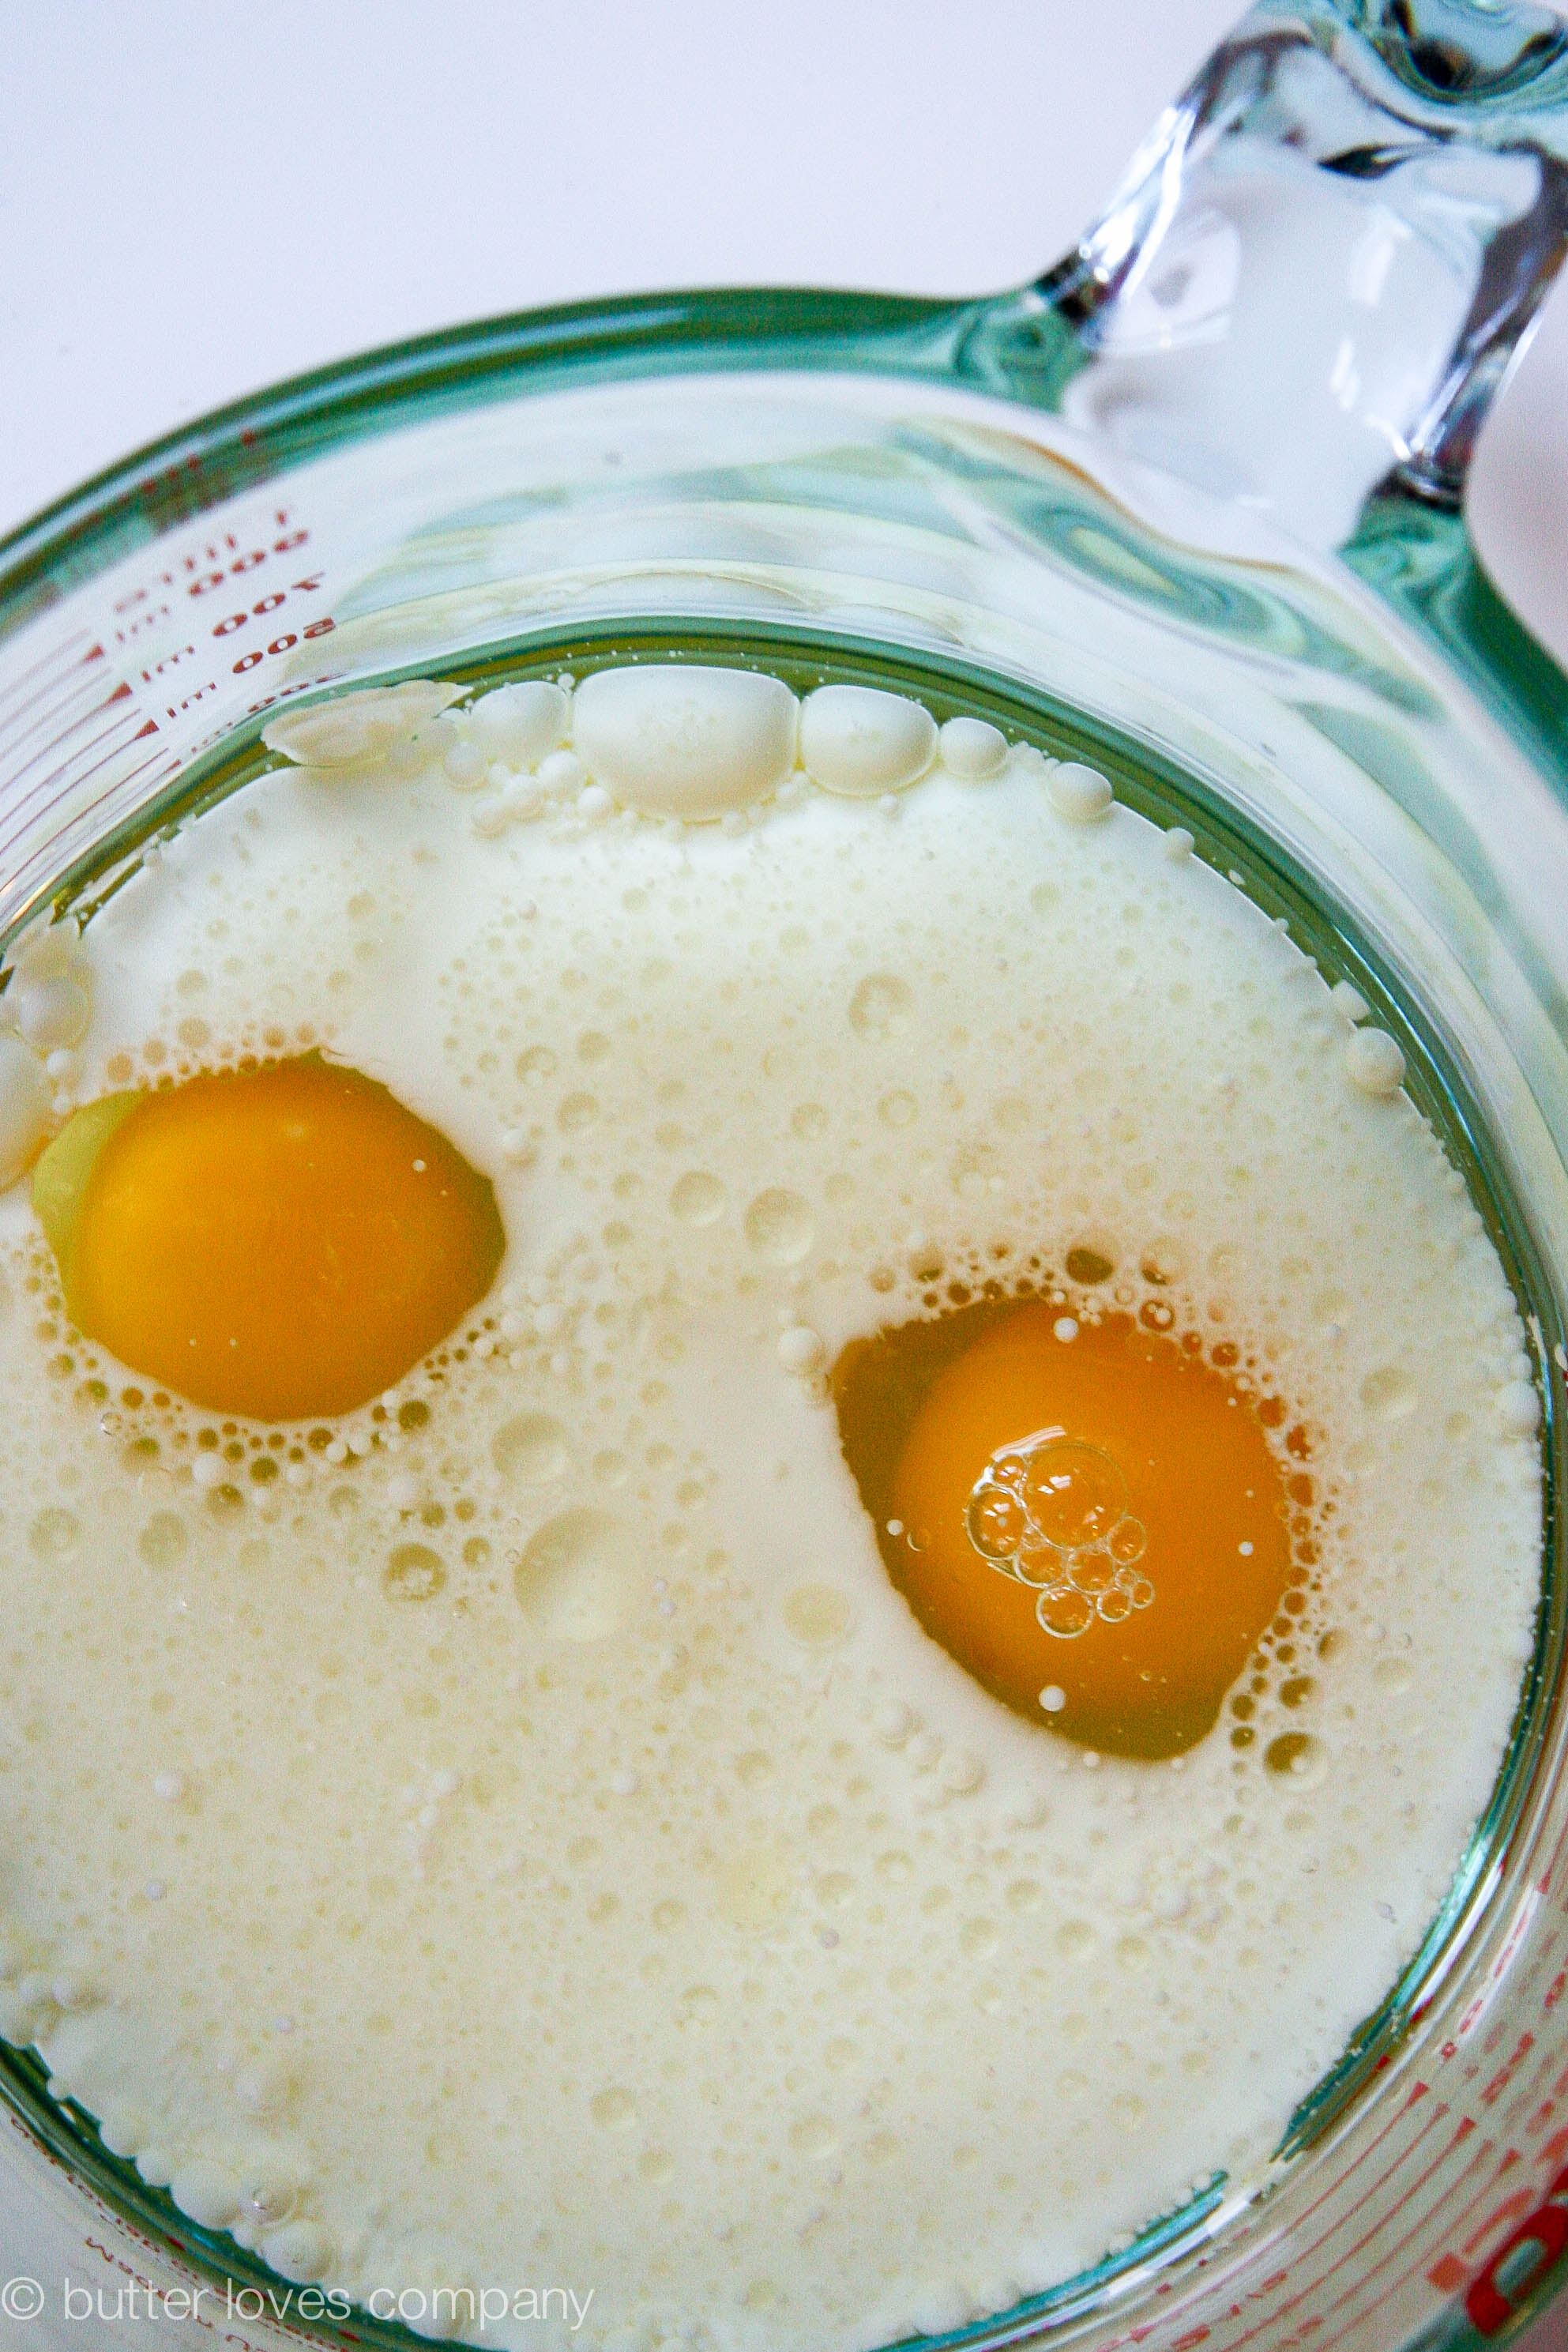
2 large eggs
1/3 cup plus 2 tablespoons sugar
1 tablespoon vegetable oil
1 teaspoon vanilla extract or paste
2 tablespoons sweetened condensed milk
5 oz (150 mL) water
vegetable oil or non-stick spray for coating egg waffle pan

Instructions:

  1. In a large bowl using a whisk or in the bowl of your electric mixer, mix together the flour, baking powder, and tapioca or corn starch.
  2. Add the eggs, sugar, vegetable oil, and vanilla and mix on low speed until combined.
  3. Add the sweetened condensed milk and water. Mix thoroughly. It may be a little bit lumpy, which is fine. You can let it sit for a few minutes in the fridge or at room temperature to help the lumps subside.
  4. Separate and pre-heat each half of the bubble waffle iron on separate burners over medium-high heat until hot, 3-5 minutes.
  5. Lightly brush or spray each pan with vegetable oil.Pour ¾ cup of the batter into the middle of one side of the egg waffle pan and shimmy the pan a little to distribute some of the batter to the outer holes. Immediately place the other side of the pan on top, flip the pan over and cook for 2 minutes. Flip again and cook for another 2 to 3 minutes, until the bubbles are golden and in-between is deep golden. The timing may vary based on your stove but you want to cook it until the bubbles pull away from the pan easily. Open the pan and invert the waffles onto a plate. Repeat with remaining batter. Enjoy!

Filed Under: breakfast and breads, eat Tagged With: bubble waffles, chicken and waffles, eggettes, hong kong street food, shojo boston, waffles

brown butter cinnamon sugar pull-apart bread

March 10, 2015 by Butter Loves Company

brown-butter-cinnamon-sugar-pull-apart-bread-10-text

WARNING: This is the kind of bread you can easily polish off in a single sitting. The second you peel the first layer of this buttery sweet dough off the loaf and smell the warm cinnamon sugar filling, your other hand will already be reaching for your next piece. Maybe it’s best if you keep some friends around to share. Or, be greedy and have it all—I would. You won’t even need to waste time slicing because this is homemade PULL-APART bread. Hands-on food is fun. Nothing like instant gratification.

I love making breads and things with yeasted dough. It makes me feel like a superwoman because I used to think only professional bakers could work bread magic (for one of my favorite yeasted dough recipes, see here). Just take a look at the layers completely transform before and after baking. It’s amazing! It’s like a science experiment in the kitchen and, man, it makes me just love science. I hope you will too.

While there are few combinations better than the simple cinnamon and sugar, you can get as weird as you want with this pull-apart bread recipe. Maybe toss in some chocolate chips … or raspberries … or even go savory and swap out the cinnamon sugar for olives and cheese. Whatever you do, you’d better get ready for carb satisfaction!

P.S. This bread pairs excellently with a Bloody Mary. We had to test, you know, to be sure. 🙂

brown-butter-cinnamon-sugar-pull-apart-bread-2

brown-butter-cinnamon-sugar-pull-apart-bread-3

brown-butter-cinnamon-sugar-pull-apart-bread-4

brown-butter-cinnamon-sugar-pull-apart-bread-5

brown-butter-cinnamon-sugar-pull-apart-bread-6

brown-butter-cinnamon-sugar-pull-apart-bread-8

brown-butter-cinnamon-sugar-pull-apart-bread-12

brown-butter-cinnamon-sugar-pull-apart-bread-9

brown-butter-cinnamon-sugar-pull-apart-bread-13

brown butter cinnamon sugar pull-apart bread
recipe adapted from joy the baker

prep time: 30 minutes
cook time: 35 minutes
total time: about 3 hours (includes time for dough to rise)
makes: one 9x5x3-inch loaf

Ingredients:

For the Dough:
2 1/4 teaspoons (1 envelope) active dry yeast
3 tablespoons warm water (between 105°F and 115°F)
3 cups all-purpose flour
1/4 cup granulated sugar, plus a pinch (divided)
1/2 teaspoon salt
2 ounces unsalted butter
1/3 cup whole milk
1/4 cup water
2 large eggs, lightly beaten
1 teaspoon pure vanilla extract

For the Filling:
1 cup granulated sugar
2 teaspoons ground cinnamon
1/2 teaspoon fresh ground nutmeg
2 ounces unsalted butter, melted until browned

Instructions:

  1. Activate your yeast: In a small bowl, sprinkle the yeast over 3 tablespoons of warm water. Stir until the yeast begins to dissolve. Add the pinch of granulated sugar and allow the mixture to sit for about 5 minutes, until the mixture is foamy and frothy.
  2. Prepare the dough: In the bowl of a stand mixer fitted with a paddle attachment, whisk together 2 cups flour, 1/4 cup sugar and salt. Set aside.
  3. In a small saucepan, melt together milk and butter until butter has just melted. Remove from the heat and add water and vanilla extract. Let mixture stand for a minute or two, or until the mixture registers 115°F to 125°F.
  4. Pour the milk mixture into the dry ingredients and mix on low until combined. Add the yeast mixture, followed by the eggs and stir until the eggs are incorporated into the batter. It may take a little while to come together. Add 3/4 cup of the remaining flour and mix on low for about 2 minutes. The mixture will be sticky.
  5. Place the dough in a large, greased bowl. Cover with plastic wrap and place in a warm space to rest until doubled in size, about 1 hour. Make ahead: After you let the dough rise to double its size, it can be refrigerated overnight to use in the morning. If you’re using this method, let the dough rest at room temperature for 30 minutes before continuing the recipe.
  6. Prepare the filling: While the dough rises, whisk together the sugar, cinnamon, and nutmeg. Set aside. Melt 2 ounces of butter until browned. Set aside. Grease and flour a 9x5x3-inch loaf pan. Set aside.
  7. Assemble and bake: Deflate the risen dough and knead about 2 tablespoons of flour into the dough. Cover with a clean kitchen towel and let rest for 5 minutes. On a lightly floured work surface, use a rolling pin to roll out the dough. The dough should be about 12-inches tall and about 20-inches long. Use a pastry brush to spread the melted brown butter across all of the dough. Sprinkle with all of the cinnamon and sugar mixture.
  8. Slice the dough vertically, into six equal-sized strips. Stack the strips on top of one another and slice the stack into six equal slices once again so you are left with six stacks of six squares. Layer the dough squares on their sides in the loaf pan. Place a kitchen towel over the loaf pan and allow to rest in a warm place for 30 to 45 minutes or until almost doubled in size.
  9. Place a rack in the center of the oven and preheat to 350°F. Place loaf in the oven and bake for 30 to 35 minutes, until the top is very golden brown. You will want to make sure the dough in the center is cooked so don’t be nervous if the top reaches a deep golden brown. That’s what you’re looking for.
  10. Remove from the oven and allow the loaf to cool for 20 to 30 minutes before running a knife around the edges of the pan to loosen the bread and invert onto a platter. Serve warm.

brown-butter-cinnamon-sugar-pull-apart-bread-14

Filed Under: breakfast and breads, eat Tagged With: bloody mary, bread, breakfast, brown butter, cinnamon sugar, pull apart bread, pull-apart

sticky bundt (sticky bun bundt cake)

January 27, 2015 by Butter Loves Company

sticky bun bundt cake 9 copy

This is a sticky bun/bundt cake hybrid which I’ve aptly named a sticky ‘bun’dt (Get it, get it?). I made a batch of fluffy sticky buns and baked them in a bundt pan literally for the sole purpose of saying sticky bundt all day. Lucky for me, the resulting sticky-sweet, pecan-studded cake tasted amazing, so I’m excited to share the recipe with you while I humbly pat myself on the back. 😉

sticky bun bundt cake 1

look at these sweet dough pinwheels getting personal! they love each other!

If you are a fan of sticky buns, you’re definitely open to a bit of butter and sugar. Plenty of pecans adhere to a sticky-sweet—but more of a mature not-too-sweet, sweet—dark brown sugar topping, all of which jumps aboard a nutty, buttery cinnamon roll train. Hopefully, the train is headed for a brunch table near you!

Making sticky buns requires a bit of patience as you’ve got to proof the dough twice; first, right after preparing the yeasted sweet dough, and second, after filling and rolling the dough into pinwheeled buns. I promise you this sticky bun bundt cake cake is worth the extra effort as the bundt is as tasty as it is visually stunning.

sticky bun bundt cake 2

There are three main elements to this sticky bun bundt cake: the dough, the filling, and the topping. Broken down into three parts it is totally manageable and you can even prepare and assemble the buns a day ahead of time so you will be able to sleep in and still impress your family and friends at Sunday brunch. Just allow the chilled buns to get to room temperature about an hour and a half before baking in the morning.

sticky bun bundt cake 4

the pecan cinnamon rolls will rise up into these layers and you will feel like a superhero for making this happen.

sticky bun bundt cake 5

sticky bun bundt cake 12

you’ll flip the sticky bundt out of its pan and smell the nuts and sweet butter combined with the warm spices and rich topping.

sticky bun bundt cake 10

sticky bun bundt cake 6

sticky bun bundt cake 11

sticky bundt
Adapted from Bon Appetit, April 2012

prep time: 30–40 minutes (plus time to chill and rise)
cook time: 50 minutes
total time: 5 hours (includes minimum time to chill and rise)
Makes: One 10-inch bundt cake or 10 individual sticky buns prepared in an 8x8x2″ metal baking pan

Ingredients:

Sweet dough:

2/3 cup whole milk
5 tablespoons sugar, divided
1 3/4 teaspoons active dry yeast (from one 1/4-ounce envelope)
2 large eggs, room temperature
2 3/4 cups all-purpose flour
1 teaspoon salt
1/2 cup (1 stick) unsalted butter, cut into 1″ pieces, room temperature, plus 1 tablespoon melted butter for greasing bowl

Topping:

2 cups chopped pecans (I like to keep about 1/2 cup whole to top the bundt, but up to you.)
1/2 cup (1 stick) unsalted butter
3/4 cup (packed) dark brown sugar
1 tablespoon vanilla extract
3/4 cup heavy cream
1/3 cup honey
1/4 teaspoon salt
1/4 teaspoon finely grated orange zest (optional)
2 teaspoons orange liqueur or rum (optional)

Filling/bun assembly:

1/2 cup (1 stick) unsalted butter, room temperature
1/2 cup (packed) dark brown sugar
1 teaspoon vanilla bean paste or extract
3/4 teaspoon ground cinnamon
1/2 teaspoon freshly grated nutmeg
1/8 teaspoon salt
1 large egg (for egg washing buns)
Coarse sea salt (such as Maldon) for finishing

Instructions:

Make the sweet dough:

  1. In a small, microwave-safe bowl, heat milk in microwave until an instant-read thermometer registers 110–115°F. Stir in 1 tablespoon sugar. Sprinkle yeast over milk and whisk to blend. Let sit until yeast is foamy, about 5 minutes. Whisk in eggs until smooth.
  2. Combine remaining 4 tablespoons of sugar, flour, and salt in the bowl of a stand mixer fitted with a dough hook. Add milk mixture and combine on low speed. With mixer still running, add the room-temperature butter, 1 piece at a time, incorporating each piece fully before adding the next one. After you’ve added the last piece, mix on medium speed for 1 minute. Increase speed to medium-high and knead until dough is soft and silky, about 10 minutes.
  3. Brush a medium bowl with melted butter; place dough in bowl. Brush top of dough with remaining melted butter; cover with plastic wrap and let sit room temperature until about doubled in size, about 45 minutes to 1 hour. Transfer to refrigerator and chill dough for 2 hours.

Meanwhile, make the topping:

  1. Preheat oven to 350°F. Toast pecans on a rimmed baking sheet until fragrant and slightly darkened, 10–12 minutes. Let cool completely. Set 1 1/2 cups nuts aside for inside the buns.
  2. Melt butter in a small, heavy saucepan over medium heat. Stir in brown sugar, vanilla, cream, honey, salt, orange zest and liqueur, if using. Bring to a boil, reduce heat to medium, and simmer until glaze is golden brown, glossy, and slightly thickened, 3–4 minutes. Pour a third of the glaze into your bundt pan, tilting to coat bottom and sides. Set aside remaining glaze. Sprinkle 1/2 cup toasted pecans over bottom of pan and let cool.

Make the filling and assemble:

  1. Using an electric mixer on medium speed, beat butter, sugar, cinnamon, nutmeg, and salt in a medium bowl until light and fluffy, 2–3 minutes. Set filling aside.
  2. Remove dough from refrigerator and transfer to a floured work surface. Lightly dust top with flour and roll out the dough into a 12×16″ rectangle about 1/4″ thick. Spread the cinnamon-sugar mixture over dough with a knife or your hands. Sprinkle 1 cup chopped pecans over the cinnamon-sugar mixture.
  3. Beginning with the long edge closest to you, roll the dough tightly into a log. Once you finish rolling, arrange the log seam-side-down on the work surface.
  4. Using a sharp knife (you can wet the knife slightly to help make a clean cut), cut the log crosswise into 10 equal pieces. Don’t worry about making perfect rolls especially if you’ll be putting into a bundt pan. Turn the buns cut-side-up and gently tuck the end of each roll under the bun so it won’t unroll while baking. Place the buns in prepared pan; space them evenly apart. If making the sticky bundt, the buns will touch. If making individual buns in a 8x8x2″ metal baking pan the buns will likely not touch each other. At this point, you can cover and chill buns and remaining glaze separately. Store remaining pecans airtight at room temperature.
  5. Loosely cover pan with plastic wrap or a kitchen towel. Let buns rise in a warm, draft-free area until doubled in size, 45 minutes to 1 hour, or 1 1/2–2 hours if dough has been chilled overnight.
  6. Arrange a rack in middle of oven; preheat to 350°F. Whisk egg with 1/2 teaspoon water in a small bowl. Brush tops of buns with egg wash. Bake, rotating pan halfway through and tenting with foil if browning too quickly, until buns are golden brown, filling is bubbling, and an instant-read thermometer inserted into center of buns registers 185°F, about 50 minutes. Let cool for 5 minutes and then invert onto a platter. Spoon remaining glaze over sticky bundt. Sprinkle with 1/2 cup pecans. Lightly sprinkle with sea salt. Serve sticky bundt warm or at room temperature.

Filed Under: breakfast and breads, desserts and sweets, eat Tagged With: brunch recipes, bundt cake, make ahead, pecans, sticky bundt, sticky buns, sweet dough

apple pie buttermilk biscuits

September 17, 2014 by Butter Loves Company

apple-pie-biscuits-joy-the-baker-bootcamp-14 copy

If you’ve ever found yourself craving apple pie for breakfast, these biscuits are for you. These fluffy treats are portable, completely 8am acceptable versions of apple pie with a sweet cinnamon apple filling folded into two fluffy, buttery buttermilk biscuit layers. Shopping for and making this recipe is extremely easy as it requires just one apple, one spice and no electric mixer of any sort. Let’s consider this our simple stepping stone into the various apple-ly pies and treats we make in the coming months. Prepare to have a super awesome smelling kitchen!

apple-pie-biscuits-joy-the-baker-bootcamp-1

I made these last Sunday as part two of the Joy the Baker and King Arthur Flour Baking Boot Camp series. The concept of the series is simple: four recipe challenges using four different King Arthur Flours + photos + Instagram #bakingbootcamp = a chance to win awesome baking prizes. If you’re interested in participating you can find out more details on Joy’s blog. Also, if you have an Instagram account, I would love to see your results. I’m @butterlc. Let’s be web buds!

apple-pie-biscuits-joy-the-baker-bootcamp-2

This challenge featured self-rising flour, which I learned is made using soft wheat flour rather than the hard wheat flour that goes into all-purpose flour. This causes it to have a lower protein content (8.5%) than all-purpose flour (11.7%) which aids in making the flour light, and resulting tender and fluffy biscuits. Apparently, this type of flour also already contains non-aluminum baking powder and a dash of salt. Whoop, whoop! Cheers to learning! Love this stuff.

apple-pie-biscuits-joy-the-baker-bootcamp-4

I don’t know about you but I had five types of flour on hand, but self-rising was not one of them. Luckily, you can make your own using this easy formula: 1 cup all-purpose flour + 1 1/2 teaspoons baking powder + 1/4 teaspoon salt. Whisk this mixture together until thoroughly combined. You will need a double batch of this for the recipe below.

Aside from having these on a casual Sunday, I can picture serving them with brunch on a crisp fall day, or even into the Thanksgiving holiday season.

*Truthfully, if you find yourself craving apple pie for breakfast, please also feel free to eat the stinkin’ pie. I know I have. That’s the beauty of being an “adult.”

apple-pie-biscuits-joy-the-baker-bootcamp-5

buttermilk lava!

apple-pie-biscuits-joy-the-baker-bootcamp-6

your dough will start coming together.

apple-pie-biscuits-joy-the-baker-bootcamp-7

roll out the dough

apple-pie-biscuits-joy-the-baker-bootcamp-8

add your sweet apple filling

apple-pie-biscuits-joy-the-baker-bootcamp-9

cut and place on a cookie sheet pan

apple-pie-biscuits-joy-the-baker-bootcamp-12

sprinkle tops with cinnamon sugar, because that can only make things better

apple-pie-biscuits-joy-the-baker-bootcamp-11

apple-pie-biscuits-joy-the-baker-bootcamp-13

biscuits.

apple-pie-biscuits-joy-the-baker-bootcamp-16

I love how the apple peeks out!

apple pie buttermilk biscuits
Joy the Baker

prep time: 15 minutes
cook time: 12–14 minutes
total time: 30–40 minutes
makes 12 biscuits

Ingredients:

For the Apples:
1 Fuji or other baking apple of choice, peeled, cored and sliced very thin
2 tablespoons unsalted butter
1 teaspoon ground cinnamon
2 tablespoons packed brown sugar (I was generous with this)
For the Biscuits:
2 cups King Arthur Unbleached Self-Rising Flour, or your own self-rising flour mixture (directions above)
1/4 cup cold unsalted butter, cut into small cubes
2 tablespoons granulated sugar
2/3 to 3/4 cup cold buttermilk
For the Topping:
1 large egg, beaten
2 tablespoons granulated sugar
1/2 teaspoon ground cinnamon
pinch of salt

Instructions:

  1. Place a rack in the center of the oven and preheat to 425°F. Line a baking sheet with parchment paper and set aside.
  2. Prepare the apples: Melt butter in a medium skillet over medium heat. Add the apples, cinnamon and brown sugar. Toss the apples until the sugar is melted and the mixture on the apples is warm and glossy. The apples will be coated but won’t be cooked through. Remove from the heat and set aside to cool.
  3. Prepare the biscuit dough: Place flour in a medium bowl. I used a baking dish with a nice flat bottom and wide top so I could get my hands in easily. Add the cold butter cubes and use your fingers to quickly break the butter down into the flour until some of the butter bits are oat-sized and others pea-sized. Stir in the granulated sugar.
  4. Create a well in the center of the flour mixture and pour in 2/3 cup buttermilk. Stir the mixture together until it is well moistened and holds together if you gently gather it together into a ball. Add the remaining buttermilk as needed. If you’re using your own homemade self-rising flour, you’ll want to add the full 3/4 cup of buttermilk.
  5. Lightly dust a work surface with all-purpose flour. Gently gather the dough into a ball and transfer it to the floured surface. Pat it into a small rectangle.
  6. Assemble: Use a rolling pin to gently roll the dough into a rectangle 1/2-inch thick, about 7-inches x 10-inches. Arrange the cooled apples in a single layer over one half of the rolled-out biscuit dough. Fold the empty side of the dough over the apples and gently seal in the apples by pressing the edges of the dough together. You can use your hands to pat the dough into a 6-inch x 8-inch rectangle and smooth the edges.
  7. Use a sharp knife to slice the dough into 12 squares. Use a spatula to place each biscuit onto the prepared baking sheet, about 2-inches apart.
  8. In a small bowl, whisk together sugar for topping, cinnamon and salt.
  9. Brush each biscuit top with beaten egg and sprinkle generously with the cinnamon sugar mixture.
  10. Bake for 12 to 14 minutes until the biscuits are risen and golden brown. Remove from the oven and serve warm, or cool completely before storing in an airtight container. Biscuits are best enjoyed within two days of baking.

apple-pie-biscuits-joy-the-baker-bootcamp-17

Filed Under: breakfast and breads, eat Tagged With: apple pie, apples, autumn, baking bootcamp, biscuits, breakfast, buttermilk, fall, king arthur flour

spiced pumpkin muffins

September 8, 2014 by Butter Loves Company

spiced-pumpkin-muffins-recipe-1 title

If someone asked you what your favorite season was, what would you say? I would most definitely shout FALL!!! Here’s the short list of reasons why:

  • A Break from Humidity: Anyone who knows me knows how much I hate humidity. Autumn brings a welcome reprieve from summer’s oppressive and unattractive face dew (aka sweat). Holding a cell phone to your ear while walking casually should not leave you sweaty. It just shouldn’t. Am I right?
  • Boots: Love, love, love ’em. Comfortable, cute, practical—as soon as Labor Day passes, I am so like, ‘Bring on the Booties!’ Boots > Flip Flops, any day.
  • Apple Picking: Did you know people come to New England to look at the leaves fall off the trees? Leaf peeping is a real thing! As a Boston native, I think I sometimes under-appreciate the beauty of nature’s red and orange hues. One thing I always appreciate though is apple picking. I turn into a total kid when it comes to plucking these sweet little beauties from the orchard trees. I especially love climbing up the trees to find that perfect apple (boots on, obviously). As a couple of added bonuses, apple picking usually means cider donuts and always means apple desserts made fresh with your bounty.
  • Football: My family and boyfriend are probably rolling their eyes right now, but I would say my love of the start of football season is actually a love of game day foods. A day of cooking and eating with friends in cozy clothes sounds amazing to me. Don’t ask me the score. I’m too busy stuffing my face with nachos.
  • All Things Pumpkin (except the latte—don’t throw tomatoes at me fellow Fall lovers): I love fall baking because of the aforementioned fresh apples, but I also love it for the pumpkin! Warm spices like cinnamon, nutmeg, and cloves take center stage with recipes featuring this orange squash. Baking with pumpkin always guarantees delicious, moist results. Let me prove it with these moist, fluffy yet chewy, pumpkin-rich muffins . . .

Two years ago, during the fall and early winter, there was a shortage of canned pumpkin. I think I only made four batches of pumpkin muffins that season! Literally devastating. Too dramatic? No way. Ever since, I’ve hoarded canned pumpkin like it was gold. You all will get to reap the benefits of this because I’ll share a number of my fall favorites over the next few weeks beginning with these simple to make spiced pumpkin muffins. No complex ingredients here. Just good ol’ pumpkin lovin’ deliciousness. I was also a little heavy handed with the warm spices, but I can’t say I regret it.

spiced-pumpkin-muffins-recipe-2

spiced-pumpkin-muffins-recipe-4

spiced-pumpkin-muffins-recipe-7

spiced-pumpkin-muffins-recipe-8

spiced-pumpkin-muffins-recipe-10

spiced-pumpkin-muffins-recipe-12

spiced pumpkin muffins
adapted from bon appetit, november 1995 via epicurious

prep time: 10 minutes
cook time: 34-38 minutes
total time: about 45-50 minutes
makes 12 jumbo muffins or 18 regular sized

Ingredients:

3 cups granulated sugar
1 cup vegetable oil
3 large eggs
1 16-ounce can solid pack pumpkin
(plain, not spiced)
3 cups all–purpose flour
1 teaspoon ground cloves
1 teaspoon ground cinnamon
1 teaspoon ground nutmeg
1 teaspoon salt
1 teaspoon baking powder

Instructions:

  1. Preheat the oven to 350°F. Spray two jumbo holed muffin pans
    (six muffins per pan) with non-stick baking spray (or alternatively, butter and flour the pans)*. In the bowl of an electric mixer fitted with the paddle attachment, beat sugar and oil on medium speed to blend. Add eggs, mixing after each addition, and then add pumpkin. Mix until combined and smooth.
  2. In a separate medium bowl, whisk together flour, cloves, cinnamon, nutmeg, salt and baking powder. With the stand mixer on low speed, mix the flour mixture into the pumpkin mixture in two additions, until just combined.
  3. Divide batter equally between prepared muffin pans. Bake until toothpick inserted into the center of one of the center muffins comes out clean, about 34–38 minutes. Allow the muffins to cool in the pans for 5 minutes. Transfer muffins to wire racks to cool completely or for as long as you can resist.

*If using standard muffin pans, you’ll want to follow the recipe exactly and once the muffins are in the oven begin testing them after 18–20 minutes.

spiced-pumpkin-muffins-recipe-13

Filed Under: breakfast and breads, eat Tagged With: autumn, cinnamon, fall, muffins, pumpkin, spiced

almond apricot olive oil cake

August 10, 2014 by Butter Loves Company

almond-apricot-olive-oil-cake-recipe-9

This cake was inspired by a recent trip to Italy. Not by me (Wah!), but by a dear friend of mine. After returning to the States, she told me about an apricot cake that she and her fiancé had loved during their time in Tuscany and was hoping I knew how to make it. I didn’t, but since I’m always up for a challenge I figured, why not give it a shot!

almond-apricot-olive-oil-cake-recipe-1

I scoured the Internet for the best olive oil cakes and one kept coming up over and over again—the famous olive oil cake from Maialino NYC. Since this is such a well-respected Italian eatery, I figured it couldn’t be a bad start. Instead of the orange juice and zest accents they add to their cake, I decided I would use apricots and pair them with a flavor I thought would complement their tartness: almond. Three cake trials, a handful of tweaks and a bottle of olive oil later, I had my winner.

almond-apricot-olive-oil-cake-recipe-2

I can totally picture you and I ordering a piece of this cake from a tiny family-owned bakery as we stroll the quaint, winding streets of Venice on a bright morning. We’d stop in a Café for a morning cappuccino and talk to the cute Italian grandma behind the counter. She’d tell us that the almond apricot olive oil cake has been in her family for years because of her grandmother’s love of apricots. She’d explain how every time she makes it she cuts each apricot into exactly eight pieces. She’d emphasize how important the quality of the olive oil is to the almost pudding-like texture of the cake and how the best comes from her great-great uncle’s olive oil vineyard. We’d understand maybe half of what she said because of her adorable accent. We’d laugh and hug and she would invite us over for dinner after our romantic gondola ride through the canals. To cap things off we’d sip on Italian table wine and eat cheese and more delicious almond apricot olive oil cake.

I can totally picture it and it would be perfect. Let’s go!

almond-apricot-olive-oil-cake-recipe-3

almond-apricot-olive-oil-cake-recipe-4

almond-apricot-olive-oil-cake-recipe-5

almond-apricot-olive-oil-cake-recipe-6

almond-apricot-olive-oil-cake-recipe-7

almond-apricot-olive-oil-cake-recipe-8

almond-apricot-olive-oil-cake-recipe-12

almond apricot olive oil cake

adapted from Maialino NYC’s famous olive oil cake

prep time: 20 minutes
cook time: 1 hour
total time: 1 hour 20 minutes (does not include 2 hours cool time)
makes a 9-inch round cake

Ingredients:

1 1/2–2 cups fresh apricots (about 3, pitted and cut into 8 pieces each)
1 1/2 cups all-purpose flour, plus a little more to coat the apricots
3/4 cup fine almond meal or almond flour (this is best for flavor but if you don’t have it, you can use another 1/2 cup all-purpose flour)
1 3/4 cup sugar
1 1/2 teaspoon salt
1/2 teaspoon baking soda
1/2 teaspoon baking powder
1 cup olive oil (extra virgin preferred)
1 1/4 cup unsweetened vanilla almond milk
1/2 cup plain Greek yogurt
3 large eggs
1 teaspoon vanilla extract or paste
1/2 teaspoon almond extract
1/2 cup sliced almonds, for topping

Instructions:

  1. Heat the oven to 350°F. Oil, butter or coat with cooking spray a 9-inch cake pan that is at least 2 inches deep. Line the bottom with parchment paper and then spray the paper. If your cake pan is less than 2 inches deep, divide between 2 pans and start checking for doneness at 30 minutes.
  2. In a small bowl, toss the chopped apricots with a little flour—about 1/4 cup—to coat the outsides. In a medium bowl, whisk the flour, almond flour, sugar, salt, baking soda and baking powder until combined. In another large bowl—or the bowl of an electric mixer fitted with the paddle attachment—mix the olive oil, almond milk, yogurt, eggs, vanilla and almond extracts until completely combined. Add the dry ingredients to the wet ingredients; mix until just combined.
  3. Pour the batter into the prepared pan and then scatter the floured apricots across the top of the cake. Sprinkle the cake evenly with sliced almonds. Bake the cake for 1 hour, until the top is golden and a cake tester or toothpick inserted into the center of the cake comes out clean. Transfer the cake in its pan to a wire rack and let cool for 30 minutes.
  4. Run a knife around the edge of the pan, invert the cake onto the rack and then flip it back onto a serving plate. Let the cake cool completely before cutting, about 2 hours. Store at room temperature or in the fridge.

Filed Under: breakfast and breads, desserts and sweets, eat Tagged With: apricot, breakfast, cake, fresh apricot, italian cake, italy, olive oil, tuscany

chewy homemade granola bars

July 29, 2014 by Butter Loves Company

chewy-homemade-granola-nature-bars-recipe-13

Raise your hand if you’re the sleep in until the last minute, get ready quick, eat a grab-and-go breakfast type. Like the “if I wear that thing that needs no ironing, I can stay in bed for exactly 7 minutes more” type. Or even the “eh, shower schmower…I’ll skip for the extra 10 minutes of rest” type. If you’re hand is up, take that hand and go ahead, hit that snooze button one more time. I’ve got you covered with this homemade granola bars recipe.

Granola bar for you, and you, and you, and you! Granola bar for me, for sure!

These chewy, wholesome, customizable, homemade breakfast bars are dreamy. Not only because they’re a cinch to make and also freeze and store well to save you precious Zs for weeks to come. But also, on top of that, they’re delicious and can be studded with any combination of your favorite nuts, fruits, chocolate chips, seeds, sprinkles or candies!

chewy-homemade-granola-nature-bars-recipe-1

After spending too much money—on my walk to work—on granola bars to satisfy my ‘I-didn’t-have-time-to-eat-breakfast’ appetite—and only half enjoying their taste, no less—I decided I needed to tackle making my own. I was so excited—as I hope you’ll be too—when I realized how easy they were to make and how many different flavor combinations could result from one basic recipe. Think of this more as a guide than a recipe. 

chewy-homemade-granola-nature-bars-recipe-3

As a heads up, these bars do call for butter, but when you think about the amount of butter in the recipe divided across an entire tray, the butter content in one bar is really not that bad. A super-healthy version will come your way soon. Promise.

chewy-homemade-granola-nature-bars-recipe-2

For this batch, I chose to use dried cranberries, golden raisins, lightly chopped walnuts, sunflower seeds, flax seeds and shredded coconut.

chewy-homemade-granola-nature-bars-recipe-4

chewy-homemade-granola-nature-bars-recipe-5

chewy-homemade-granola-nature-bars-recipe-7

chewy-homemade-granola-nature-bars-recipe-8

chewy-homemade-granola-nature-bars-recipe-11

chewy-homemade-granola-nature-bars-recipe-12

chewy-homemade-granola-nature-bars-recipe-9

chewy homemade granola bars
adapted from the smitten kitchen recipe which is adapted from king arthur flour

prep time: 10 minutes
cook time: 35 minutes
total time: 45 minutes (not including cool time after baking)
makes 12 to 16 bars

Ingredients:

1 2/3 cups 1-minute rolled oats (aka instant oats; I used old fashion oats for 1/3 cup of this because I had them on hand and was interested in the texture. Feel free to try that combination or use all instant.)
1/2 to 3/4 cup granulated sugar (less for mild sweetness, more for sweeter bars)
1/3 cup oat flour (or 1/3 cup oats, ground into a powdery texture in a food processor or blender)
1/2 teaspoon salt
1/4 teaspoon ground cinnamon
2 to 3 cups assorted dried fruits, nuts, seeds, chocolate chips, sprinkles or candies (pick any of your favorites until they total 10 to 15 ounces)
1/3 cup peanut butter or another nut butter (optional)
1 tablespoon vanilla extract (optional)
6 tablespoons melted butter
1/4 cup honey or maple syrup
2 tablespoons light corn syrup
1 tablespoon water

Instruction:

  1. Preheat the oven to 350°F. Line an 8″ x 8″ x 2″ baking pan with a piece of parchment paper to cover the bottom and two opposite sides (you are creating “handles” that will help you remove the granola bars later). Lightly grease, with butter or a non-stick spray, the parchment paper and the exposed pan.
  2. In a large bowl, stir together the rolled oats, sugar, oat flour, salt, cinnamon and desired fruits and nuts. Set aside.
  3. In a small bowl, whisk together the vanilla, melted butter, honey or syrup, corn syrup and water. If using peanut butter, toss that in with the wet ingredients now.
  4. Pour the wet ingredients into the bowl with the dry and stir until all of the oats have been coated with the wet ingredients and the mixture starts coming together in chunks. Spread mixture into the prepared pan and press firmly across the top and into all corners and edges. Smooth down the top for a flat, even final product.
  5. Bake the bars for 25 to 35 minutes until they’re brown around the edges and a deep golden color on top. They may seem soft and almost under-baked in the center, but they’ll set completely once fully cooled.
  6. Cool the bars—in the pan—completely on a cooling rack. Once cool, lift the bars out of the pan using the parchment paper “handles” and then double check that they are totally cool in the middle. If yes, use a serrated knife to cut the bars into squares or rectangles—or triangles if you’re so inclined. To store, wrap the bars individually in plastic or stack them in an airtight container and leave at room temperature or in the refrigerator. The bars will seem hard when you take them right out of the fridge, but they come back to their chewy state in about 10 minutes. Remember, they also freeze well.

Filed Under: breakfast and breads, eat Tagged With: breakfast, dried fruit, easy, granola, make ahead, nature bars, nuts, oats, on the go

blueberry buttermilk scones with cinnamon sugar butter

July 10, 2014 by Butter Loves Company

blueberry buttermilk scones with cinnamon sugar butter 20 copy

When spending your vacation at a house on the water, you’d better not forget to pack your bathing suit, sunscreen, aloe vera for when you inevitably get burned regardless of the sunscreen, boogie board, frisbee, Stephen King or Emily Griffin novel (pick your poison), kitchen tongs and measuring cups/spoons. You’re probably thinking those last two don’t scream ‘sand between the toes,’ but if you have access to a kitchen, these tools will make life much easier and breakfast much more delicious.

I learned from my mom that you should always travel with tongs.* The reason being, she told me, you never know what the kitchen supply situation will be. With this in mind, I decided that because of my baking obsession I should also always travel with measuring tools. You see, some vacation rentals are equipped for a chef, while others are equipped for a stack of take-out pizzas (no knock there, love me some take-out pizza). Luckily, even if you’re staying in the latter, you can make delicious homemade treats because, with just your hands, you can be quite the little bakeshop.

blueberry buttermilk scones with cinnamon sugar butter 1

You’ll already be all sandy after the beach; why not also get a little flour on your hands while making some blueberry buttermilk scones with cinnamon sugar butter? The butter—oh the butter—may be my new little obsession. It is SO easy to make, and with just just three ingredients, you can have this addictive sweet spiced spread at your disposal in no time. I’m going to start making it by the pound.

blueberry buttermilk scones with cinnamon sugar butter 2

Your cohorts will thank you when they’re slicing through the sweet, juicy blueberries in the light, buttery scone and smearing it with the cinnamon sugar butter. They may actually volunteer to make you a piña colada for your hard work. (Our little secret will be how easy the ‘work’ was, but go on, accept that island drink reward ;-))

* For clarification: this applies when you have a kitchen to work with. I did not, for example, bring tongs to Las Vegas for a girl’s weekend. That would be strange. Probably not all that surprising, but definitely strange.

blueberry buttermilk scones with cinnamon sugar butter 4

blueberry buttermilk scones with cinnamon sugar butter 5

blueberry buttermilk scones with cinnamon sugar butter 9

blueberry buttermilk scones with cinnamon sugar butter 8

blueberry buttermilk scones with cinnamon sugar butter 17

blueberry buttermilk scones with cinnamon sugar butter 15

blueberry buttermilk scones with cinnamon sugar butter 16

blueberry buttermilk scones with cinnamon sugar butter 19

blueberry buttermilk scones with cinnamon sugar butter
Adapted from M.S. Milliken & S. Feniger, 2007

Prep Time: 15 minutes
Cook Time: 16–18 minutes
Total Time: 30–35 minutes
Makes 8 large or 16 medium-sized scones

Ingredients:

3 cups all-purpose flour
1/3 cup granulated sugar
1 teaspoon salt
2 1/2 teaspoons baking powder
1/2 teaspoon baking soda
1/2 teaspoon ground cinnamon
3/4 cup (1 1/2 sticks) unsalted butter
1 cup buttermilk
1 cup fresh blueberries
1 egg lightly whipped with 1 tablespoon water (for brushing)
A dash more granulated sugar for sprinkling
Cinnamon sugar butter (recipe follows)

Instructions:

  1. Preheat oven to 400 degrees F and lightly grease a cookie sheet or line with parchment paper. Combine the flour, sugar, salt, baking powder, baking soda and ground cinnamon in a large bowl. Add butter and mix with your fingertips or with a pastry blender until it reaches a coarse meal and the butter is in pea-sized pieces or just smaller. Add buttermilk and mix until almost combined. Mix in blueberries until everything is just combined.
  2. Transfer dough to a floured board (divide into two parts if you’d like smaller scones). Roll into 1-inch thick rounds for larger scones or into 3/4-inch thick rounds if you divided the dough and are making smaller scones. Cut each round into 8 wedges and place slightly separated onto the prepared baking sheet. Brush the tops of the scones with the egg mixture, sprinkle each lightly with sugar and bake for 16–18 minutes, or until lightly browned. Serve warm, split in half with a smear cinnamon sugar butter.

cinnamon sugar butter

makes 1/4 cup

Ingredients:

1/4 cup butter, softened at room temperature (I use salted, but if you use unsalted, add a dash of salt)
2 tablespoons light brown sugar
3/4 teaspoon ground cinnamon

Instructions:

  1. In a small bowl, stir together butter, light brown sugar and ground cinnamon until completely combined and fluffy. Chill and serve.

Filed Under: breakfast and breads, eat Tagged With: blueberry, breakfast, butter, buttermilk, cinnamon, easy, scones, sugar

white bean, spinach and mushroom egg bake

July 3, 2014 by Butter Loves Company

white bean spinach mushroom egg bake 4 copy

This recipe is amazing because it is a one-dish meal and who doesn’t love a one-dish meal? It’s also a breakfast, lunch or dinner meal, a fact that compels me to sing the Bagel Bites “pizza any time” commercial. But seriously, this is a wonderful option under almost any circumstance. You can easily adjust this recipe if you hate mushrooms, want to try it with black beans or just add some spice with a dash or two of red pepper flakes. If you don’t have a cast iron or oven-safe skillet, you can prepare everything in a pan on the stovetop and transfer it all into a regular baking dish, top with eggs and cook. In that case, it’s a two dish meal. Still not bad.

white bean spinach mushroom egg bake 9

I know all of you lucky ducks with dishwashers are thinking, “Why does this girl care so much about a one-dish meal.” Well, let me take you through what brought this recipe to Casa J + G. I call it a “get home from work cleaning rampage.”

Tell me if this sounds familiar: you come home from work, look around and realize “oh gosh, there is zero clear space and I’m worse than a toddler who leaves out every last one of their toys and I really should have put my laundry away as soon as it was done and did I really think I would finish that project I took everything out of my closet for and when did that Jenga stack of dishes get that high and when did I get so many* shoes and how did that one end up over there? These are the days I go on one of the aforementioned “get home from work cleaning rampages.” I’m a firm believer that physical clutter can have a tremendous effect on mental clutter.

white bean spinach mushroom egg bake 8

And how does all this relate to today’s recipe? Well, after the “get home from work cleaning rampage,” the absolute last thing I want to do is fill the sink with another full load of dishes after making dinner.

Enter: the glorious one-skillet White Bean, Spinach and Mushroom Egg Bake. The combination of creamy white beans, meaty mushrooms, iron-rich spinach and runny eggs really works here. I imagine a big dollop of this, egg and all, would be great on a piece of crusty bread. But really, what wouldn’t be good on a piece of crusty bread?

Happy Fourth of July, all!

*so many should never be confused with too many. Amen.

white bean spinach mushroom egg bake 7

white bean spinach mushroom egg bake 6

white bean spinach mushroom egg bake 5

white bean spinach mushroom egg bake 2

white bean spinach mushroom egg bake 4

white bean spinach mushroom egg bake 1

white bean, spinach and mushroom egg bake
Adapted from Gourmet magazine

Prep Time: 15 minutes
Cook Time: 15 minutes
Total Time: 30–40 minutes
Makes: 4 servings

Ingredients:

10 oz. fresh spinach
1/2 medium-sized white or yellow onion, finely diced
1 clove garlic, minced
3 tablespoons butter
2 cups (5–6 oz.) white button mushrooms, cut into 1/2-inch thick slices
1 15 oz. can of cannellini beans, rinsed thoroughly
1/3 cup milk, whole is best
1 heaping tablespoon all purpose flour
1/4 teaspoon salt
1/4 teaspoon pepper
1/8 teaspoon grated nutmeg
4 large eggs
1/4 cup grated Parmesan cheese

Instructions:

  1. Place rack in upper third of oven and preheat oven to 450°. Bring 1/2 inch water to a boil in a 10- to 12-inch ovenproof, cast iron or other heavy skillet. Add half of the spinach to the water and cook, stirring to flip the spinach, until it wilts and shrinks, about 30 seconds. Add remaining spinach and cook until it wilts, another 30 seconds. Continue to cook the spinach over medium-high heat until tender, about 1 more minute. Drain into a colander and immediately cool under cold running water. Gently squeeze handfuls of spinach to remove as much liquid as possible, transfer to a cutting board and coarsely chop.
  2. Wipe the skillet dry, then melt the butter in the skillet over medium heat. Add the onion and garlic and cook, stirring frequently, until softened, 2 to 3 minutes. Add mushrooms and cook, stirring, until the mushrooms are softened and have released some of their juices, about 3 to 4 minutes. Stir in well-rinsed, canned cannellini beans until well distributed. Stir in milk, flour, salt, pepper, nutmeg and chopped spinach and cook for 1 to 2 minutes. Remove skillet from heat and make four large indentations in spinach mixture (like you’re making room for gravy in your Thanksgiving mashed potatoes). Crack an egg into each indentation and bake, uncovered, until egg whites are set but yolks are still runny, 7 to 10 minutes. Season eggs with salt and pepper if you like, then sprinkle with cheese.


Filed Under: breakfast and breads, eat, mains Tagged With: baked eggs, eggs, mushrooms, one pot, one skillet, spinach, white bean

white carrot muffins

June 25, 2014 by Butter Loves Company

white carrot muffins recipe 9 text

I’m fairly convinced New York City is home to about every food option you could ever hope for. 4:00 am waffles? No problem! Questionable street meat? You got it! Ten course tasting menu from a world-renowned chef? Well, it’s definitely there if you have a bulky wallet.

Even with no farm in sight, this past weekend we stumbled upon a market with some of the freshest produce I’ve seen outside of suburban nurseries. The Union Square market was chock full of some of the most vibrant, most reasonably priced fresh fruits, veggies, meats and eggs. One of the stands attracting a flock of photographers consisted of piles and piles of assorted, beautifully colored carrots: sunny yellow, deep purple swirled with orange and bright, bright white.

white carrot muffins recipe 2

I started wondering how these multicolored carrots might work in baked goods that are generally rich with traditional carrots (e.g. carrot cake, carrot muffins, carrot soufflé). I knew that once we got back to Boston I had to find out the answer. Here is the result of my exploration.

white carrot muffins recipe 3

In my opinion the white carrots have a softer flavor than the other varieties, but are perfectly delicate and sweet when kissed with a little spice. If you’re looking for a morning muffin that is ultra-light and fluffy, and not one bit too crumbly, you’ve found it. Of course, because the white carrots can be hard to come by, you can make these with orange carrots just as easily. I haven’t tried making them with the purple variety yet, but if you do, I am dying to know how they come out!

white carrot muffins recipe 4

white carrot muffins recipe 5

white carrot muffins recipe 8

white carrot muffins recipe 6

white carrot muffins recipe 7

white carrot muffins recipe 10

white carrot muffins recipe 12

white carrot muffins
adapted from Dorie Greenspan in “Baking with Julia”

Prep Time: 15 minutes
Cook Time: 20 minutes
Total Time: about 35–40 minutes
Makes 12 muffins

Ingredients:
2 cups all purpose flour
1/2 white granulated sugar
1/3 cup packed light brown sugar
1 tablespoon baking powder
2 teaspoons ground cinnamon
1 teaspoon ground ginger
1/4 teaspoon ground nutmeg
1/4 teaspoon table salt
2/3 cup canola or vegetable oil
3/4 cup whole milk
2 large eggs
1 1/2 teaspoon vanilla extract
1 cup shredded white or orange carrots (from about 3 medium)
1/2 cup sweetened shredded coconut
1/3 cup dried cranberries
1/3 cup roughly chopped walnuts (optional)

Instructions:

  1. Place a rack in the center row of the oven and preheat to 425 degrees F. Grease or line a 12 mold, standard size muffin pan with paper liners and set aside.
  2. In a large bowl, whisk together the flour and both sugars until combined and free of lumps. Add the baking powder, cinnamon, ginger, nutmeg and salt and combine.
  3. In a large glass measuring cup, or a separate small bowl, whisk together the oil, milk, eggs and vanilla extract until well combined.
  4. Pour this liquid mixture over the dry flour mixture. With a whisk, rubber spatula or spoon, gently but quickly stir ingredients to blend, being cautious not to over mix (better to have some lumps than to over mix in this case). Gently stir in the shredded carrots, coconut, cranberries and walnuts—if using. Divide the batter evenly among the muffin cups.
  5. Bake at 425 degrees F for 8 minutes, then reduce heat to 375 degrees F to cook an additional 8–10 minutes, or until a tooth pick inserted into the center of a muffin comes out clean. Remove and let muffin pan cool on a wire rack for 5 minutes. Remove the muffins and let cool. Enjoy warm or at room temperature. Best if eaten on the day they are made. These last a few days but their texture becomes a bit more dense the longer you wait to eat them.

Filed Under: breakfast and breads, eat Tagged With: breakfast, breakfast bread, carrot, muffins, summer

« Previous Page
Next Page »

Welcome!

jenna of butterlovescompany

Pull up a chair

Hi! I’m Jenna. Story seeker, food lover, recipe developer based in NYC. Firm believer in making every day delicious! Read more…

looking for something?

  • Email
  • Facebook
  • Instagram
  • Pinterest
  • RSS
  • Twitter

Latest Posts

  • Freezer Meals to Make Before Baby: How We Meal Prepped Before Baby
  • mom’s famous spiced pecans
  • funfetti cookie dough truffles (no-bake)
  • maple coconut cookies
  • snickerdoodle blondies

popular now

braised short rib pasta sauce (short rib ragu)
rosemary honey buttermilk biscuits
strawberry cinnamon rolls
bourbon banana bread
chocolate marble loaf cake
chocolate pecan torte with strawberry buttercream

grammin’

Let’s get ready to bake throughout the holidays! Let’s get ready to bake throughout the holidays! I’ve teamed up with @lucky_leaf_fruit_filling, @diamondnuts and #Kids360 to give away some delicious baking ingredients to make your spirits bright this season. 

To enter:
-Follow @lucky_leaf_fruit_filling, @diamondnuts and @butterlovescompany
-Comment and tag a friend and the name of your favorite holiday dessert
-Enter by December 1. Winner will be selected at random and DM’d! 

You’ll win: 
•(1) Can of Lucky Leaf Premium Blueberry Filling
•(1) Can of Lucky Leaf Premium Apple Filling
•(1) Can of Lucky Leaf Premium Cherry Filling
•(1) Can of Lucky Leaf Premium Strawberry Filling
•(1) Can of Lucky Leaf Premium Peach Filling
•(1) Recipe Book
•(2) Dish Towels
•(1) Pot-Holder
•(1) Picnic Basket

#ad NO PURCHASE NECESSARY. Open to legal residents of the United States (including its commonwealths, territories, and possessions) who are legal age of majority. Enter by 11:59 pm ET on December 1, 2021. Odds of winning depend on # of entries received. Void where prohibited. This is not sponsored or endorsed by Instagram or Facebook.
This was the best photo we could get with an alway This was the best photo we could get with an always moving toddler. 🥸 Happy Thanksgiving to you and yours! ♥️
Something that the past year or so has taught me: Something that the past year or so has taught me: stock your pantry! Having a stocked kitchen has made it super easy to cook and bake without having to run out to the store. Crucial when you get a craving for an Apple Walnut Cake and need to make one stat. With @lucky_leaf_fruit_filling and @diamondnuts, you can put together a delicious cake SO easily with no peeling and slicing of apples. 🍎🌰You get all the beautiful warm spice flavor with sweet, tart apples, and crunchy, hearty walnuts. #ad Get the recipe below: 

Apple Walnut Cake

* 1 box (15.25 oz.) spice cake mix
* 1 can (21 oz.) Lucky Leaf® Premium Apple Fruit Filling
* 2 large eggs
* 1 tbsp. pure vanilla extract
* 1/4 cup whole milk
* 1/4 cup brown sugar
* 1 tsp. ground cinnamon
* 1/2 cup finely chopped Diamond of California® Shelled Walnuts
* 1 container (8 oz.) whipped topping, thawed

Instructions
1. Preheat oven to 350° F and grease 9x13-inch pan. 
2. Combine dry cake mix, apple filling, eggs, vanilla & milk in large bowl. Beat for 2 minutes. Spread half of the batter in the pan. 
3. Make the Walnut Cinnamon filling: Combine brown sugar, cinnamon and walnuts. Sprinkle half the mixture on top of batter. Top with remaining batter and then sprinkle remaining walnut mixture on top.
4. Bake cake for 28-33 minutes. Cool cake. Top with whipped topping and sprinkle with walnut pieces.

Don’t miss my upcoming chance to W I N with #kids360, Diamond and Lucky Leaf!
Spiced pecans, wedding cookies, chocolate turtles, Spiced pecans, wedding cookies, chocolate turtles, pecan pie, sticky buns…just a few of the treats on my standard holiday baking agenda. What do they have in common? NUTS! @diamondnuts are a staple around here for the holidays (and all year, let’s be honest) and I want to share the love. Thanks to Diamond and #kids360, we are giving someone ✨15 FREE product coupons for @diamondnuts ✨to help you bake your holiday treats this year. Go nuts!

To enter:
* Follow @diamondnuts and @butterlovescompany
* Comment and tag a friend who deserves a day off to go nuts! 
* Enter by end of day November 25th. Winner will be selected at random and DM’d! 

#ad NO PURCHASE NECESSARY. Open to legal residents of the United States (including its commonwealths, territories, and possessions) who are the legal age of majority. Enter by 11:59 pm ET on November 25, 2021. Odds of winning depend on # of entries received. Void where prohibited. This is not sponsored or endorsed by Instagram or Facebook.
No gimmicks, no “just for the ‘gram” razzle No gimmicks, no “just for the ‘gram” razzle dazzle here. Just really good chocolate chip cookies.🍪
Fun fact: Layered Magic Cookie Bars were one of th Fun fact: Layered Magic Cookie Bars were one of the first things I ever baked. Making them again with @diamondnuts makes me super nostalgic. Brought me directly back to middle school. Watch out or you may find me in butterfly clips doodling I <3 SOS on my binder soon. There is a reason this recipe is awesome: first, the cookie bars are incredibly delicious. And, second, they are SO easy to put together. Honestly, they are the PERFECT treat to make with your kids. Pecans and walnuts give the bars the best crunch, nuttiness, and heartiness. You could totally customize if there is a certain kind of jam you love, or a combination of nuts that the family loves. #ad Get the recipe below: 

Seven Layer Magic Cookie Bars

* 1/2 cup (1 stick) butter, melted
* 2 cups graham cracker crumbs
* 1 cup raspberry jam
* 1 cup shredded coconut
* 1 cup Diamond of California® walnuts
* 1 cup Diamond of California® pecans
* 1 cup semi-sweet or bittersweet chocolate chips
* 1 (14-ounce) can sweetened condensed milk

Instructions
1. Preheat oven to 350°F. To toast walnuts and pecans, spread evenly on a baking sheet or in a shallow pan. Bake, stirring once or twice, until lightly browned and fragrant, 7 to 10 minutes. Line a 9×13-inch pan with parchment paper.
2. In a medium bowl, combine the melted butter and graham cracker crumbs; mix well. Transfer the crumbs to the prepared pan and using your finger tips, or the flat bottom of a small measuring cup, press firmly and evenly on the bottom of the pan. Spread the raspberry jam evenly over the crumbs. Sprinkle coconut in an even layer over the jam, followed by the chocolate chips, walnuts and pecans. Drizzle the condensed milk evenly over the top.
3. Bake until bubbling and golden brown, 30-35 minutes. Let cool completely in the pan. If lined with parchment, lift out and place on a cutting board. With a sharp knife, cut into bars.

Look out for an upcoming chance to ✨ w i n ✨with @diamondnuts and #kids360!
Raise your hand if you could use a cup of coffee. Raise your hand if you could use a cup of coffee. 🙋 We are giving away some @timhortonsus coffee goodies so you can get your cozy cool morning on with Canada’s favorite cup of joe. Make my Pumpkin Coffee Coffee Cake for a buzzy morning snack or just brew a strong cup for a little pep in your step (as tired parents over here, we could surely use it). 🍂

To enter:
● Follow @butterlovescompany and @timhortonsus
● Comment and tag a friend you would love to grab coffee with ☕ (each comment=1 entry)
● Enter by midnight November 18. Winner will be selected at random and DM’d!
 
You’ll win:
•(1) Colombian Ground Coffee
•(1) Dark Roast Ground Coffee
•(1) Decaf Ground Coffee
•(1) Whole Bean Original Blend Coffee
•(1) Keurig Variety 30-Pack
•(1) Mug
•(1) Branded Notebook
•(1) Branded Baseball Cap
 
 
ad #timhortons #kids360 NO PURCHASE NECESSARY. Open to legal residents of the United States (including its commonwealths, territories, and possessions) who are legal age of majority. Enter by 11:59 pm ET on November  18, 2021. Odds of winning depend on # of entries received. Void where prohibited. This is not sponsored or endorsed by Instagram or Facebook.
Can’t beat a classic. 🥧 Apple streusel pie fo Can’t beat a classic. 🥧 Apple streusel pie for yesterday’s friendsgiving.🥰 Grateful for time with friends enjoying great food. Remy had so much fun playing that he slept until 7am so we are hopefully out of the 4am daylight savings nightmare (knock on wood). 

Sunday includes a farmers market bop, movies, and cooking for the week. Wouldn’t change a thing. 🥳
Cannot. Get. Enough. Fall. Baking. Who’s with me Cannot. Get. Enough. Fall. Baking. Who’s with me? 🍁  This coffee cake packs a punch because it is made with @timhortonsus brewed coffee in the batter and the glaze. A true *coffee* cake. The texture is dreamy and the coffee is perfectly balanced and smooth. It is goood. #ad Get the recipe below:
 
Pumpkin Coffee Coffee Cake
 
Topping
● 2/3 cup granulated sugar
● pinch of salt
● 2/3 cup flour
● 1 teaspoon cinnamon
● 4 tablespoons butter, melted

Filling
● 1/3 cup brown sugar, packed
● 1 teaspoon cinnamon
● 1 teaspoon unsweetened cocoa powder, optional

Cake
● 1/3 cup vegetable oil
● 2 large eggs, at room temperature
● 1 cup granulated sugar
● 1 cup pumpkin purée
● 1 teaspoon pumpkin pie spice
● 1 teaspoon salt
● 1 teaspoon baking powder
● 1/2 cup brewed @timhortonsus Coffee
● 2 cups flour

Glaze
● 1 cup powdered sugar
● 2 tablespoons brewed @timhortonsus coffee
 
Instructions
1. Preheat the oven to 350°F and grease an 8 inch square pan and line with parchment.
2. Make topping: Stir together the sugar, salt, flour, cinnamon, and melted butter until combined into pea sized lumps. Stirring just until well combined. Set aside.
3. Make filling: Mix together the brown sugar, spice, and cocoa powder. Set it aside.
4. Make cake: Beat together the oil, eggs, sugar, pumpkin, pie spice, salt, and baking powder until smooth. Add the brewed coffee followed by the flour, alternating in two additions, and stir until combined.
5. Spread half the batter into the prepared pan. Sprinkle the filling evenly on top of the batter. Top with the remaining batter. Sprinkle the topping over the batter in the pan.
6. Bake until a toothpick inserted into the center comes out clean, about 40 to 45 minutes. Let cool.
7. Make glaze: Combine the powdered sugar and brewed coffee until smooth and thick but drizzle-able. Using a fork, drizzle it over the cake.

Don’t miss our upcoming chance to ⚡️W I N⚡️ thanks to @timhortonsus and #Kids360!

#timhortons #kids360fanclub
One of the hardest parts about being a working mom One of the hardest parts about being a working mom is how little time you get to spend with your sweet bean during the week. Between wake up and getting to daycare, to pickup and bedtime it’s often an hour at best (which is also filled with making dinner, bath time, etc). I soak up ALL the minutes and the weekends are an absolute snuggle and play fest. It’s so tough though! If you are in the same boat, know that you aren’t alone and you’re doing a good job!! ♥️

This photo has nothing to do with this but I made the cookies for our neighbors and regretting not keeping one for myself right now. 😬🤣
✨W I N !✨ I’ve teamed up with @nielsenmassey ✨W I N !✨ I’ve teamed up with @nielsenmassey and #Kids360 to give away some seriously amazing ingredients to make your desserts sing. 🎶 I love their products and have been using them for years—the vanilla is 💯!!
 
To enter:
● Follow @nielsenmassey and @butterlovescompany 
● Comment and tag a friend you’d love to bake with
● Enter by Thursday November 11th. Winner will be selected at random and DM’d!
 
You’ll win:
•(1) Madagascar Bourbon Pure Vanilla Powder
•(1) Madagascar Bourbon Pure Vanilla Sugar
•(1) Ugandan Pure Vanilla Extract
•(1) Pure Coffee Extract
•(1) Pure Peppermint Extract
•(1) Rose Water
•(1) Pure Lemon Extract
•(1) Tahitian Two Vanilla Beans
•(1) Tahitian Pure Vanilla Extract
•(1) Mexican Two Vanilla Beans
•(1) Mexican Pure Vanilla Extract
•(1) Madagascar Bourbon Two Vanilla Beans
•(1) Madagascar Bourbon Pure Vanilla Extract
•(1) Madagascar Bourbon Pure Vanilla Bean Paste
•(1) Orange Blossom Water
•(1) Pure Orange Extract
•(1) Pure Almond Extract
•(1) Pure Chocolate Extract
.
#ad NO PURCHASE NECESSARY. Open to legal residents of the United States (including its commonwealths, territories, and possessions) who are legal age of majority. Enter by 11:59 pm ET on November  11, 2021. Odds of winning depend on # of entries received. Void where prohibited. This giveaway is not sponsored or endorsed by Instagram or Facebook.
Brainstorming dessert recipes for Thanksgiving and Brainstorming dessert recipes for Thanksgiving and it’s hard not to think about this Black Forest Pie. 🍒🍫 It was such an indulgent tart-sweet chocolate-y treat. It has a chocolate all butter pie crust, a layer of dark chocolate ganache, a layer of chocolate pudding, a cherry topping, and whipped cream. Oh, and a cherry on top! Recipe is from @emcdowell #thebookonpie! 

This one *might* be too rich for the menu but there WILL be pie (duh)🥧. What kind of pie do you need to have on your Thanksgiving table?
This error message is only visible to WordPress admins
Hi! I'm Jenna, founder of butter loves company. From holidays to Tuesdays, let's find a way to make every meal special.
  • Email
  • Facebook
  • Instagram
  • Pinterest
  • RSS
  • Twitter
a2f54ba1dcf0635e58c8be4aa2035ce84863a9d9606a428ab3

© 2013-2019 BUTTER LOVES COMPANY, LLC.

Copyright © 2025 · Foodie Pro Theme by Shay Bocks · Built on the Genesis Framework · Powered by WordPress