butter loves company

new york food blogger and lifestyle influencer

  • home
  • Recipes
  • travel
  • lifestyle
  • cookie orders
  • about
  • contact

blueberry and lemon cream tart

February 10, 2015 by Butter Loves Company

blueberry-lemon-cream-tart-5-2

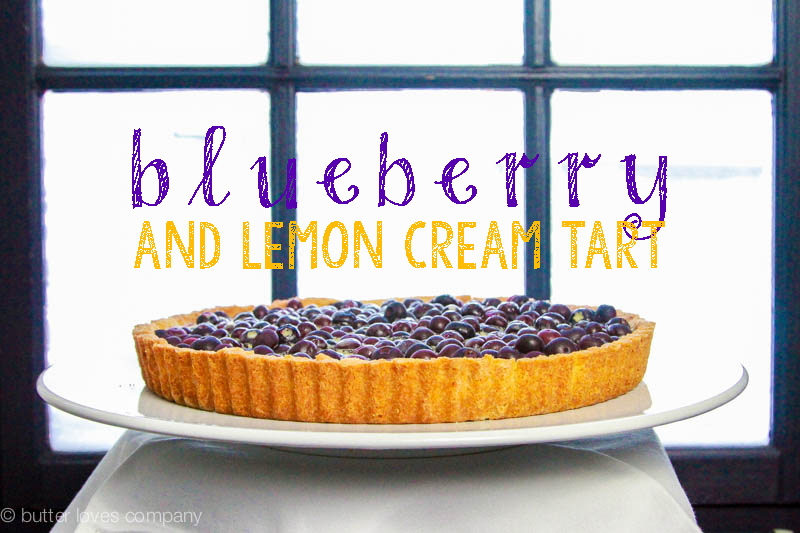
Easy as pie tart? Yup. This puppy is even easier than pie! You want to know why? You know that part in pie making when you have to roll out the chilled dough and then transport it to the pie dish and, if you’re like me, you want to then slice more dough for a lattice top or try cut-outs, or patterns, or ruffles, or fringe … this is beginning to sound like the E! Grammy’s Fashion Police wrap up! Well, with this tart, you don’t have to do ANY of that! Easy pease, my friends.

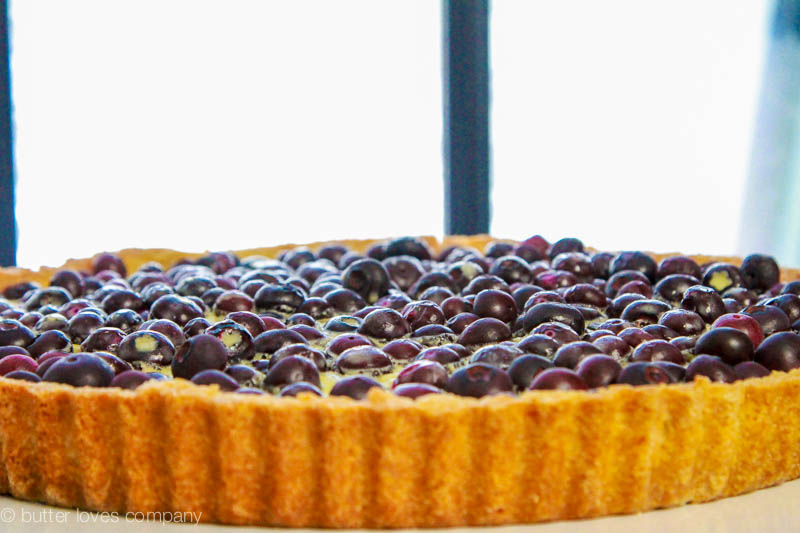
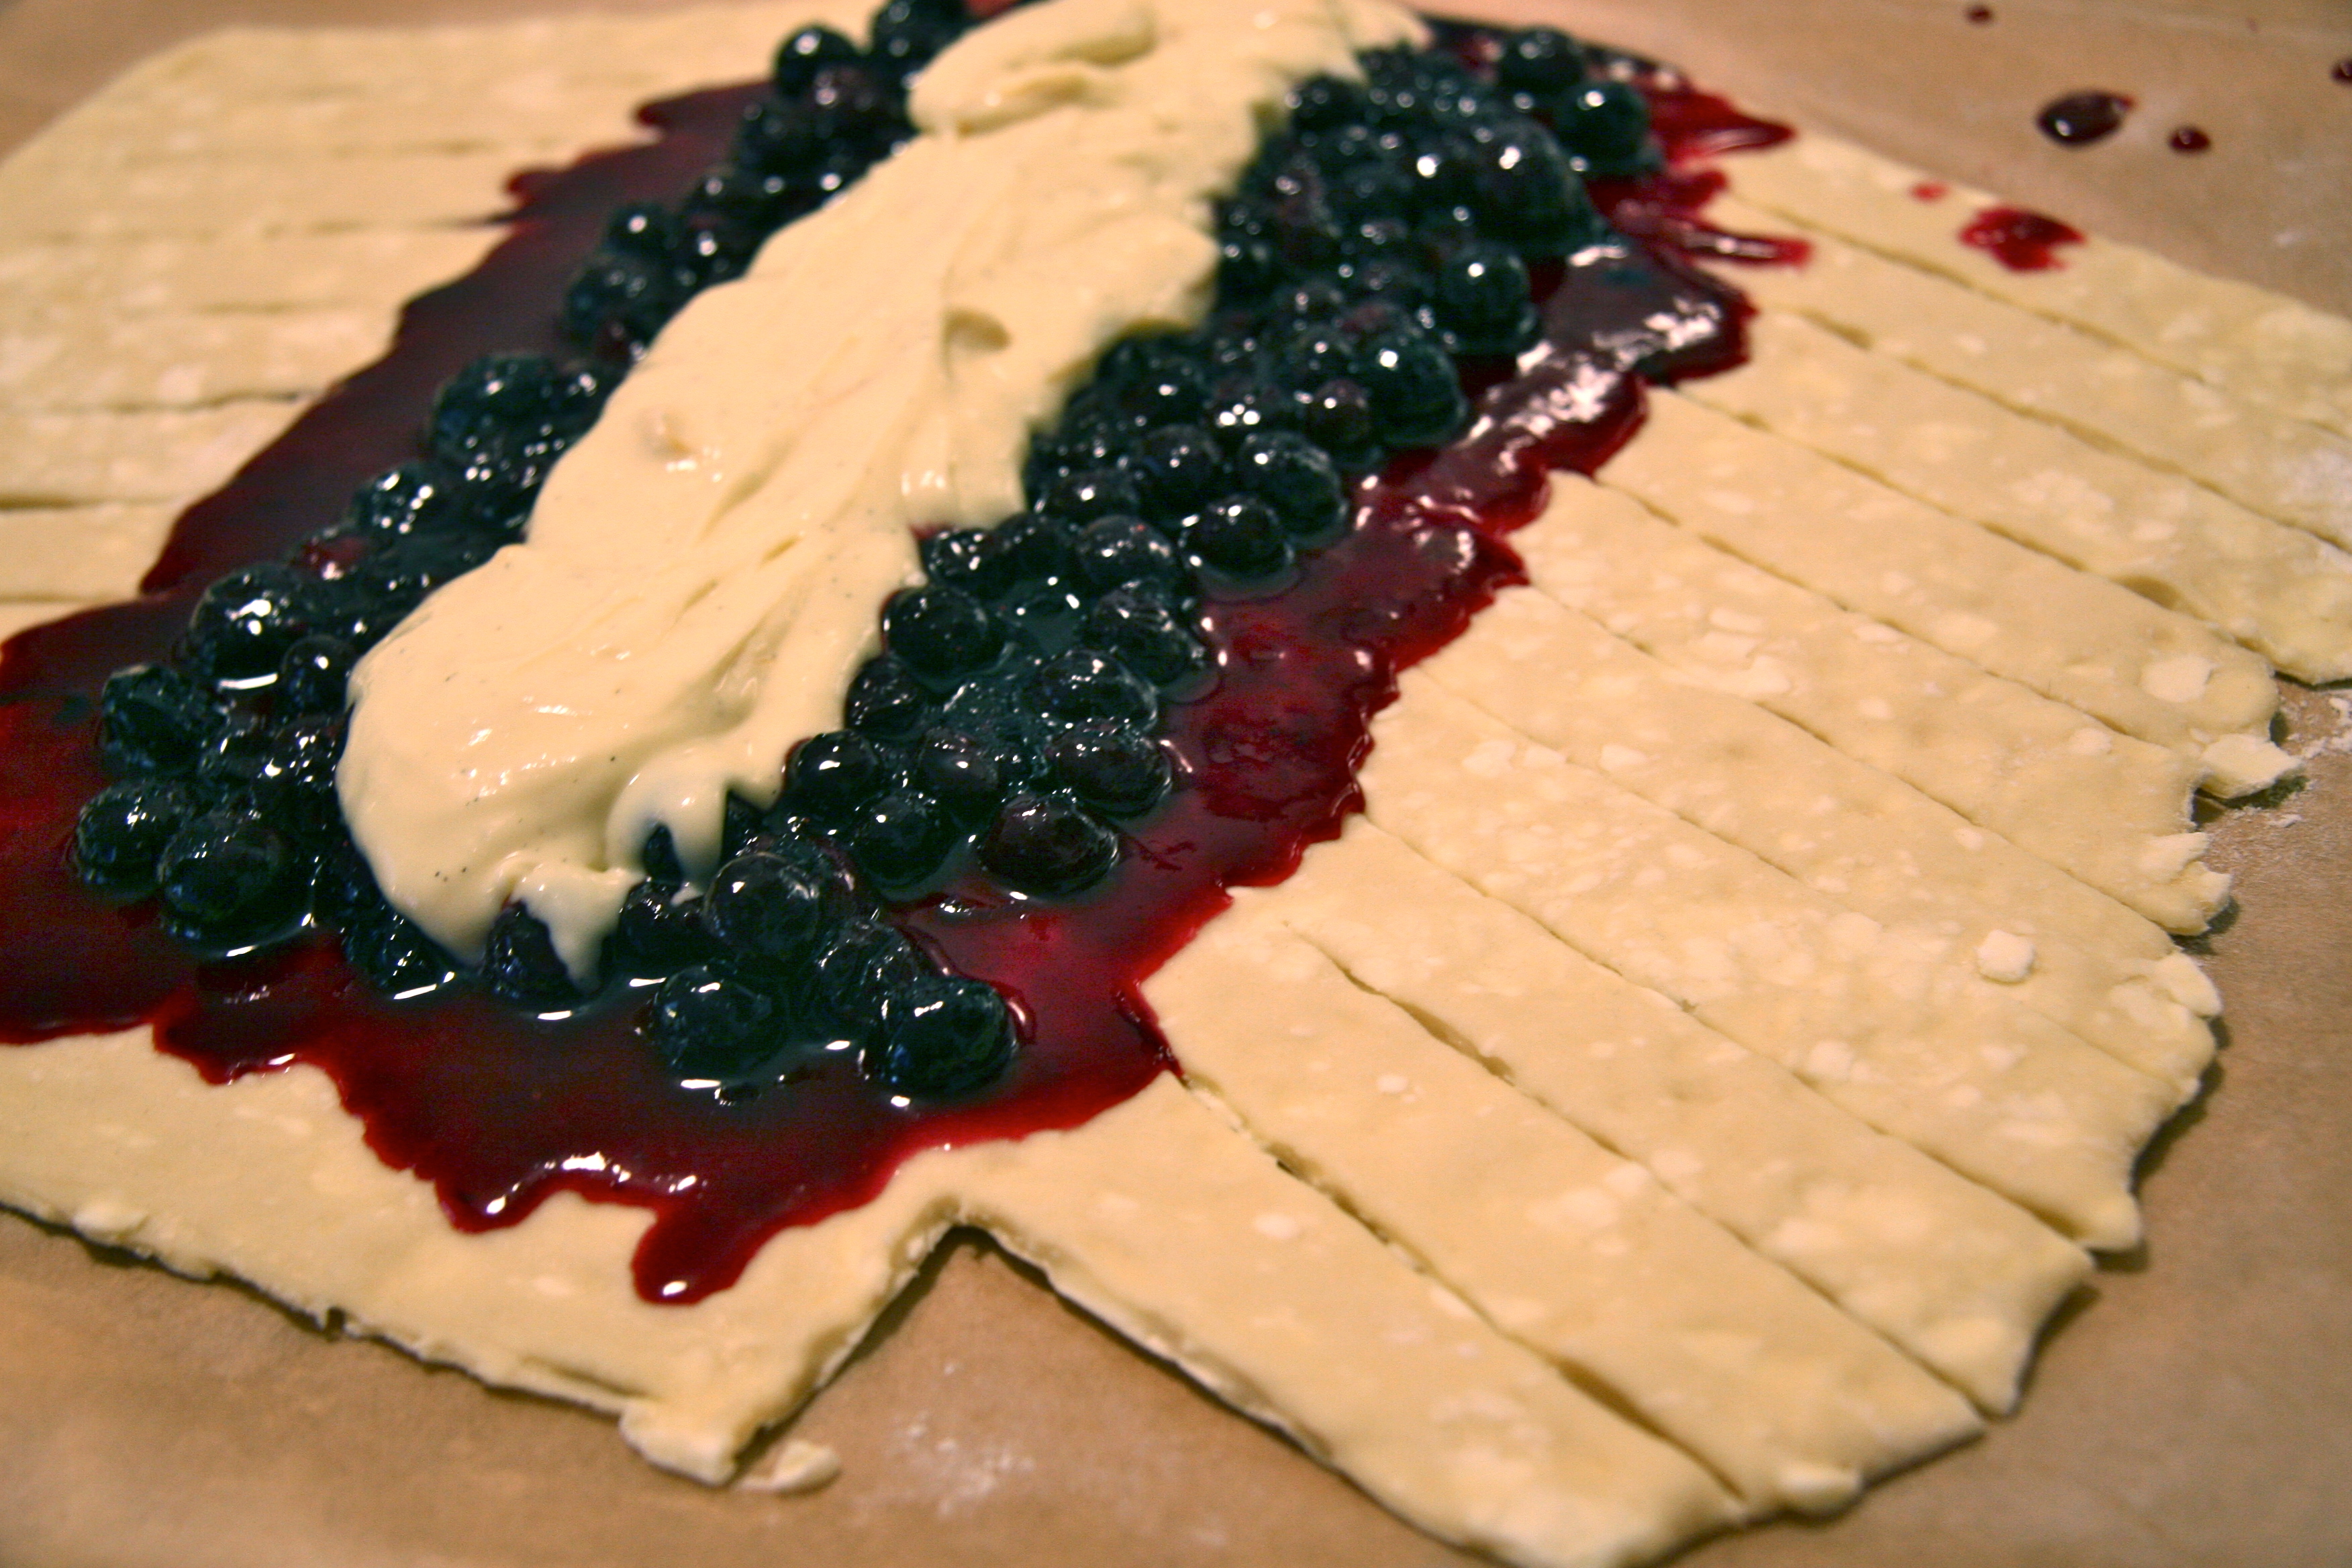
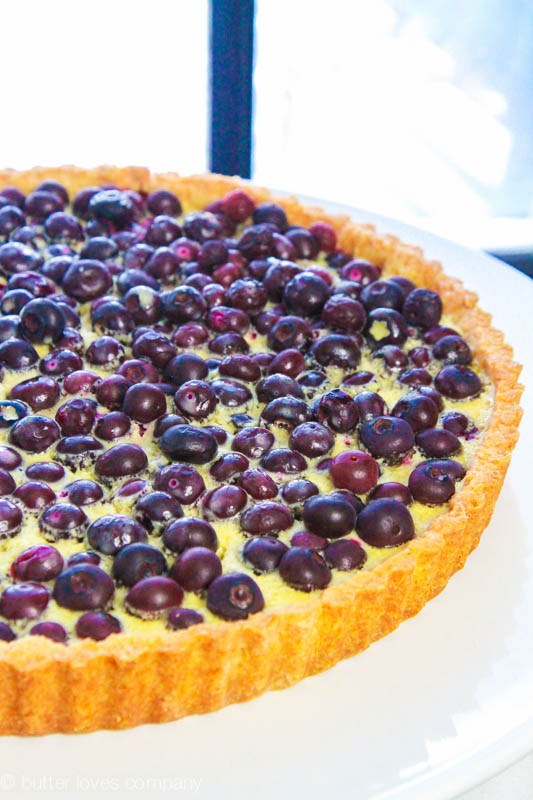
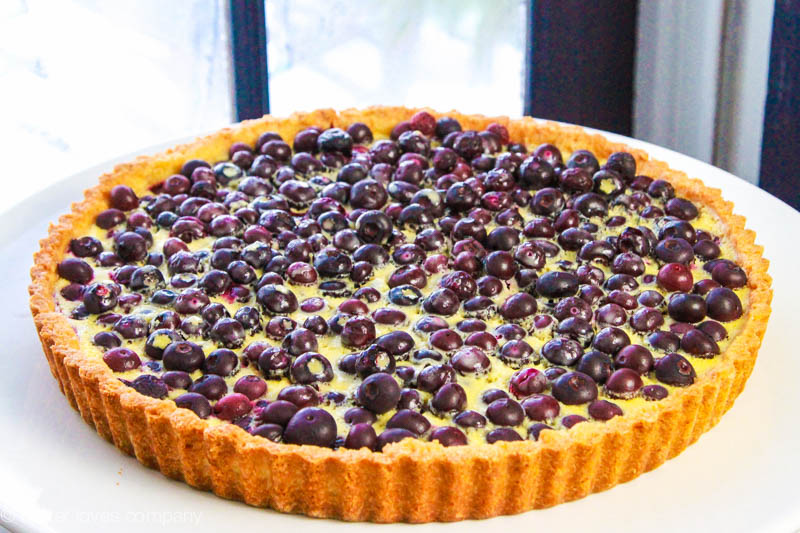
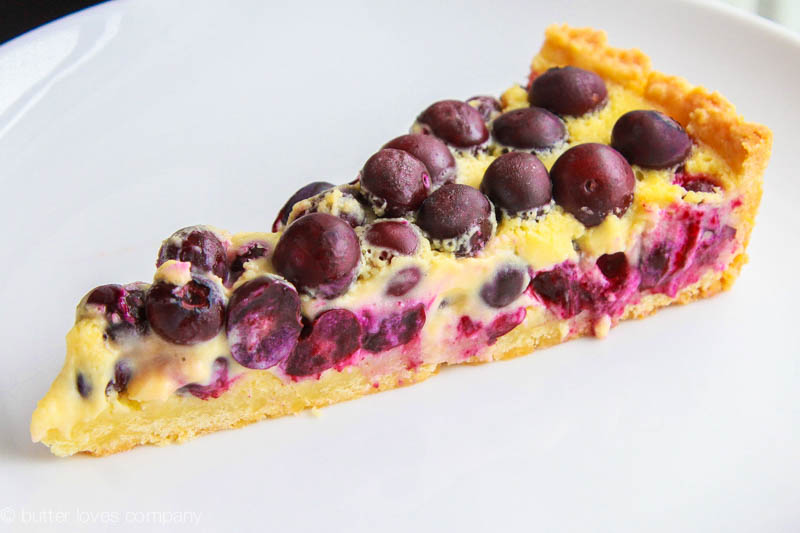
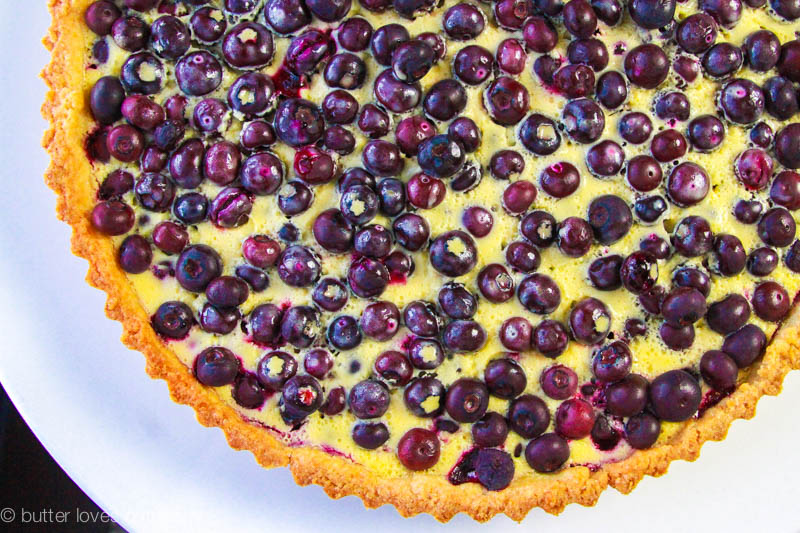
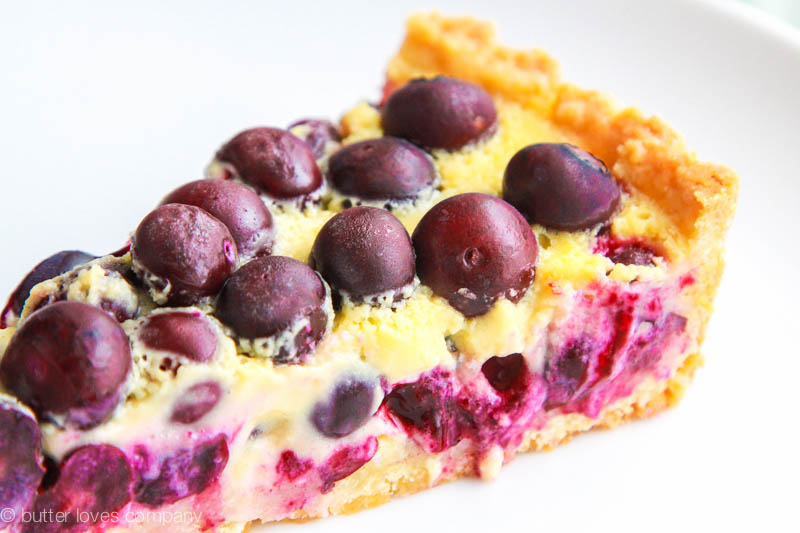
Once you prepare the dough, you can just push it right into the pan with your sticky little fingers. It is a tad more crumbly than a pie crust with a texture like that of shortbread. Once you line the pan, you partially bake the dough so it can stand up to all the juicy blueberries and tart, creamy filling you’ll top it with next. The blueberries stay whole and plump up in the oven so you can pop them with your teeth as you devour a slice. Then you’ll pour a lemony Greek yogurt sauce over the sweet blueberries and bake the entire tart until the sauce sets into what is similar to a loose custard. The combination of the buttery crust, sweet blueberries, and tart lemon cream is bright, fresh, and dreamy. 

The tart holds well in the fridge for a few days and can be served cool or at room temperature. It can also be served for breakfast when you are snowed-in in Boston. I can attest to that.

blueberry-lemon-cream-tart-3

blueberry-lemon-cream-tart-1

blueberry-lemon-cream-tart-7blueberry-lemon-cream-tart-6

blueberry-lemon-cream-tart-8

blueberry and lemon cream tart
adapted from Gourmet Magazine, July 1990

prep time: 30 minutes
cook time: 60 minutes
total time: 1 hour 30 minutes (plus more for chilling dough)
Makes 1 12-Inch Tart in Pan with Removable Bottom

Ingredients:

For the crust:
2 2/3 cups all-purpose flour
1/2 cup sugar
1/2 teaspoon salt
2 sticks (1 cup) very cold, unsalted butter, cut into 1-inch cubes
2 large egg yolks, beaten with 4 tablespoons ice water
pie weights, dry beans, or raw rice for weighting the shell

For the filling:
3/4 cup plain greek yogurt
1/4 cup heavy cream
3 large egg yolks
1/2 cup granulated sugar
1 tablespoon freshly grated lemon zest
1 tablespoon fresh lemon juice
1/2 stick (1/4 cup) unsalted butter, melted and cooled
1 teaspoon vanilla extract
1/2 teaspoon salt
2 tablespoons all-purpose flour
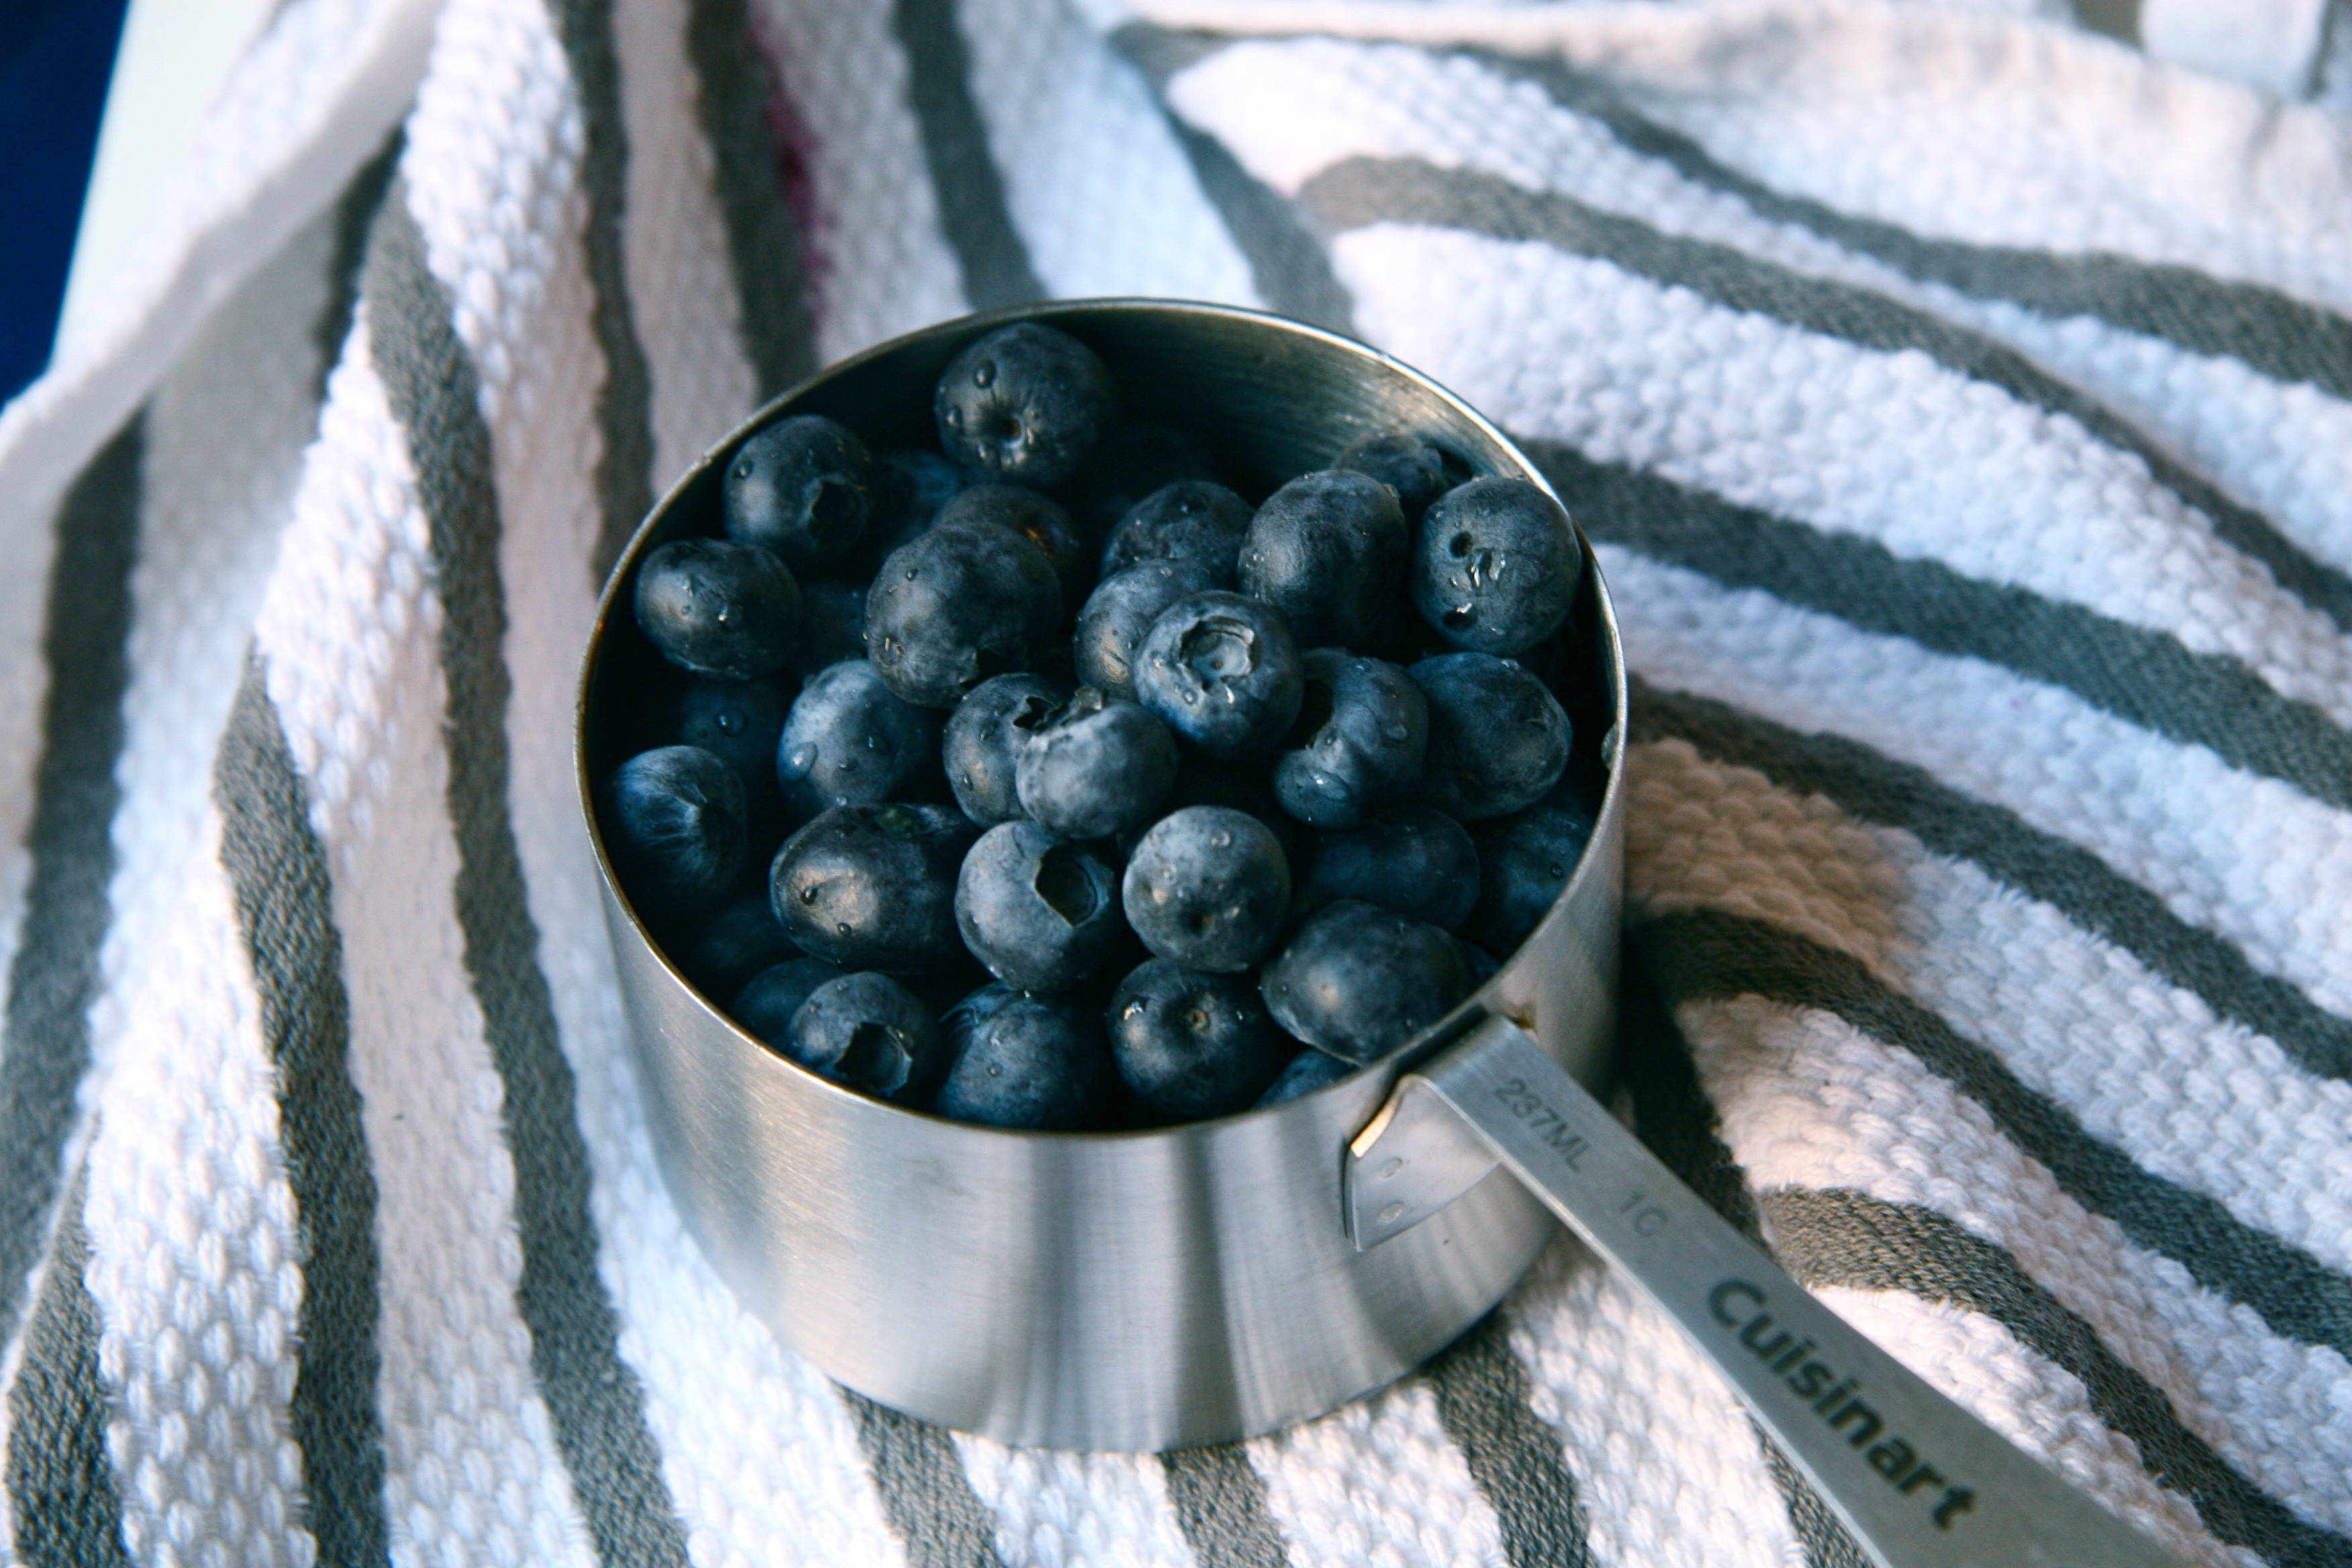
4 cups fresh blueberries (Take a look and remove extra stems or any bluebs that look dried out.)

Instructions:

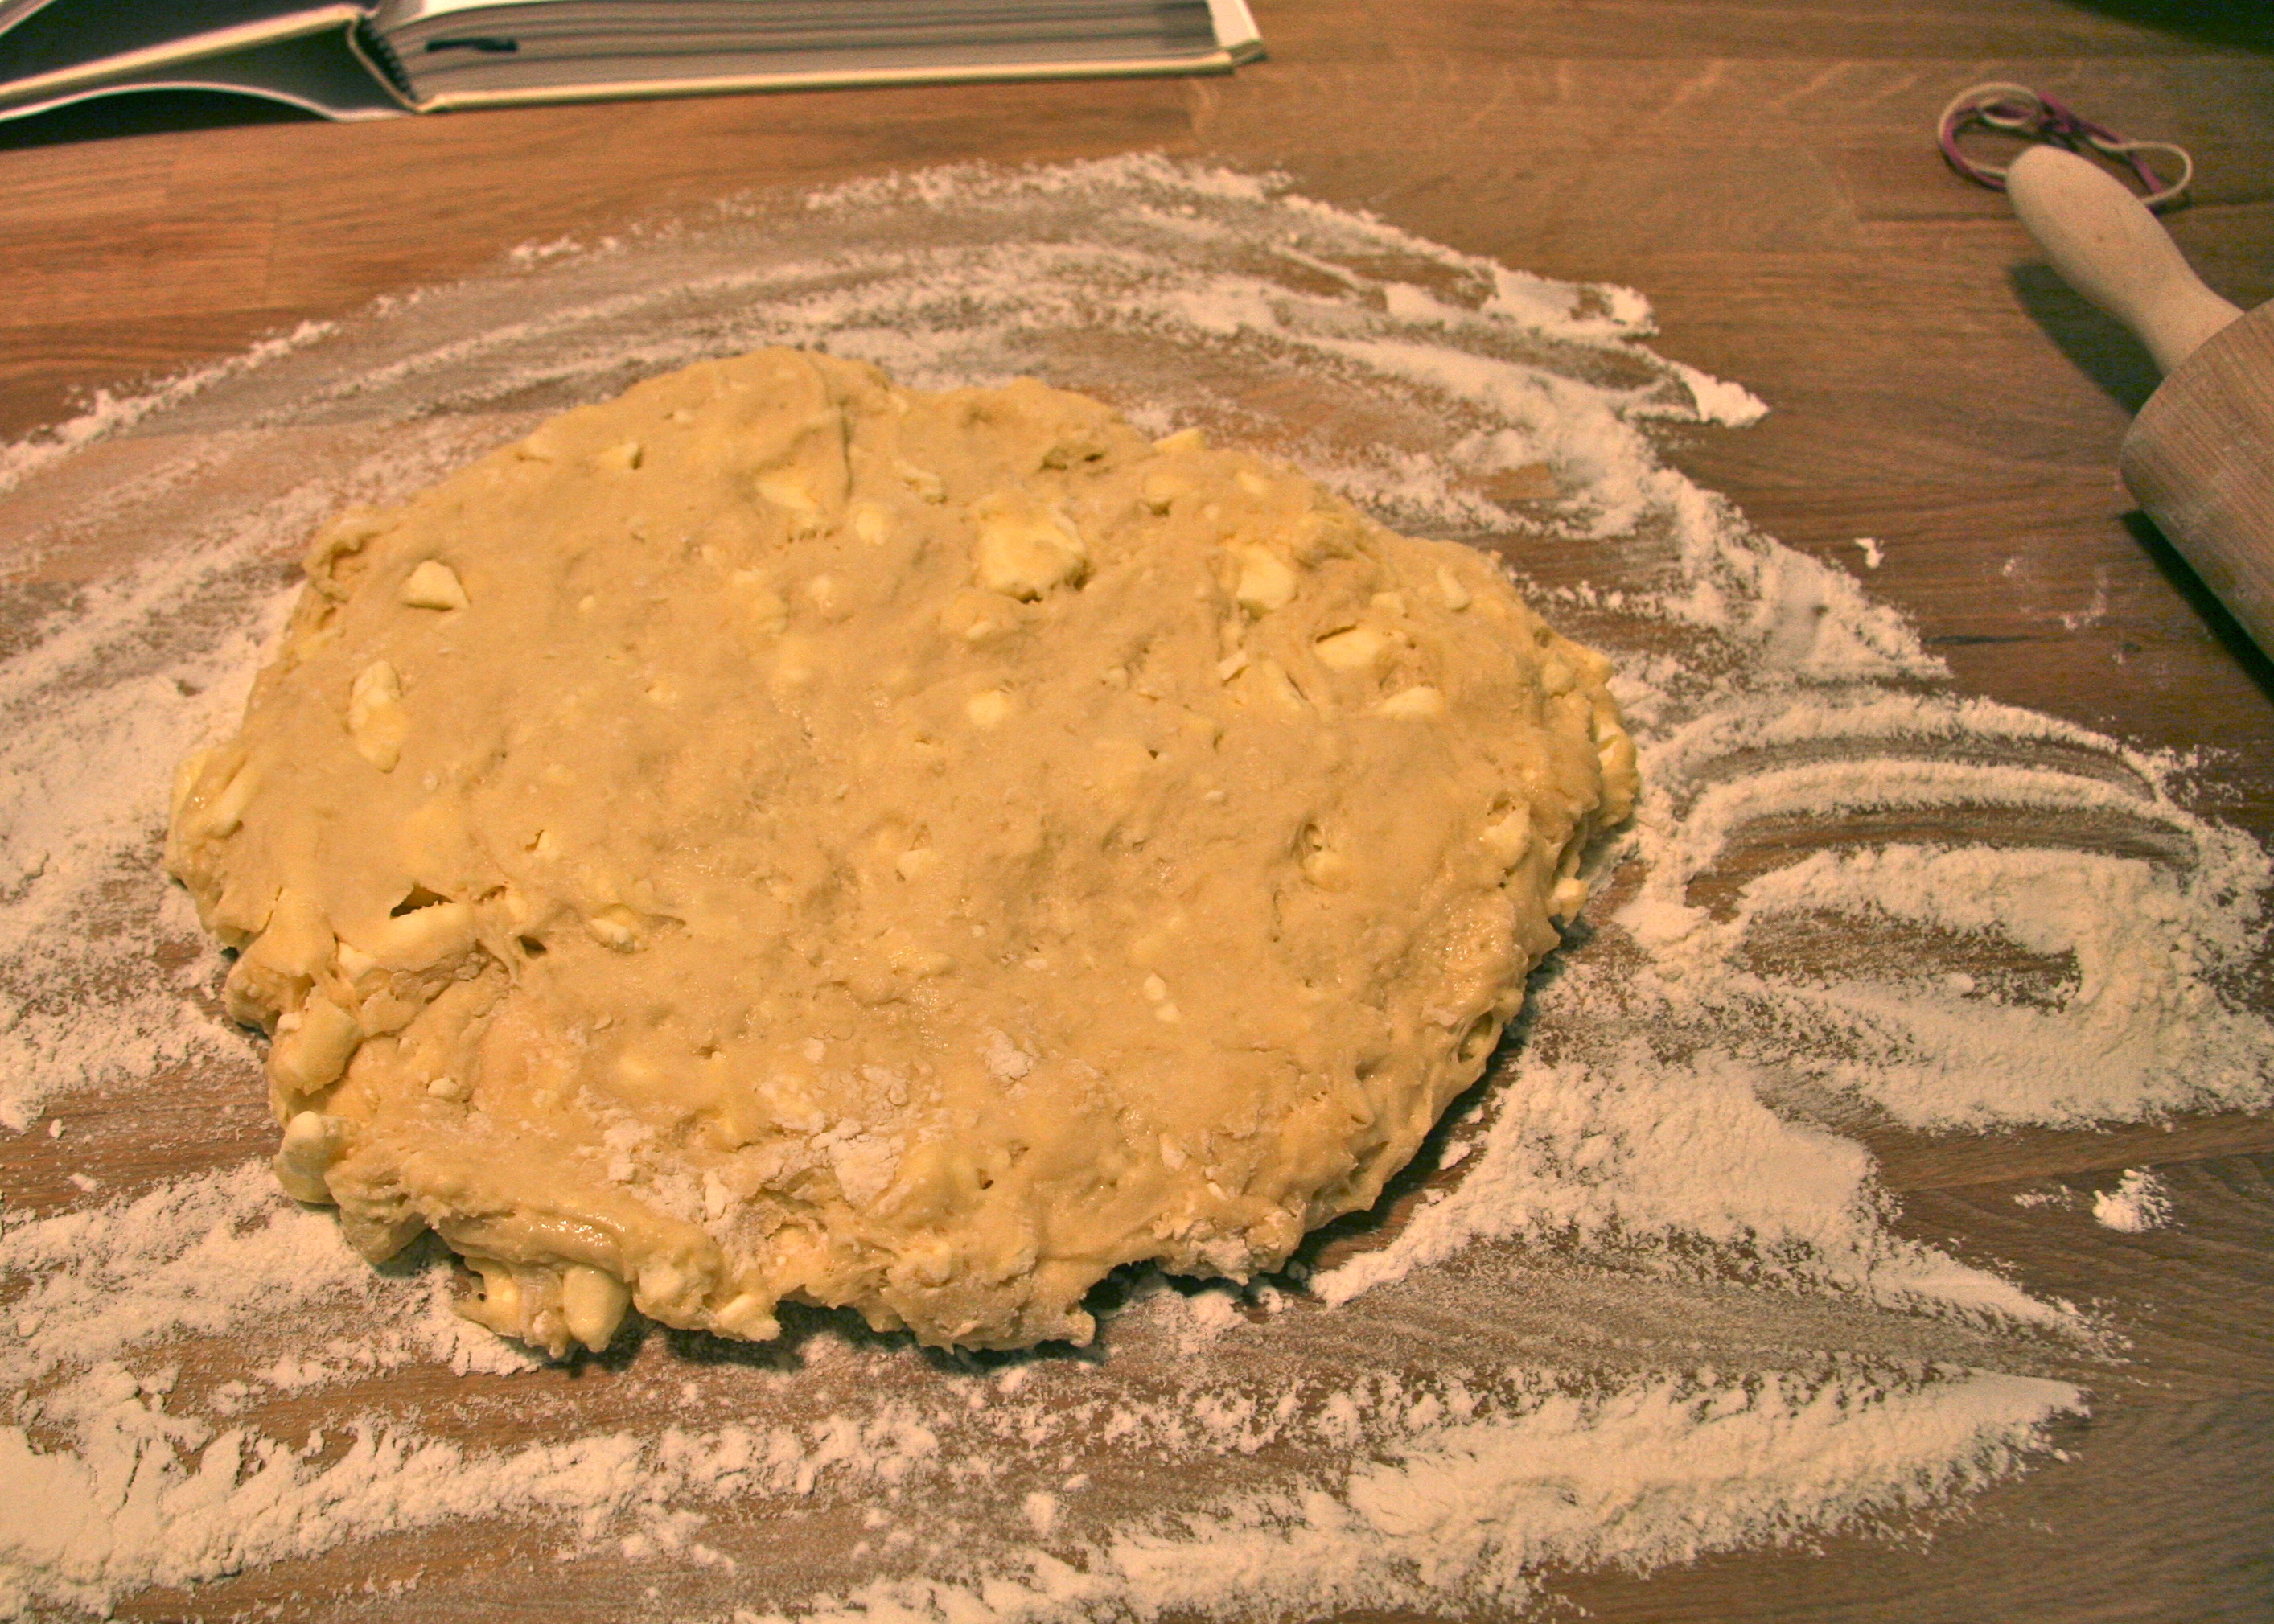
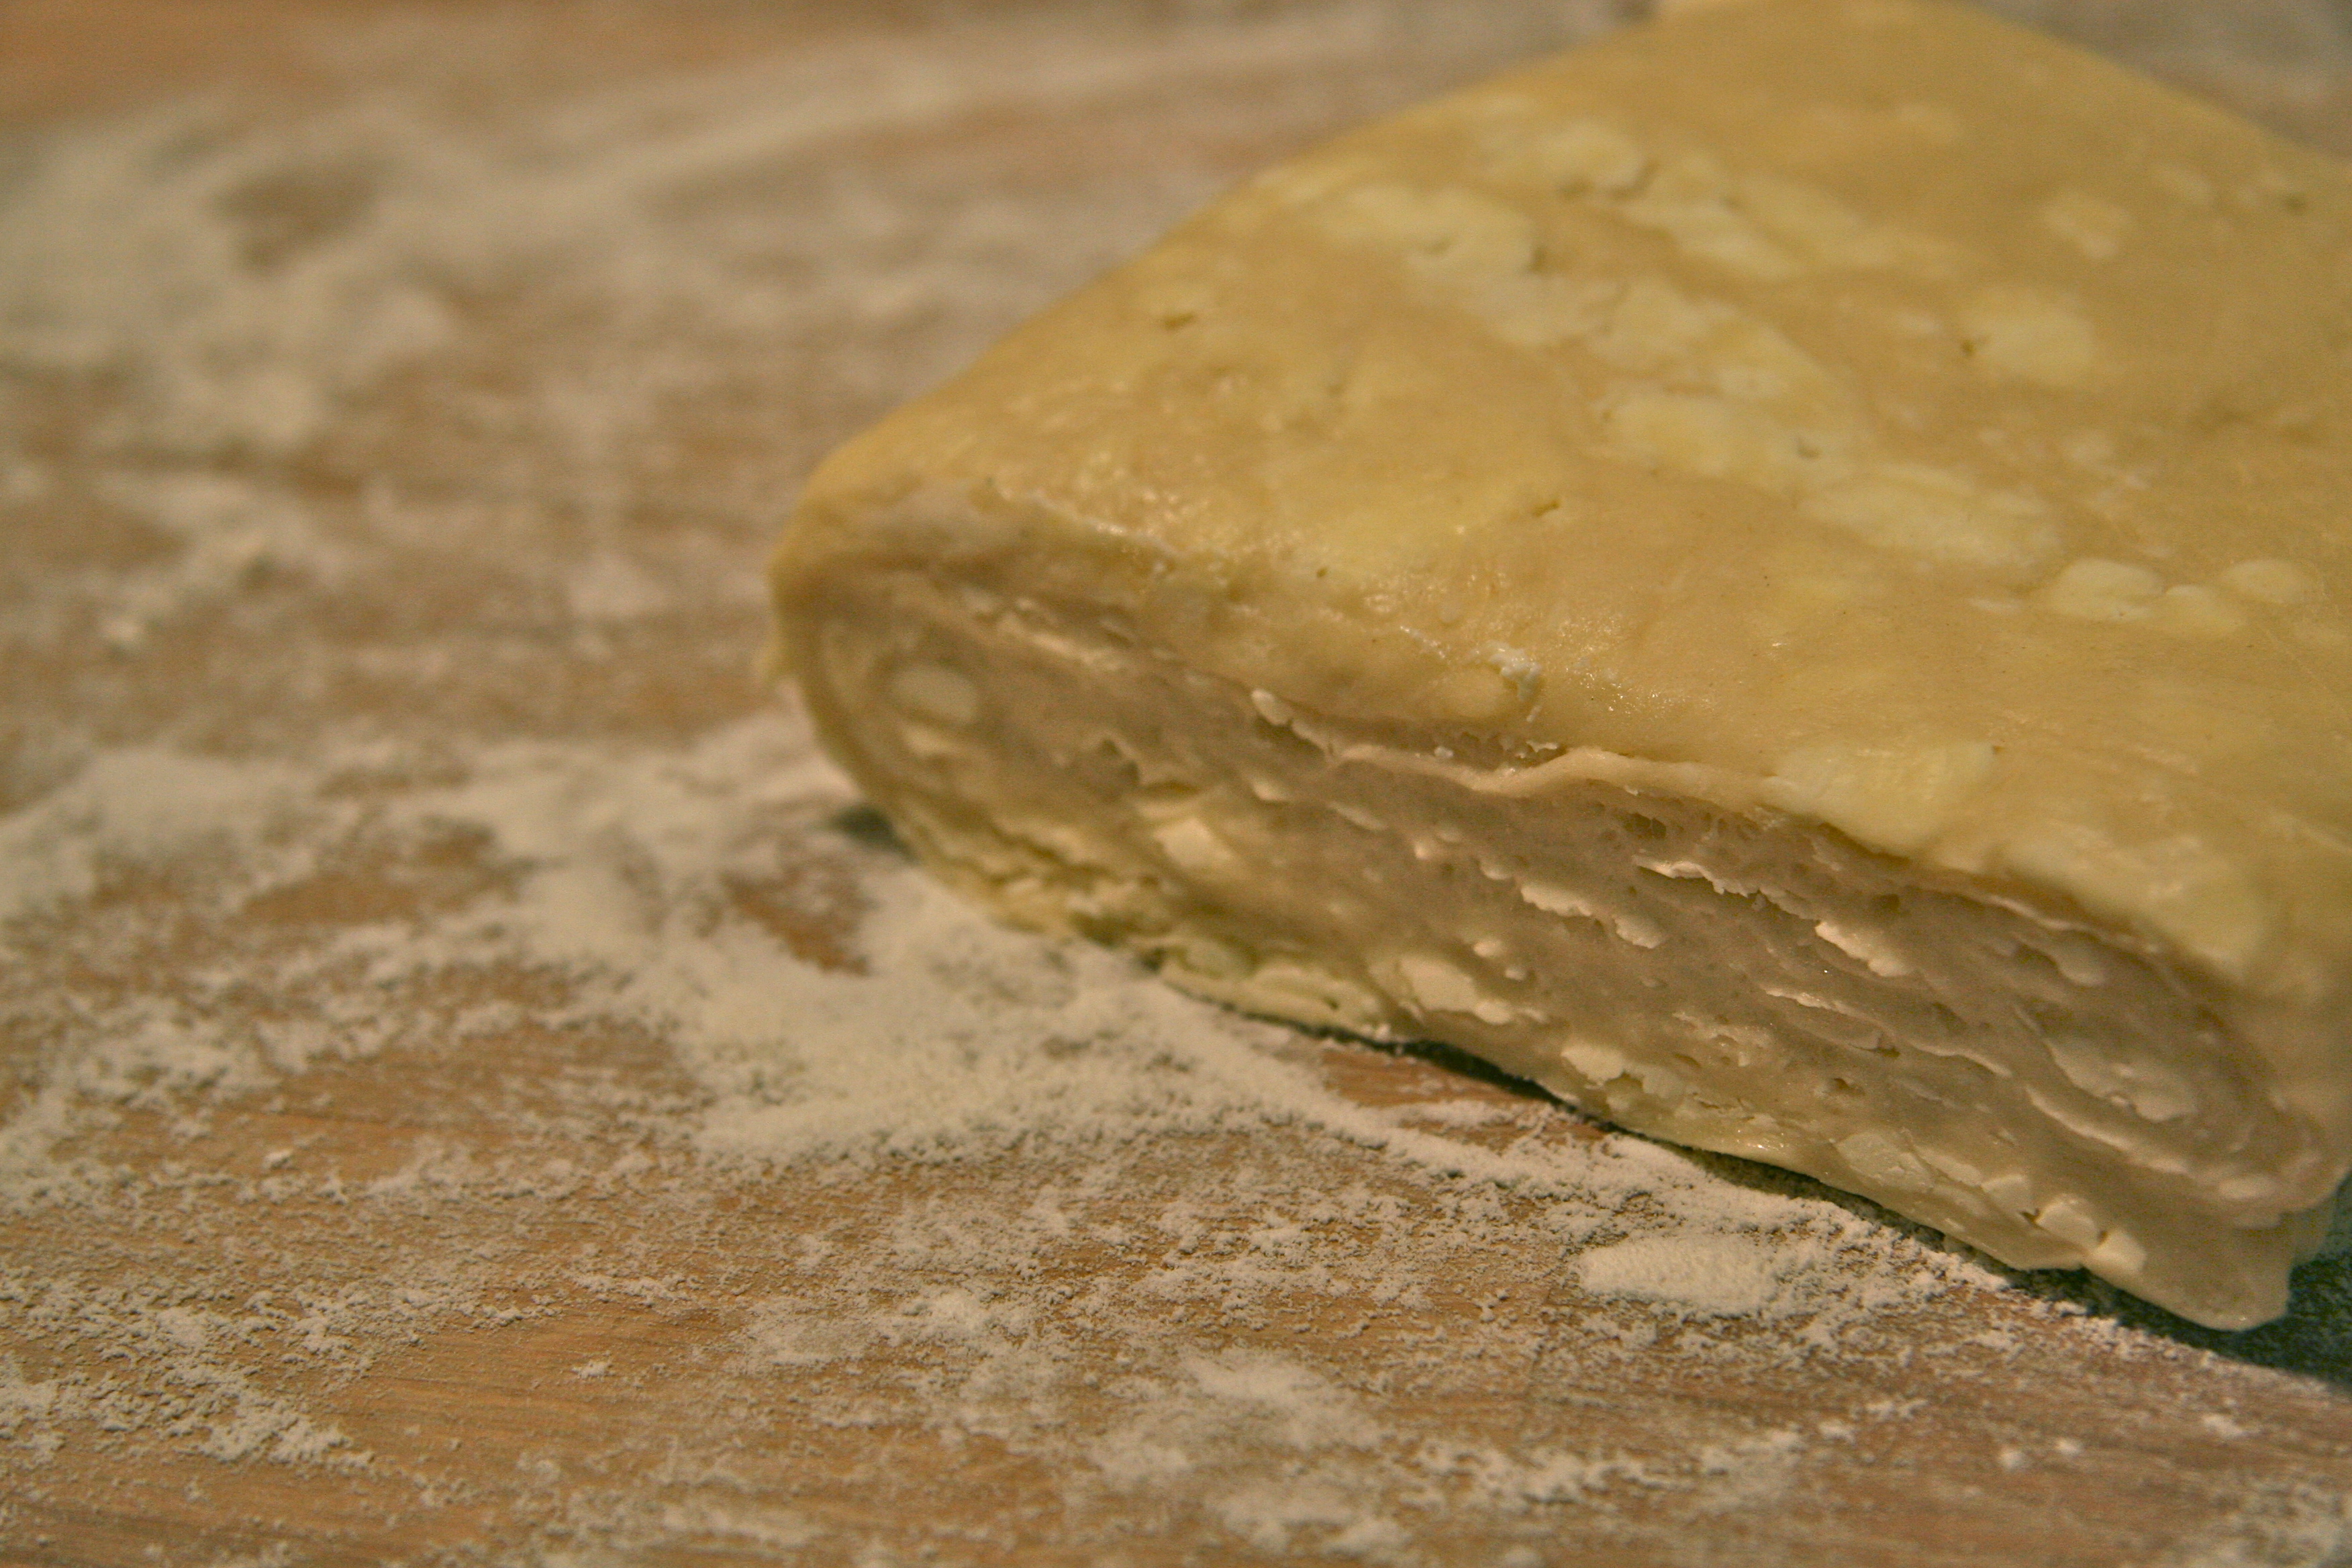
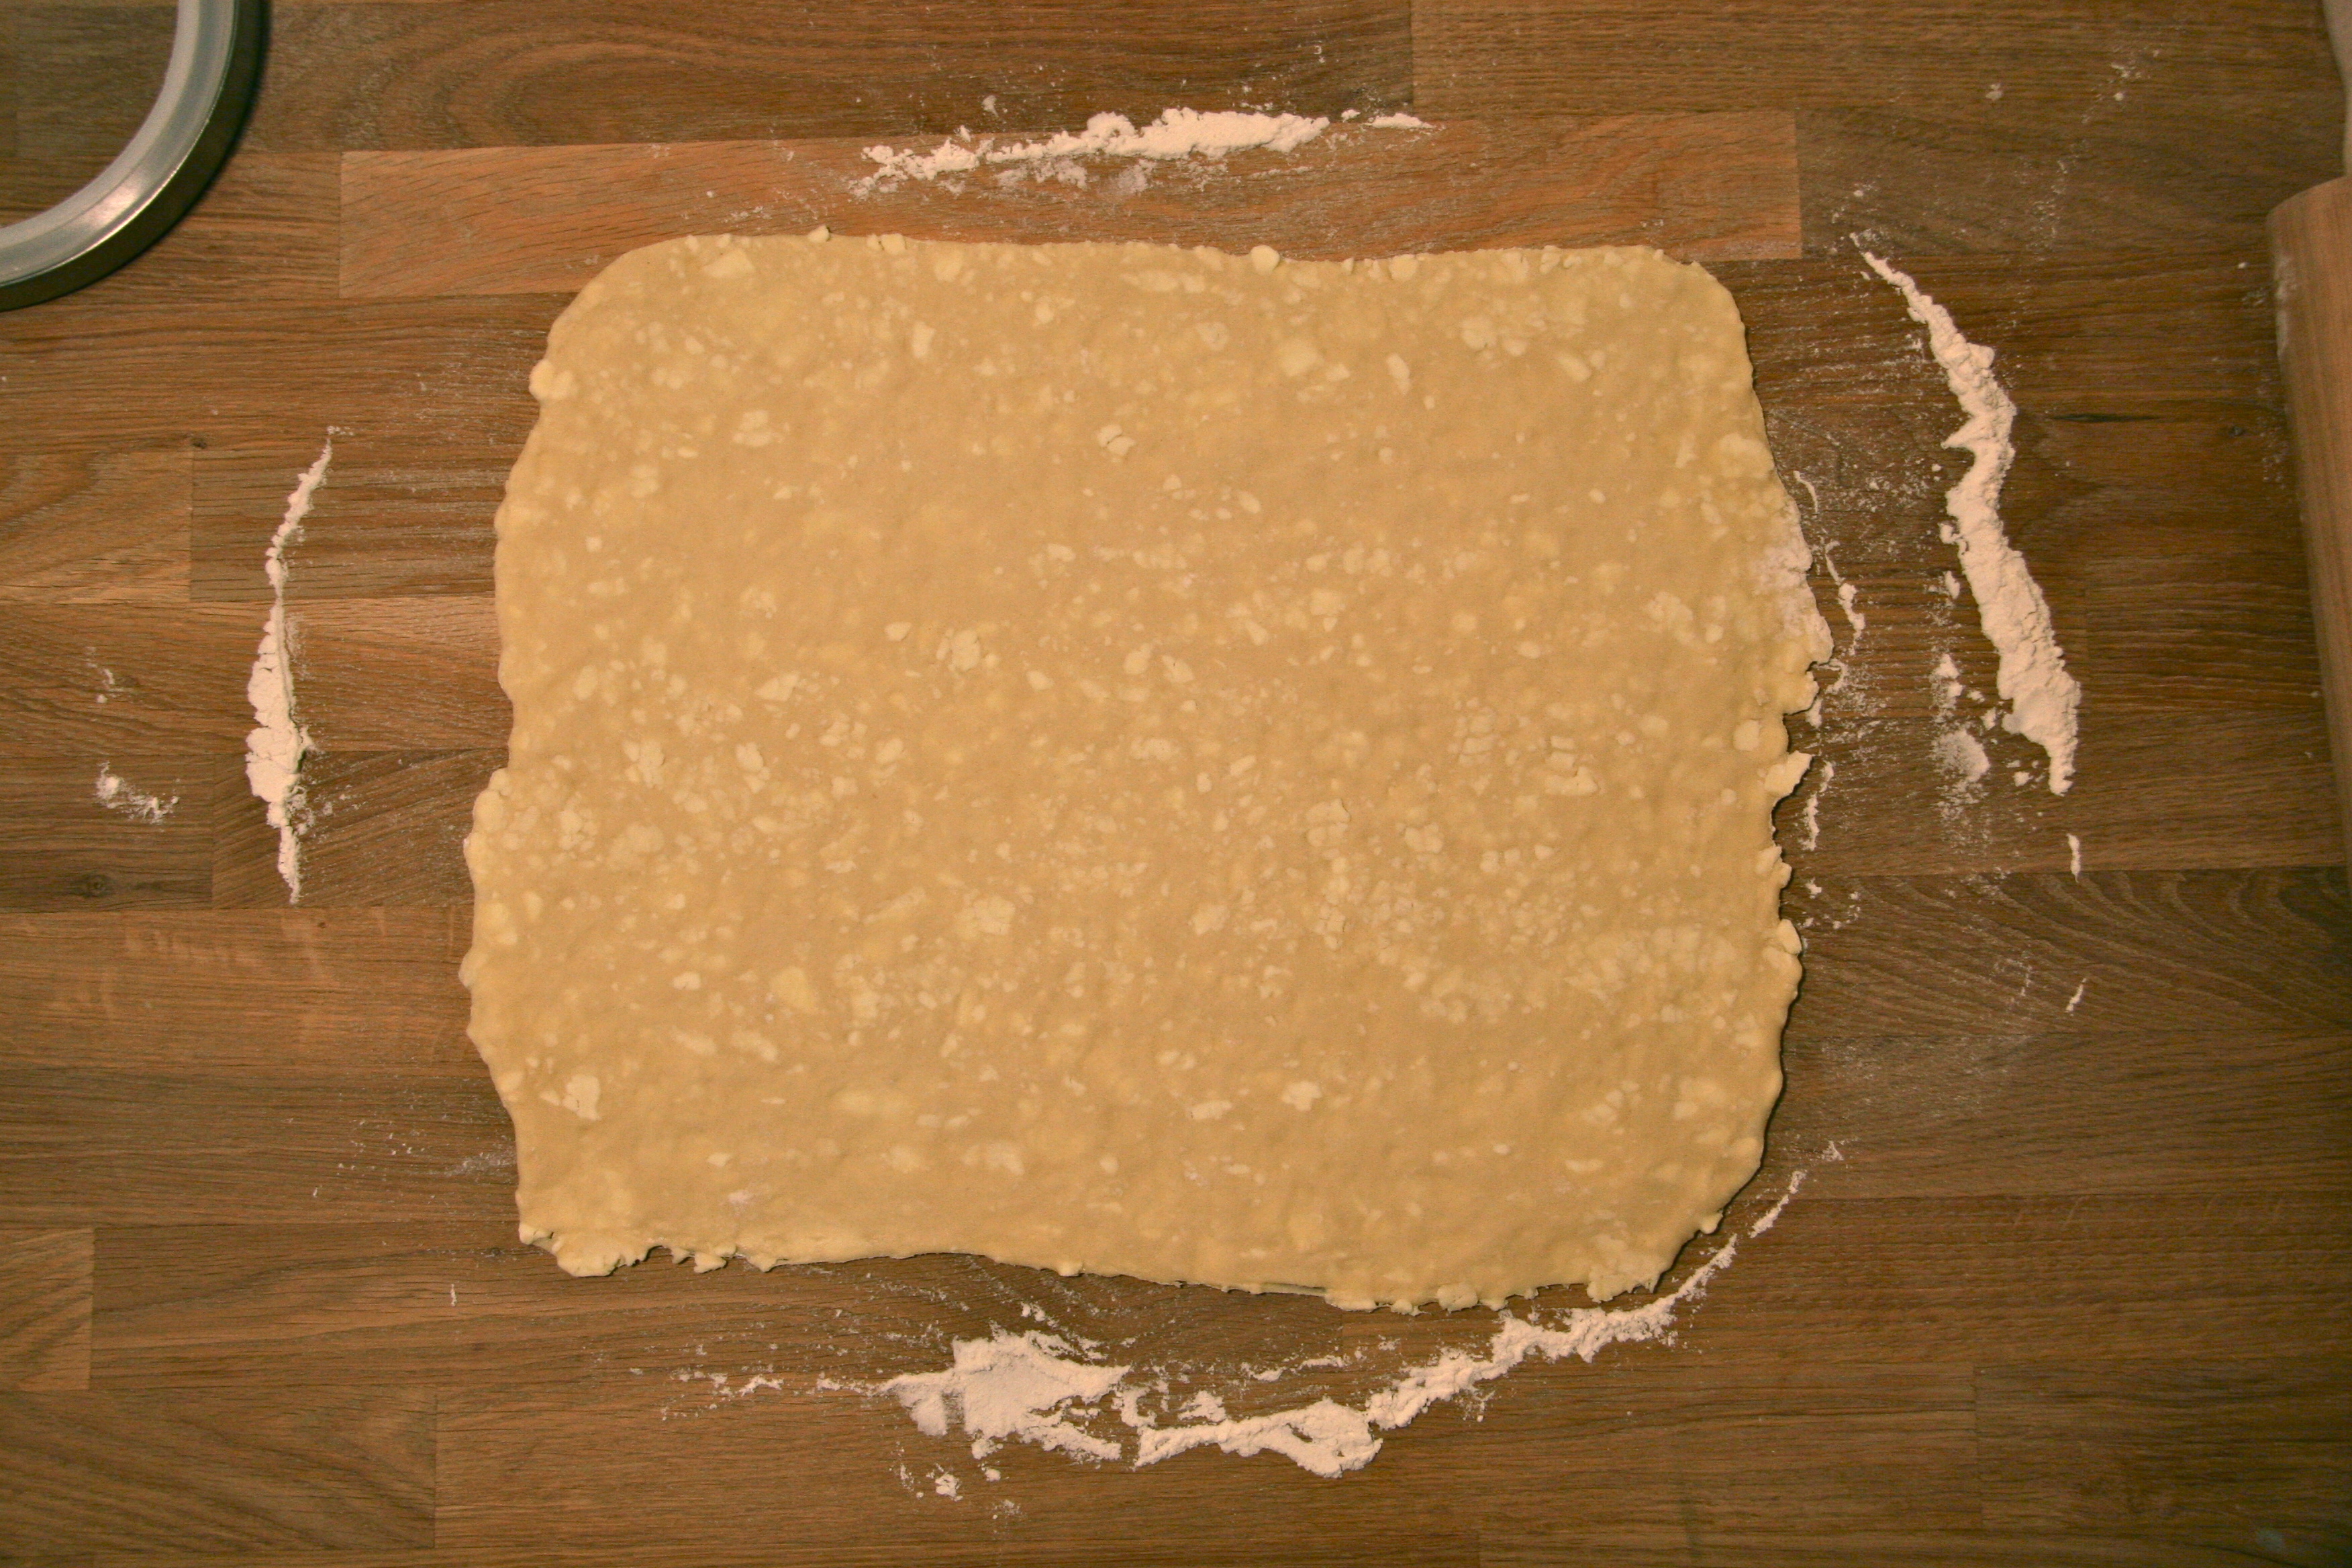
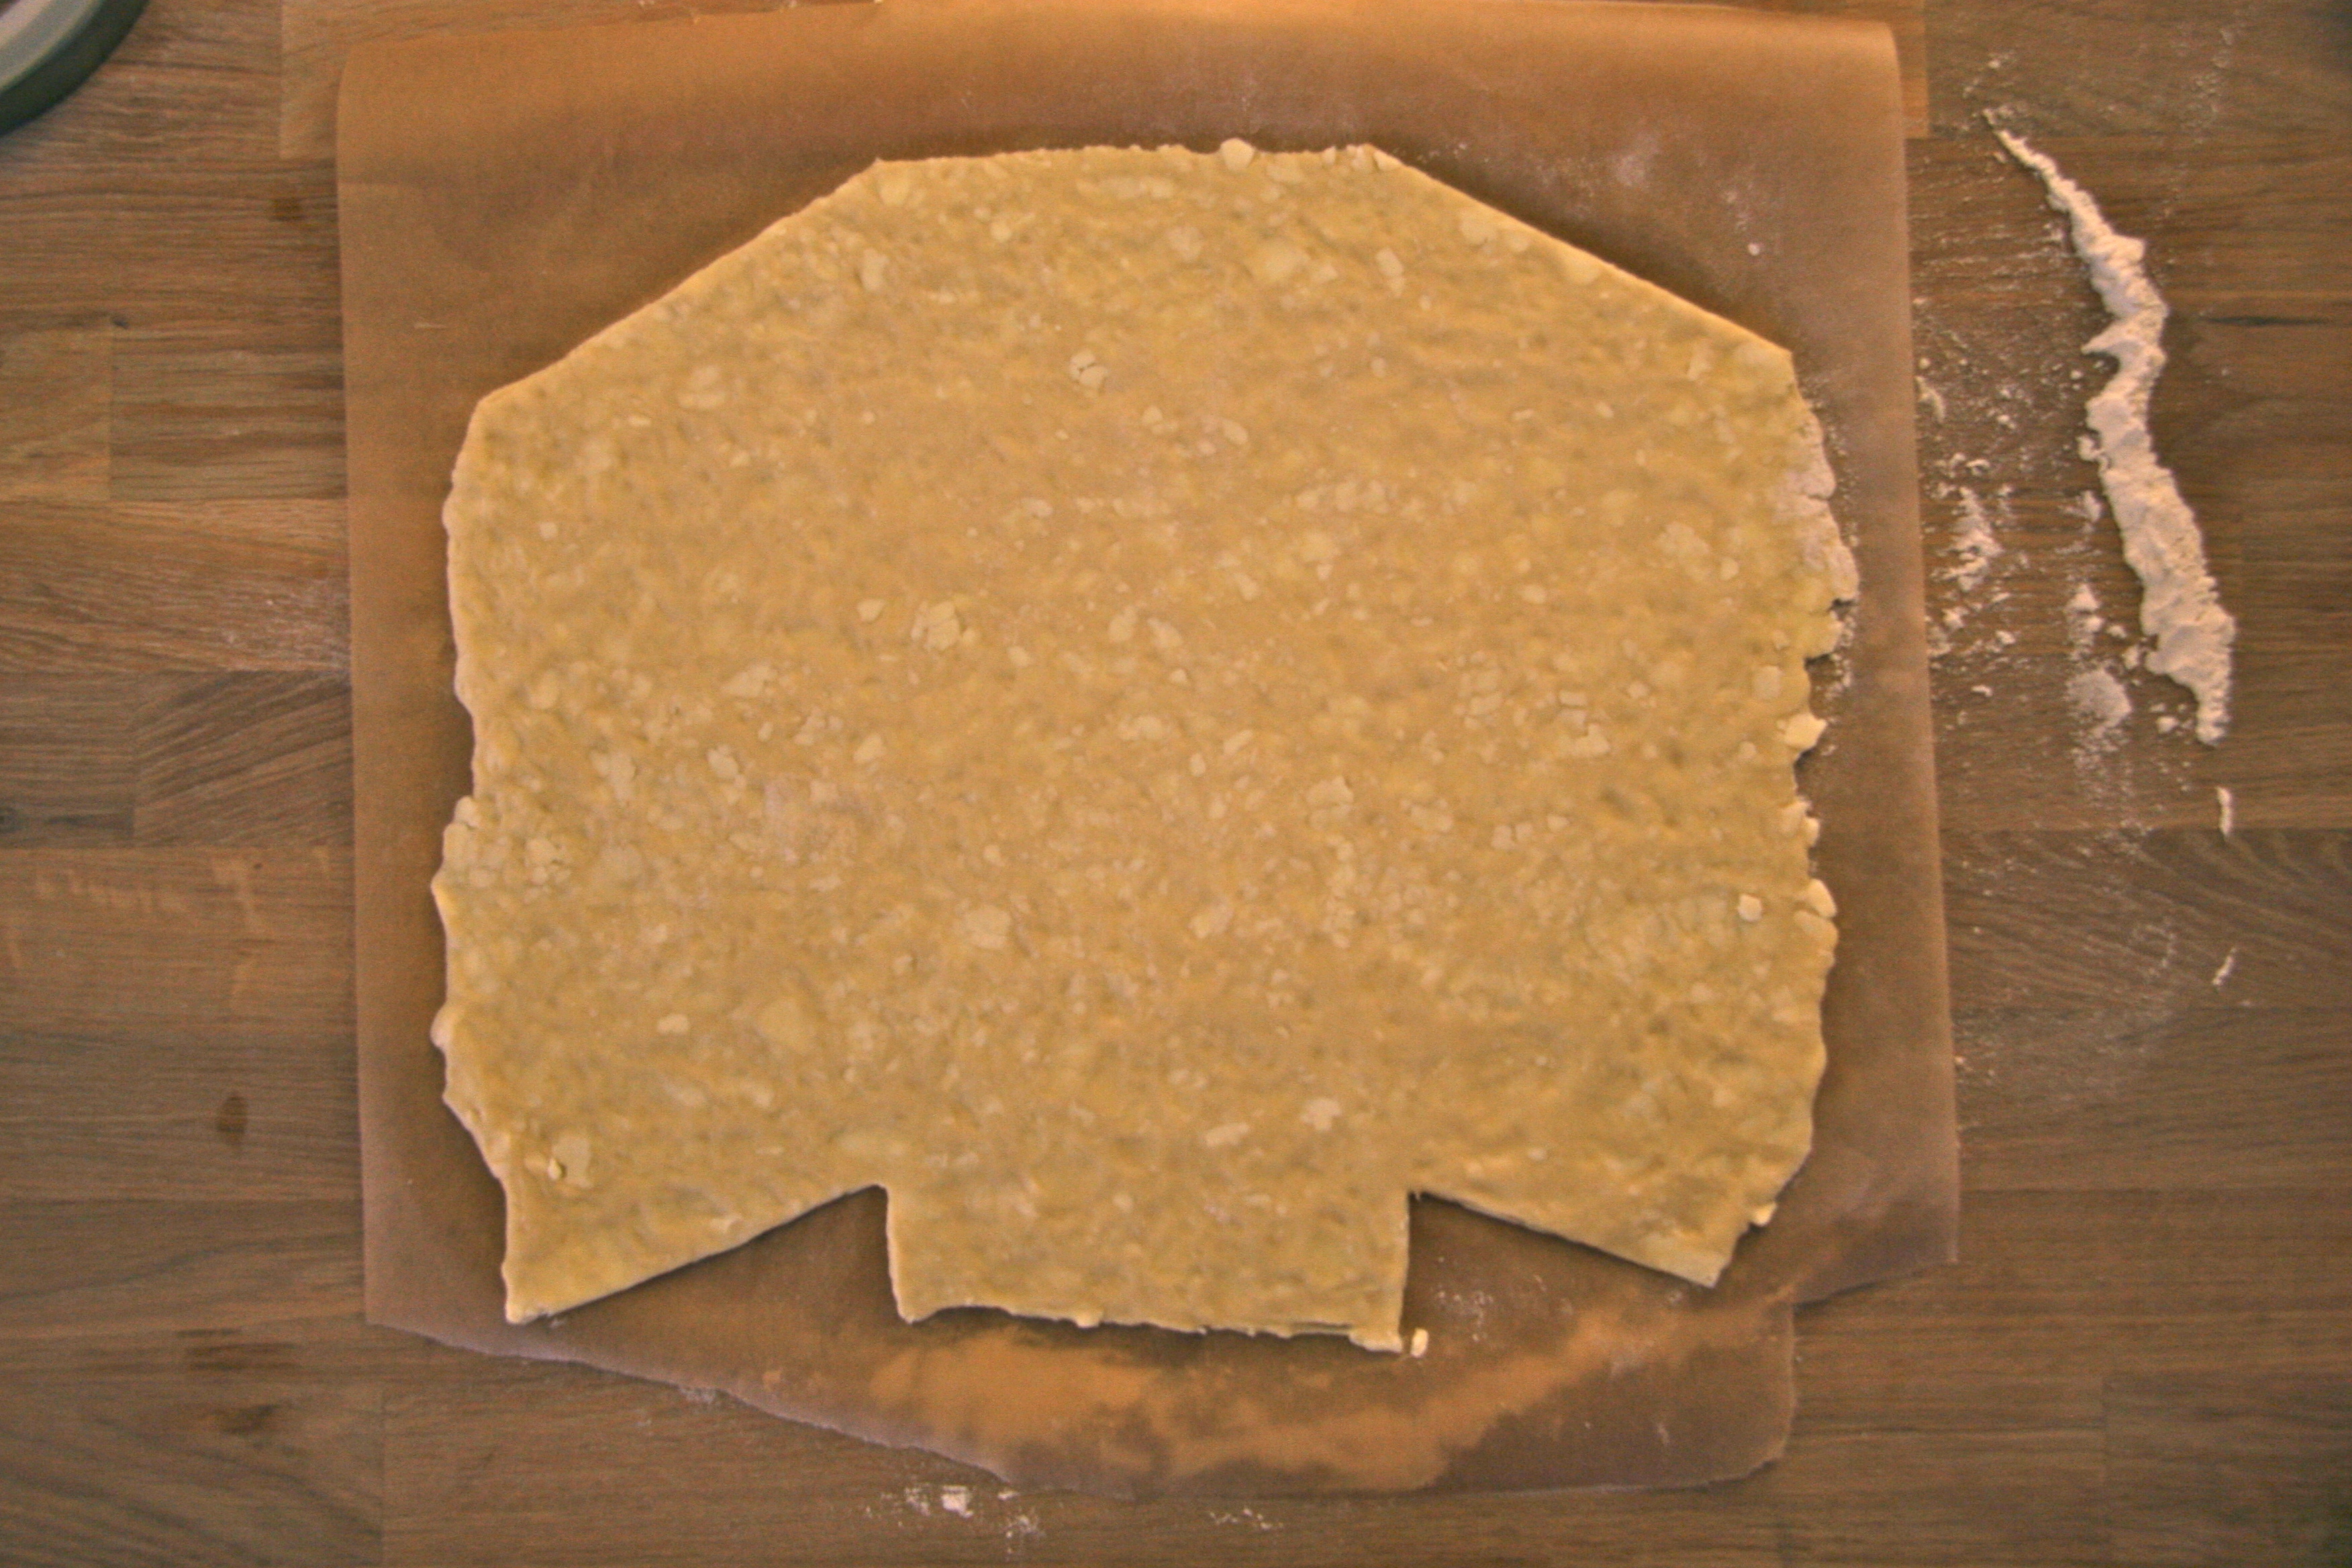
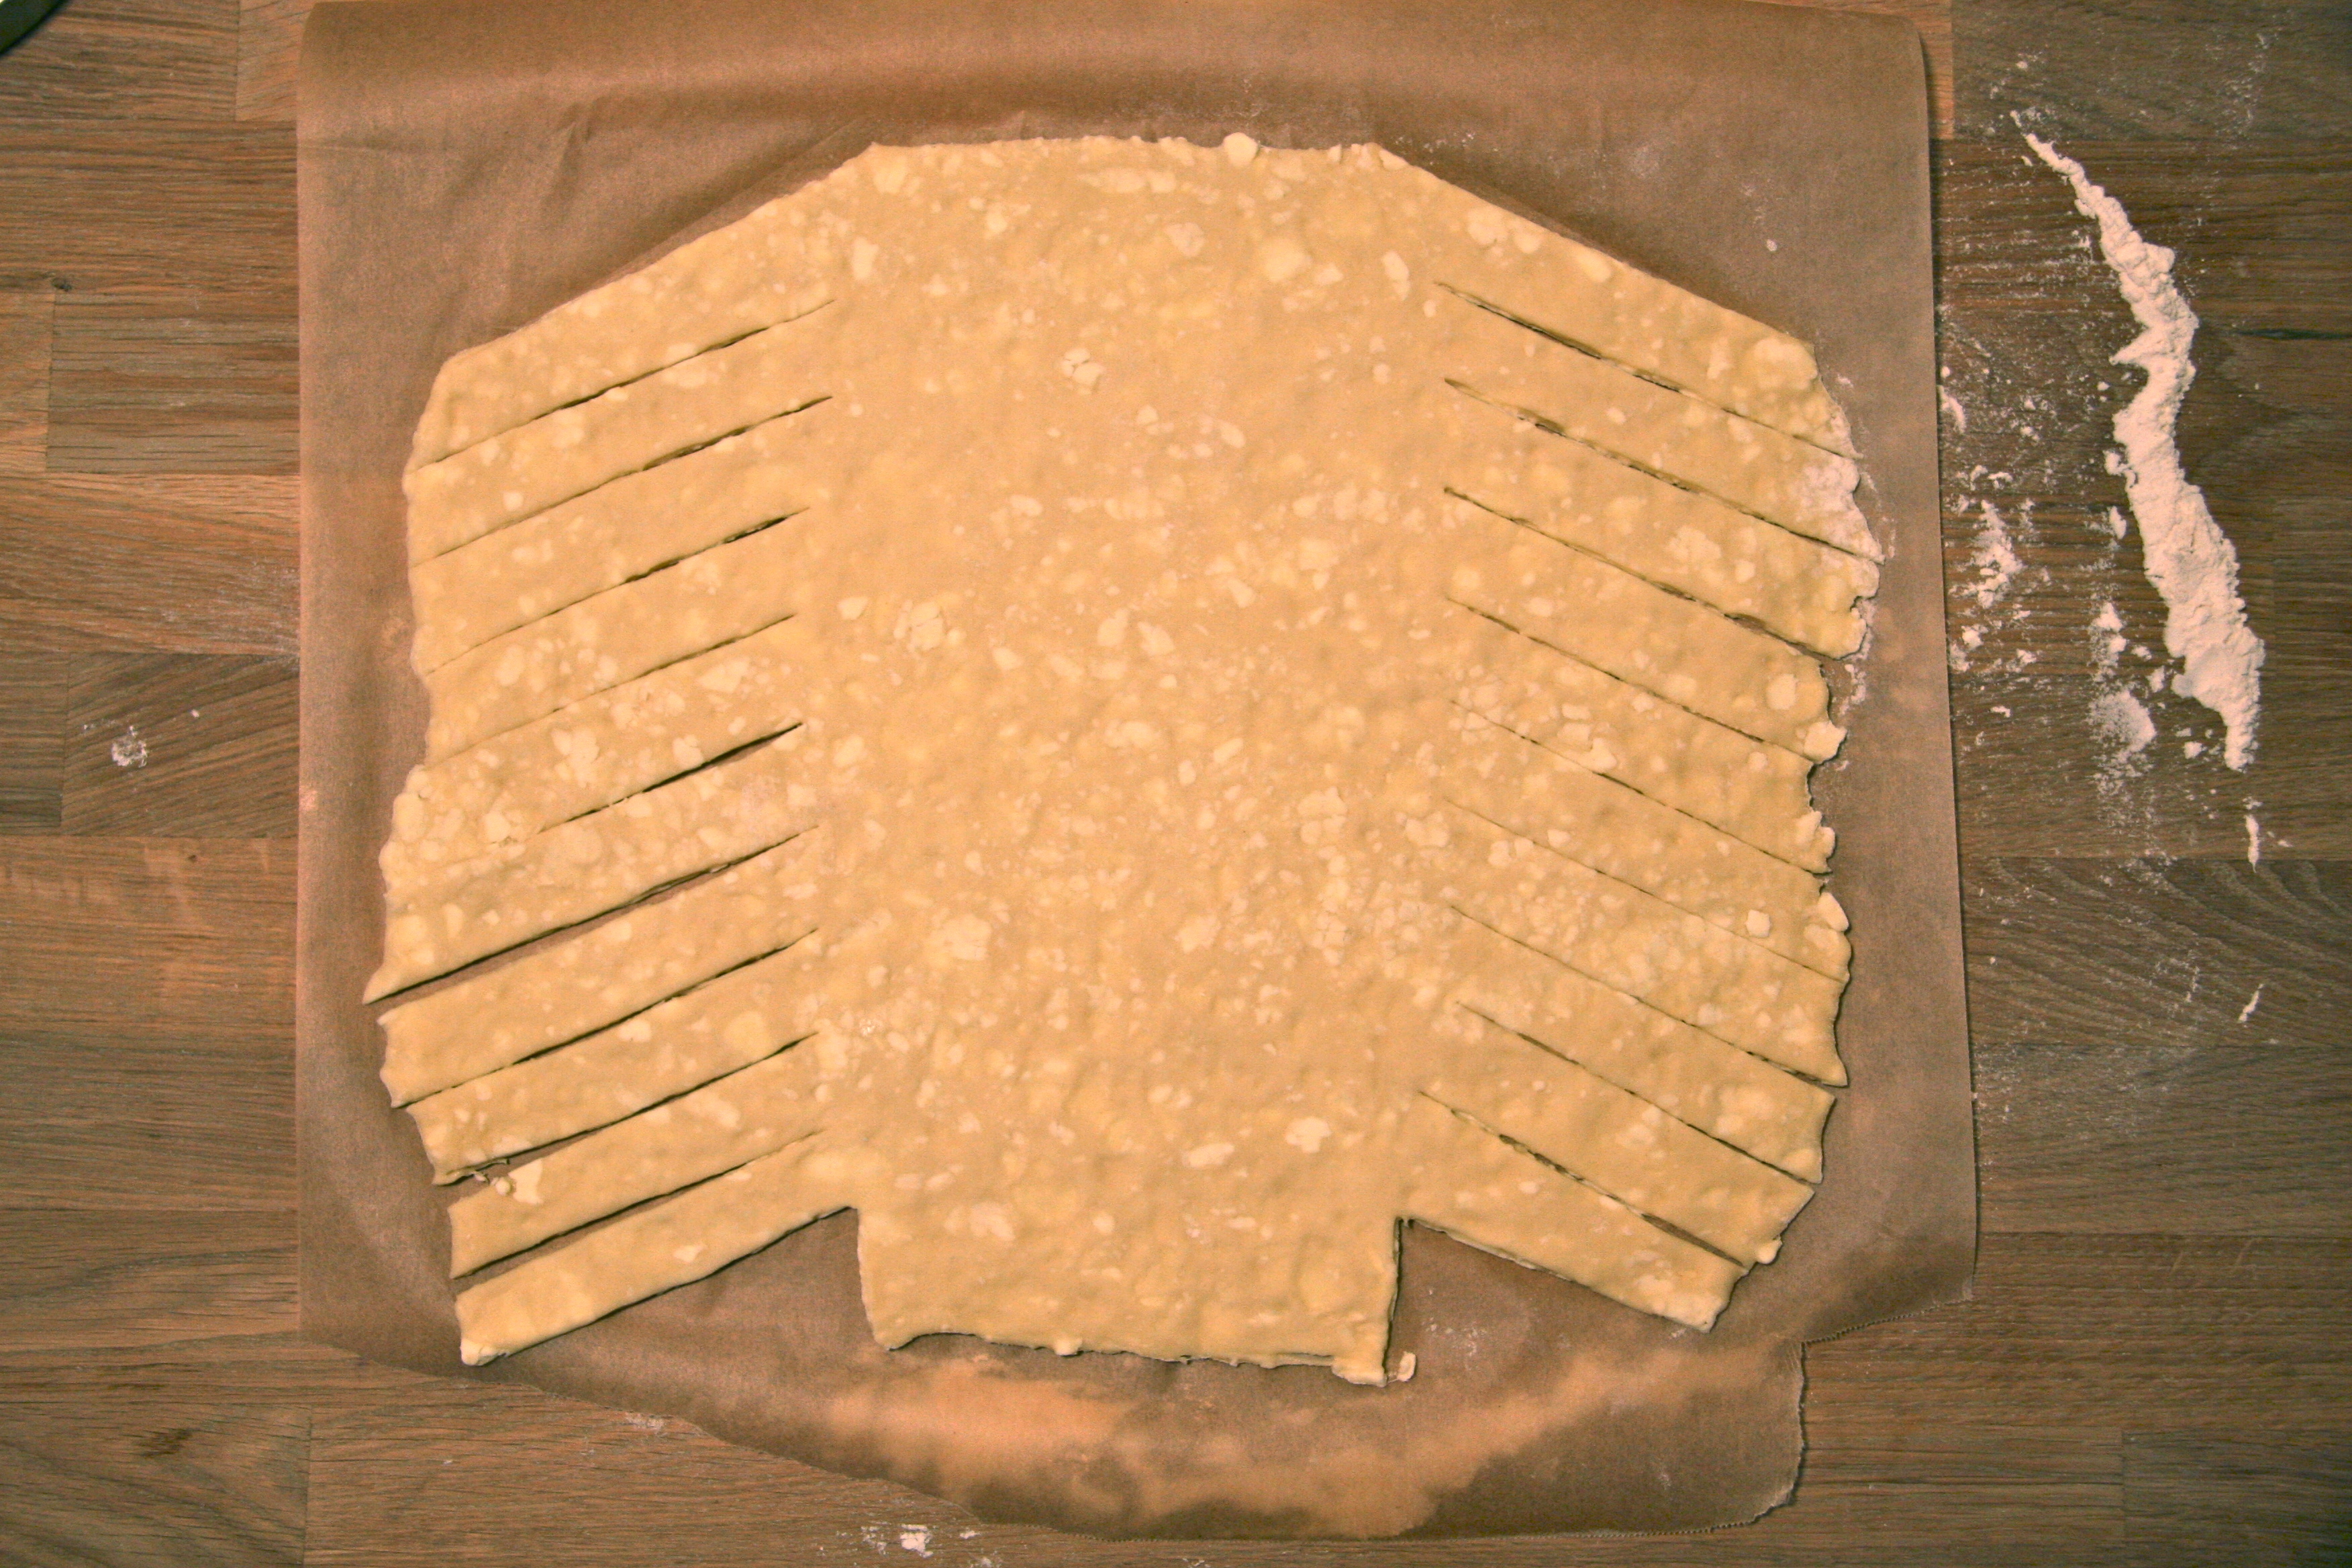
  1. Make the crust: In the bowl of a food processor, pulse together the flour, sugar, and salt. Add the chilled butter and pulse the mixture until it resembles coarse meal, about 10 pulses. Pour in the yolk and water mixture and pulse until the liquid is incorporated and the dough begins coming together. Turn the dough onto a clean surface and, using your hands, gather the dough into a ball. Wrap the ball in plastic wrap and chill for 1 hour.
  2. Grab your tart pan (with removable fluted rim) and remove chilled dough from the refrigerator. Grab small chunks of the dough at a time and push into the tart pan with your fingertips. Continue pressing the dough into the pan until you have lined the bottom and sides with dough about 1/4 inch thick. Chill the crust for at least 30 minutes in the fridge, 15 minutes in the freezer, or cover and leave overnight. Preheat your oven to 350°F. Line the inside of the tart crust with foil, fill the foil with the pie weights, dry beans or rice, and bake the shell in the middle of the oven for 25 minutes. Remove the foil and weights carefully, bake the crust for 5 to 10 minutes more, or until it is pale golden, and let it cool in the pan on a rack. Keep the oven heated at 350°F while you prepare the filling.
  3. Make the filling: In a blender, food processor, or large bowl with a vigorous hand, blend together the yogurt, cream, yolks, granulated sugar, lemon zest, lemon juice, butter, vanilla, salt, and flour until the mixture is smooth. Set aside.
  4. Spread the fresh blueberries evenly over the bottom of the par-baked tart crust. Pour the yogurt and lemon mixture over them. Bake the tart in the middle of the oven at 350°F for 30 to 35 minutes, or until the filling is just set.
  5. Let the tart cool completely in the pan on a rack. Serve at room temperature or store the tart in the refrigerator and serve chilled. Tart keeps for 4 to 5 days (keep chilled).

blueberry-lemon-cream-tart-4

Filed Under: desserts and sweets, eat Tagged With: berries, blueberry, blueberry tart, butter, citrus, easy dessert, lemon, lemon cream, pie crust, tart crust

blueberry buttermilk scones with cinnamon sugar butter

July 10, 2014 by Butter Loves Company

blueberry buttermilk scones with cinnamon sugar butter 20 copy

When spending your vacation at a house on the water, you’d better not forget to pack your bathing suit, sunscreen, aloe vera for when you inevitably get burned regardless of the sunscreen, boogie board, frisbee, Stephen King or Emily Griffin novel (pick your poison), kitchen tongs and measuring cups/spoons. You’re probably thinking those last two don’t scream ‘sand between the toes,’ but if you have access to a kitchen, these tools will make life much easier and breakfast much more delicious.

I learned from my mom that you should always travel with tongs.* The reason being, she told me, you never know what the kitchen supply situation will be. With this in mind, I decided that because of my baking obsession I should also always travel with measuring tools. You see, some vacation rentals are equipped for a chef, while others are equipped for a stack of take-out pizzas (no knock there, love me some take-out pizza). Luckily, even if you’re staying in the latter, you can make delicious homemade treats because, with just your hands, you can be quite the little bakeshop.

blueberry buttermilk scones with cinnamon sugar butter 1

You’ll already be all sandy after the beach; why not also get a little flour on your hands while making some blueberry buttermilk scones with cinnamon sugar butter? The butter—oh the butter—may be my new little obsession. It is SO easy to make, and with just just three ingredients, you can have this addictive sweet spiced spread at your disposal in no time. I’m going to start making it by the pound.

blueberry buttermilk scones with cinnamon sugar butter 2

Your cohorts will thank you when they’re slicing through the sweet, juicy blueberries in the light, buttery scone and smearing it with the cinnamon sugar butter. They may actually volunteer to make you a piña colada for your hard work. (Our little secret will be how easy the ‘work’ was, but go on, accept that island drink reward ;-))

* For clarification: this applies when you have a kitchen to work with. I did not, for example, bring tongs to Las Vegas for a girl’s weekend. That would be strange. Probably not all that surprising, but definitely strange.

blueberry buttermilk scones with cinnamon sugar butter 4

blueberry buttermilk scones with cinnamon sugar butter 5

blueberry buttermilk scones with cinnamon sugar butter 9

blueberry buttermilk scones with cinnamon sugar butter 8

blueberry buttermilk scones with cinnamon sugar butter 17

blueberry buttermilk scones with cinnamon sugar butter 15

blueberry buttermilk scones with cinnamon sugar butter 16

blueberry buttermilk scones with cinnamon sugar butter 19

blueberry buttermilk scones with cinnamon sugar butter
Adapted from M.S. Milliken & S. Feniger, 2007

Prep Time: 15 minutes
Cook Time: 16–18 minutes
Total Time: 30–35 minutes
Makes 8 large or 16 medium-sized scones

Ingredients:

3 cups all-purpose flour
1/3 cup granulated sugar
1 teaspoon salt
2 1/2 teaspoons baking powder
1/2 teaspoon baking soda
1/2 teaspoon ground cinnamon
3/4 cup (1 1/2 sticks) unsalted butter
1 cup buttermilk
1 cup fresh blueberries
1 egg lightly whipped with 1 tablespoon water (for brushing)
A dash more granulated sugar for sprinkling
Cinnamon sugar butter (recipe follows)

Instructions:

  1. Preheat oven to 400 degrees F and lightly grease a cookie sheet or line with parchment paper. Combine the flour, sugar, salt, baking powder, baking soda and ground cinnamon in a large bowl. Add butter and mix with your fingertips or with a pastry blender until it reaches a coarse meal and the butter is in pea-sized pieces or just smaller. Add buttermilk and mix until almost combined. Mix in blueberries until everything is just combined.
  2. Transfer dough to a floured board (divide into two parts if you’d like smaller scones). Roll into 1-inch thick rounds for larger scones or into 3/4-inch thick rounds if you divided the dough and are making smaller scones. Cut each round into 8 wedges and place slightly separated onto the prepared baking sheet. Brush the tops of the scones with the egg mixture, sprinkle each lightly with sugar and bake for 16–18 minutes, or until lightly browned. Serve warm, split in half with a smear cinnamon sugar butter.

cinnamon sugar butter

makes 1/4 cup

Ingredients:

1/4 cup butter, softened at room temperature (I use salted, but if you use unsalted, add a dash of salt)
2 tablespoons light brown sugar
3/4 teaspoon ground cinnamon

Instructions:

  1. In a small bowl, stir together butter, light brown sugar and ground cinnamon until completely combined and fluffy. Chill and serve.

Filed Under: breakfast and breads, eat Tagged With: blueberry, breakfast, butter, buttermilk, cinnamon, easy, scones, sugar

blueberry and cheese danish braid

March 13, 2014 by Butter Loves Company

Blueberry and Cheese Danish Braid 2

A sophisticated braid of flaky, buttery, lightly sweet dough filled with juicy blueberries and creamy cheese filling, speckled with vanilla beans and a little lemon zest.

I distinctly remember eating a certain almond Danish when I was studying in Italy (a certain one, but certainly not just once). The top was sprinkled generously with sweet, white dots of sugar along with slivered almonds.

If you’ve been to Europe, or to a European bakery, you may’ve noticed the pastries frequently have thick white sugar dotting their tops, a Scandinavian tradition, or so I conclude from my research. Each time I ate Danish in Europe, I noticed those sugar pearls and wondered if bakeries in the U.S. used this as well. I’m sure some had, and presumably more now, but I liked to believe that this sugar was somehow magical and only existed in the sweet back rooms of European bakeries. Isn’t it funny how you notice the tiniest nuisances of another culture when traveling? Often, things go overlooked in your own home; until you return with fresh eyes (like how large a jar of peanut butter or a jug of milk looks in the U.S. versus those you may find in Florence, Italy).

Unbelievably, it took me almost five years to buy this sugar when I got back to the U.S., after I discovered it wasn’t so mystical after all. The reason being, I had never considered making the Danishes, croissants, or other yeast-dough pastries they adorn, at home. I was intimidated and thought it’d be too time consuming or too frustrating or something only those who have attended pastry school could tackle.

I was so wrong—and I now kick myself for not having attempted sooner. Oh, the breakfasts I could have had in college!

You too can make Danish at home. Specifically—if you follow this recipe, which I selfishly think you’ll love—you can make a Blueberry and Cheese Danish Braid. It’s not hard, though does require a little preparation to give the yeast time to rise in the refrigerator after the dough is mixed.

So, decide when you want to eat the pastry and plan to make the dough the day or night before. You could also make the fillings ahead and keep refrigerated. Promise me you won’t be intimidated by the length of the recipe, I wrote it out to make it as easy as possible! You can try filling the Danish Braid with lots of flavor combinations if you aren’t fond of blueberries and creamy cheese (I believe the other word for that is crazy . . . kidding!). Please try it with whatever you like best: cherry, strawberry, raspberry, nutella, pastry cream, lemon curd, etc.

Whether or not you have pearl sugar on hand, the Danish experience will still be magical!

blueberries for danish

blueberries for danish filling

After dough is initially chilled overnight, you can begin shaping it to create the flaky layers that will be the danish.

After dough is initially chilled overnight, you can begin shaping it to create the flaky layers that will be the danish.

danish dough 3

after the roll and fold stage, you can already see the layers built into the danish!

roll out the dough after its second 'chill'

roll out the dough after its second ‘chill’

cut out top outside corners and small triangles on bottom. This will serve to frame the filling.

cut out top outside corners and small triangles on bottom. This will serve to frame the filling.

cut slanting lines down each side. These will be crossed over the filling to create the braid.

cut slanting lines down each side. These will be crossed over the filling to create the braid.

fill the danish dough.

fill the danish dough. Mine was a tad too runny, but turned out completely fine!

Brush with egg wash and drizzle with sugar and almonds, if desired.

Brush with egg wash and drizzle with sugar and almonds, if desired.

magical sugar

magical sugar

enjoy with or without glaze!

enjoy with or without glaze!

*Apologies for the format of this recipe versus previous recipes. I felt it would be easier to read written out this way because there are multiple components.

Blueberry and Cheese Danish Braid
Adapted from Beatrice Ojakangas via Baking with Julia, Ina Garten

Makes 2 long braids; about 6-8 servings each. If you’d like to make just one braid, cut the dough in half after the roll and fold stage and freeze up to one month.

Prep Time: 1 hour 30 minutes

Total Time: At least 8 hours (including chilling time)

For the pastry:

¼ cup warm water (between 105-115 degrees F)
2 ½ teaspoons active dry yeast
½ cup milk, at room temperature (I used 2%, but any milk fat level will work.)
1 large eggs, at room temperature
¼ cup granulated sugar
1 teaspoon salt
2 ½ cups unbleached all purpose flour
2 sticks (8 ounces) cold unsalted butter
1 egg white mixed with 1 tablespoon water, for egg wash
¼ cup slivered almonds (optional)
1 tablespoon pearl sugar (optional)
3-4 teaspoons cold heavy cream, for glaze (optional)
½ cup confectioners sugar, for glaze (optional)

For the Blueberry Filling

2 cups fresh blueberries (other berries can be substituted here)
1 cup sugar
1 teaspoon cornstarch
1 to 2 tablespoons fresh lemon juice

For the Cream Cheese Filling

8 ounces cream cheese, at room temperature
1/3 cup sugar
2 large egg yolks, at room temperature
2 tablespoons ricotta cheese
1 teaspoon pure vanilla bean paste, or extract
1/4 teaspoon salt
1 tablespoon grated lemon zest (about 1 lemon)

Instructions:

Prepare the dough: Pour the water into a large bowl, sprinkle the yeast over it, and let both soften for two minutes. Add the milk, egg, sugar, and salt and whisk together. Set aside. Put the flour in the bowl of a food processor fitted with the metal blade. Cut the butter into ¼ – ½ inch thick slices and drop them onto the flour. Pulse 8 to 10 times, until the butter is cut into pieces that are about ½ inch in diameter, but not any smaller than that. If in doubt, stop when the pieces are larger. It’s better that way, than to over mix. Empty the butter flour mixture into the bowl with the yeast and, using a rubber spatula, gentle turn the mixture over, just until the dry ingredients are moistened. Be cautious not to over mix. You’ll want to see pieces of butter throughout the dough – this will ensure it is flaky. Cover the bowl with plastic wrap and refrigerate overnight (up to 4 days).

Roll the dough: After the dough has chilled overnight, lightly flour a work surface and turn the dough onto it. Dust the top of the dough with flour. Roll the dough into a square about 16 inches on each side (the dough might be sticky, so keep the flour close and cover the rolling pin as needed. You can also cover the dough and chill it again if it becomes too soft to roll). Fold the dough into the middle in thirds, like a business letter that you’re going to put in an envelope. Turn it so that the closed fold is to your left. Roll the dough out again, this time into a long narrow rectangle, about 10 inches wide by 24 inches long. Fold the rectangle in thirds again, turn it so the closed fold is to your left, and roll into a 20 inch square. Fold the square in thirds, like a business letter, so that you have a rectangle. Roll the dough out into a rectangle about 10 inches wide by 24 inches long. Fold the dough in thirds again, wrap it tightly with plastic wrap and chill for at least 30 minutes (up to 2 days. If not using after 2 days, the dough can be frozen at this point for 1 month, thawing overnight in a refrigerator before use.)

Prepare the Blueberry filling: Stir the berries and sugar together in a small saucepan over medium heat. Heat until sugar has dissolved, stirring frequently. Add lemon juice and cornstarch and cook 1-2 more minutes. Transfer to a bowl. Cover and refrigerate until fully cooled.

Prepare the Cream Cheese Filling: Place the cream cheese and sugar in the bowl of an electric mixer fitted with a paddle attachment and cream them together on low speed until smooth. With the mixer still on low, add the egg yolks, ricotta, vanilla, salt, and lemon zest and mix until just combined. Keep away from anyone who likes cream cheese or you might find some missing.

Shape the dough: After the dough has chilled from rolling and folding, lightly flour a work surface and roll the chilled dough into a rectangle 10 inches wide and 16 inches long (eyeball it). Lift onto a sheet of parchment paper and position the dough so the lengthy side is perpendicular to you. Cut the two top corners off the dough at an angle slanting downward and cut two small triangles out of the bottom of the dough. This will frame the space in the middle third of the dough for the filling, see image above. Using a sharp knife cut 10-12 slanting lines down each side, angling the cuts downward, not crossing over the space you framed for the filling, see image above.

Fill and Braid the dough: Spread some of the blueberry filling down the length of the dough (there will be juice leftover. Use the chunky portion. Spoon the cream cheese filling in a narrow line down the center of the blueberry filling. Fold the strips of the pastry into the center over the filling, alternating folding from the left side and the right side until you’ve reached the bottom. Brush the pastry with the egg wash and sprinkle with almonds and pearl sugar, if using. Allow the Danish to sit at room temperature while you preheat the oven.

Baking the Braid: Preheat the oven to 400 degrees F. Slide the braid, parchment and all, onto a baking sheet. Bake for 15 to 20 minutes, or until golden, rotating once or twice during baking. Transfer the pastry to a cooling rack and prepare the glaze, if using. To prepare the glaze, stir the cream into the confectioners sugar in a small bowl, adding just enough until it produces a smooth, shiny glaze. Using a spoon or fork, drizzle the glaze over the pastry. Serve the pastry warm, or at room temperature.

Filed Under: breakfast and breads, eat Tagged With: blueberry, blueberry filling, cheese danish filling, cream cheese, danish, danish braid, homemade, pearl sugar

Welcome!

jenna of butterlovescompany

Pull up a chair

Hi! I’m Jenna. Story seeker, food lover, recipe developer based in NYC. Firm believer in making every day delicious! Read more…

looking for something?

  • Email
  • Facebook
  • Instagram
  • Pinterest
  • RSS
  • Twitter

Latest Posts

  • Freezer Meals to Make Before Baby: How We Meal Prepped Before Baby
  • mom’s famous spiced pecans
  • funfetti cookie dough truffles (no-bake)
  • maple coconut cookies
  • snickerdoodle blondies

popular now

strawberry cinnamon rolls
braised short rib pasta sauce (short rib ragu)
rosemary honey buttermilk biscuits
peach blueberry pie
chocolate marble loaf cake
bourbon banana bread

grammin’

Let’s get ready to bake throughout the holidays! Let’s get ready to bake throughout the holidays! I’ve teamed up with @lucky_leaf_fruit_filling, @diamondnuts and #Kids360 to give away some delicious baking ingredients to make your spirits bright this season. 

To enter:
-Follow @lucky_leaf_fruit_filling, @diamondnuts and @butterlovescompany
-Comment and tag a friend and the name of your favorite holiday dessert
-Enter by December 1. Winner will be selected at random and DM’d! 

You’ll win: 
•(1) Can of Lucky Leaf Premium Blueberry Filling
•(1) Can of Lucky Leaf Premium Apple Filling
•(1) Can of Lucky Leaf Premium Cherry Filling
•(1) Can of Lucky Leaf Premium Strawberry Filling
•(1) Can of Lucky Leaf Premium Peach Filling
•(1) Recipe Book
•(2) Dish Towels
•(1) Pot-Holder
•(1) Picnic Basket

#ad NO PURCHASE NECESSARY. Open to legal residents of the United States (including its commonwealths, territories, and possessions) who are legal age of majority. Enter by 11:59 pm ET on December 1, 2021. Odds of winning depend on # of entries received. Void where prohibited. This is not sponsored or endorsed by Instagram or Facebook.
This was the best photo we could get with an alway This was the best photo we could get with an always moving toddler. 🥸 Happy Thanksgiving to you and yours! ♥️
Something that the past year or so has taught me: Something that the past year or so has taught me: stock your pantry! Having a stocked kitchen has made it super easy to cook and bake without having to run out to the store. Crucial when you get a craving for an Apple Walnut Cake and need to make one stat. With @lucky_leaf_fruit_filling and @diamondnuts, you can put together a delicious cake SO easily with no peeling and slicing of apples. 🍎🌰You get all the beautiful warm spice flavor with sweet, tart apples, and crunchy, hearty walnuts. #ad Get the recipe below: 

Apple Walnut Cake

* 1 box (15.25 oz.) spice cake mix
* 1 can (21 oz.) Lucky Leaf® Premium Apple Fruit Filling
* 2 large eggs
* 1 tbsp. pure vanilla extract
* 1/4 cup whole milk
* 1/4 cup brown sugar
* 1 tsp. ground cinnamon
* 1/2 cup finely chopped Diamond of California® Shelled Walnuts
* 1 container (8 oz.) whipped topping, thawed

Instructions
1. Preheat oven to 350° F and grease 9x13-inch pan. 
2. Combine dry cake mix, apple filling, eggs, vanilla & milk in large bowl. Beat for 2 minutes. Spread half of the batter in the pan. 
3. Make the Walnut Cinnamon filling: Combine brown sugar, cinnamon and walnuts. Sprinkle half the mixture on top of batter. Top with remaining batter and then sprinkle remaining walnut mixture on top.
4. Bake cake for 28-33 minutes. Cool cake. Top with whipped topping and sprinkle with walnut pieces.

Don’t miss my upcoming chance to W I N with #kids360, Diamond and Lucky Leaf!
Spiced pecans, wedding cookies, chocolate turtles, Spiced pecans, wedding cookies, chocolate turtles, pecan pie, sticky buns…just a few of the treats on my standard holiday baking agenda. What do they have in common? NUTS! @diamondnuts are a staple around here for the holidays (and all year, let’s be honest) and I want to share the love. Thanks to Diamond and #kids360, we are giving someone ✨15 FREE product coupons for @diamondnuts ✨to help you bake your holiday treats this year. Go nuts!

To enter:
* Follow @diamondnuts and @butterlovescompany
* Comment and tag a friend who deserves a day off to go nuts! 
* Enter by end of day November 25th. Winner will be selected at random and DM’d! 

#ad NO PURCHASE NECESSARY. Open to legal residents of the United States (including its commonwealths, territories, and possessions) who are the legal age of majority. Enter by 11:59 pm ET on November 25, 2021. Odds of winning depend on # of entries received. Void where prohibited. This is not sponsored or endorsed by Instagram or Facebook.
No gimmicks, no “just for the ‘gram” razzle No gimmicks, no “just for the ‘gram” razzle dazzle here. Just really good chocolate chip cookies.🍪
Fun fact: Layered Magic Cookie Bars were one of th Fun fact: Layered Magic Cookie Bars were one of the first things I ever baked. Making them again with @diamondnuts makes me super nostalgic. Brought me directly back to middle school. Watch out or you may find me in butterfly clips doodling I <3 SOS on my binder soon. There is a reason this recipe is awesome: first, the cookie bars are incredibly delicious. And, second, they are SO easy to put together. Honestly, they are the PERFECT treat to make with your kids. Pecans and walnuts give the bars the best crunch, nuttiness, and heartiness. You could totally customize if there is a certain kind of jam you love, or a combination of nuts that the family loves. #ad Get the recipe below: 

Seven Layer Magic Cookie Bars

* 1/2 cup (1 stick) butter, melted
* 2 cups graham cracker crumbs
* 1 cup raspberry jam
* 1 cup shredded coconut
* 1 cup Diamond of California® walnuts
* 1 cup Diamond of California® pecans
* 1 cup semi-sweet or bittersweet chocolate chips
* 1 (14-ounce) can sweetened condensed milk

Instructions
1. Preheat oven to 350°F. To toast walnuts and pecans, spread evenly on a baking sheet or in a shallow pan. Bake, stirring once or twice, until lightly browned and fragrant, 7 to 10 minutes. Line a 9×13-inch pan with parchment paper.
2. In a medium bowl, combine the melted butter and graham cracker crumbs; mix well. Transfer the crumbs to the prepared pan and using your finger tips, or the flat bottom of a small measuring cup, press firmly and evenly on the bottom of the pan. Spread the raspberry jam evenly over the crumbs. Sprinkle coconut in an even layer over the jam, followed by the chocolate chips, walnuts and pecans. Drizzle the condensed milk evenly over the top.
3. Bake until bubbling and golden brown, 30-35 minutes. Let cool completely in the pan. If lined with parchment, lift out and place on a cutting board. With a sharp knife, cut into bars.

Look out for an upcoming chance to ✨ w i n ✨with @diamondnuts and #kids360!
Raise your hand if you could use a cup of coffee. Raise your hand if you could use a cup of coffee. 🙋 We are giving away some @timhortonsus coffee goodies so you can get your cozy cool morning on with Canada’s favorite cup of joe. Make my Pumpkin Coffee Coffee Cake for a buzzy morning snack or just brew a strong cup for a little pep in your step (as tired parents over here, we could surely use it). 🍂

To enter:
● Follow @butterlovescompany and @timhortonsus
● Comment and tag a friend you would love to grab coffee with ☕ (each comment=1 entry)
● Enter by midnight November 18. Winner will be selected at random and DM’d!
 
You’ll win:
•(1) Colombian Ground Coffee
•(1) Dark Roast Ground Coffee
•(1) Decaf Ground Coffee
•(1) Whole Bean Original Blend Coffee
•(1) Keurig Variety 30-Pack
•(1) Mug
•(1) Branded Notebook
•(1) Branded Baseball Cap
 
 
ad #timhortons #kids360 NO PURCHASE NECESSARY. Open to legal residents of the United States (including its commonwealths, territories, and possessions) who are legal age of majority. Enter by 11:59 pm ET on November  18, 2021. Odds of winning depend on # of entries received. Void where prohibited. This is not sponsored or endorsed by Instagram or Facebook.
Can’t beat a classic. 🥧 Apple streusel pie fo Can’t beat a classic. 🥧 Apple streusel pie for yesterday’s friendsgiving.🥰 Grateful for time with friends enjoying great food. Remy had so much fun playing that he slept until 7am so we are hopefully out of the 4am daylight savings nightmare (knock on wood). 

Sunday includes a farmers market bop, movies, and cooking for the week. Wouldn’t change a thing. 🥳
Cannot. Get. Enough. Fall. Baking. Who’s with me Cannot. Get. Enough. Fall. Baking. Who’s with me? 🍁  This coffee cake packs a punch because it is made with @timhortonsus brewed coffee in the batter and the glaze. A true *coffee* cake. The texture is dreamy and the coffee is perfectly balanced and smooth. It is goood. #ad Get the recipe below:
 
Pumpkin Coffee Coffee Cake
 
Topping
● 2/3 cup granulated sugar
● pinch of salt
● 2/3 cup flour
● 1 teaspoon cinnamon
● 4 tablespoons butter, melted

Filling
● 1/3 cup brown sugar, packed
● 1 teaspoon cinnamon
● 1 teaspoon unsweetened cocoa powder, optional

Cake
● 1/3 cup vegetable oil
● 2 large eggs, at room temperature
● 1 cup granulated sugar
● 1 cup pumpkin purée
● 1 teaspoon pumpkin pie spice
● 1 teaspoon salt
● 1 teaspoon baking powder
● 1/2 cup brewed @timhortonsus Coffee
● 2 cups flour

Glaze
● 1 cup powdered sugar
● 2 tablespoons brewed @timhortonsus coffee
 
Instructions
1. Preheat the oven to 350°F and grease an 8 inch square pan and line with parchment.
2. Make topping: Stir together the sugar, salt, flour, cinnamon, and melted butter until combined into pea sized lumps. Stirring just until well combined. Set aside.
3. Make filling: Mix together the brown sugar, spice, and cocoa powder. Set it aside.
4. Make cake: Beat together the oil, eggs, sugar, pumpkin, pie spice, salt, and baking powder until smooth. Add the brewed coffee followed by the flour, alternating in two additions, and stir until combined.
5. Spread half the batter into the prepared pan. Sprinkle the filling evenly on top of the batter. Top with the remaining batter. Sprinkle the topping over the batter in the pan.
6. Bake until a toothpick inserted into the center comes out clean, about 40 to 45 minutes. Let cool.
7. Make glaze: Combine the powdered sugar and brewed coffee until smooth and thick but drizzle-able. Using a fork, drizzle it over the cake.

Don’t miss our upcoming chance to ⚡️W I N⚡️ thanks to @timhortonsus and #Kids360!

#timhortons #kids360fanclub
One of the hardest parts about being a working mom One of the hardest parts about being a working mom is how little time you get to spend with your sweet bean during the week. Between wake up and getting to daycare, to pickup and bedtime it’s often an hour at best (which is also filled with making dinner, bath time, etc). I soak up ALL the minutes and the weekends are an absolute snuggle and play fest. It’s so tough though! If you are in the same boat, know that you aren’t alone and you’re doing a good job!! ♥️

This photo has nothing to do with this but I made the cookies for our neighbors and regretting not keeping one for myself right now. 😬🤣
✨W I N !✨ I’ve teamed up with @nielsenmassey ✨W I N !✨ I’ve teamed up with @nielsenmassey and #Kids360 to give away some seriously amazing ingredients to make your desserts sing. 🎶 I love their products and have been using them for years—the vanilla is 💯!!
 
To enter:
● Follow @nielsenmassey and @butterlovescompany 
● Comment and tag a friend you’d love to bake with
● Enter by Thursday November 11th. Winner will be selected at random and DM’d!
 
You’ll win:
•(1) Madagascar Bourbon Pure Vanilla Powder
•(1) Madagascar Bourbon Pure Vanilla Sugar
•(1) Ugandan Pure Vanilla Extract
•(1) Pure Coffee Extract
•(1) Pure Peppermint Extract
•(1) Rose Water
•(1) Pure Lemon Extract
•(1) Tahitian Two Vanilla Beans
•(1) Tahitian Pure Vanilla Extract
•(1) Mexican Two Vanilla Beans
•(1) Mexican Pure Vanilla Extract
•(1) Madagascar Bourbon Two Vanilla Beans
•(1) Madagascar Bourbon Pure Vanilla Extract
•(1) Madagascar Bourbon Pure Vanilla Bean Paste
•(1) Orange Blossom Water
•(1) Pure Orange Extract
•(1) Pure Almond Extract
•(1) Pure Chocolate Extract
.
#ad NO PURCHASE NECESSARY. Open to legal residents of the United States (including its commonwealths, territories, and possessions) who are legal age of majority. Enter by 11:59 pm ET on November  11, 2021. Odds of winning depend on # of entries received. Void where prohibited. This giveaway is not sponsored or endorsed by Instagram or Facebook.
Brainstorming dessert recipes for Thanksgiving and Brainstorming dessert recipes for Thanksgiving and it’s hard not to think about this Black Forest Pie. 🍒🍫 It was such an indulgent tart-sweet chocolate-y treat. It has a chocolate all butter pie crust, a layer of dark chocolate ganache, a layer of chocolate pudding, a cherry topping, and whipped cream. Oh, and a cherry on top! Recipe is from @emcdowell #thebookonpie! 

This one *might* be too rich for the menu but there WILL be pie (duh)🥧. What kind of pie do you need to have on your Thanksgiving table?
This error message is only visible to WordPress admins
Hi! I'm Jenna, founder of butter loves company. From holidays to Tuesdays, let's find a way to make every meal special.
  • Email
  • Facebook
  • Instagram
  • Pinterest
  • RSS
  • Twitter
a2f54ba1dcf0635e58c8be4aa2035ce84863a9d9606a428ab3

© 2013-2019 BUTTER LOVES COMPANY, LLC.

Copyright © 2025 · Foodie Pro Theme by Shay Bocks · Built on the Genesis Framework · Powered by WordPress