butter loves company

new york food blogger and lifestyle influencer

  • home
  • Recipes
  • travel
  • lifestyle
  • cookie orders
  • about
  • contact

sugared brioche doughnuts

August 11, 2016 by Butter Loves Company

brioche-doughnut-recipe-6

Check. Check 1-2. Check 1-2-3-4.

Hello…

it’s me!

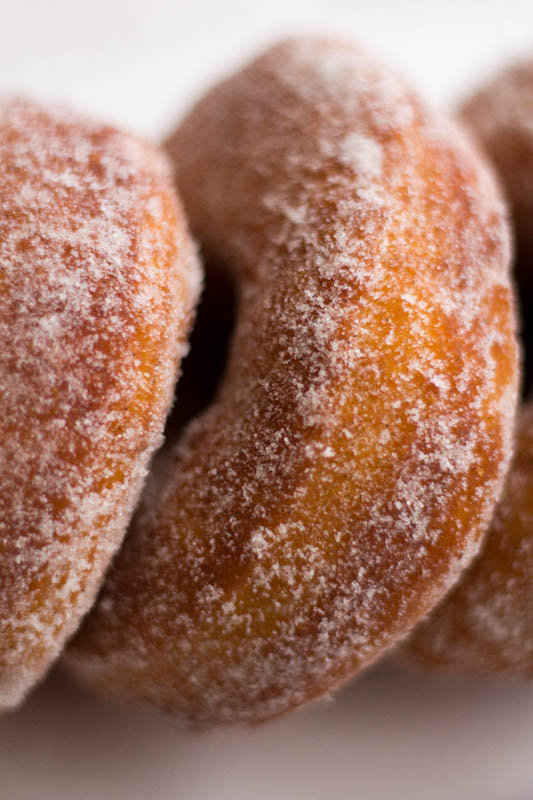
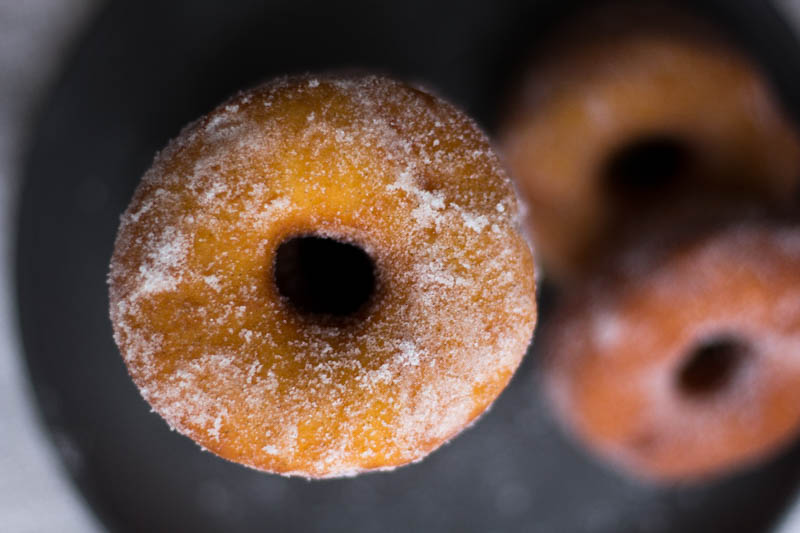
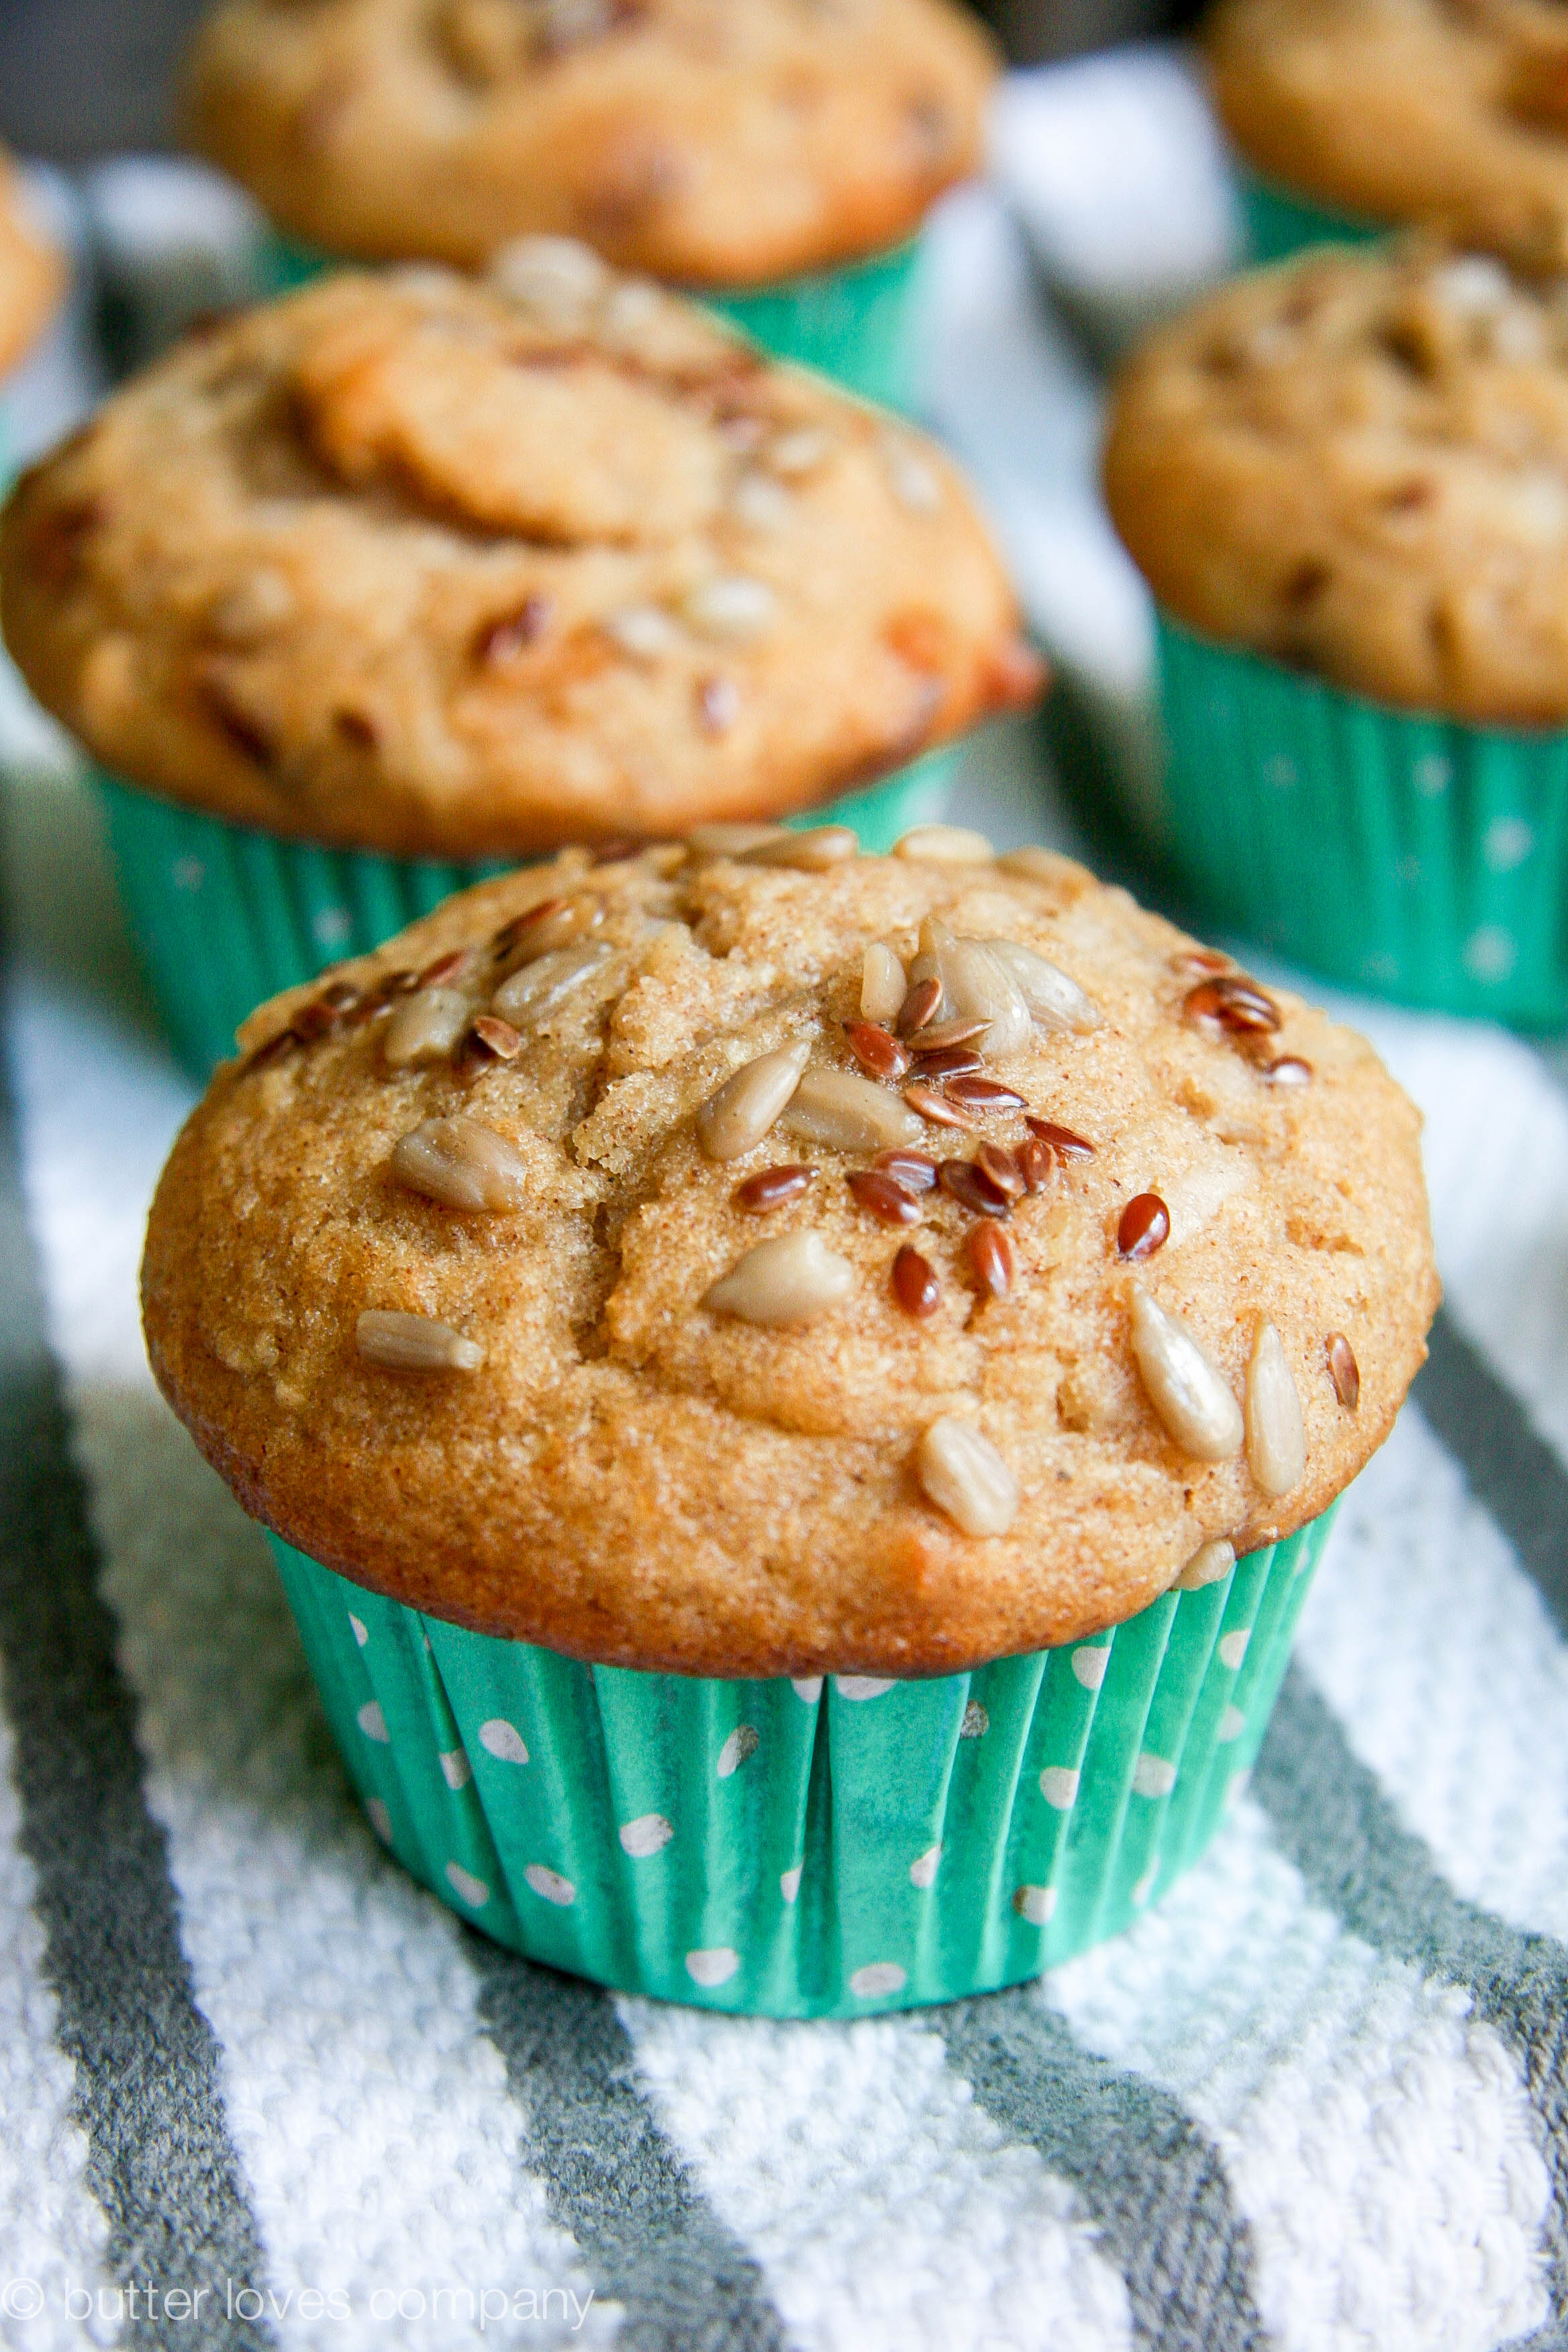
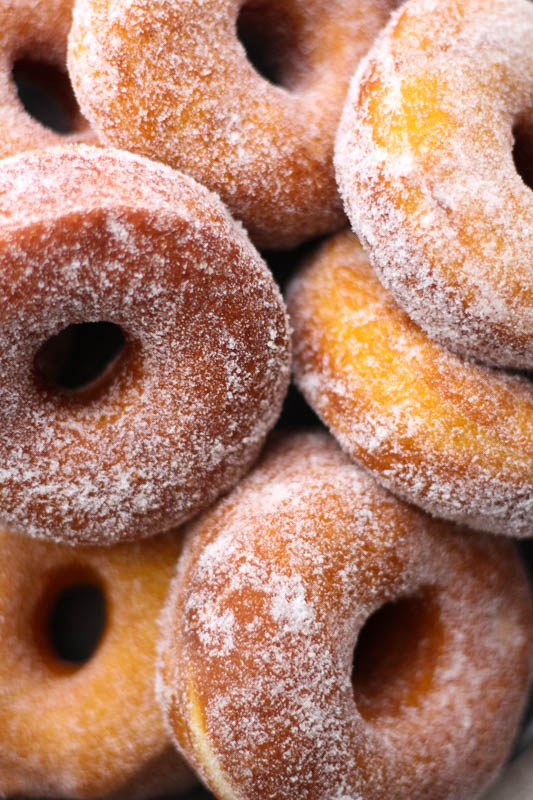
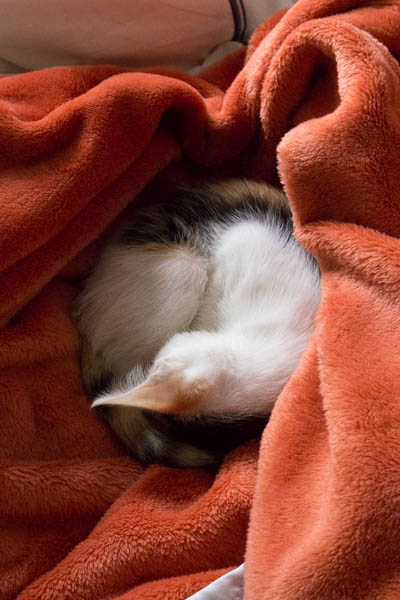
I am (honestly) in California dreaming about who we used to be. That is, food friends! Life has been quite busy lately and I’m going to blame my temporary break on the new doughnut in my life. No, I’m not talking about these sugared brioche doughnuts that I hope you’re grabbing for on the screen (they are that good, I promise). I’m referring to the newest member of the Butter Loves Company family, our precious calico kitten—say hello to Nori! She is my new kitchen assistant, contributing mostly by sleeping curled into an adorable doughnut shape. I couldn’t be happier to be her mama.

nori2

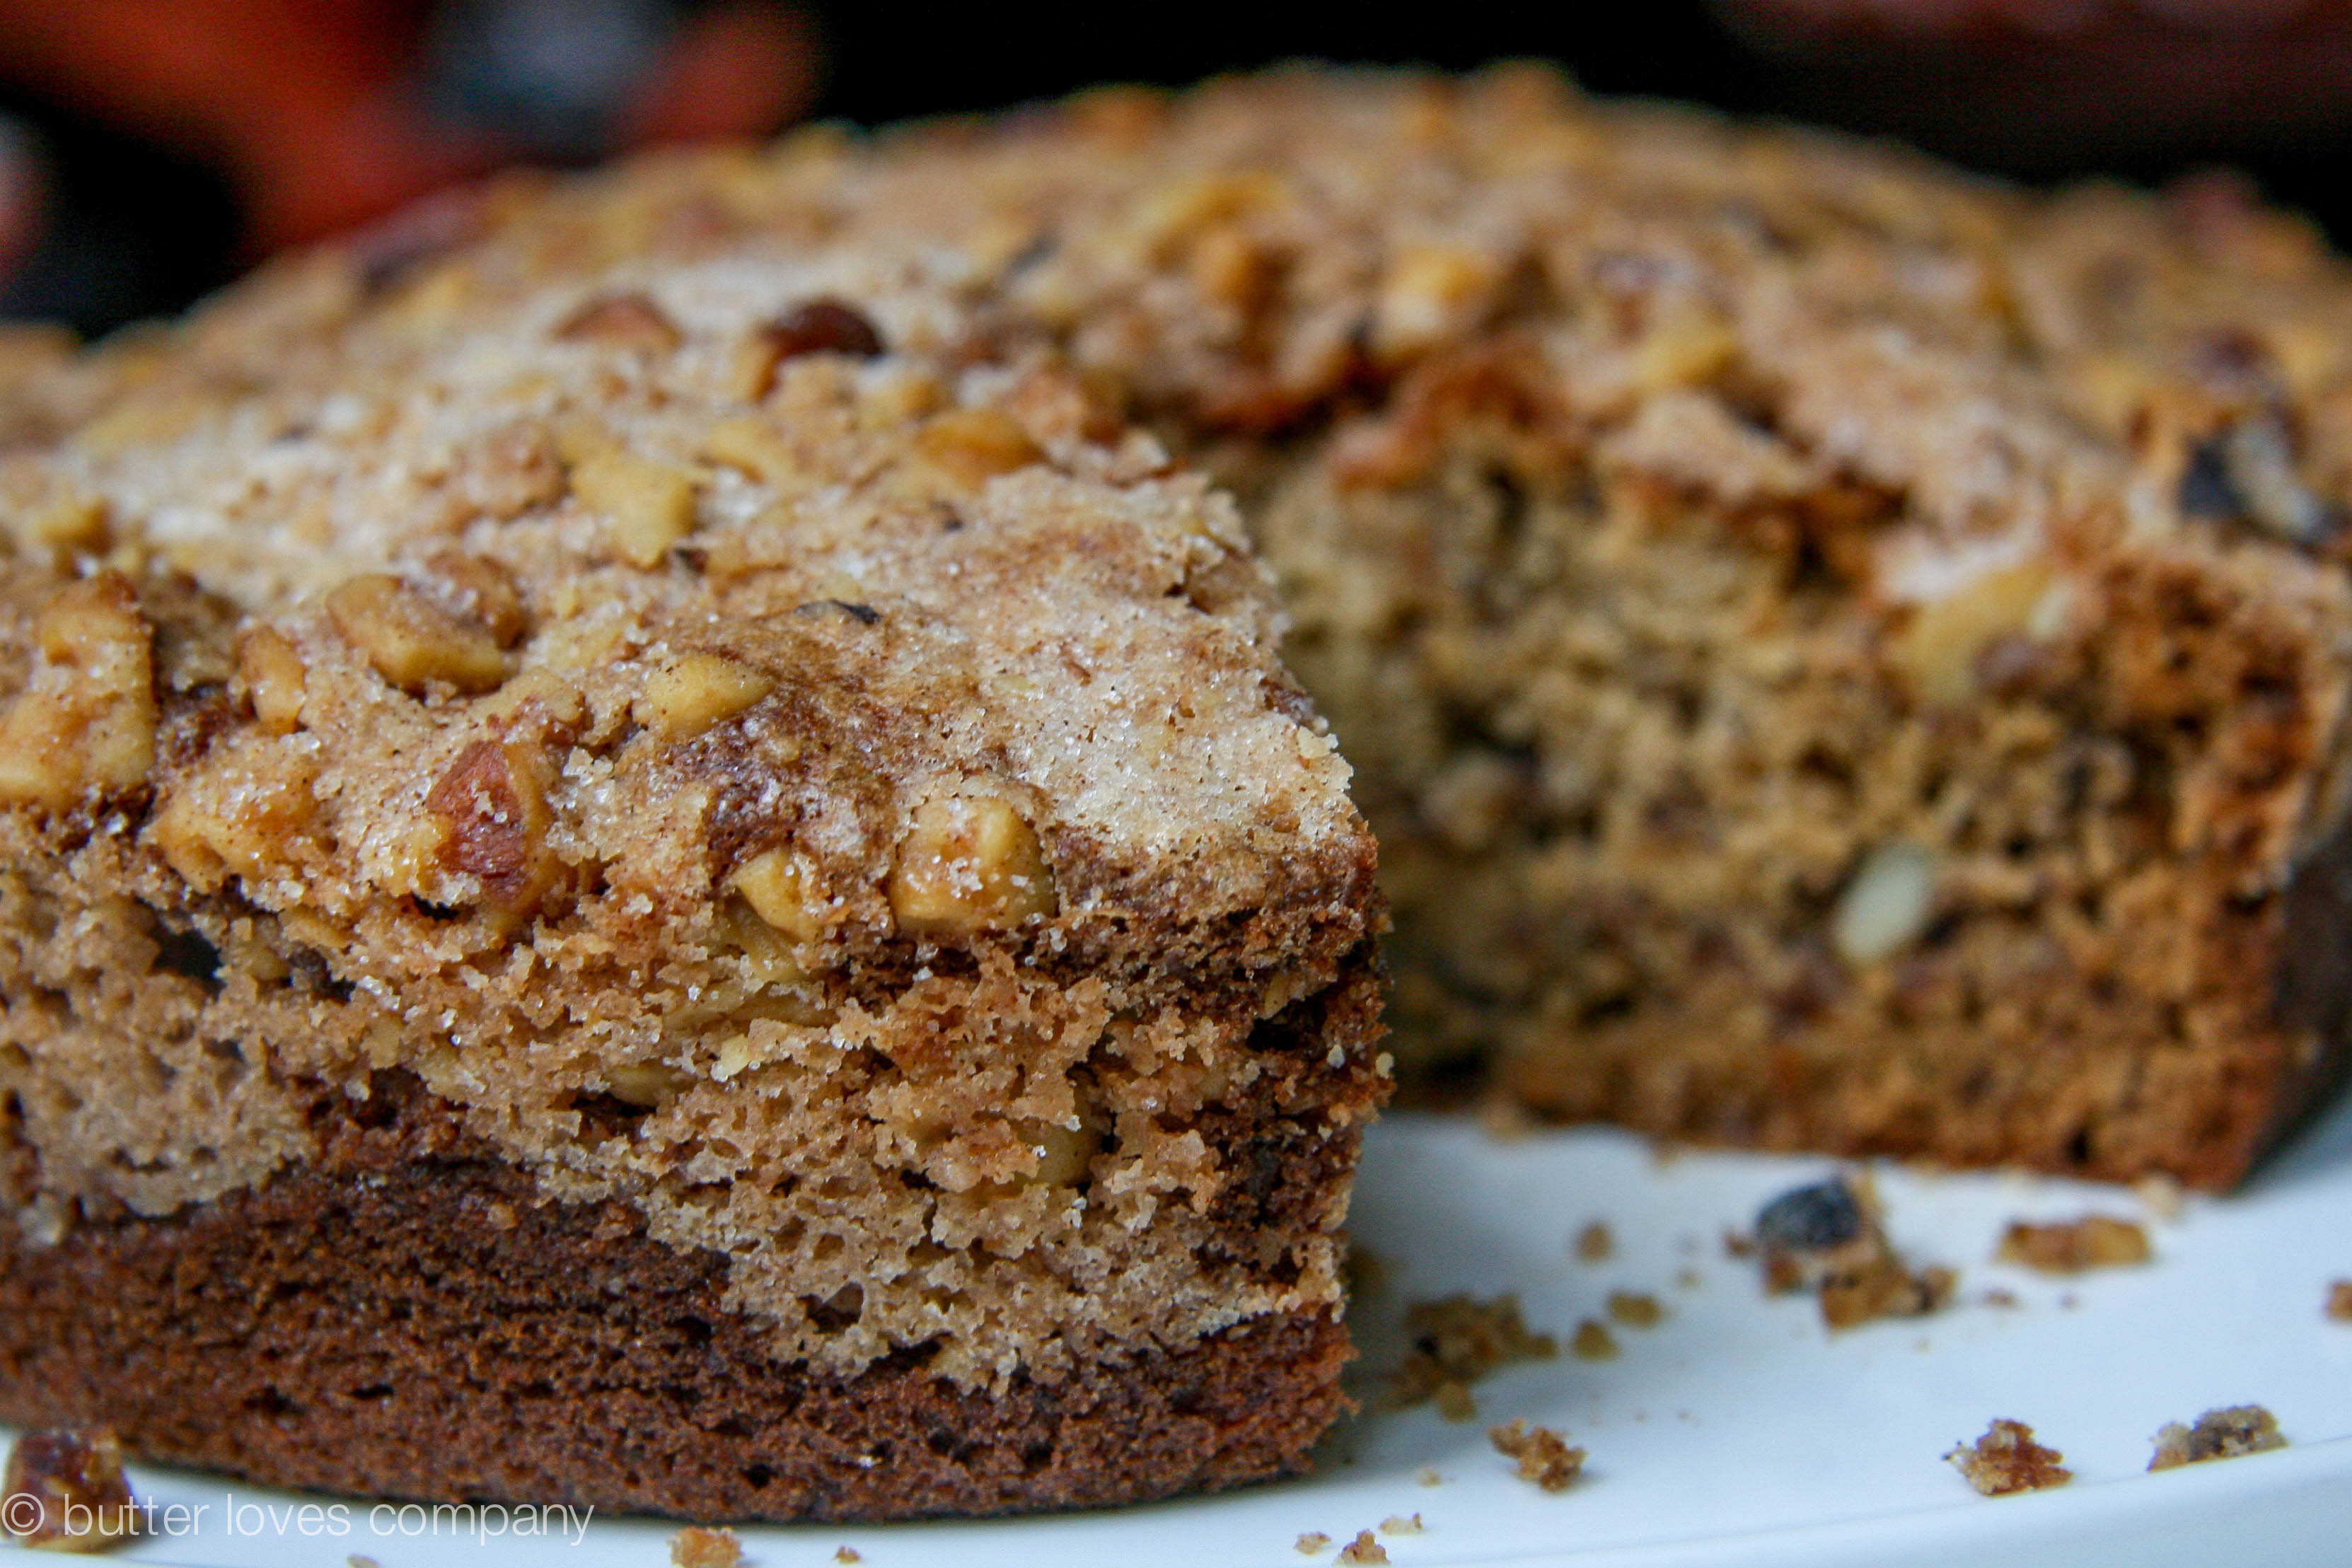
Cute cats aside, I am bursting with excitement to share this recipe with you. Imagine biting into a sweet, buttery cloud with egg-y richness and a kiss of vanilla. Sounds pretty amazing, right? That’s what you’ll get with this perfect sugared brioche doughnut recipe. As soon as I tried Thomas Keller’s recipe from Bouchon Bakery, it was game over.

brioche-doughnut-recipe-1

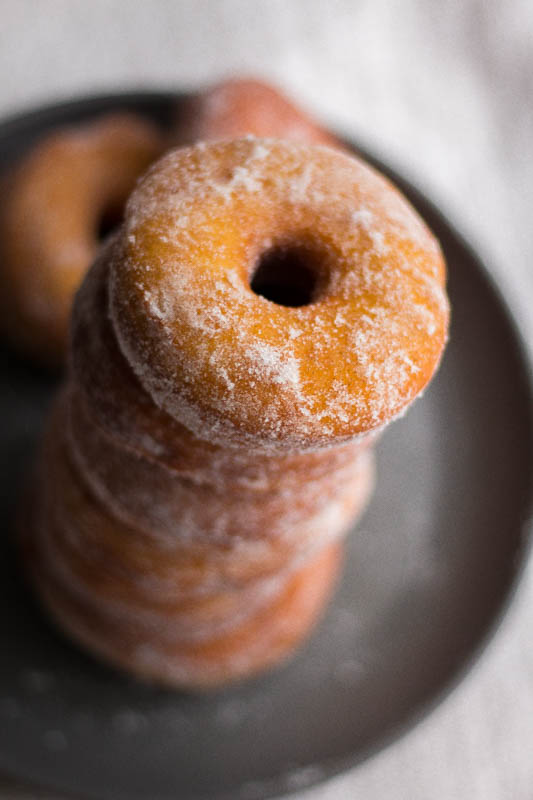
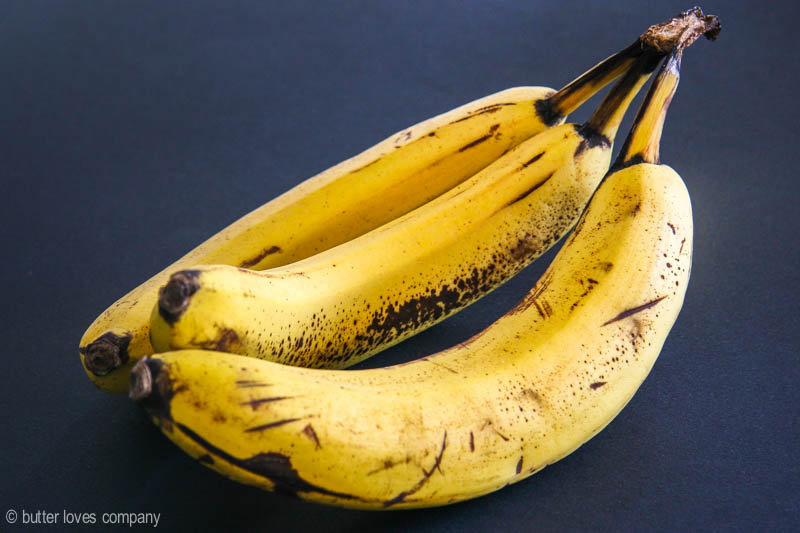
If you’re thinking, “Homemade doughnuts? That seems difficult,” let’s take it step-by-step. You’ll prepare a simple dough, which is a mostly hands-off process, allowing your stand mixer to do the heavy lifting. You’ll let the dough proof for an hour and then again overnight in the fridge. You’ll roll out and cut the dough into your doughnut shapes. You’ll heat the oil and fry those pretties for just a couple minutes. Remove from the oil, let cool and toss them in vanilla sugar. Give one to everyone you see around you—well, maybe not the cats!

blc signature

brioche-doughnut-recipe-4

Print
sugared brioche doughnuts

Prep Time: 10 hours

Cook Time: 30 minutes

Servings: 8 doughnuts, plus 8 munchkins!

brioche-donut-recipe-5

Ingredients

  • 518 grams all-purpose flour (3 1/2 cups plus 3 tablespoons)
  • 10 grams instant yeast (1 tablespoon)
  • 74 grams granulated sugar (1/4 cup plus 2 tablespoons)
  • 9 grams table salt (1 tablespoon)
  • 212 grams warm whole milk (3/4 cup plus 1 1/2 tablespoons; at about 75°F)
  • 111 grams egg (1/4 cup plus 3 tablespoons; about 2 large eggs)
  • 9 grams vanilla extract, vanilla bean paste, or vanilla bean caviar (1 1/2 teaspoons)
  • 55 grams unsalted butter, at room temperature, cut into cubes (2 ounces)
  • Canola oil, for frying (enough to fill your Dutch oven or pot 3 inches deep)
  • 300 grams granulated sugar or vanilla sugar (1 1/2 cups; sugar massaged with leftover vanilla bean pod)
  • Other tools:
  • Round doughnut cutter or circular cookie cutters (you could use two round cookie cutters: one large one for the outside and one small one to cut out the doughnut centers)
  • Candy thermometer

Instructions

    Prepare the Dough
  1. Spray a medium bowl with non-stick spray and set aside.
  2. In the bowl of a stand mixer fitted with the dough hook, mix together the flour and yeast. Add the sugar, salt, milk, egg, and vanilla and mix on low speed until incorporated. Continue mixing on low speed for 30 minutes (the dough may stick to the side of the bowl).
  3. With the mixer running, gradually add the butter, a cube at a time, incorporating each cube completely before adding the next. Continue until you’ve added all the butter, scraping down the bowl periodically. Mix for 5 more minutes.
  4. Scrape the dough onto a lightly floured surface and pat into a rectangular shape, using only enough flour so it doesn’t stick to the surface. Stretch and fold the left side of the dough to over 2/3 of the dough, and then stretch the right side and folder over the left (Like you would fold a letter, if people still sent letters!). Repeat once more, this time folding the top down and then the bottom up. Place in prepared bowl seam-side down. Cover with plastic wrap or a clean dishtowel and let sit at room temperature for an hour.
  5. Turn the dough out onto a lightly floured surface and gently pat the dough down pressing large air bubbles to the edge to release. Repeat the stretching and folding process and then return the dough to the bowl, seam-side down, cover, and refrigerate overnight.
    Roll and Shape
  1. Line a baking sheet with parchment paper, spray with non-stick spray, and set nearby. Turn the chilled dough out onto a lightly floured surface and roll it out to about 11-inches wide and about 1-inch thick. Working quickly using your doughnut cutter or round cookies cutters, cut rounds from the dough. Dust off excess flour and place onto prepared pan. Gently lay a sheet of plastic wrap over the dough and allow to proof at room temperature for 1 to 1 1/2 hours, or until the dough has doubled in size and when you gently press with your finger, the imprint remains.
    Fry Doughnuts!
  1. Fill a Dutch oven or heavy stockpot with 3 inches of canola oil. Fit with your candy thermometer and heat oil to 350°F/177°C. Set a cooling rack over a baking sheet and pour your sugar or vanilla sugar into a wide, shallow bowl—ready for dipping! Gently lower 2 to 4 doughnuts (depending on how large your pot is—the doughnuts should be able to float freely) into the oil and fry for 30 seconds, without moving them. Flip doughnuts over with tongs, a spoon, or chopsticks and fry for 45 seconds. Flip back over once more and fry another 45 seconds, or until they are golden brown. Adjust the heat as needed throughout frying to maintain the temperature. Transfer the doughnuts to the prepared rack to cool while you start the second batch. While the second batch is frying, toss the first batch in the sugar to coat on all sides, and transfer to a serving platter. Repeat with remaining batches.
  2. The doughnuts are best enjoyed the day they are fried—heavenly eaten fresh, fresh, fresh! They do last another day or two in a covered container but their texture will be much more dense and the sugar coating will moisten.

Notes

Recipe by Thomas Keller from the Bouchon Bakery cookbook, process adapted slightly.

6.1.0
https://www.butterlovescompany.com/2016/08/11/brioche-doughnut-recipe/
butter loves company | jenna larsson

brioche-doughnut-recipe-2

Filed Under: breakfast and breads, desserts and sweets, eat Tagged With: breakfast, breakfast bread, brioche, donuts, doughnuts

bourbon banana bread

September 3, 2015 by Butter Loves Company

An easy mixer-free recipe for moist banana bread spiked with bourbon for a little deep heat. One of the best banana breads I’ve ever tasted and, trust me, I’ve tasted A LOT of banana breads.

bourbon-banana-bread-recipe-7

Take a look around the kitchen. Do you see bananas? Yes? How do they look? Please tell me they are so over-ripe that they are almost detaching from the stem. Now, tell me you’re ready to mash them all up and whip up a batch of banana bread!

But we’re not whipping up just any old banana bread, today. We’re taking a pit stop by the wet bar and grabbing the bourbon. Yup. We’re spiking the banana bread and it might just be the best thing you’ve ever tasted. Get ready to start buying those ’nanners just to let them get all brown and speckled. Bourbon banana bread is happening.

bourbon-banana-bread-recipe-1

Greg tried to throw these bananas out. I was like umm, what are you doing..are you kidding me?!! This is peak bread ripeness! Love ya! 😉

This bread is moist with distinct banana flavor. Cinnamon and nutmeg spice up the flavor while Greek yogurt and, of course, butter add tang and richness. The kicker here is the flavor that the bourbon brings to the party. It adds this little mature spicy heat to the mix. It’s like you know as you’re biting into it that the bread has edge. Something about the whole package is just utter banana glory.

Bonus: You don’t need a mixer for this recipe.

I used Knob Creek because I had it leftover from a party. Though I bet you could use any brand without it changing the flavor too much.

bourbon-banana-bread-recipe-2

bourbon-banana-bread-recipe-3

It will be so easy, you’ll just mix by hand and then pop this thaaang in the oven.

bourbon-banana-bread-recipe-5

bourbon-banana-bread-recipe-8

bourbon-banana-bread-recipe-6

bourbon-banana-bread-recipe-9

One month ago: Iced Brownie Thins
Six months ago: Funfetti Pie Crust
One year ago: Spiced Pumpkin Muffins

Print
bourbon banana bread

Servings: makes one 8 x 4.5 inch loaf

bourbon-banana-bread-recipe-8

An easy mixer-free recipe for moist banana bread spiked with bourbon for a little deep heat. One of the best banana breads I've ever tasted and, trust me, I've tasted A LOT of banana breads.

Ingredients

  • 2 cups all-purpose flour
  • 1 teaspoon baking soda
  • 1/2 teaspoon table salt
  • 1/2 teaspoon cinnamon
  • 1/4 teaspoon nutmeg
  • 1/2 cup (1 stick or 8 tablespoons) unsalted butter, melted and cooled slightly
  • 3/4 cup light brown sugar
  • 1/2 cup granulated sugar
  • 1 1/4 cups very ripe bananas, mashed (about 3)
  • 1/4 cup plain Greek yogurt or sour cream
  • 2 larges eggs, at room temperature
  • 2 tablespoons bourbon
  • 1 vanilla bean, scraped or 1 teaspoon vanilla extract

Instructions

  1. Center a rack in the oven and preheat to 350°F. Butter an 8 x 4.5 or 9 x 5 inch loaf pan, line the bottom of the pan with parchment and grease the parchment. Set aside.
  2. In a medium bowl, whisk together the flour, baking soda, salt, cinnamon, and nutmeg. Set aside.
  3. In a large bowl using a spatula or wooden spoon, combine the melted butter, both sugars, the mashed bananas, and the yogurt. Add the eggs and stir until incorporated. Stir in the bourbon and vanilla. Add the flour mixture to the banana mixture and stir until just combined.
  4. Scrape the batter into the prepared pan and bake for 55 to 65 minutes, or until a toothpick inserted into the center of the bread comes out clean. The bread will be a deep brown color. If you’re concerned that the top is browning too fast, you may tent some foil over the top for the last 10 to 15 minutes of cooking. I didn’t need to do this, but always good to have that option! Once the loaf is slightly cooled, invert onto a rack or platter. Keeps well for a 4 or 5 days wrapped tightly at room temperature or may be wrapped and frozen for about one month.
6.1.0
https://www.butterlovescompany.com/2015/09/03/bourbon-banana-bread-recipe/
butter loves company | jenna larsson

bourbon-banana-bread-recipe-4

Interested in more banana bread? Check out this Brown Butter Banana Bread. It’s another one of my faves!

brown butter banana bread with crumble 8

Filed Under: breakfast and breads, eat Tagged With: banana bread, bourbon, breakfast bread

chocolate marble loaf cake

August 18, 2015 by Butter Loves Company

chocolate-marble-loaf-cake-11 copyThis is the kind of simple loaf you see sliced thick and domino-stacked in bakery cases. It’s sturdy with a welcomed denseness and enough sweetness to count as a casual dessert, but not so much that you feel guilty about enjoying it as a weekday breakfast ‘al desko.’ The latter is really where this chocolate marble loaf cake shines.

As the bread bakes up in the oven it cracks slightly on top so you can peek into the loaf and see swirls of chocolate and vanilla batter. With crisped edges and a moist center, this loaf is a little of everything and not too much of anything.

While it looks like you are combining two different cake batters to make this, you really only make one base batter and then jazz up half of it with melted bittersweet chocolate. Semisweet would work too, but it inclusion would yield an overall sweeter cake. If you’re wondering how to create the two-toned marble look, have no fear! There are quite a few process photos below and it is all explained in the recipe instructions.

If you’re feeling frisky, you could add a little citrus zest to the vanilla batter before you scoop it into the pan. Serve as-is for breakfast or top with whipped cream or ice cream, and preferably hot fudge, for dessert!

chocolate-marble-loaf-cake-1

Here we have your two glorious batters!

chocolate-marble-loaf-cake-3

Making marble magic – first scoop the two flavors into the pan.

chocolate-marble-loaf-cake-5chocolate-marble-loaf-cake-4chocolate-marble-loaf-cake-6chocolate-marble-loaf-cake-7chocolate-marble-loaf-cake-8chocolate-marble-loaf-cake-10

Print
chocolate marble loaf cake

Prep Time: 15 minutes

Cook Time: 1 hour, 10 minutes

Total Time: 1 hour, 10 minutes

Servings: one 8-inch loaf (about 8 servings)

chocolate-marble-loaf-cake-11 copy

This is the kind of simple loaf you see sliced thick and domino-stacked in bakery cases. It’s sturdy with a welcomed denseness and a little sweetness on the vanilla side swirled with rich chocolate flavor.

Ingredients

  • 2 cups plus 2 tablespoons all-purpose flour
  • 1 1/4 teaspoons baking powder
  • 1/2 teaspoon salt
  • 3/4 cup (1 1/2 sticks or 12 tablespoons) unsalted butter, at room temperature
  • 1 cup granulated sugar
  • 4 large eggs, at room temperature
  • 3/4 teaspoon vanilla extract
  • 1/2 cup whole milk
  • 1/2 cup (4 oz.) bittersweet chocolate chips, melted and cooled

Instructions

  1. Preheat the oven to 325°F. Butter or grease an 8 1/2 x 4 1/2 inch loaf pan. Line the bottom of the pan with a rectangle of parchment paper and grease the parchment. Place the pan on the top of a cookie sheet and set aside.
  2. In a medium bowl, whisk together the flour, baking powder, and salt. Set aside.
  3. In the bowl of an electric mixer fitted with the paddle attachment, cream the butter on medium speed until smooth. Add the sugar and cream on medium speed until light and fluffy, about 5 minutes. Add the eggs, one at a time, and mix thoroughly after each addition. Beat in the vanilla extract.
  4. Reduce the mixer speed to low and alternate adding the flour and milk, beginning and ending with the flour and mixing only until each addition is just incorporated. Keep the empty bowl that the flour mixture was in nearby.
  5. Scrape down the bowl with a spatula and scoop half of the batter into the now empty flour bowl. Set aside. This will be the vanilla part of the marble loaf. We’ll make the chocolate part of the marble loaf out of the remaining half of the batter in the stand mixer. Add the chocolate into the bowl of your electric mixer and mix on low speed to combine.
  6. We are now ready to scoop the two batters into the prepared pan!
  7. Randomly drop spoonfuls of the vanilla and chocolate batters into the pan OR spoon the batters out into long alternating rows (this is what I did here: bottom row was vanilla-chocolate-vanilla and then the second row was chocolate-vanilla-chocolate). Then, grab a butter knife and plunge it into the batter at one end of the loaf. Drag the knife to the other side of the loaf pan in a zig-zag motion, careful not to exceed 6 zig-zags. Remember, marbling can take on a life of its own in the oven so don’t get too picky about a perfect marble, but it is best not to over-mix the doughs once they are in the pan.
  8. Bake the loaf, resting on top of a cookie sheet, for 1 hour and 10 minutes to 1 hour and 20 minutes, or until the top is lightly golden and a toothpick inserted into the center of the loaf comes out clean. Remove from the oven and let cool in the pan for about 15 minutes before inverting it onto a rack and flipping it right-side-up to cool completely.
6.1.0
https://www.butterlovescompany.com/2015/08/18/chocolate-marble-loaf-cake/
butter loves company | jenna larsson

chocolate-marble-loaf-cake-9

If you like this loaf, you should totally check out this Lemon Loaf with Lavender Glaze!

emon loaf with lavender glaze 5

While we’re on the loaf topic, this Brown Butter Cinnamon Sugar Pull Apart Bread is one of my favorite loaf shaped things!

brown-butter-cinnamon-sugar-pull-apart-bread-9


Filed Under: breakfast and breads, desserts and sweets, eat Tagged With: bread, breakfast bread, chocolate, marble cake

white carrot muffins

June 25, 2014 by Butter Loves Company

white carrot muffins recipe 9 text

I’m fairly convinced New York City is home to about every food option you could ever hope for. 4:00 am waffles? No problem! Questionable street meat? You got it! Ten course tasting menu from a world-renowned chef? Well, it’s definitely there if you have a bulky wallet.

Even with no farm in sight, this past weekend we stumbled upon a market with some of the freshest produce I’ve seen outside of suburban nurseries. The Union Square market was chock full of some of the most vibrant, most reasonably priced fresh fruits, veggies, meats and eggs. One of the stands attracting a flock of photographers consisted of piles and piles of assorted, beautifully colored carrots: sunny yellow, deep purple swirled with orange and bright, bright white.

white carrot muffins recipe 2

I started wondering how these multicolored carrots might work in baked goods that are generally rich with traditional carrots (e.g. carrot cake, carrot muffins, carrot soufflé). I knew that once we got back to Boston I had to find out the answer. Here is the result of my exploration.

white carrot muffins recipe 3

In my opinion the white carrots have a softer flavor than the other varieties, but are perfectly delicate and sweet when kissed with a little spice. If you’re looking for a morning muffin that is ultra-light and fluffy, and not one bit too crumbly, you’ve found it. Of course, because the white carrots can be hard to come by, you can make these with orange carrots just as easily. I haven’t tried making them with the purple variety yet, but if you do, I am dying to know how they come out!

white carrot muffins recipe 4

white carrot muffins recipe 5

white carrot muffins recipe 8

white carrot muffins recipe 6

white carrot muffins recipe 7

white carrot muffins recipe 10

white carrot muffins recipe 12

white carrot muffins
adapted from Dorie Greenspan in “Baking with Julia”

Prep Time: 15 minutes
Cook Time: 20 minutes
Total Time: about 35–40 minutes
Makes 12 muffins

Ingredients:
2 cups all purpose flour
1/2 white granulated sugar
1/3 cup packed light brown sugar
1 tablespoon baking powder
2 teaspoons ground cinnamon
1 teaspoon ground ginger
1/4 teaspoon ground nutmeg
1/4 teaspoon table salt
2/3 cup canola or vegetable oil
3/4 cup whole milk
2 large eggs
1 1/2 teaspoon vanilla extract
1 cup shredded white or orange carrots (from about 3 medium)
1/2 cup sweetened shredded coconut
1/3 cup dried cranberries
1/3 cup roughly chopped walnuts (optional)

Instructions:

  1. Place a rack in the center row of the oven and preheat to 425 degrees F. Grease or line a 12 mold, standard size muffin pan with paper liners and set aside.
  2. In a large bowl, whisk together the flour and both sugars until combined and free of lumps. Add the baking powder, cinnamon, ginger, nutmeg and salt and combine.
  3. In a large glass measuring cup, or a separate small bowl, whisk together the oil, milk, eggs and vanilla extract until well combined.
  4. Pour this liquid mixture over the dry flour mixture. With a whisk, rubber spatula or spoon, gently but quickly stir ingredients to blend, being cautious not to over mix (better to have some lumps than to over mix in this case). Gently stir in the shredded carrots, coconut, cranberries and walnuts—if using. Divide the batter evenly among the muffin cups.
  5. Bake at 425 degrees F for 8 minutes, then reduce heat to 375 degrees F to cook an additional 8–10 minutes, or until a tooth pick inserted into the center of a muffin comes out clean. Remove and let muffin pan cool on a wire rack for 5 minutes. Remove the muffins and let cool. Enjoy warm or at room temperature. Best if eaten on the day they are made. These last a few days but their texture becomes a bit more dense the longer you wait to eat them.

Filed Under: breakfast and breads, eat Tagged With: breakfast, breakfast bread, carrot, muffins, summer

brown butter banana bread, with crumble

June 11, 2014 by Butter Loves Company

brown butter banana bread with crumble 6

I’m going to go out on a limb and say no one ever plans to make banana bread. I mean, no one ever goes to the grocery store to pick the brownest, most-speckled bananas on the display for the sole purpose of baking moist, delicious breakfast bread . . . Right?

Wrong!

Yesterday I found myself digging through the mounds of bananas at the grocery store, trying to find the most over-ripe, dumpster-bound ’nanners they had. You see, I’ve recently been stockpiling smoothie supplies, which has left me with lots of browning bananas—the byproduct of which has been excessive amounts of banana bread. So when I noticed I had one of these Dalmation-spotted bananas left in the fruit bowl this week, I didn’t want it to go to waste. And that brings us back to yesterday and the aforementioned produce section scavenge. (Disregard the fact that I didn’t want one thing to go to waste, so I went out and bought TWO MORE THINGS. My logic is sensational.)

brown butter banana bread with crumble 1

When I got home, I thought about how—despite having made lots of banana breads in the past—I had never really found the one. Each result was pretty typical: moist, slightly sweet, lightly spiced, even-crumbed banana-y cake. Not sweet enough, too sweet, too dull, too crazy, clingy, not clingy enough . . . wait, ugh, oh right, the bread! This time I wanted to up the banana bread ante so my natural thought process looked a little like free association:

Bananas (duh)! Banana Bread (keep)! Bread! Bread and Butter! Butter! Brown Butter (ohh, yeaahh)! Butter on Pancakes! Banana Pancakes (Jack Johnson?)! Breakfast! Coffee cake (interesting . . .)! Streusel (of course)!

brown butter banana bread with crumble 2

Sweet banana bread with a nutty depth from brown butter and a crunchy cinnamon sugar topping sounded like exactly what I needed and, I would argue, you need it too. If you’re intimidated by the sound of brown butter, stop that. You can do it. You’ll literally just heat the butter until it starts to crackle and foam. Once the crackling subsides, it will start turning golden and you’re in business! So . . . Run! Get to the store, before all the brown bananas run out!!

brown butter banana bread with crumble 3

brown butter banana bread with crumble 4

brown butter banana bread with crumble 5

brown butter banana bread with crumble 9

brown butter banana bread with crumble 8

brown butter banana bread, with crumble
adapted from Joy the Baker

Prep Time: 30 minutes (includes browning and cooling butter)
Cook Time: 45–55 minutes
Total Time: about 1 hour 25 minutes
Makes 1 9 x 5 loaf

Ingredients:

1½ sticks (6 oz.) unsalted butter, cut into tablespoon-sized pieces (we will brown this in step one; it will result in a little over ½ cup brown butter)
2 cups all-purpose flour
½ cup granulated sugar
¼ cup light brown sugar, packed
1 teaspoon baking soda
½ teaspoon salt
½ teaspoon ground cinnamon
¼ teaspoon ground nutmeg
2 large eggs, room temperature
1½ teaspoons vanilla extract
¼ cup well shaken buttermilk (mine was straight from the fridge cold)
1½ cups very ripe bananas, mashed (about 3 medium bananas)

Topping:
½ cup granulated sugar
¼ cup all-purpose flour
¾ cups roughly chopped walnuts (optional)
2 tablespoons (¼ stick) unsalted butter, cold and cut into ½ pieces
1 teaspoon ground cinnamon
Pinch of salt

Instructions:

  1. In a small saucepan with a small heatproof bowl nearby, melt the butter—stirring constantly until all of the pieces have melted. About 30 seconds after the butter melts completely, it will begin to bubble and foam. You will hear crackling sounds. Continue to stir constantly. As the foam and crackling begins to subside stir constantly while paying attention to the color and smell of the butter. As soon as it gives off a nutty smell and starts turning light brown take it off the heat to prevent it from burning. Then, quickly, but carefully, pour into the small heatproof bowl. Allow the brown butter to cool at room temp (or in the fridge if you’re in a pinch) while you prepare the rest of the bread.
  2. Preheat the oven to 350 degrees F with a rack in the center. Grease a 9 x 5 inch bread pan or similar sized baking dish.
  3. Prepare the crumble: In a small bowl combine the sugar, flour, walnuts (if using), butter, cinnamon and salt. Use your hands to mix together until the butter begins to stick to the other ingredients to make chunks. Some of the mixture will stay powdery, and that’s okay. Set aside.
  4. Prepare the bread: In a large bowl—or the bowl of an electric mixer fitted with the paddle attachment—whisk together flour, white and brown sugars, baking soda, salt, cinnamon and nutmeg.
  5. In a medium bowl, whisk together eggs, vanilla extract and buttermilk. Add the mashed bananas and then the cooled brown butter.
  6. With the mixer on low speed, add half of the egg mixture into the flour mixture and mix until combined. Add the second half of the egg mixture and mix on low until just combined. Be careful not to over mix.
  7. Spread half of the bread batter into the prepared baking pan. Sprinkle ⅓ of the crumble on top of the batter. Top with remaining half of bread batter, using a knife or spoon to spread if needed. Top evenly with the rest of the crumb topping.
  8. Bake bread for 45–55 minutes, or until a toothpick inserted into the center of the bread comes out clean. Remove from the oven and allow to rest in the pan for 15 minutes before inverting onto a wire rack to cool completely. Enjoy warm or at room temperature for up to 4 days.

Filed Under: breakfast and breads, eat Tagged With: banana, banana bread, breakfast, breakfast bread, brown butter, crumble, streusel

lemon loaf with lavender glaze

April 30, 2014 by Butter Loves Company

lemon loaf with lavender glaze 6

Since, after three days, we’ve officially finished the final crumb of this bread, I thought it was time you all should know about it. Three days is actually a pretty impressive length of time, which I’ll attribute to my trying to be “good” about my sweet intake this week. I consider this a success even if only for the fact that each time I ate it I actually cut a slice and put it on a plate, rather than jabbing a fork into the loaf for a bite each time I passed its platter. (Does anyone else leave a fork on the serving plate ready for this move at any time?) If When I make this again, I’d estimate a one- to two-day counter life based on deliciousness alone.

lemon loaf with lavender glaze 1

This loaf was the result of yet another ‘Buttermilk Conundrum,’ as I like to call it. I often purchase buttermilk for a recipe that only requires a half-cup of it. Before I know it, the carton has taken up residence in my fridge until I finally realize expiration is approaching and google, “what to do with leftover buttermilk.” It’s a classic tale—a Buttermilk Conundrum.

lemon loaf with lavender glaze 2

Well my Google search was a little more targeted this time knowing I also had lemons in the fridge, it was early on a rainy Saturday morning and I much preferred to stay in pajamas than put on real-people-clothes to go to the store for anything. I found a well-reviewed Ina Garten lemon cake recipe as a starting point. Her recipe made two loaves, which we didn’t need in the apartment (see, I was being good!), so I started to tweak a little bit as I scaled the recipe down. It turned out to be quite good with a perfect bread loaf texture—moist with a tight but not-too-dense crumb. There was a noticeable citrus flavor—without it being too bitter or too tart—from the additions of lemon zest in the cake and lemon juice in a syrup spooned over the warm loaf after it comes out of the oven. I decided to call it a bread versus a cake solely to make Greg and me feel better about having it for breakfast.

Once the loaf cooled completely, I topped it with a lavender glaze to play around with some dried cooking lavender in my cabinet. It added a subtle floral note, which was a nice compliment to the citrus. If you don’t have lavender, a simple lemon glaze or powdered sugar and milk glaze would have also been super as the bread itself is the star here.

lemon loaf with lavender glaze 3

lemon loaf with lavender glaze 4

emon loaf with lavender glaze 5

lemon loaf with lavender glaze 8

Lemon Loaf with Lavender Glaze
Adapted from Ina Garten

Prep Time: 10 minutes
Cook Time: 45 minutes
Total Time: About 1 hour 30 minutes (including cool time)
Makes one 8-inch loaf

Ingredients:

For the Cake:

1 stick (¼ pound/8 tablespoons) unsalted butter, softened
1¼ cups granulated sugar, divided
2 extra-large eggs, at room temperature
¼ cup grated lemon zest (from about 3 lemons)
1½ cups flour
¼ teaspoon baking powder
¼ teaspoon baking soda
½ teaspoon table salt
¼ cup plus 2 tablespoons fresh lemon juice, divided (from about 2 lemons)
½ cup well-shaken buttermilk
½ teaspoon pure vanilla extract

For the Glaze:

½ cup milk
1 tablespoon dried lavender (from a food store, not a flower store)
1 cup confectioner’s sugar

Directions:

  1. Preheat the oven to 350 degrees F. Butter and flour an 8 x 4 x 3 inch loaf pan (or comparable size), or coat with a non-stick baking spray.
  2. Cream the butter and 1 cup granulated sugar in the bowl of an electric mixer fitted with the paddle attachment until light and fluffy, about 5 minutes. With the mixer on medium speed, add the eggs, 1 at a time, and then the lemon zest.
  3. In a small bowl, sift together the flour, baking powder, baking soda, and salt. In another bowl, combine 2 tablespoons lemon juice, the buttermilk and vanilla. Add the flour and buttermilk mixtures alternately to the batter—beginning and ending with the flour. Spoon into loaf pan, smooth the top and bake for 45–55 minutes, until a cake tester comes out clean. Allow the cake to cool for 10 minutes in the pan while you prepare the lemon syrup.
  4. To prepare the lemon syrup, combine ¼ cup granulated sugar with ¼ cup lemon juice in a small saucepan and cook over low heat until the sugar dissolves. Remove from heat.
  5. Remove the cake from the pan and set it on a rack set over a tray or sheet pan. Spoon the lemon syrup over it. Allow the cake to cool completely.
  6. To prepare the glaze, heat the milk in a saucepan over medium heat until it starts to boil. Remove the pan from heat and add the dried lavender. Let the mixture steep for 5–8 minutes then strain the milk into a small bowl or cup to remove the dried lavender. Whisk the confectioner’s sugar into the milk, a tablespoon at a time, until you get a smooth glaze. Pour or spoon over the cooled loaf.

Filed Under: breakfast and breads, desserts and sweets, eat Tagged With: bread, breakfast bread, buttermilk, cake, citrus, glaze, lavender, lemon

Welcome!

jenna of butterlovescompany

Pull up a chair

Hi! I’m Jenna. Story seeker, food lover, recipe developer based in NYC. Firm believer in making every day delicious! Read more…

looking for something?

  • Email
  • Facebook
  • Instagram
  • Pinterest
  • RSS
  • Twitter

Latest Posts

  • Freezer Meals to Make Before Baby: How We Meal Prepped Before Baby
  • mom’s famous spiced pecans
  • funfetti cookie dough truffles (no-bake)
  • maple coconut cookies
  • snickerdoodle blondies

popular now

strawberry cinnamon rolls
braised short rib pasta sauce (short rib ragu)
rosemary honey buttermilk biscuits
peach blueberry pie
chocolate marble loaf cake
bourbon banana bread

grammin’

Let’s get ready to bake throughout the holidays! Let’s get ready to bake throughout the holidays! I’ve teamed up with @lucky_leaf_fruit_filling, @diamondnuts and #Kids360 to give away some delicious baking ingredients to make your spirits bright this season. 

To enter:
-Follow @lucky_leaf_fruit_filling, @diamondnuts and @butterlovescompany
-Comment and tag a friend and the name of your favorite holiday dessert
-Enter by December 1. Winner will be selected at random and DM’d! 

You’ll win: 
•(1) Can of Lucky Leaf Premium Blueberry Filling
•(1) Can of Lucky Leaf Premium Apple Filling
•(1) Can of Lucky Leaf Premium Cherry Filling
•(1) Can of Lucky Leaf Premium Strawberry Filling
•(1) Can of Lucky Leaf Premium Peach Filling
•(1) Recipe Book
•(2) Dish Towels
•(1) Pot-Holder
•(1) Picnic Basket

#ad NO PURCHASE NECESSARY. Open to legal residents of the United States (including its commonwealths, territories, and possessions) who are legal age of majority. Enter by 11:59 pm ET on December 1, 2021. Odds of winning depend on # of entries received. Void where prohibited. This is not sponsored or endorsed by Instagram or Facebook.
This was the best photo we could get with an alway This was the best photo we could get with an always moving toddler. 🥸 Happy Thanksgiving to you and yours! ♥️
Something that the past year or so has taught me: Something that the past year or so has taught me: stock your pantry! Having a stocked kitchen has made it super easy to cook and bake without having to run out to the store. Crucial when you get a craving for an Apple Walnut Cake and need to make one stat. With @lucky_leaf_fruit_filling and @diamondnuts, you can put together a delicious cake SO easily with no peeling and slicing of apples. 🍎🌰You get all the beautiful warm spice flavor with sweet, tart apples, and crunchy, hearty walnuts. #ad Get the recipe below: 

Apple Walnut Cake

* 1 box (15.25 oz.) spice cake mix
* 1 can (21 oz.) Lucky Leaf® Premium Apple Fruit Filling
* 2 large eggs
* 1 tbsp. pure vanilla extract
* 1/4 cup whole milk
* 1/4 cup brown sugar
* 1 tsp. ground cinnamon
* 1/2 cup finely chopped Diamond of California® Shelled Walnuts
* 1 container (8 oz.) whipped topping, thawed

Instructions
1. Preheat oven to 350° F and grease 9x13-inch pan. 
2. Combine dry cake mix, apple filling, eggs, vanilla & milk in large bowl. Beat for 2 minutes. Spread half of the batter in the pan. 
3. Make the Walnut Cinnamon filling: Combine brown sugar, cinnamon and walnuts. Sprinkle half the mixture on top of batter. Top with remaining batter and then sprinkle remaining walnut mixture on top.
4. Bake cake for 28-33 minutes. Cool cake. Top with whipped topping and sprinkle with walnut pieces.

Don’t miss my upcoming chance to W I N with #kids360, Diamond and Lucky Leaf!
Spiced pecans, wedding cookies, chocolate turtles, Spiced pecans, wedding cookies, chocolate turtles, pecan pie, sticky buns…just a few of the treats on my standard holiday baking agenda. What do they have in common? NUTS! @diamondnuts are a staple around here for the holidays (and all year, let’s be honest) and I want to share the love. Thanks to Diamond and #kids360, we are giving someone ✨15 FREE product coupons for @diamondnuts ✨to help you bake your holiday treats this year. Go nuts!

To enter:
* Follow @diamondnuts and @butterlovescompany
* Comment and tag a friend who deserves a day off to go nuts! 
* Enter by end of day November 25th. Winner will be selected at random and DM’d! 

#ad NO PURCHASE NECESSARY. Open to legal residents of the United States (including its commonwealths, territories, and possessions) who are the legal age of majority. Enter by 11:59 pm ET on November 25, 2021. Odds of winning depend on # of entries received. Void where prohibited. This is not sponsored or endorsed by Instagram or Facebook.
No gimmicks, no “just for the ‘gram” razzle No gimmicks, no “just for the ‘gram” razzle dazzle here. Just really good chocolate chip cookies.🍪
Fun fact: Layered Magic Cookie Bars were one of th Fun fact: Layered Magic Cookie Bars were one of the first things I ever baked. Making them again with @diamondnuts makes me super nostalgic. Brought me directly back to middle school. Watch out or you may find me in butterfly clips doodling I <3 SOS on my binder soon. There is a reason this recipe is awesome: first, the cookie bars are incredibly delicious. And, second, they are SO easy to put together. Honestly, they are the PERFECT treat to make with your kids. Pecans and walnuts give the bars the best crunch, nuttiness, and heartiness. You could totally customize if there is a certain kind of jam you love, or a combination of nuts that the family loves. #ad Get the recipe below: 

Seven Layer Magic Cookie Bars

* 1/2 cup (1 stick) butter, melted
* 2 cups graham cracker crumbs
* 1 cup raspberry jam
* 1 cup shredded coconut
* 1 cup Diamond of California® walnuts
* 1 cup Diamond of California® pecans
* 1 cup semi-sweet or bittersweet chocolate chips
* 1 (14-ounce) can sweetened condensed milk

Instructions
1. Preheat oven to 350°F. To toast walnuts and pecans, spread evenly on a baking sheet or in a shallow pan. Bake, stirring once or twice, until lightly browned and fragrant, 7 to 10 minutes. Line a 9×13-inch pan with parchment paper.
2. In a medium bowl, combine the melted butter and graham cracker crumbs; mix well. Transfer the crumbs to the prepared pan and using your finger tips, or the flat bottom of a small measuring cup, press firmly and evenly on the bottom of the pan. Spread the raspberry jam evenly over the crumbs. Sprinkle coconut in an even layer over the jam, followed by the chocolate chips, walnuts and pecans. Drizzle the condensed milk evenly over the top.
3. Bake until bubbling and golden brown, 30-35 minutes. Let cool completely in the pan. If lined with parchment, lift out and place on a cutting board. With a sharp knife, cut into bars.

Look out for an upcoming chance to ✨ w i n ✨with @diamondnuts and #kids360!
Raise your hand if you could use a cup of coffee. Raise your hand if you could use a cup of coffee. 🙋 We are giving away some @timhortonsus coffee goodies so you can get your cozy cool morning on with Canada’s favorite cup of joe. Make my Pumpkin Coffee Coffee Cake for a buzzy morning snack or just brew a strong cup for a little pep in your step (as tired parents over here, we could surely use it). 🍂

To enter:
● Follow @butterlovescompany and @timhortonsus
● Comment and tag a friend you would love to grab coffee with ☕ (each comment=1 entry)
● Enter by midnight November 18. Winner will be selected at random and DM’d!
 
You’ll win:
•(1) Colombian Ground Coffee
•(1) Dark Roast Ground Coffee
•(1) Decaf Ground Coffee
•(1) Whole Bean Original Blend Coffee
•(1) Keurig Variety 30-Pack
•(1) Mug
•(1) Branded Notebook
•(1) Branded Baseball Cap
 
 
ad #timhortons #kids360 NO PURCHASE NECESSARY. Open to legal residents of the United States (including its commonwealths, territories, and possessions) who are legal age of majority. Enter by 11:59 pm ET on November  18, 2021. Odds of winning depend on # of entries received. Void where prohibited. This is not sponsored or endorsed by Instagram or Facebook.
Can’t beat a classic. 🥧 Apple streusel pie fo Can’t beat a classic. 🥧 Apple streusel pie for yesterday’s friendsgiving.🥰 Grateful for time with friends enjoying great food. Remy had so much fun playing that he slept until 7am so we are hopefully out of the 4am daylight savings nightmare (knock on wood). 

Sunday includes a farmers market bop, movies, and cooking for the week. Wouldn’t change a thing. 🥳
Cannot. Get. Enough. Fall. Baking. Who’s with me Cannot. Get. Enough. Fall. Baking. Who’s with me? 🍁  This coffee cake packs a punch because it is made with @timhortonsus brewed coffee in the batter and the glaze. A true *coffee* cake. The texture is dreamy and the coffee is perfectly balanced and smooth. It is goood. #ad Get the recipe below:
 
Pumpkin Coffee Coffee Cake
 
Topping
● 2/3 cup granulated sugar
● pinch of salt
● 2/3 cup flour
● 1 teaspoon cinnamon
● 4 tablespoons butter, melted

Filling
● 1/3 cup brown sugar, packed
● 1 teaspoon cinnamon
● 1 teaspoon unsweetened cocoa powder, optional

Cake
● 1/3 cup vegetable oil
● 2 large eggs, at room temperature
● 1 cup granulated sugar
● 1 cup pumpkin purée
● 1 teaspoon pumpkin pie spice
● 1 teaspoon salt
● 1 teaspoon baking powder
● 1/2 cup brewed @timhortonsus Coffee
● 2 cups flour

Glaze
● 1 cup powdered sugar
● 2 tablespoons brewed @timhortonsus coffee
 
Instructions
1. Preheat the oven to 350°F and grease an 8 inch square pan and line with parchment.
2. Make topping: Stir together the sugar, salt, flour, cinnamon, and melted butter until combined into pea sized lumps. Stirring just until well combined. Set aside.
3. Make filling: Mix together the brown sugar, spice, and cocoa powder. Set it aside.
4. Make cake: Beat together the oil, eggs, sugar, pumpkin, pie spice, salt, and baking powder until smooth. Add the brewed coffee followed by the flour, alternating in two additions, and stir until combined.
5. Spread half the batter into the prepared pan. Sprinkle the filling evenly on top of the batter. Top with the remaining batter. Sprinkle the topping over the batter in the pan.
6. Bake until a toothpick inserted into the center comes out clean, about 40 to 45 minutes. Let cool.
7. Make glaze: Combine the powdered sugar and brewed coffee until smooth and thick but drizzle-able. Using a fork, drizzle it over the cake.

Don’t miss our upcoming chance to ⚡️W I N⚡️ thanks to @timhortonsus and #Kids360!

#timhortons #kids360fanclub
One of the hardest parts about being a working mom One of the hardest parts about being a working mom is how little time you get to spend with your sweet bean during the week. Between wake up and getting to daycare, to pickup and bedtime it’s often an hour at best (which is also filled with making dinner, bath time, etc). I soak up ALL the minutes and the weekends are an absolute snuggle and play fest. It’s so tough though! If you are in the same boat, know that you aren’t alone and you’re doing a good job!! ♥️

This photo has nothing to do with this but I made the cookies for our neighbors and regretting not keeping one for myself right now. 😬🤣
✨W I N !✨ I’ve teamed up with @nielsenmassey ✨W I N !✨ I’ve teamed up with @nielsenmassey and #Kids360 to give away some seriously amazing ingredients to make your desserts sing. 🎶 I love their products and have been using them for years—the vanilla is 💯!!
 
To enter:
● Follow @nielsenmassey and @butterlovescompany 
● Comment and tag a friend you’d love to bake with
● Enter by Thursday November 11th. Winner will be selected at random and DM’d!
 
You’ll win:
•(1) Madagascar Bourbon Pure Vanilla Powder
•(1) Madagascar Bourbon Pure Vanilla Sugar
•(1) Ugandan Pure Vanilla Extract
•(1) Pure Coffee Extract
•(1) Pure Peppermint Extract
•(1) Rose Water
•(1) Pure Lemon Extract
•(1) Tahitian Two Vanilla Beans
•(1) Tahitian Pure Vanilla Extract
•(1) Mexican Two Vanilla Beans
•(1) Mexican Pure Vanilla Extract
•(1) Madagascar Bourbon Two Vanilla Beans
•(1) Madagascar Bourbon Pure Vanilla Extract
•(1) Madagascar Bourbon Pure Vanilla Bean Paste
•(1) Orange Blossom Water
•(1) Pure Orange Extract
•(1) Pure Almond Extract
•(1) Pure Chocolate Extract
.
#ad NO PURCHASE NECESSARY. Open to legal residents of the United States (including its commonwealths, territories, and possessions) who are legal age of majority. Enter by 11:59 pm ET on November  11, 2021. Odds of winning depend on # of entries received. Void where prohibited. This giveaway is not sponsored or endorsed by Instagram or Facebook.
Brainstorming dessert recipes for Thanksgiving and Brainstorming dessert recipes for Thanksgiving and it’s hard not to think about this Black Forest Pie. 🍒🍫 It was such an indulgent tart-sweet chocolate-y treat. It has a chocolate all butter pie crust, a layer of dark chocolate ganache, a layer of chocolate pudding, a cherry topping, and whipped cream. Oh, and a cherry on top! Recipe is from @emcdowell #thebookonpie! 

This one *might* be too rich for the menu but there WILL be pie (duh)🥧. What kind of pie do you need to have on your Thanksgiving table?
This error message is only visible to WordPress admins
Hi! I'm Jenna, founder of butter loves company. From holidays to Tuesdays, let's find a way to make every meal special.
  • Email
  • Facebook
  • Instagram
  • Pinterest
  • RSS
  • Twitter
a2f54ba1dcf0635e58c8be4aa2035ce84863a9d9606a428ab3

© 2013-2019 BUTTER LOVES COMPANY, LLC.

Copyright © 2025 · Foodie Pro Theme by Shay Bocks · Built on the Genesis Framework · Powered by WordPress