butter loves company

new york food blogger and lifestyle influencer

  • home
  • Recipes
  • travel
  • lifestyle
  • cookie orders
  • about
  • contact

cornmeal pancakes with honey cayenne butter

August 20, 2015 by Butter Loves Company

cornmeal-pancakes-9
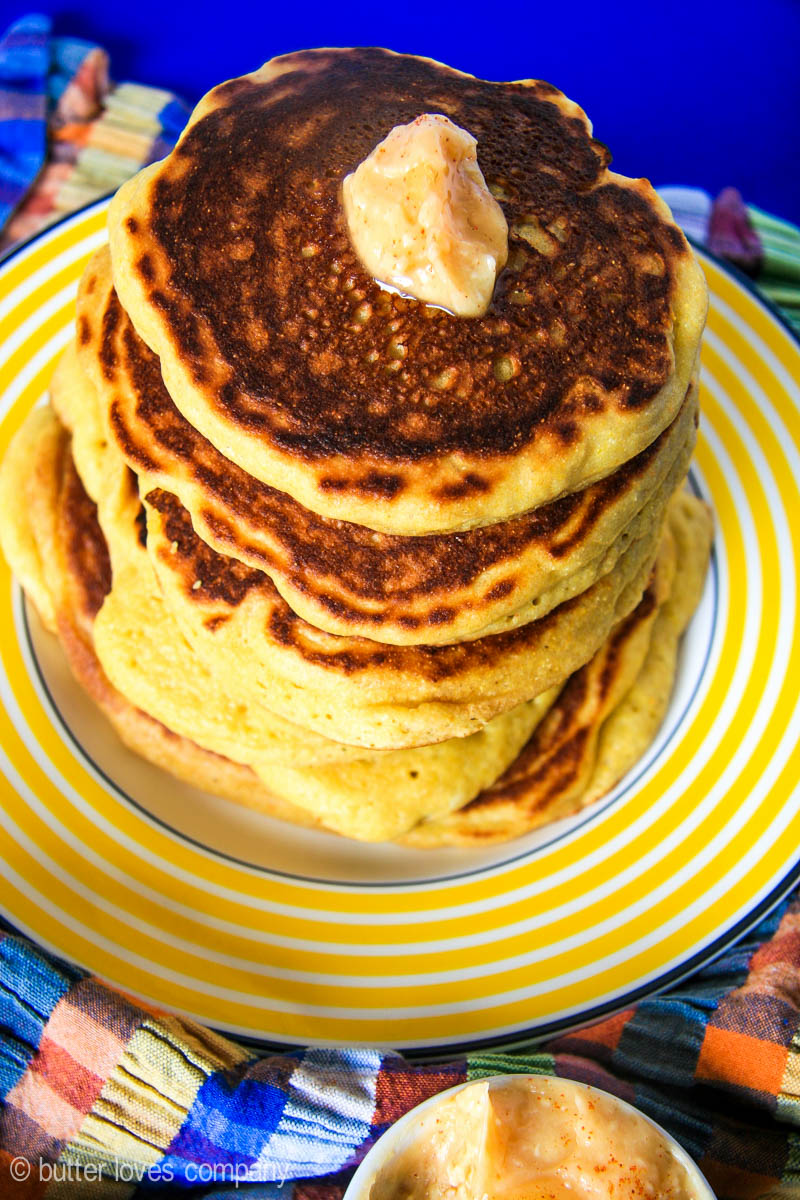
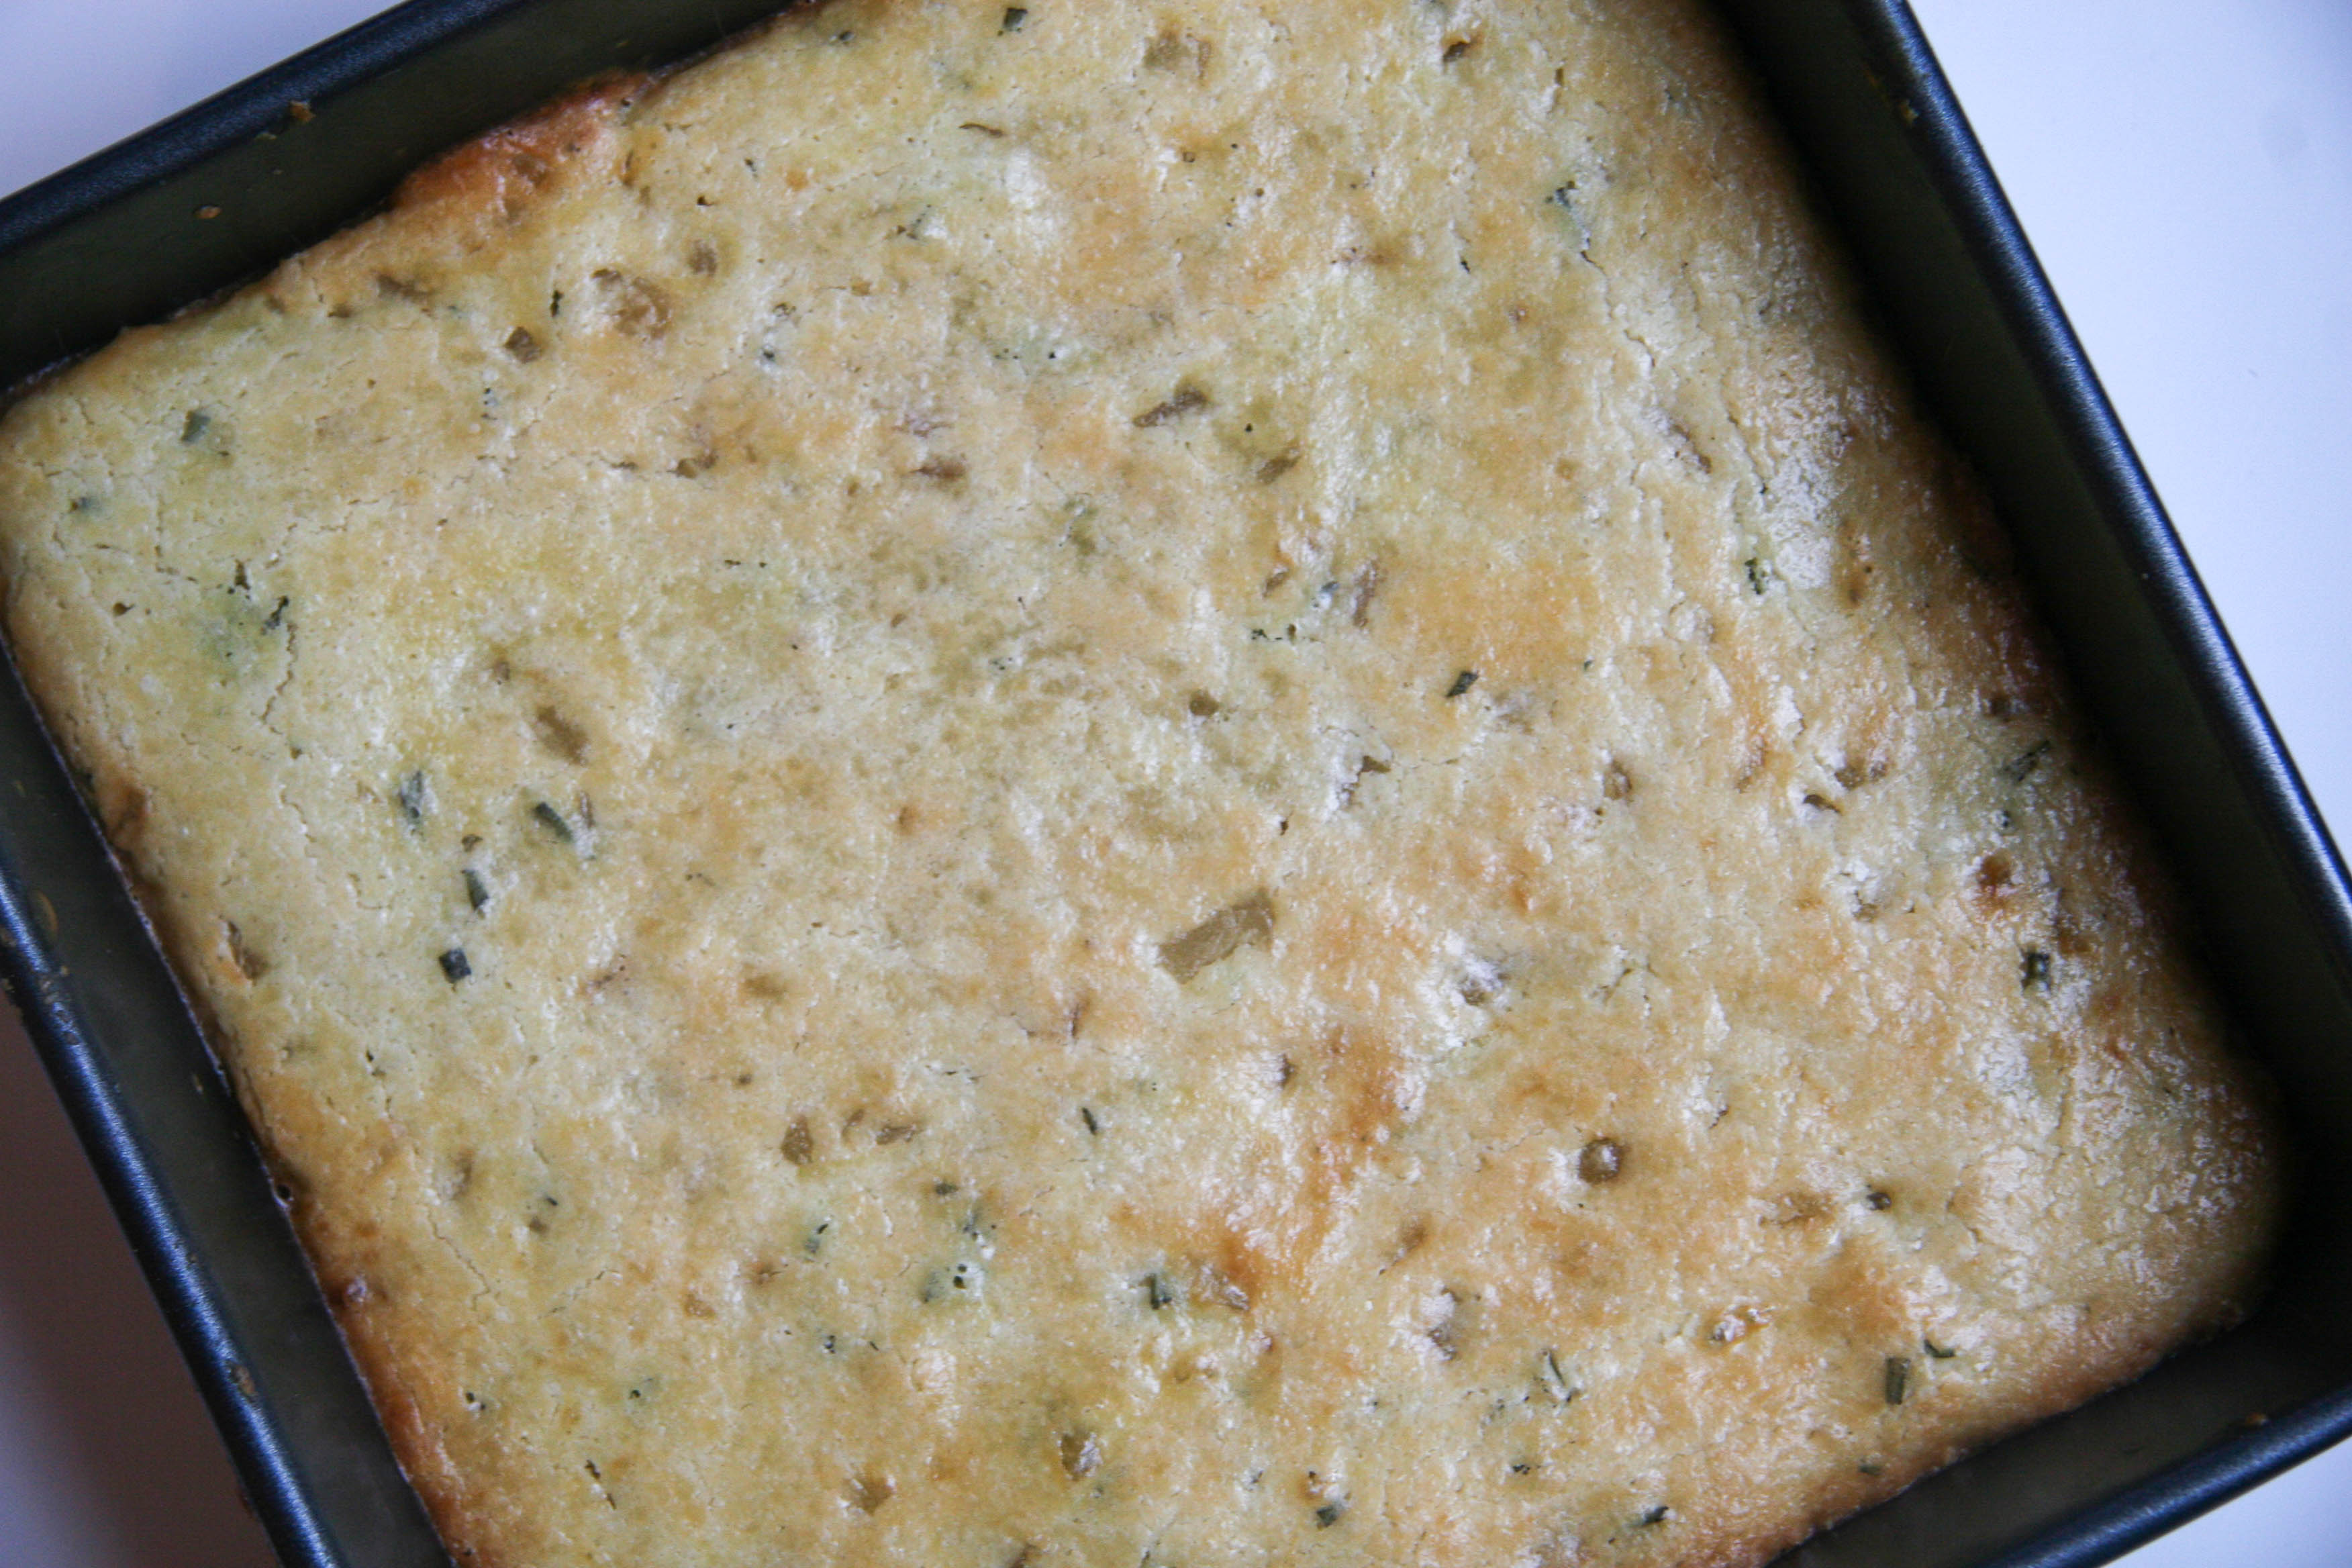
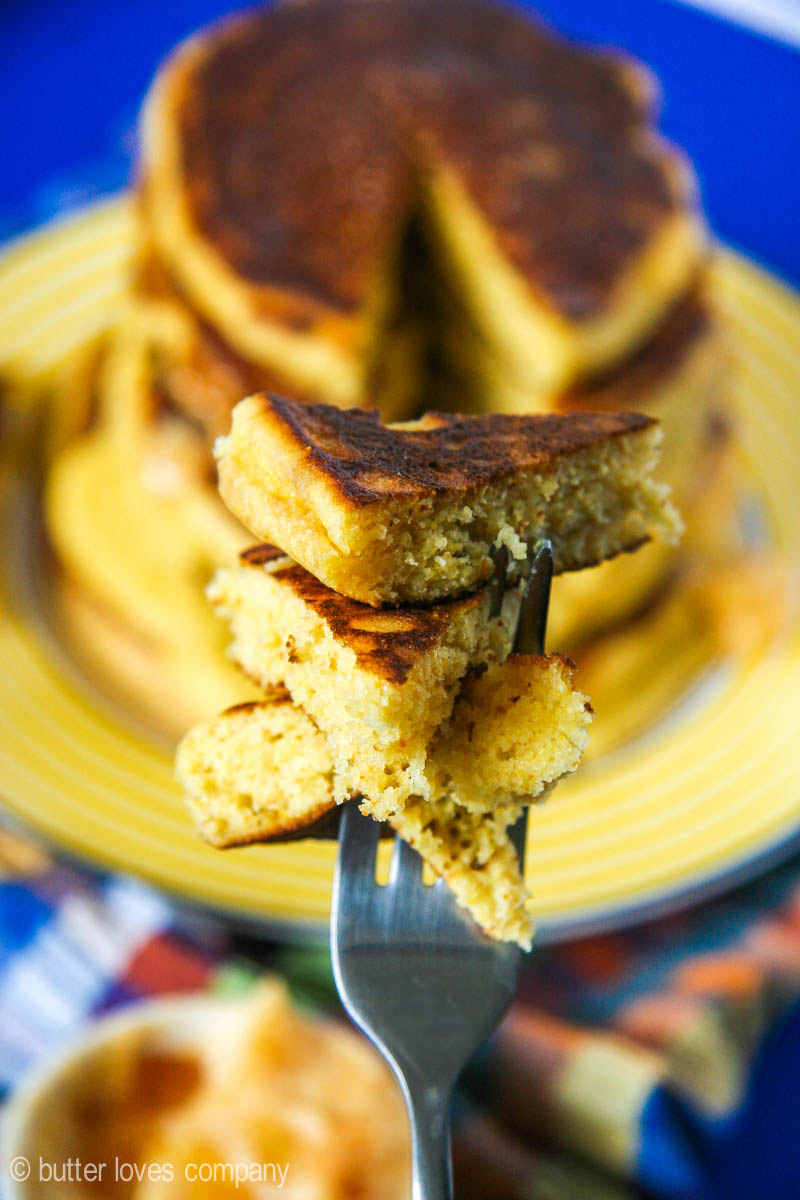
These delicious little pancakes have a natural sweetness and slightly grainy texture from the addition of cornmeal. They are crisp on the outside and fluffy on the inside and taste a bit like seared cornbread you may find at a neighborhood BBQ joint. Don’t skip slathering with a generous smear of creamy honey cayenne butter. The sweet heat pulls it all together.

Pancakes have always been tough for me. Even though they aren’t my favorite breakfast carb (Hello, things like bagels and sticky buns EXIST.), I actually make them fairly often because they are quick for a weekday morning breakfast and because I’ve yet to master the flip and I like the challenge.

Honestly, my pancake flipping ability is an embarrassment. Greg says I’m not flipping fast enough. Okay, sure. Then, I try flipping fast and basically invent pancake batter wallpaper and inevitably find that the half-cooked pancake landed perfectly on the pan’s edge as if trying to escape from the impending breakfast disaster. If you follow me on snapchat (butterlc), you may have seen my first attempt at these cornmeal pancakes with honey cayenne butter. The flavor was great but it was NOT PRETTY. Obviously, I had to try again. I’m so glad I did!

cornmeal-pancakes-2

cornmeal-pancakes-3

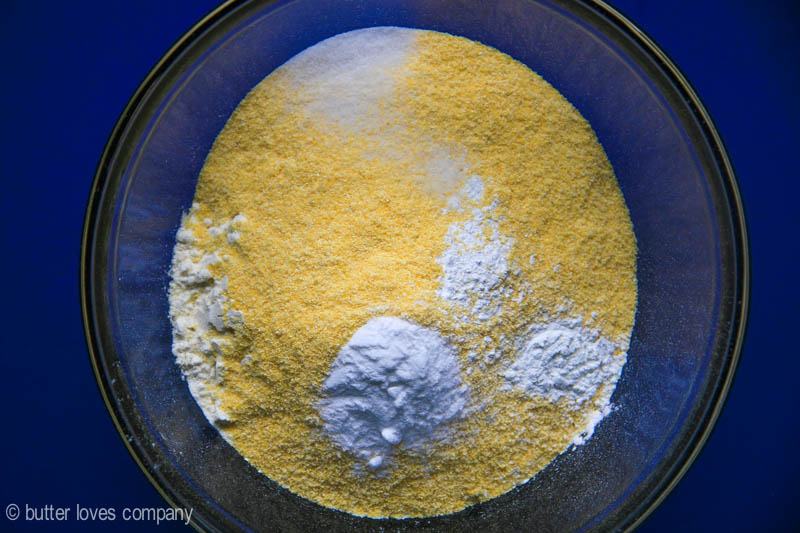
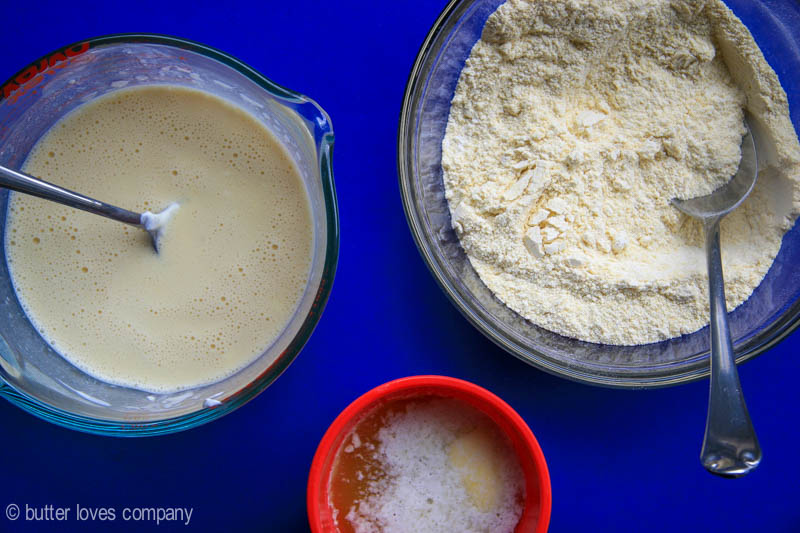
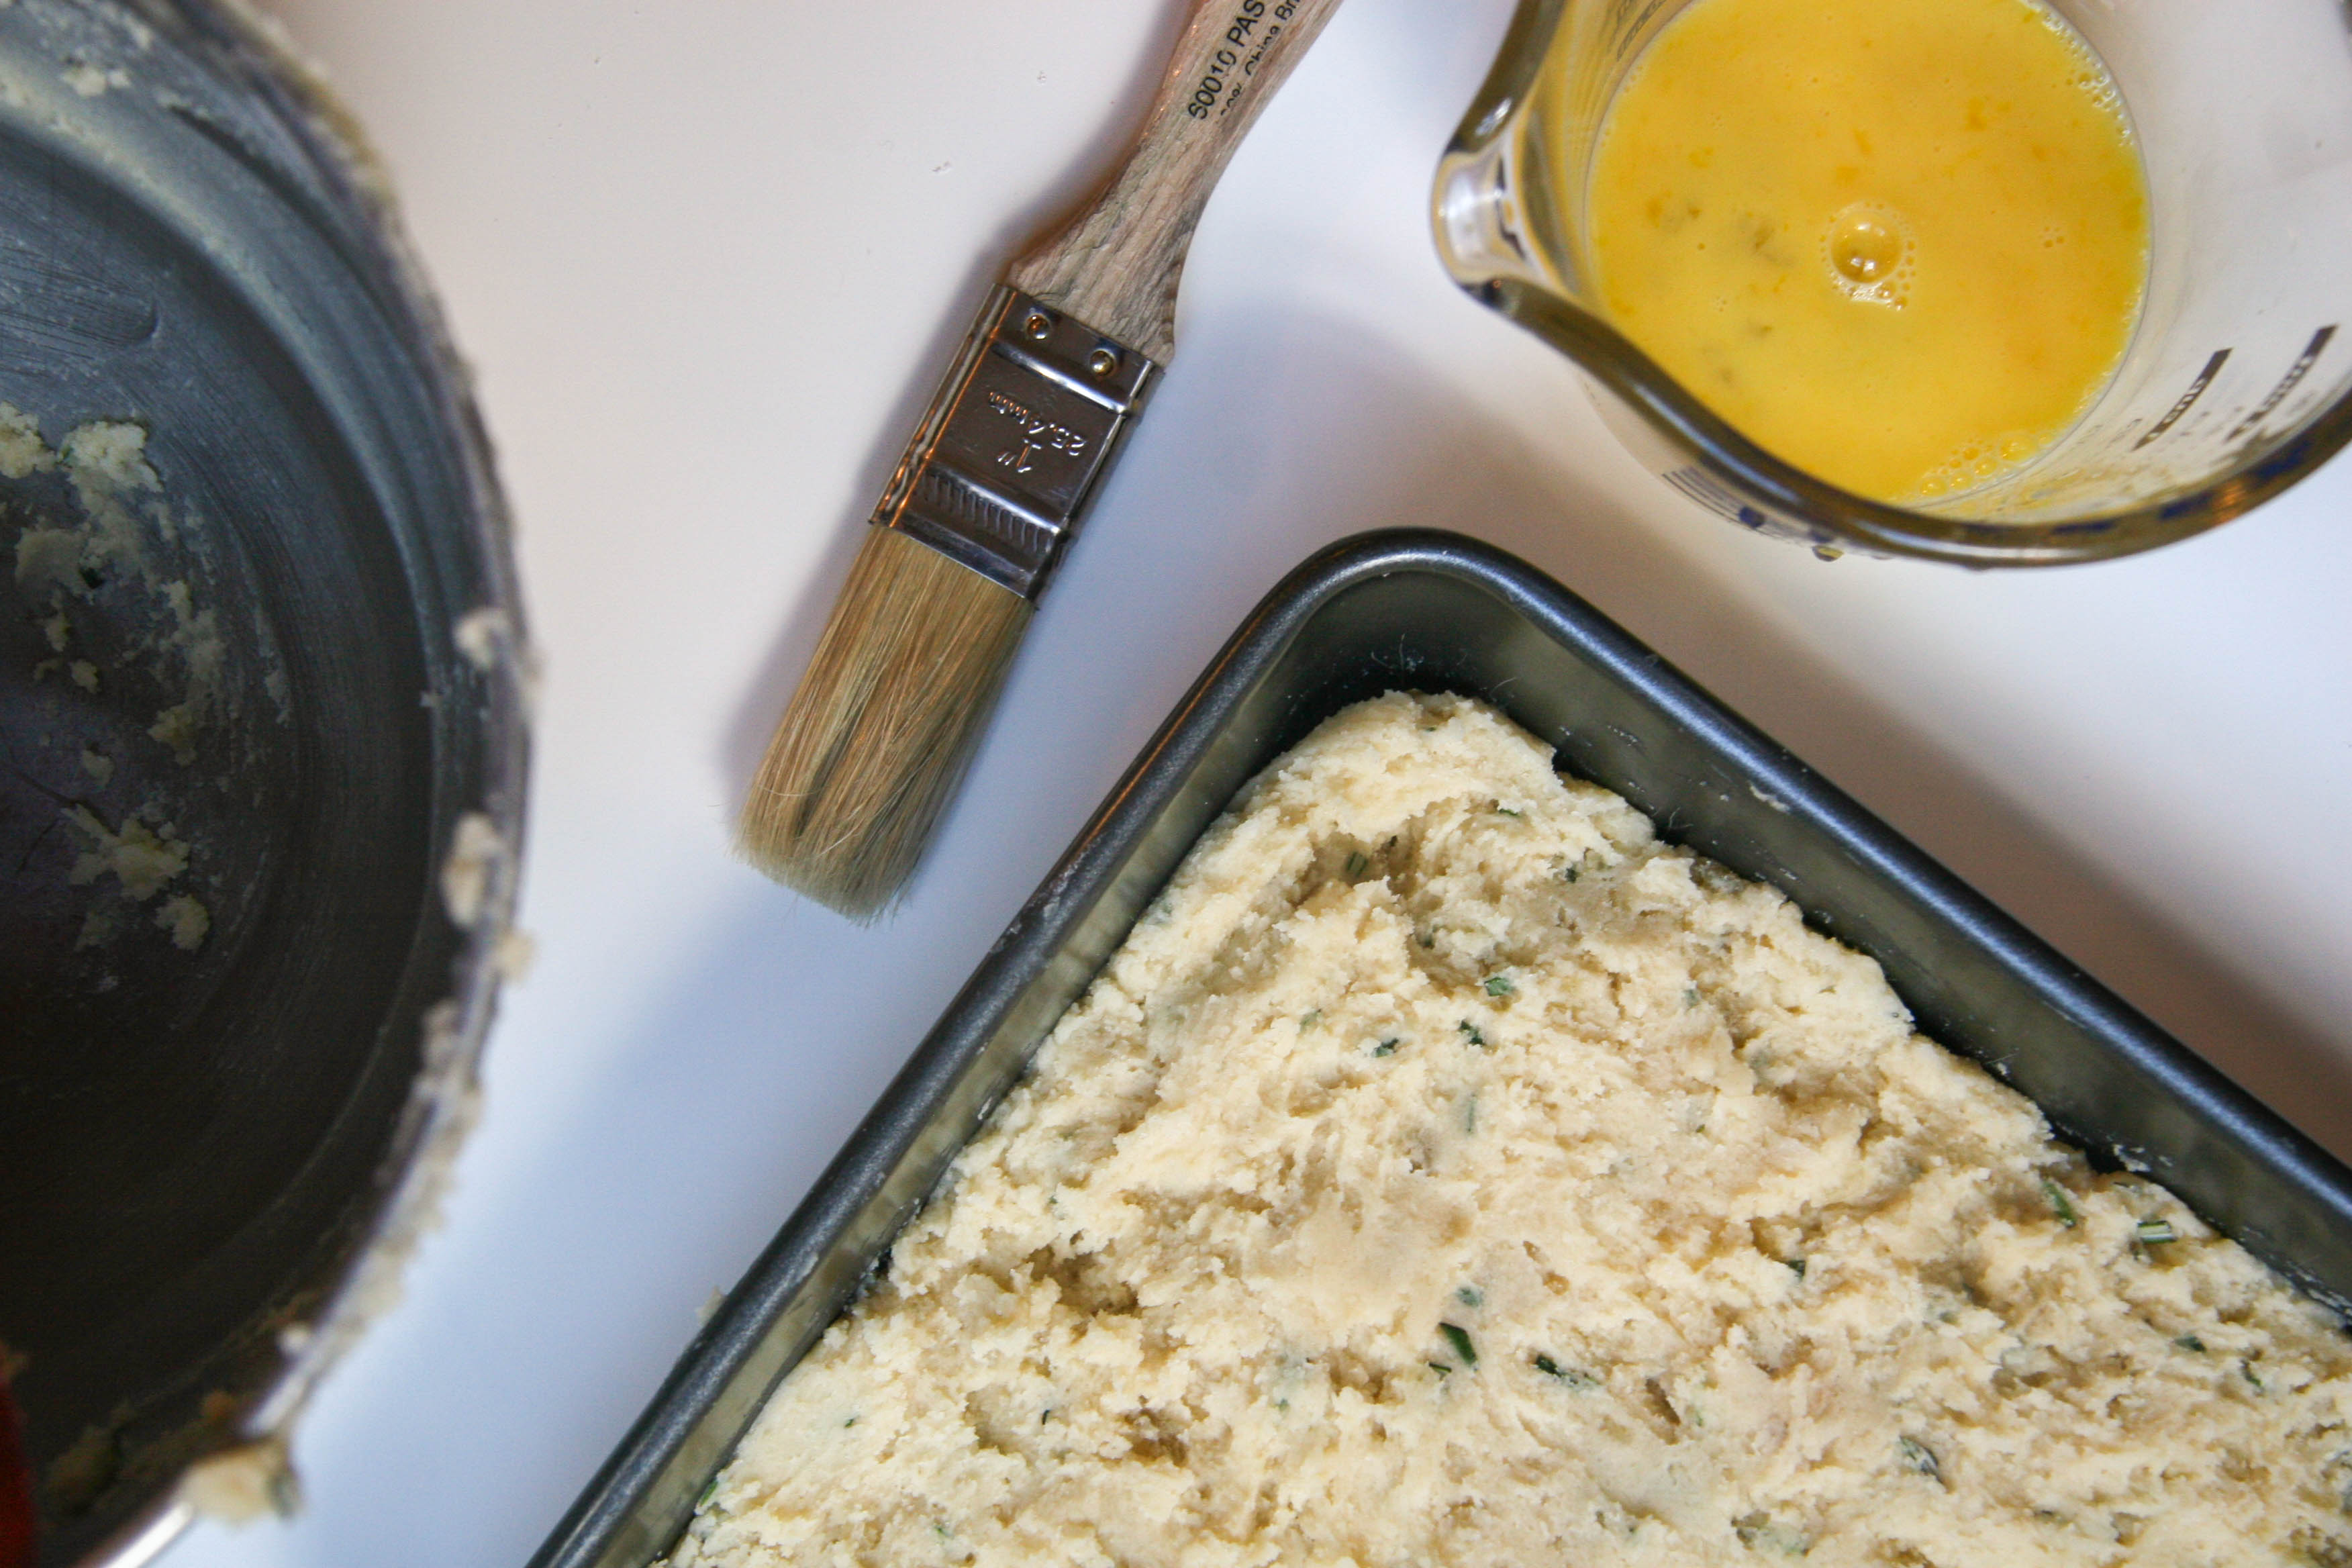
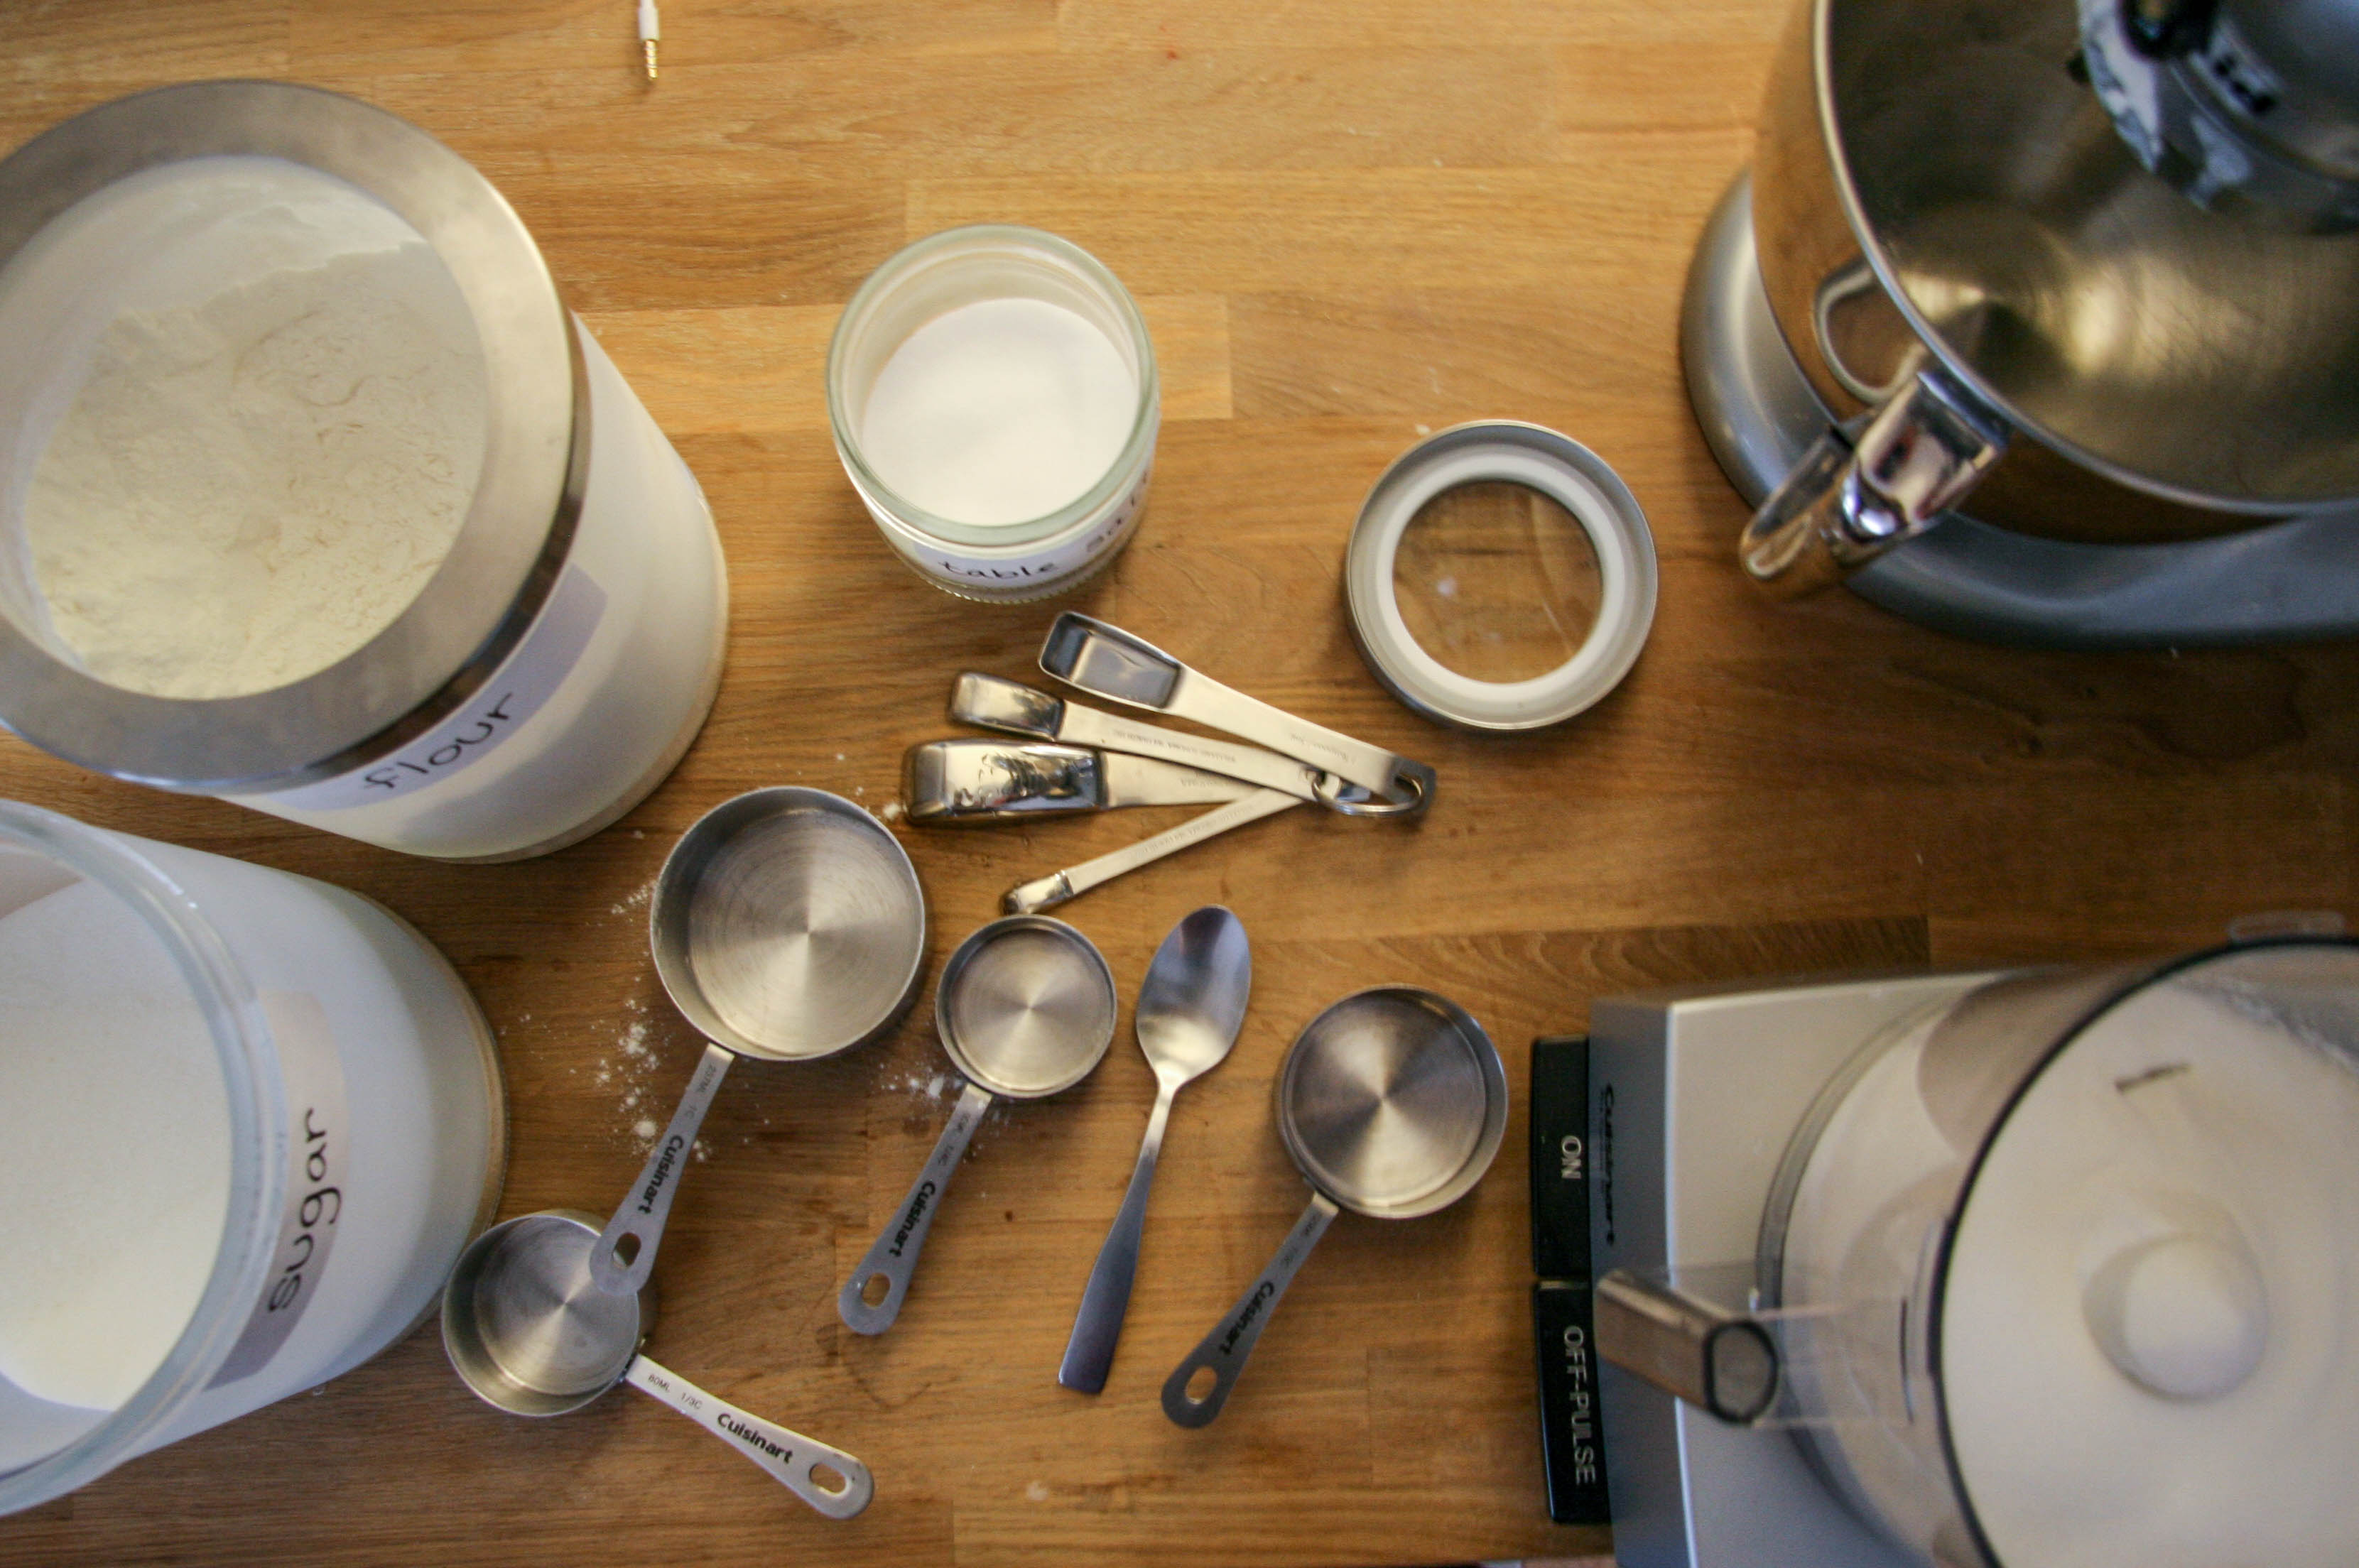
We have your flour cornmeal mixture, your yogurt milk mixture and your butter honey mixture. Time to make some batter!

cornmeal-pancakes-1

cornmeal-pancakes-7

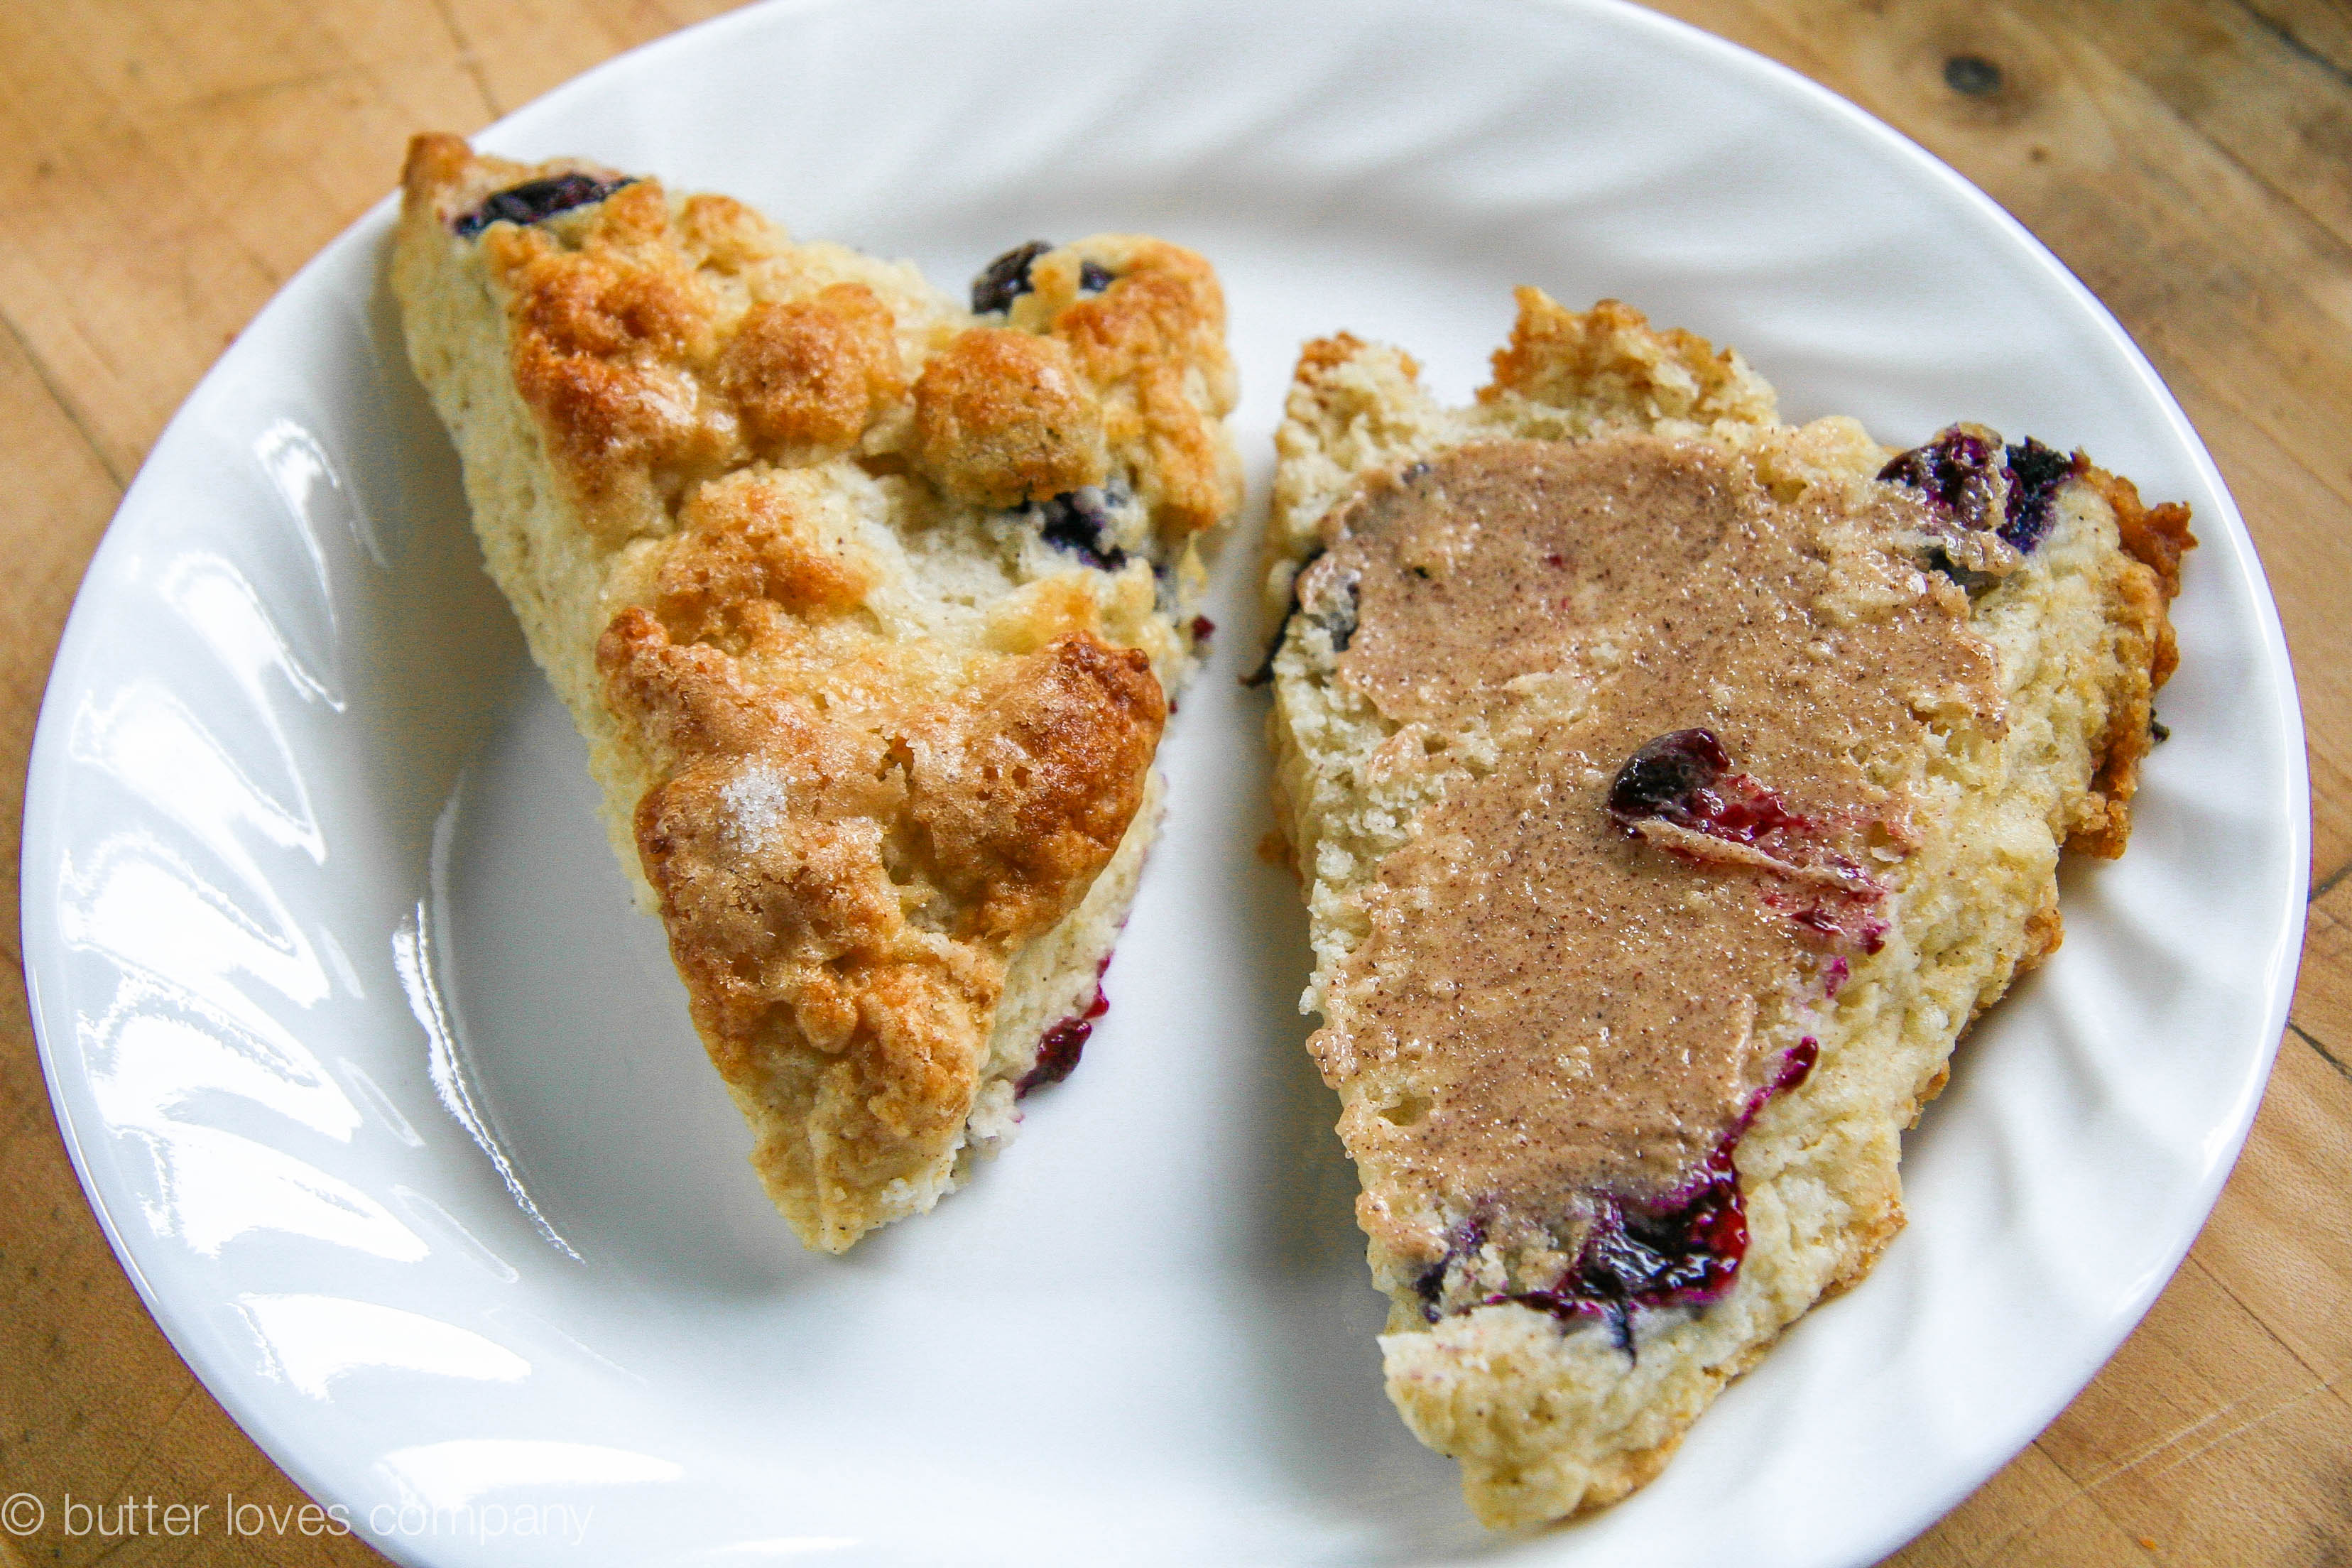
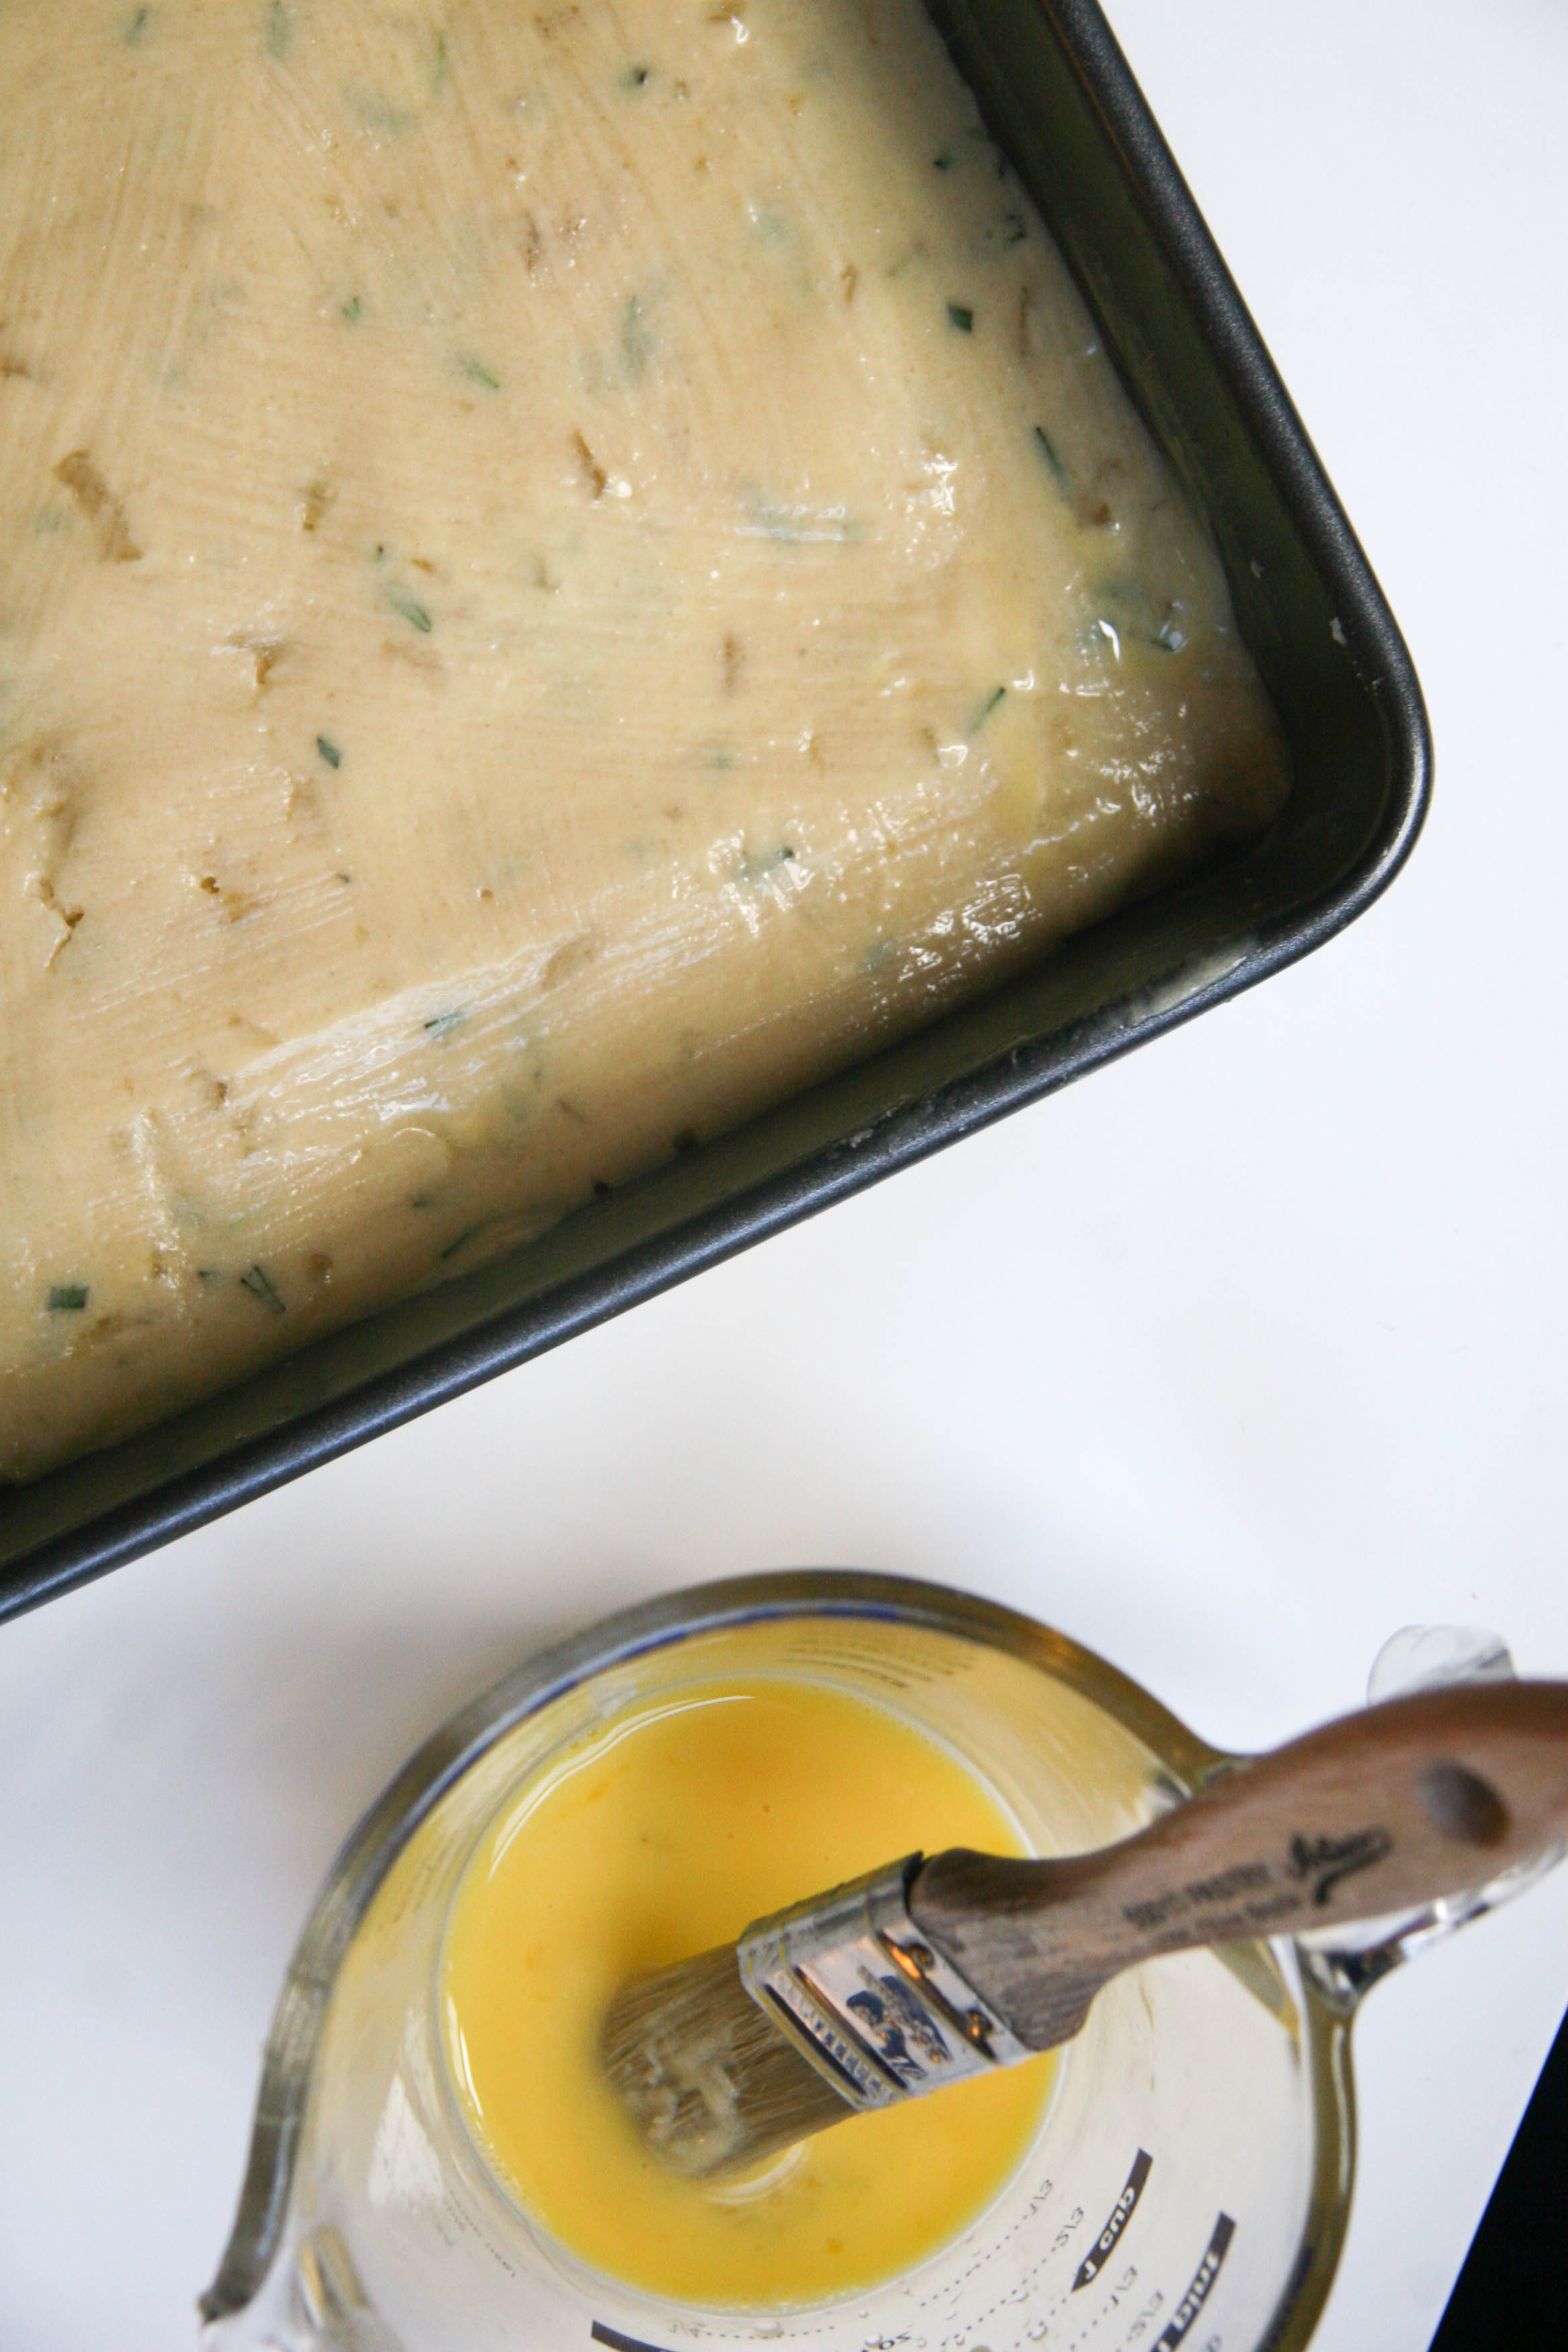
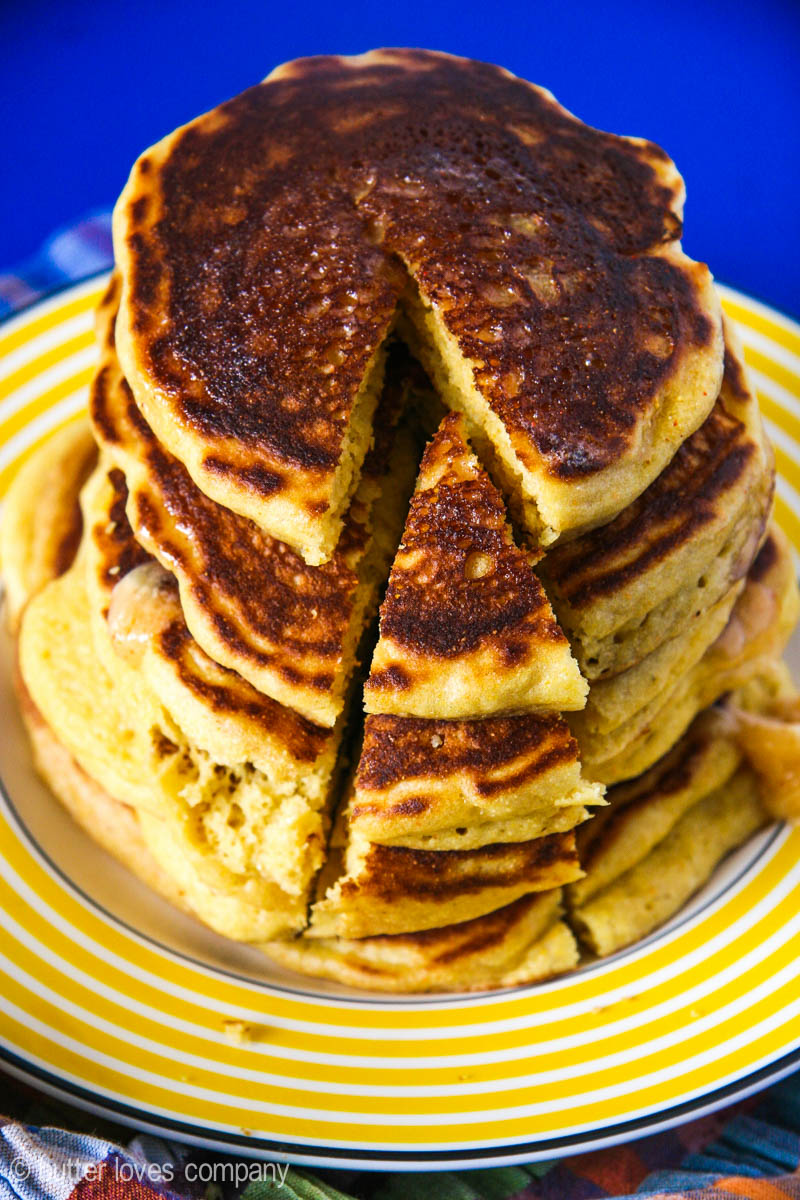
Look at that butter sliding right across the hot pancakes, yum!

cornmeal-pancakes-4

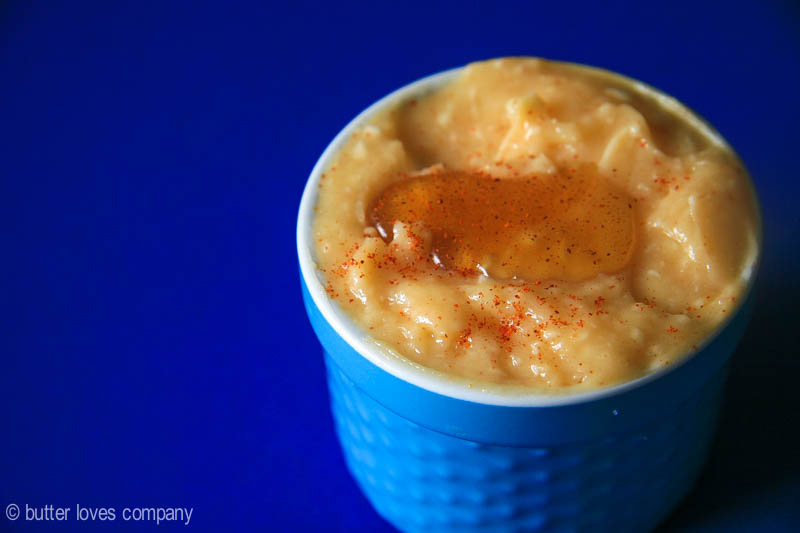
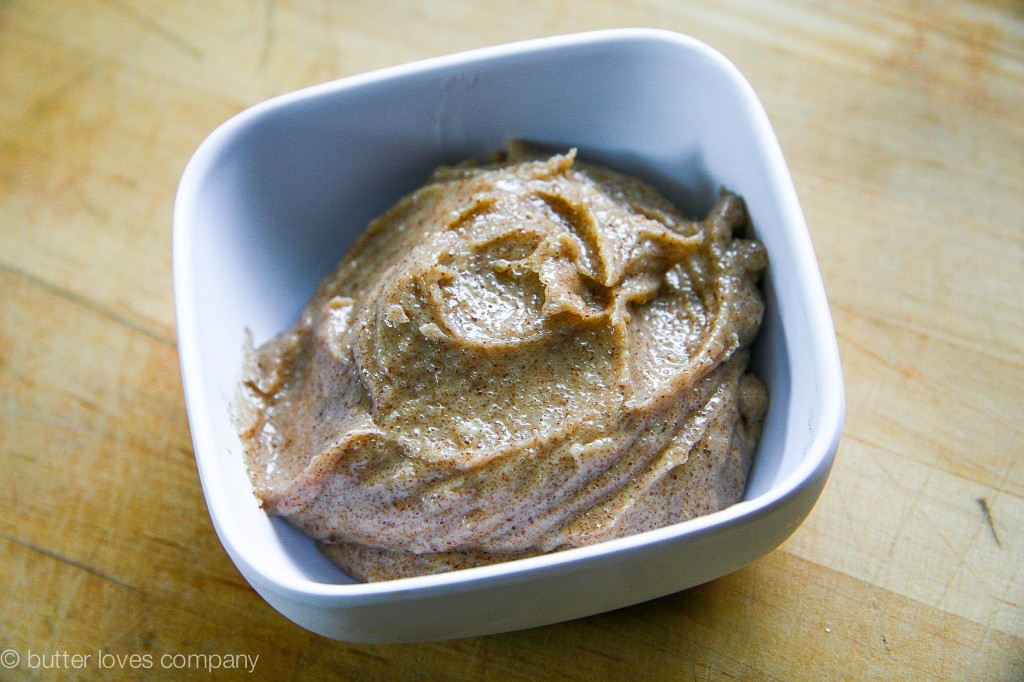
This honey cayenne butter is luscious. Make some extra to have on toast!

cornmeal-pancakes-6

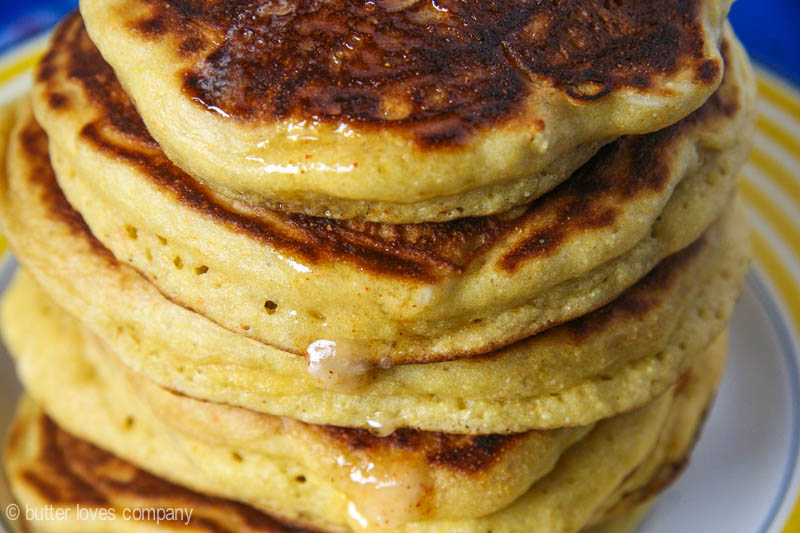
You can see some of the cayenne flecks from when the butter melted right off of this stack of pancakes…..

cornmeal-pancakes-10

Print
cornmeal pancakes with honey cayenne butter

Prep Time: 10 minutes

Cook Time: 5 minutes

Servings: about eight 5-inch pancakes

cornmeal-pancakes-7

These cornmeal pancakes have a natural sweetness and slightly grainy texture from the addition of cornmeal. They are crisp on the outside and fluffy on the inside and taste a bit like seared cornbread you may find at a BBQ joint. Don’t skip slathering with a generous smear of the creamy honey cayenne butter. The sweet heat pulls it all together!

Ingredients

  • 1 cup all-purpose flour
  • 1 cup fine cornmeal
  • 1 teaspoon baking soda
  • 1/2 teaspoon baking powder
  • 1/4 teaspoon salt
  • 1/4 cup (half a stick or 4 tablespoons) unsalted butter, melted and cooled slightly
  • 3 tablespoons honey (if you like your pancakes sweeter, use 1/4 cup)
  • 1/2 cup Greek yogurt
  • 1/2 cup milk (almond milk works fine here)
  • 1 teaspoon vanilla extract
  • 2 large eggs
    For the Honey Cayenne Butter:
  • 1/4 cup (half a stick or 4 tablespoons) unsalted butter, at room temperature
  • 1 tablespoon honey
  • 1/4 to 1/2 teaspoon ground cayenne (depending on your preferred spice level)
  • 1/4 teaspoon salt

Instructions

  1. Make the honey cayenne butter: In a small bowl, vigorously stir together the room temperature butter, honey, cayenne, and salt until it is combined and smooth. Transfer to another small serving dish, if desired. Set aside until the pancakes are ready.
  2. In a large bowl, stir together the flour, cornmeal, baking soda, baking powder, and salt until combined. Set aside.
  3. In a small bowl, mix together the melted butter and honey. Set aside.
  4. In a liquid measuring cup or another small bowl, combine the yogurt, milk, vanilla, and eggs. Whisk until combined. Add this to the flour mixture and stir to combine (it may look crumbly). Add the butter mixture to the flour and milk mixture and stir until it is evenly incorporated.
  5. Set a non-stick or cast iron skillet over medium heat and brush with oil (I’ve been using a coconut oil spray recently that I love.). Add scoopfuls of batter to the pan and cook until small bubbles come up and edges are crisp. These pancakes won’t have as many bubbles as some other pancakes. Flip each pancake and cook until lightly browned. Transfer to a plate and cover with foil to keep warm while you prepare the remaining pancakes. Serve hot with honey cayenne butter.
6.1.0
https://www.butterlovescompany.com/2015/08/20/cornmeal-pancakes-with-honey-cayenne-butter/
butter loves company | jenna larsson

cornmeal-pancakes-5

Filed Under: breakfast and breads, eat Tagged With: breakfast, butter, cornmeal, pancakes

blueberry and lemon cream tart

February 10, 2015 by Butter Loves Company

blueberry-lemon-cream-tart-5-2

Easy as pie tart? Yup. This puppy is even easier than pie! You want to know why? You know that part in pie making when you have to roll out the chilled dough and then transport it to the pie dish and, if you’re like me, you want to then slice more dough for a lattice top or try cut-outs, or patterns, or ruffles, or fringe … this is beginning to sound like the E! Grammy’s Fashion Police wrap up! Well, with this tart, you don’t have to do ANY of that! Easy pease, my friends.

Once you prepare the dough, you can just push it right into the pan with your sticky little fingers. It is a tad more crumbly than a pie crust with a texture like that of shortbread. Once you line the pan, you partially bake the dough so it can stand up to all the juicy blueberries and tart, creamy filling you’ll top it with next. The blueberries stay whole and plump up in the oven so you can pop them with your teeth as you devour a slice. Then you’ll pour a lemony Greek yogurt sauce over the sweet blueberries and bake the entire tart until the sauce sets into what is similar to a loose custard. The combination of the buttery crust, sweet blueberries, and tart lemon cream is bright, fresh, and dreamy. 

The tart holds well in the fridge for a few days and can be served cool or at room temperature. It can also be served for breakfast when you are snowed-in in Boston. I can attest to that.

blueberry-lemon-cream-tart-3

blueberry-lemon-cream-tart-1

blueberry-lemon-cream-tart-7blueberry-lemon-cream-tart-6

blueberry-lemon-cream-tart-8

blueberry and lemon cream tart
adapted from Gourmet Magazine, July 1990

prep time: 30 minutes
cook time: 60 minutes
total time: 1 hour 30 minutes (plus more for chilling dough)
Makes 1 12-Inch Tart in Pan with Removable Bottom

Ingredients:

For the crust:
2 2/3 cups all-purpose flour
1/2 cup sugar
1/2 teaspoon salt
2 sticks (1 cup) very cold, unsalted butter, cut into 1-inch cubes
2 large egg yolks, beaten with 4 tablespoons ice water
pie weights, dry beans, or raw rice for weighting the shell

For the filling:
3/4 cup plain greek yogurt
1/4 cup heavy cream
3 large egg yolks
1/2 cup granulated sugar
1 tablespoon freshly grated lemon zest
1 tablespoon fresh lemon juice
1/2 stick (1/4 cup) unsalted butter, melted and cooled
1 teaspoon vanilla extract
1/2 teaspoon salt
2 tablespoons all-purpose flour
4 cups fresh blueberries (Take a look and remove extra stems or any bluebs that look dried out.)

Instructions:

  1. Make the crust: In the bowl of a food processor, pulse together the flour, sugar, and salt. Add the chilled butter and pulse the mixture until it resembles coarse meal, about 10 pulses. Pour in the yolk and water mixture and pulse until the liquid is incorporated and the dough begins coming together. Turn the dough onto a clean surface and, using your hands, gather the dough into a ball. Wrap the ball in plastic wrap and chill for 1 hour.
  2. Grab your tart pan (with removable fluted rim) and remove chilled dough from the refrigerator. Grab small chunks of the dough at a time and push into the tart pan with your fingertips. Continue pressing the dough into the pan until you have lined the bottom and sides with dough about 1/4 inch thick. Chill the crust for at least 30 minutes in the fridge, 15 minutes in the freezer, or cover and leave overnight. Preheat your oven to 350°F. Line the inside of the tart crust with foil, fill the foil with the pie weights, dry beans or rice, and bake the shell in the middle of the oven for 25 minutes. Remove the foil and weights carefully, bake the crust for 5 to 10 minutes more, or until it is pale golden, and let it cool in the pan on a rack. Keep the oven heated at 350°F while you prepare the filling.
  3. Make the filling: In a blender, food processor, or large bowl with a vigorous hand, blend together the yogurt, cream, yolks, granulated sugar, lemon zest, lemon juice, butter, vanilla, salt, and flour until the mixture is smooth. Set aside.
  4. Spread the fresh blueberries evenly over the bottom of the par-baked tart crust. Pour the yogurt and lemon mixture over them. Bake the tart in the middle of the oven at 350°F for 30 to 35 minutes, or until the filling is just set.
  5. Let the tart cool completely in the pan on a rack. Serve at room temperature or store the tart in the refrigerator and serve chilled. Tart keeps for 4 to 5 days (keep chilled).

blueberry-lemon-cream-tart-4

Filed Under: desserts and sweets, eat Tagged With: berries, blueberry, blueberry tart, butter, citrus, easy dessert, lemon, lemon cream, pie crust, tart crust

blueberry buttermilk scones with cinnamon sugar butter

July 10, 2014 by Butter Loves Company

blueberry buttermilk scones with cinnamon sugar butter 20 copy

When spending your vacation at a house on the water, you’d better not forget to pack your bathing suit, sunscreen, aloe vera for when you inevitably get burned regardless of the sunscreen, boogie board, frisbee, Stephen King or Emily Griffin novel (pick your poison), kitchen tongs and measuring cups/spoons. You’re probably thinking those last two don’t scream ‘sand between the toes,’ but if you have access to a kitchen, these tools will make life much easier and breakfast much more delicious.

I learned from my mom that you should always travel with tongs.* The reason being, she told me, you never know what the kitchen supply situation will be. With this in mind, I decided that because of my baking obsession I should also always travel with measuring tools. You see, some vacation rentals are equipped for a chef, while others are equipped for a stack of take-out pizzas (no knock there, love me some take-out pizza). Luckily, even if you’re staying in the latter, you can make delicious homemade treats because, with just your hands, you can be quite the little bakeshop.

blueberry buttermilk scones with cinnamon sugar butter 1

You’ll already be all sandy after the beach; why not also get a little flour on your hands while making some blueberry buttermilk scones with cinnamon sugar butter? The butter—oh the butter—may be my new little obsession. It is SO easy to make, and with just just three ingredients, you can have this addictive sweet spiced spread at your disposal in no time. I’m going to start making it by the pound.

blueberry buttermilk scones with cinnamon sugar butter 2

Your cohorts will thank you when they’re slicing through the sweet, juicy blueberries in the light, buttery scone and smearing it with the cinnamon sugar butter. They may actually volunteer to make you a piña colada for your hard work. (Our little secret will be how easy the ‘work’ was, but go on, accept that island drink reward ;-))

* For clarification: this applies when you have a kitchen to work with. I did not, for example, bring tongs to Las Vegas for a girl’s weekend. That would be strange. Probably not all that surprising, but definitely strange.

blueberry buttermilk scones with cinnamon sugar butter 4

blueberry buttermilk scones with cinnamon sugar butter 5

blueberry buttermilk scones with cinnamon sugar butter 9

blueberry buttermilk scones with cinnamon sugar butter 8

blueberry buttermilk scones with cinnamon sugar butter 17

blueberry buttermilk scones with cinnamon sugar butter 15

blueberry buttermilk scones with cinnamon sugar butter 16

blueberry buttermilk scones with cinnamon sugar butter 19

blueberry buttermilk scones with cinnamon sugar butter
Adapted from M.S. Milliken & S. Feniger, 2007

Prep Time: 15 minutes
Cook Time: 16–18 minutes
Total Time: 30–35 minutes
Makes 8 large or 16 medium-sized scones

Ingredients:

3 cups all-purpose flour
1/3 cup granulated sugar
1 teaspoon salt
2 1/2 teaspoons baking powder
1/2 teaspoon baking soda
1/2 teaspoon ground cinnamon
3/4 cup (1 1/2 sticks) unsalted butter
1 cup buttermilk
1 cup fresh blueberries
1 egg lightly whipped with 1 tablespoon water (for brushing)
A dash more granulated sugar for sprinkling
Cinnamon sugar butter (recipe follows)

Instructions:

  1. Preheat oven to 400 degrees F and lightly grease a cookie sheet or line with parchment paper. Combine the flour, sugar, salt, baking powder, baking soda and ground cinnamon in a large bowl. Add butter and mix with your fingertips or with a pastry blender until it reaches a coarse meal and the butter is in pea-sized pieces or just smaller. Add buttermilk and mix until almost combined. Mix in blueberries until everything is just combined.
  2. Transfer dough to a floured board (divide into two parts if you’d like smaller scones). Roll into 1-inch thick rounds for larger scones or into 3/4-inch thick rounds if you divided the dough and are making smaller scones. Cut each round into 8 wedges and place slightly separated onto the prepared baking sheet. Brush the tops of the scones with the egg mixture, sprinkle each lightly with sugar and bake for 16–18 minutes, or until lightly browned. Serve warm, split in half with a smear cinnamon sugar butter.

cinnamon sugar butter

makes 1/4 cup

Ingredients:

1/4 cup butter, softened at room temperature (I use salted, but if you use unsalted, add a dash of salt)
2 tablespoons light brown sugar
3/4 teaspoon ground cinnamon

Instructions:

  1. In a small bowl, stir together butter, light brown sugar and ground cinnamon until completely combined and fluffy. Chill and serve.

Filed Under: breakfast and breads, eat Tagged With: blueberry, breakfast, butter, buttermilk, cinnamon, easy, scones, sugar

candied ginger rosemary triangles

April 9, 2014 by Butter Loves Company

rosemary candied ginger cookies13A candied ginger dotted shortbread/brownie-like bar filled with fresh, fragrant rosemary for a slightly sweet treat.

Back when I was a shy little pig-tailed girl, I had absolutely no interest in these. My mom always made them at Christmas, forcing the herby bar to compete for my attention in a house that may as well be the Olympic stadium of the holiday dessert games (see Cinnamon Pinwheel Cookies).

In first place, with 80 kajillion points, our gold medalist, Whoopie Pies! In second place, with 70 kajillion, Grandma’s Apple Pie! And so on and so forth, until you finally get to the Candied Ginger Rosemary bars, who barely got a consolation prize.

“Bleh!” I would say, “Why would anyone ruin perfectly delicious treats by putting rosemary and ginger bars next to them?!”

To pre-teen Jenna, they screamed pinkies up, foo foo, chi-chi, museum-enthusiast adult.

rosemary candied ginger cookies3

Flash forward to two years ago: I was home baking with my mom for Christmas and she asked me to make a batch of these. I think I ate 2–3 immediately (let’s be honest, it was 4–5) and then found myself reaching for them even on Christmas Eve. They were right next to the whoopie pies, so that is huge.

rosemary candied ginger cookies4

I had grown up to appreciate the freshness of chopped rosemary, the slight spice and chew of candied ginger, and the harmonious interplay between these two flavors in this subtly sweet bar. Its texture is similar to that of a buttery shortbread/brownie hybrid. The candied ginger makes it chewy and the rosemary aroma emerges every time you take a bite. They can be served as a dessert, but I’d also like to try them served with appetizers.

Have any of you had “consolation prize” foods you’ve grown to love over time? I’d love to hear about them!

osemary candied ginger cookies6

rosemary candied ginger cookies7

rosemary candied ginger cookies9

rosemary candied ginger cookies10

osemary candied ginger cookies12

candied ginger rosemary triangles
Author: butter loves company
Prep time: 15 mins
Cook time: 25 mins
Total time: 40 mins
Serves: makes 32 triangles
A candied ginger dotted shortbread/brownie-like bar filled with fresh, fragrant rosemary for a slightly sweet treat.
Ingredients
  • 2 sticks unsalted butter, softened
  • ¾ cup plus 2 tablespoons sugar
  • 2 cups flour
  • ½ teaspoon salt
  • 2 large eggs, one beaten lightly, the other reserved for egg wash
  • ½ cup finely chopped crystallized ginger
  • 1 tablespoon chopped fresh rosemary (or 1½ tablespoons dried rosemary)
Instructions
  1. Preheat oven to 350 degrees. Set aside an 8 x 8 inch baking pan (You do not need to butter or coat it with non-stick baking spray.)
  2. In a large bowl, or the bowl of an electric mixer fitted with a paddle attachment, beat together the butter and sugar on medium speed until light and fluffy.
  3. In a medium bowl, sift together flour and salt. Gradually beat this flour mixture into the butter mixture on low speed until just combined. Add the one lightly beaten egg. Beat in ginger and rosemary until just combined. Press the dough evenly into the 8 x 8 inch baking pan (it will be thick).
  4. In a small bowl, beat remaining egg with 1 tablespoon water to make an egg wash and brush on dough. Bake in the middle rack of oven for about 25–30 minutes or until a toothpick poked in the center of the dough comes out clear. Cool in the pan on a rack then cut into triangles.
  5. May be made 5 days ahead, chilled and covered. May also be frozen in an airtight container for up to 1 month.
3.2.1275


Filed Under: desserts and sweets, eat Tagged With: butter, candied ginger, cookie, ginger, not-too-sweet, rosemary, shortbread

broyé (salted butter table cookie)

March 23, 2014 by Butter Loves Company

A large, rustic, buttery, salty cookie adorned with a pretty crosshatch meant to be shared at your table (although, it does not need to be!)

broye cookie 1

I am obsessed with this.

Yes, it may only have 5 ingredients and sounds pretty basic, but I just love everything about this recipe. The simple, buttery, salty, crunchy yet tender cookie is one you keep reaching back for until you “accidentally” eat the entire thing. But, what I love most, perhaps even more than its taste, is its sheer concept. The large, rectangular cookie is intended for sharing with many on the center of your table, each guest breaking off his or her portion as you sit and enjoy each other’s company.

On a table, this little rustic guy is somehow casually dramatic.

In her book Around My French Table, Dorie Greenspan explains the broyé, meaning crushed cookie in French, is a tradition in the butter loving Poitou region of western France. Although I’ve never been there, if this cookie is a staple, I could see myself calling the region “home.”  The cookie can be made with flaky or coarse sea salt, or sel gris, for a noticeably salty flavor between sweet, buttery bites, but can also be made with table salt.

broye cookie 2

broye cookie dough

broye cookie 3

broye cookie 4

broye cookie 5

broye cookie 6

broyé (salted butter table cookie)
Recipe Type: cookies
Cuisine: dessert
Author: adapted from Dorie Greenspan
Prep time: 1 hour 10 mins
Cook time: 25 mins
Total time: 1 hour 35 mins
Serves: 6-8
A large, rustic, buttery, salty cookie adorned with a pretty crosshatch meant to be shared at your table (although, it does not need to be!)
Ingredients
  • 1 ¾ cups unbleached all purpose flour
  • 2/3 cups granulated sugar
  • ¾–1 teaspoon sel gris or kosher salt
  • 9 tablespoons (1 stick plus 1 tablespoon) cold unsalted butter, cut into 18 pieces
  • 3–6 tablespoons cold water
  • 1 egg yolk, for glazing
Instructions
  1. Put the flour, sugar and salt in the work bowl of a food processor and pulse to combine. Drop in the butter and pulse until the butter is in both pea-sized pieces and some in small flakes, about 8 to 9 one-second pulses. With the machine running, start adding the cold water gradually; adding just enough water to produce a dough. To test, you can stop the processor and feel the dough to determine if it has become malleable.
  2. Scrape the dough onto a work surface or a large piece of plastic wrap. Form it into a ball and then pat it down slightly into a disk. Wrap tightly with plastic and refrigerate for about 1 hour (the dough can now be refrigerated for up to 3 days or frozen for up to 2 months.)
  3. When you’re ready to bake, center a rack in the oven and preheat the oven to 350 degrees. Line a baking sheet with a silicon mat or parchment paper.
  4. Remove the dough from the fridge. Place the dough between 2 sheets of plastic wrap or wax paper and, with a rolling pin, roll it into a rectangle that’s about ¼ inch thick and about 5 inches wide x 11 inches long. Keep in mind, it should be rustic! Don’t worry about exact size or even edges. Transfer the dough to the lined baking sheet.
  5. Beat the egg yolk with a few drops of water to create the glaze, and, with a pastry brush, paint the top surface of the dough with the glaze. Use the back of a fork to create a crosshatch pattern.
  6. Bake the cookie for 25 to 35 minutes, or until it is golden (check fairly often as mine was done after just 25 minutes). It will be firm around the edges, but may have a spring in the center. Transfer the baking sheet to a rack and cool the cookie to room temperature.
  7. To serve: place the cookie in the center of your table and let your friends and family reach their hands in and crack off pieces.
3.2.1275


Filed Under: desserts and sweets, eat Tagged With: baking, butter, cookie, crowd, easy, french, recipe, salt, sugar cookie

Welcome!

jenna of butterlovescompany

Pull up a chair

Hi! I’m Jenna. Story seeker, food lover, recipe developer based in NYC. Firm believer in making every day delicious! Read more…

looking for something?

  • Email
  • Facebook
  • Instagram
  • Pinterest
  • RSS
  • Twitter

Latest Posts

  • Freezer Meals to Make Before Baby: How We Meal Prepped Before Baby
  • mom’s famous spiced pecans
  • funfetti cookie dough truffles (no-bake)
  • maple coconut cookies
  • snickerdoodle blondies

popular now

strawberry cinnamon rolls
braised short rib pasta sauce (short rib ragu)
rosemary honey buttermilk biscuits
peach blueberry pie
chocolate marble loaf cake
bourbon banana bread

grammin’

Let’s get ready to bake throughout the holidays! Let’s get ready to bake throughout the holidays! I’ve teamed up with @lucky_leaf_fruit_filling, @diamondnuts and #Kids360 to give away some delicious baking ingredients to make your spirits bright this season. 

To enter:
-Follow @lucky_leaf_fruit_filling, @diamondnuts and @butterlovescompany
-Comment and tag a friend and the name of your favorite holiday dessert
-Enter by December 1. Winner will be selected at random and DM’d! 

You’ll win: 
•(1) Can of Lucky Leaf Premium Blueberry Filling
•(1) Can of Lucky Leaf Premium Apple Filling
•(1) Can of Lucky Leaf Premium Cherry Filling
•(1) Can of Lucky Leaf Premium Strawberry Filling
•(1) Can of Lucky Leaf Premium Peach Filling
•(1) Recipe Book
•(2) Dish Towels
•(1) Pot-Holder
•(1) Picnic Basket

#ad NO PURCHASE NECESSARY. Open to legal residents of the United States (including its commonwealths, territories, and possessions) who are legal age of majority. Enter by 11:59 pm ET on December 1, 2021. Odds of winning depend on # of entries received. Void where prohibited. This is not sponsored or endorsed by Instagram or Facebook.
This was the best photo we could get with an alway This was the best photo we could get with an always moving toddler. 🥸 Happy Thanksgiving to you and yours! ♥️
Something that the past year or so has taught me: Something that the past year or so has taught me: stock your pantry! Having a stocked kitchen has made it super easy to cook and bake without having to run out to the store. Crucial when you get a craving for an Apple Walnut Cake and need to make one stat. With @lucky_leaf_fruit_filling and @diamondnuts, you can put together a delicious cake SO easily with no peeling and slicing of apples. 🍎🌰You get all the beautiful warm spice flavor with sweet, tart apples, and crunchy, hearty walnuts. #ad Get the recipe below: 

Apple Walnut Cake

* 1 box (15.25 oz.) spice cake mix
* 1 can (21 oz.) Lucky Leaf® Premium Apple Fruit Filling
* 2 large eggs
* 1 tbsp. pure vanilla extract
* 1/4 cup whole milk
* 1/4 cup brown sugar
* 1 tsp. ground cinnamon
* 1/2 cup finely chopped Diamond of California® Shelled Walnuts
* 1 container (8 oz.) whipped topping, thawed

Instructions
1. Preheat oven to 350° F and grease 9x13-inch pan. 
2. Combine dry cake mix, apple filling, eggs, vanilla & milk in large bowl. Beat for 2 minutes. Spread half of the batter in the pan. 
3. Make the Walnut Cinnamon filling: Combine brown sugar, cinnamon and walnuts. Sprinkle half the mixture on top of batter. Top with remaining batter and then sprinkle remaining walnut mixture on top.
4. Bake cake for 28-33 minutes. Cool cake. Top with whipped topping and sprinkle with walnut pieces.

Don’t miss my upcoming chance to W I N with #kids360, Diamond and Lucky Leaf!
Spiced pecans, wedding cookies, chocolate turtles, Spiced pecans, wedding cookies, chocolate turtles, pecan pie, sticky buns…just a few of the treats on my standard holiday baking agenda. What do they have in common? NUTS! @diamondnuts are a staple around here for the holidays (and all year, let’s be honest) and I want to share the love. Thanks to Diamond and #kids360, we are giving someone ✨15 FREE product coupons for @diamondnuts ✨to help you bake your holiday treats this year. Go nuts!

To enter:
* Follow @diamondnuts and @butterlovescompany
* Comment and tag a friend who deserves a day off to go nuts! 
* Enter by end of day November 25th. Winner will be selected at random and DM’d! 

#ad NO PURCHASE NECESSARY. Open to legal residents of the United States (including its commonwealths, territories, and possessions) who are the legal age of majority. Enter by 11:59 pm ET on November 25, 2021. Odds of winning depend on # of entries received. Void where prohibited. This is not sponsored or endorsed by Instagram or Facebook.
No gimmicks, no “just for the ‘gram” razzle No gimmicks, no “just for the ‘gram” razzle dazzle here. Just really good chocolate chip cookies.🍪
Fun fact: Layered Magic Cookie Bars were one of th Fun fact: Layered Magic Cookie Bars were one of the first things I ever baked. Making them again with @diamondnuts makes me super nostalgic. Brought me directly back to middle school. Watch out or you may find me in butterfly clips doodling I <3 SOS on my binder soon. There is a reason this recipe is awesome: first, the cookie bars are incredibly delicious. And, second, they are SO easy to put together. Honestly, they are the PERFECT treat to make with your kids. Pecans and walnuts give the bars the best crunch, nuttiness, and heartiness. You could totally customize if there is a certain kind of jam you love, or a combination of nuts that the family loves. #ad Get the recipe below: 

Seven Layer Magic Cookie Bars

* 1/2 cup (1 stick) butter, melted
* 2 cups graham cracker crumbs
* 1 cup raspberry jam
* 1 cup shredded coconut
* 1 cup Diamond of California® walnuts
* 1 cup Diamond of California® pecans
* 1 cup semi-sweet or bittersweet chocolate chips
* 1 (14-ounce) can sweetened condensed milk

Instructions
1. Preheat oven to 350°F. To toast walnuts and pecans, spread evenly on a baking sheet or in a shallow pan. Bake, stirring once or twice, until lightly browned and fragrant, 7 to 10 minutes. Line a 9×13-inch pan with parchment paper.
2. In a medium bowl, combine the melted butter and graham cracker crumbs; mix well. Transfer the crumbs to the prepared pan and using your finger tips, or the flat bottom of a small measuring cup, press firmly and evenly on the bottom of the pan. Spread the raspberry jam evenly over the crumbs. Sprinkle coconut in an even layer over the jam, followed by the chocolate chips, walnuts and pecans. Drizzle the condensed milk evenly over the top.
3. Bake until bubbling and golden brown, 30-35 minutes. Let cool completely in the pan. If lined with parchment, lift out and place on a cutting board. With a sharp knife, cut into bars.

Look out for an upcoming chance to ✨ w i n ✨with @diamondnuts and #kids360!
Raise your hand if you could use a cup of coffee. Raise your hand if you could use a cup of coffee. 🙋 We are giving away some @timhortonsus coffee goodies so you can get your cozy cool morning on with Canada’s favorite cup of joe. Make my Pumpkin Coffee Coffee Cake for a buzzy morning snack or just brew a strong cup for a little pep in your step (as tired parents over here, we could surely use it). 🍂

To enter:
● Follow @butterlovescompany and @timhortonsus
● Comment and tag a friend you would love to grab coffee with ☕ (each comment=1 entry)
● Enter by midnight November 18. Winner will be selected at random and DM’d!
 
You’ll win:
•(1) Colombian Ground Coffee
•(1) Dark Roast Ground Coffee
•(1) Decaf Ground Coffee
•(1) Whole Bean Original Blend Coffee
•(1) Keurig Variety 30-Pack
•(1) Mug
•(1) Branded Notebook
•(1) Branded Baseball Cap
 
 
ad #timhortons #kids360 NO PURCHASE NECESSARY. Open to legal residents of the United States (including its commonwealths, territories, and possessions) who are legal age of majority. Enter by 11:59 pm ET on November  18, 2021. Odds of winning depend on # of entries received. Void where prohibited. This is not sponsored or endorsed by Instagram or Facebook.
Can’t beat a classic. 🥧 Apple streusel pie fo Can’t beat a classic. 🥧 Apple streusel pie for yesterday’s friendsgiving.🥰 Grateful for time with friends enjoying great food. Remy had so much fun playing that he slept until 7am so we are hopefully out of the 4am daylight savings nightmare (knock on wood). 

Sunday includes a farmers market bop, movies, and cooking for the week. Wouldn’t change a thing. 🥳
Cannot. Get. Enough. Fall. Baking. Who’s with me Cannot. Get. Enough. Fall. Baking. Who’s with me? 🍁  This coffee cake packs a punch because it is made with @timhortonsus brewed coffee in the batter and the glaze. A true *coffee* cake. The texture is dreamy and the coffee is perfectly balanced and smooth. It is goood. #ad Get the recipe below:
 
Pumpkin Coffee Coffee Cake
 
Topping
● 2/3 cup granulated sugar
● pinch of salt
● 2/3 cup flour
● 1 teaspoon cinnamon
● 4 tablespoons butter, melted

Filling
● 1/3 cup brown sugar, packed
● 1 teaspoon cinnamon
● 1 teaspoon unsweetened cocoa powder, optional

Cake
● 1/3 cup vegetable oil
● 2 large eggs, at room temperature
● 1 cup granulated sugar
● 1 cup pumpkin purée
● 1 teaspoon pumpkin pie spice
● 1 teaspoon salt
● 1 teaspoon baking powder
● 1/2 cup brewed @timhortonsus Coffee
● 2 cups flour

Glaze
● 1 cup powdered sugar
● 2 tablespoons brewed @timhortonsus coffee
 
Instructions
1. Preheat the oven to 350°F and grease an 8 inch square pan and line with parchment.
2. Make topping: Stir together the sugar, salt, flour, cinnamon, and melted butter until combined into pea sized lumps. Stirring just until well combined. Set aside.
3. Make filling: Mix together the brown sugar, spice, and cocoa powder. Set it aside.
4. Make cake: Beat together the oil, eggs, sugar, pumpkin, pie spice, salt, and baking powder until smooth. Add the brewed coffee followed by the flour, alternating in two additions, and stir until combined.
5. Spread half the batter into the prepared pan. Sprinkle the filling evenly on top of the batter. Top with the remaining batter. Sprinkle the topping over the batter in the pan.
6. Bake until a toothpick inserted into the center comes out clean, about 40 to 45 minutes. Let cool.
7. Make glaze: Combine the powdered sugar and brewed coffee until smooth and thick but drizzle-able. Using a fork, drizzle it over the cake.

Don’t miss our upcoming chance to ⚡️W I N⚡️ thanks to @timhortonsus and #Kids360!

#timhortons #kids360fanclub
One of the hardest parts about being a working mom One of the hardest parts about being a working mom is how little time you get to spend with your sweet bean during the week. Between wake up and getting to daycare, to pickup and bedtime it’s often an hour at best (which is also filled with making dinner, bath time, etc). I soak up ALL the minutes and the weekends are an absolute snuggle and play fest. It’s so tough though! If you are in the same boat, know that you aren’t alone and you’re doing a good job!! ♥️

This photo has nothing to do with this but I made the cookies for our neighbors and regretting not keeping one for myself right now. 😬🤣
✨W I N !✨ I’ve teamed up with @nielsenmassey ✨W I N !✨ I’ve teamed up with @nielsenmassey and #Kids360 to give away some seriously amazing ingredients to make your desserts sing. 🎶 I love their products and have been using them for years—the vanilla is 💯!!
 
To enter:
● Follow @nielsenmassey and @butterlovescompany 
● Comment and tag a friend you’d love to bake with
● Enter by Thursday November 11th. Winner will be selected at random and DM’d!
 
You’ll win:
•(1) Madagascar Bourbon Pure Vanilla Powder
•(1) Madagascar Bourbon Pure Vanilla Sugar
•(1) Ugandan Pure Vanilla Extract
•(1) Pure Coffee Extract
•(1) Pure Peppermint Extract
•(1) Rose Water
•(1) Pure Lemon Extract
•(1) Tahitian Two Vanilla Beans
•(1) Tahitian Pure Vanilla Extract
•(1) Mexican Two Vanilla Beans
•(1) Mexican Pure Vanilla Extract
•(1) Madagascar Bourbon Two Vanilla Beans
•(1) Madagascar Bourbon Pure Vanilla Extract
•(1) Madagascar Bourbon Pure Vanilla Bean Paste
•(1) Orange Blossom Water
•(1) Pure Orange Extract
•(1) Pure Almond Extract
•(1) Pure Chocolate Extract
.
#ad NO PURCHASE NECESSARY. Open to legal residents of the United States (including its commonwealths, territories, and possessions) who are legal age of majority. Enter by 11:59 pm ET on November  11, 2021. Odds of winning depend on # of entries received. Void where prohibited. This giveaway is not sponsored or endorsed by Instagram or Facebook.
Brainstorming dessert recipes for Thanksgiving and Brainstorming dessert recipes for Thanksgiving and it’s hard not to think about this Black Forest Pie. 🍒🍫 It was such an indulgent tart-sweet chocolate-y treat. It has a chocolate all butter pie crust, a layer of dark chocolate ganache, a layer of chocolate pudding, a cherry topping, and whipped cream. Oh, and a cherry on top! Recipe is from @emcdowell #thebookonpie! 

This one *might* be too rich for the menu but there WILL be pie (duh)🥧. What kind of pie do you need to have on your Thanksgiving table?
This error message is only visible to WordPress admins
Hi! I'm Jenna, founder of butter loves company. From holidays to Tuesdays, let's find a way to make every meal special.
  • Email
  • Facebook
  • Instagram
  • Pinterest
  • RSS
  • Twitter
a2f54ba1dcf0635e58c8be4aa2035ce84863a9d9606a428ab3

© 2013-2019 BUTTER LOVES COMPANY, LLC.

Copyright © 2025 · Foodie Pro Theme by Shay Bocks · Built on the Genesis Framework · Powered by WordPress