butter loves company

new york food blogger and lifestyle influencer

  • home
  • Recipes
  • travel
  • lifestyle
  • cookie orders
  • about
  • contact

my favorite strawberry rhubarb pie

May 30, 2014 by Butter Loves Company

strawberry rhubarb pie 12

You know those people who know everything there is to know about fresh produce? The ones who can tell you exactly which plant is a perennial versus an annual, which grows better in the shade than the sun and which should be under-watered versus over-watered? The farmer’s market-aficionados who know which is the best time of the year, the month or the week to buy every fruit or veggie because that’s when it’s at the peak of freshness?

I do.

And nope, I’m definitely not one of them.

I’m the puppy who follows those people around the farmer’s market looking for tips. Maybe one day, I’ll (creepily) collect enough pointers to come close to being one of those people, but, for now, I’m the one who stands behind them and says, “I’ll have a pound of that too!”

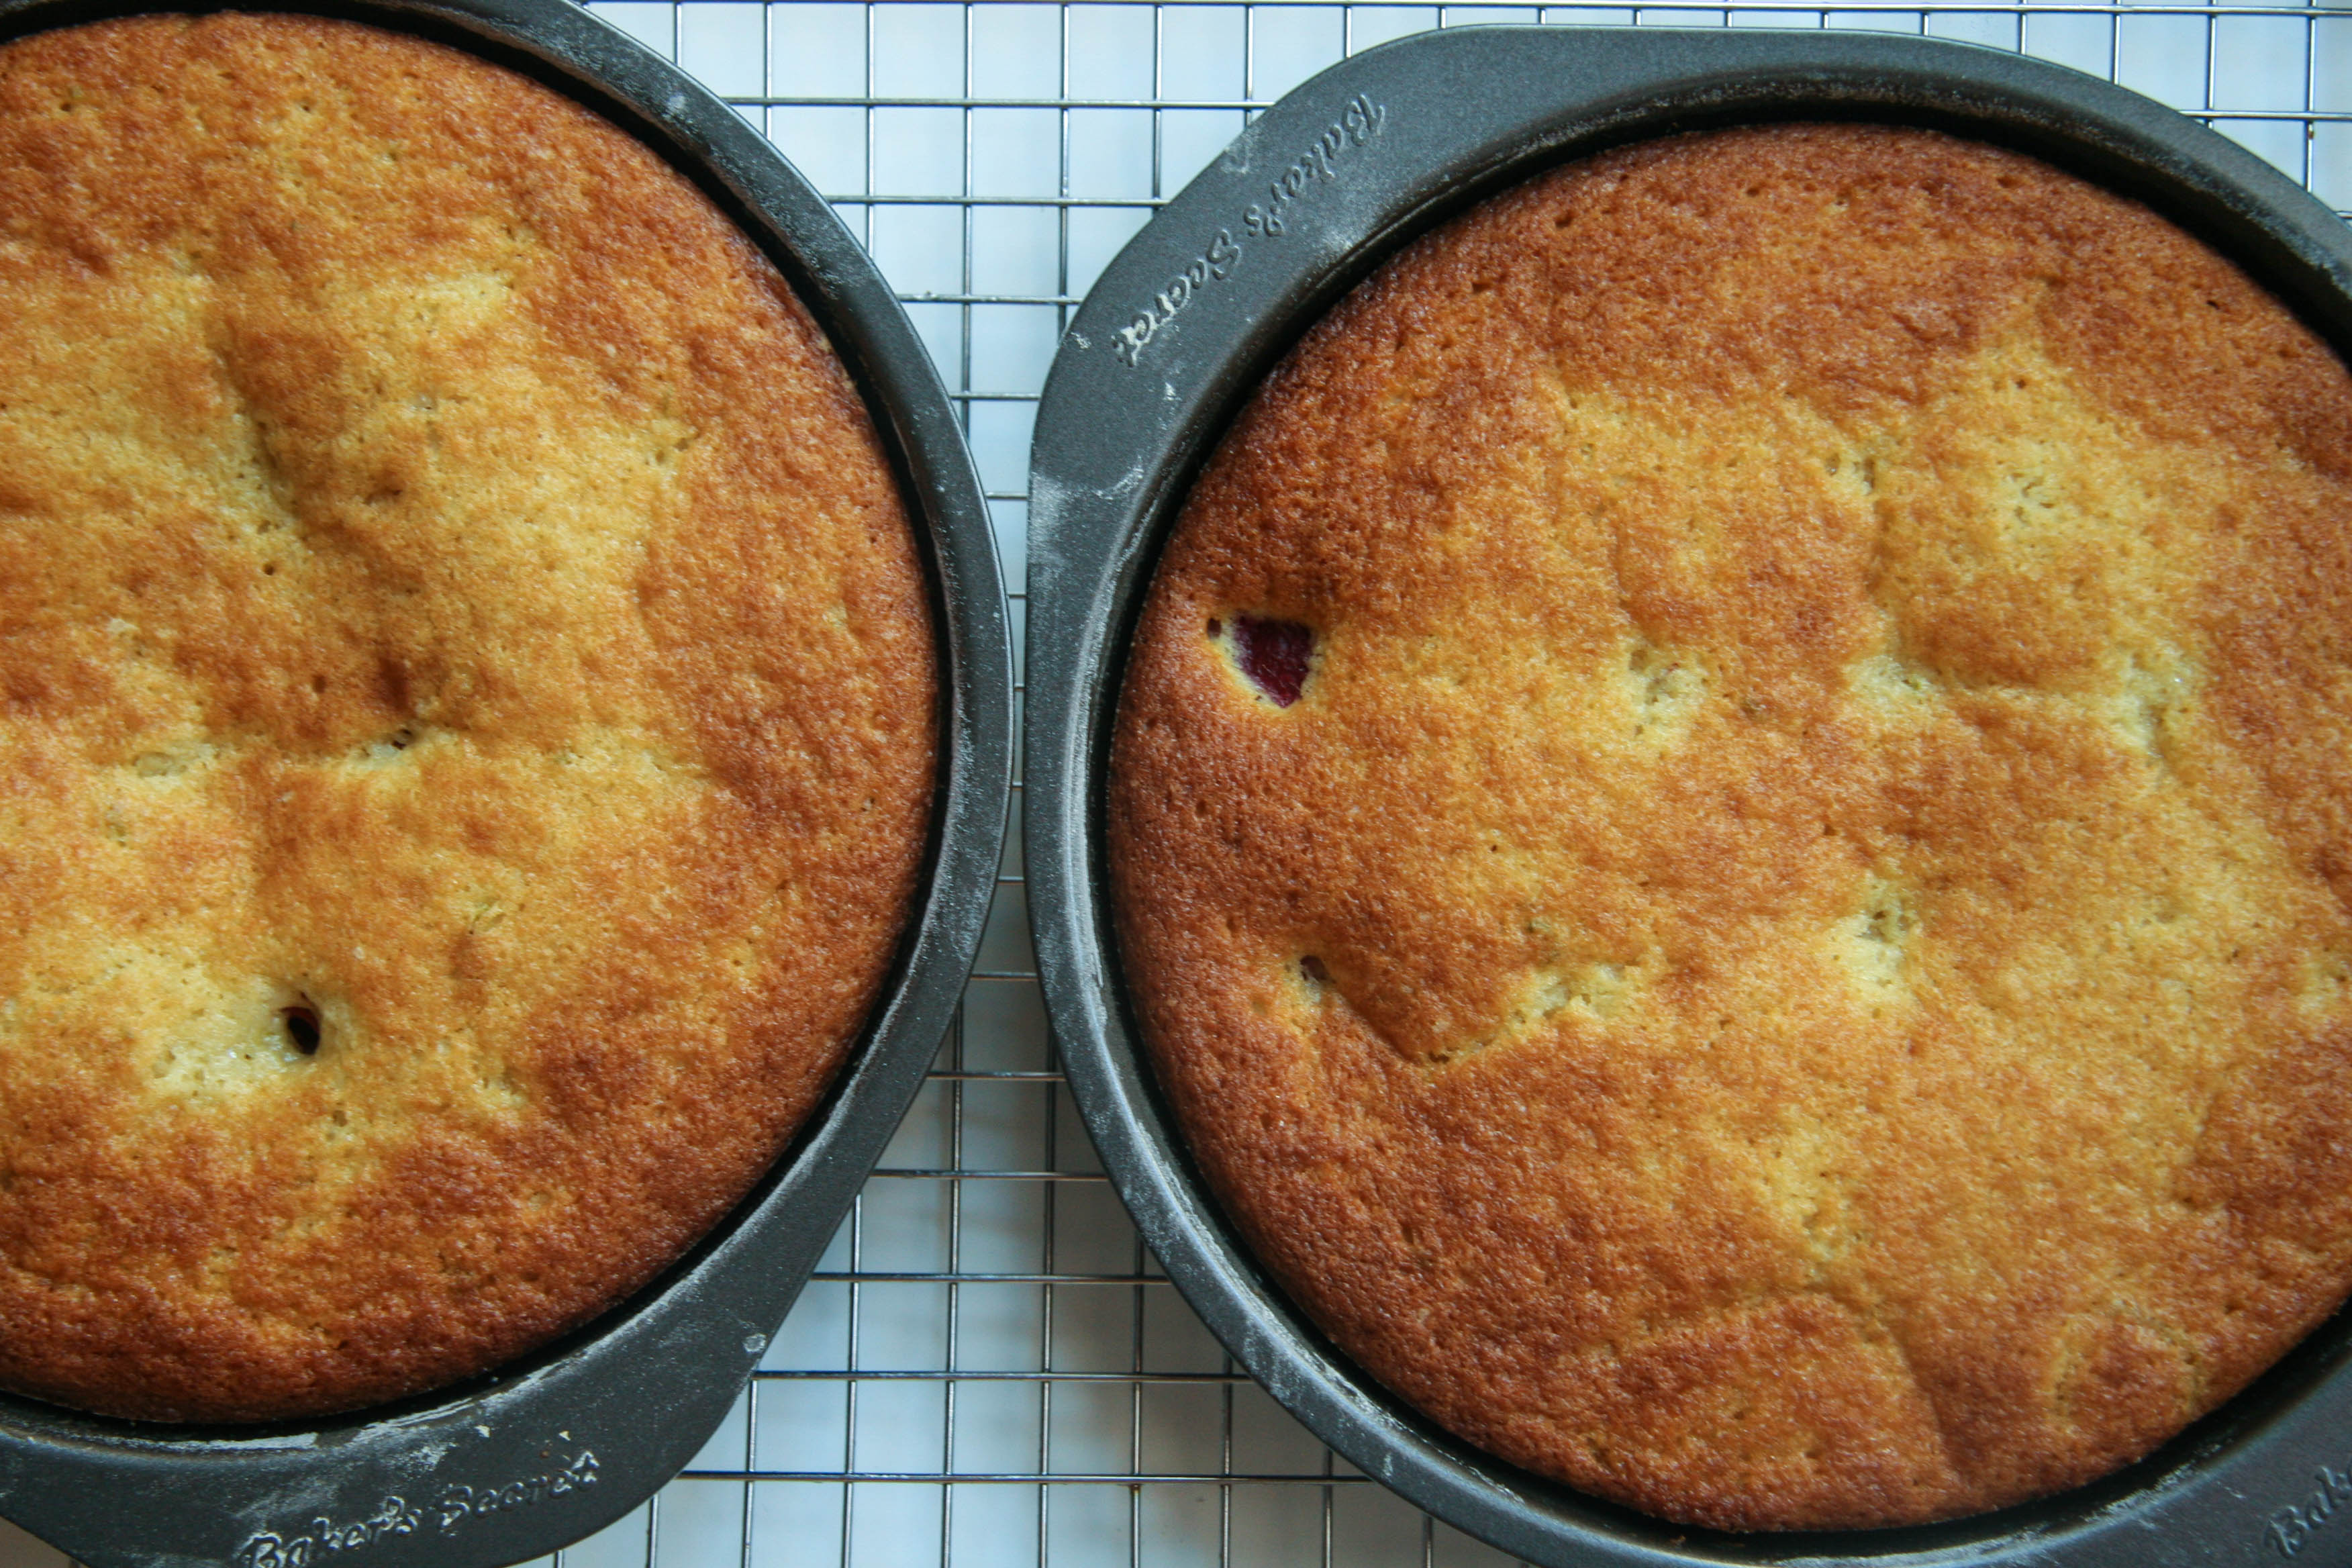
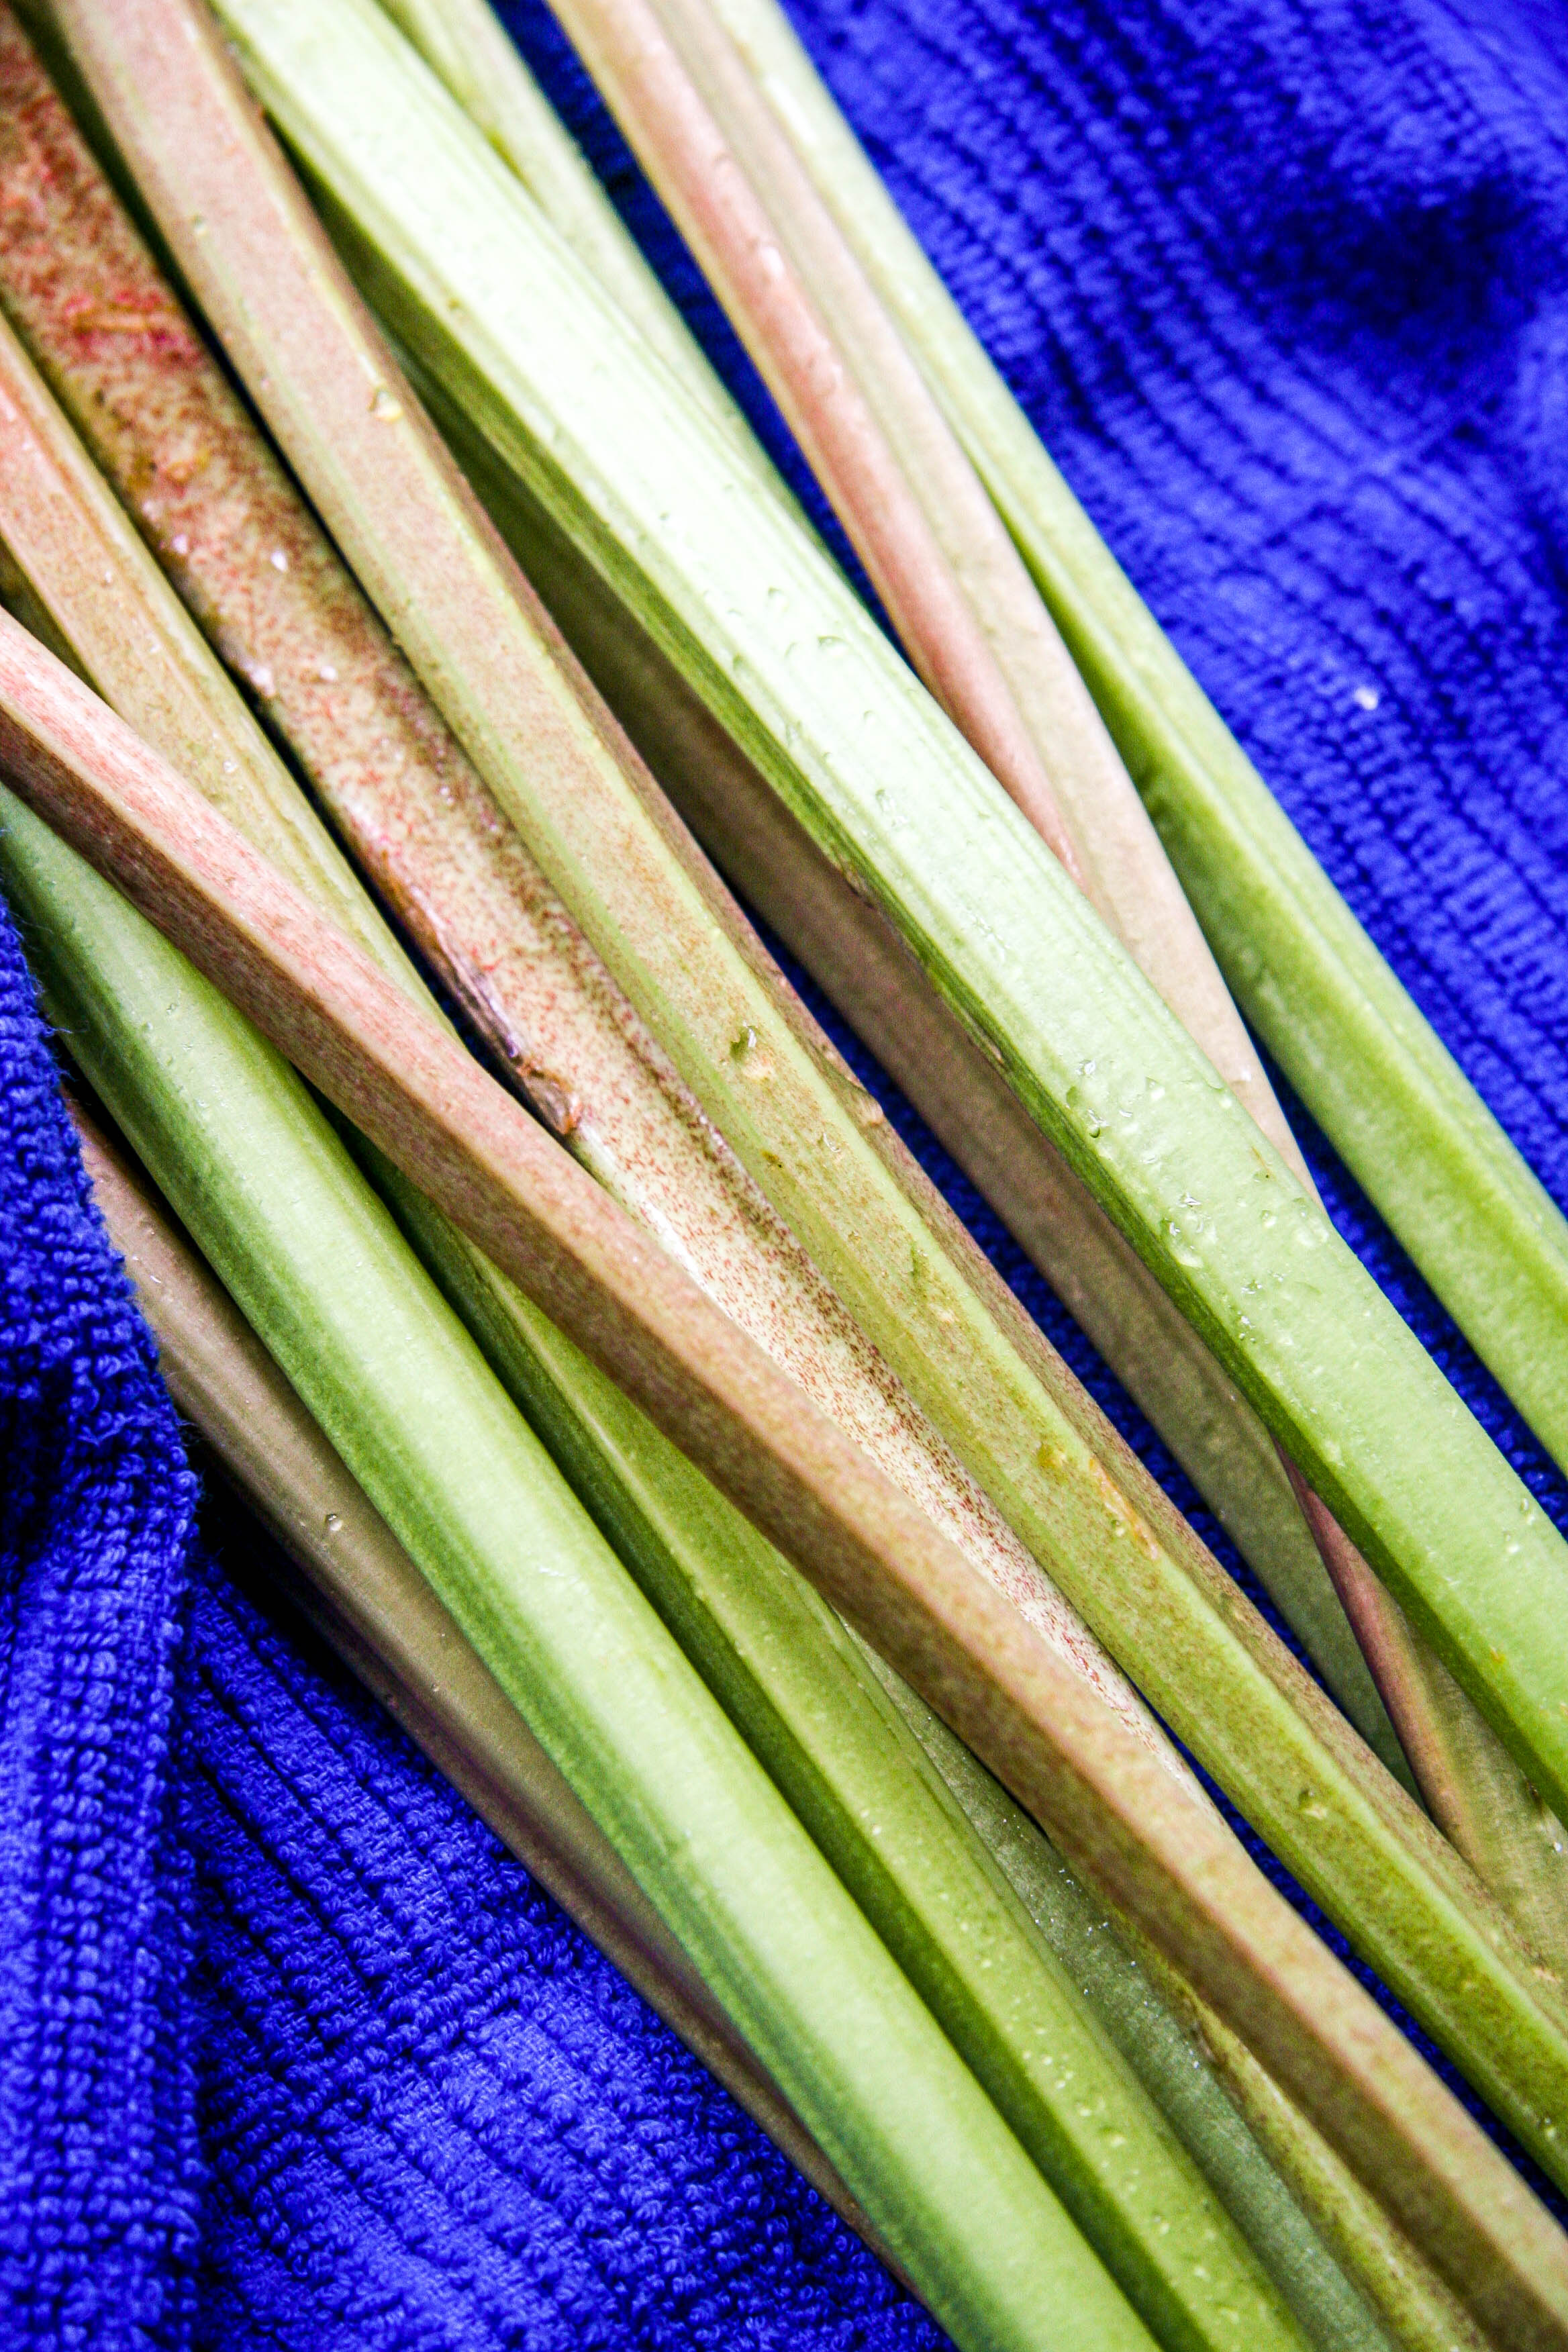
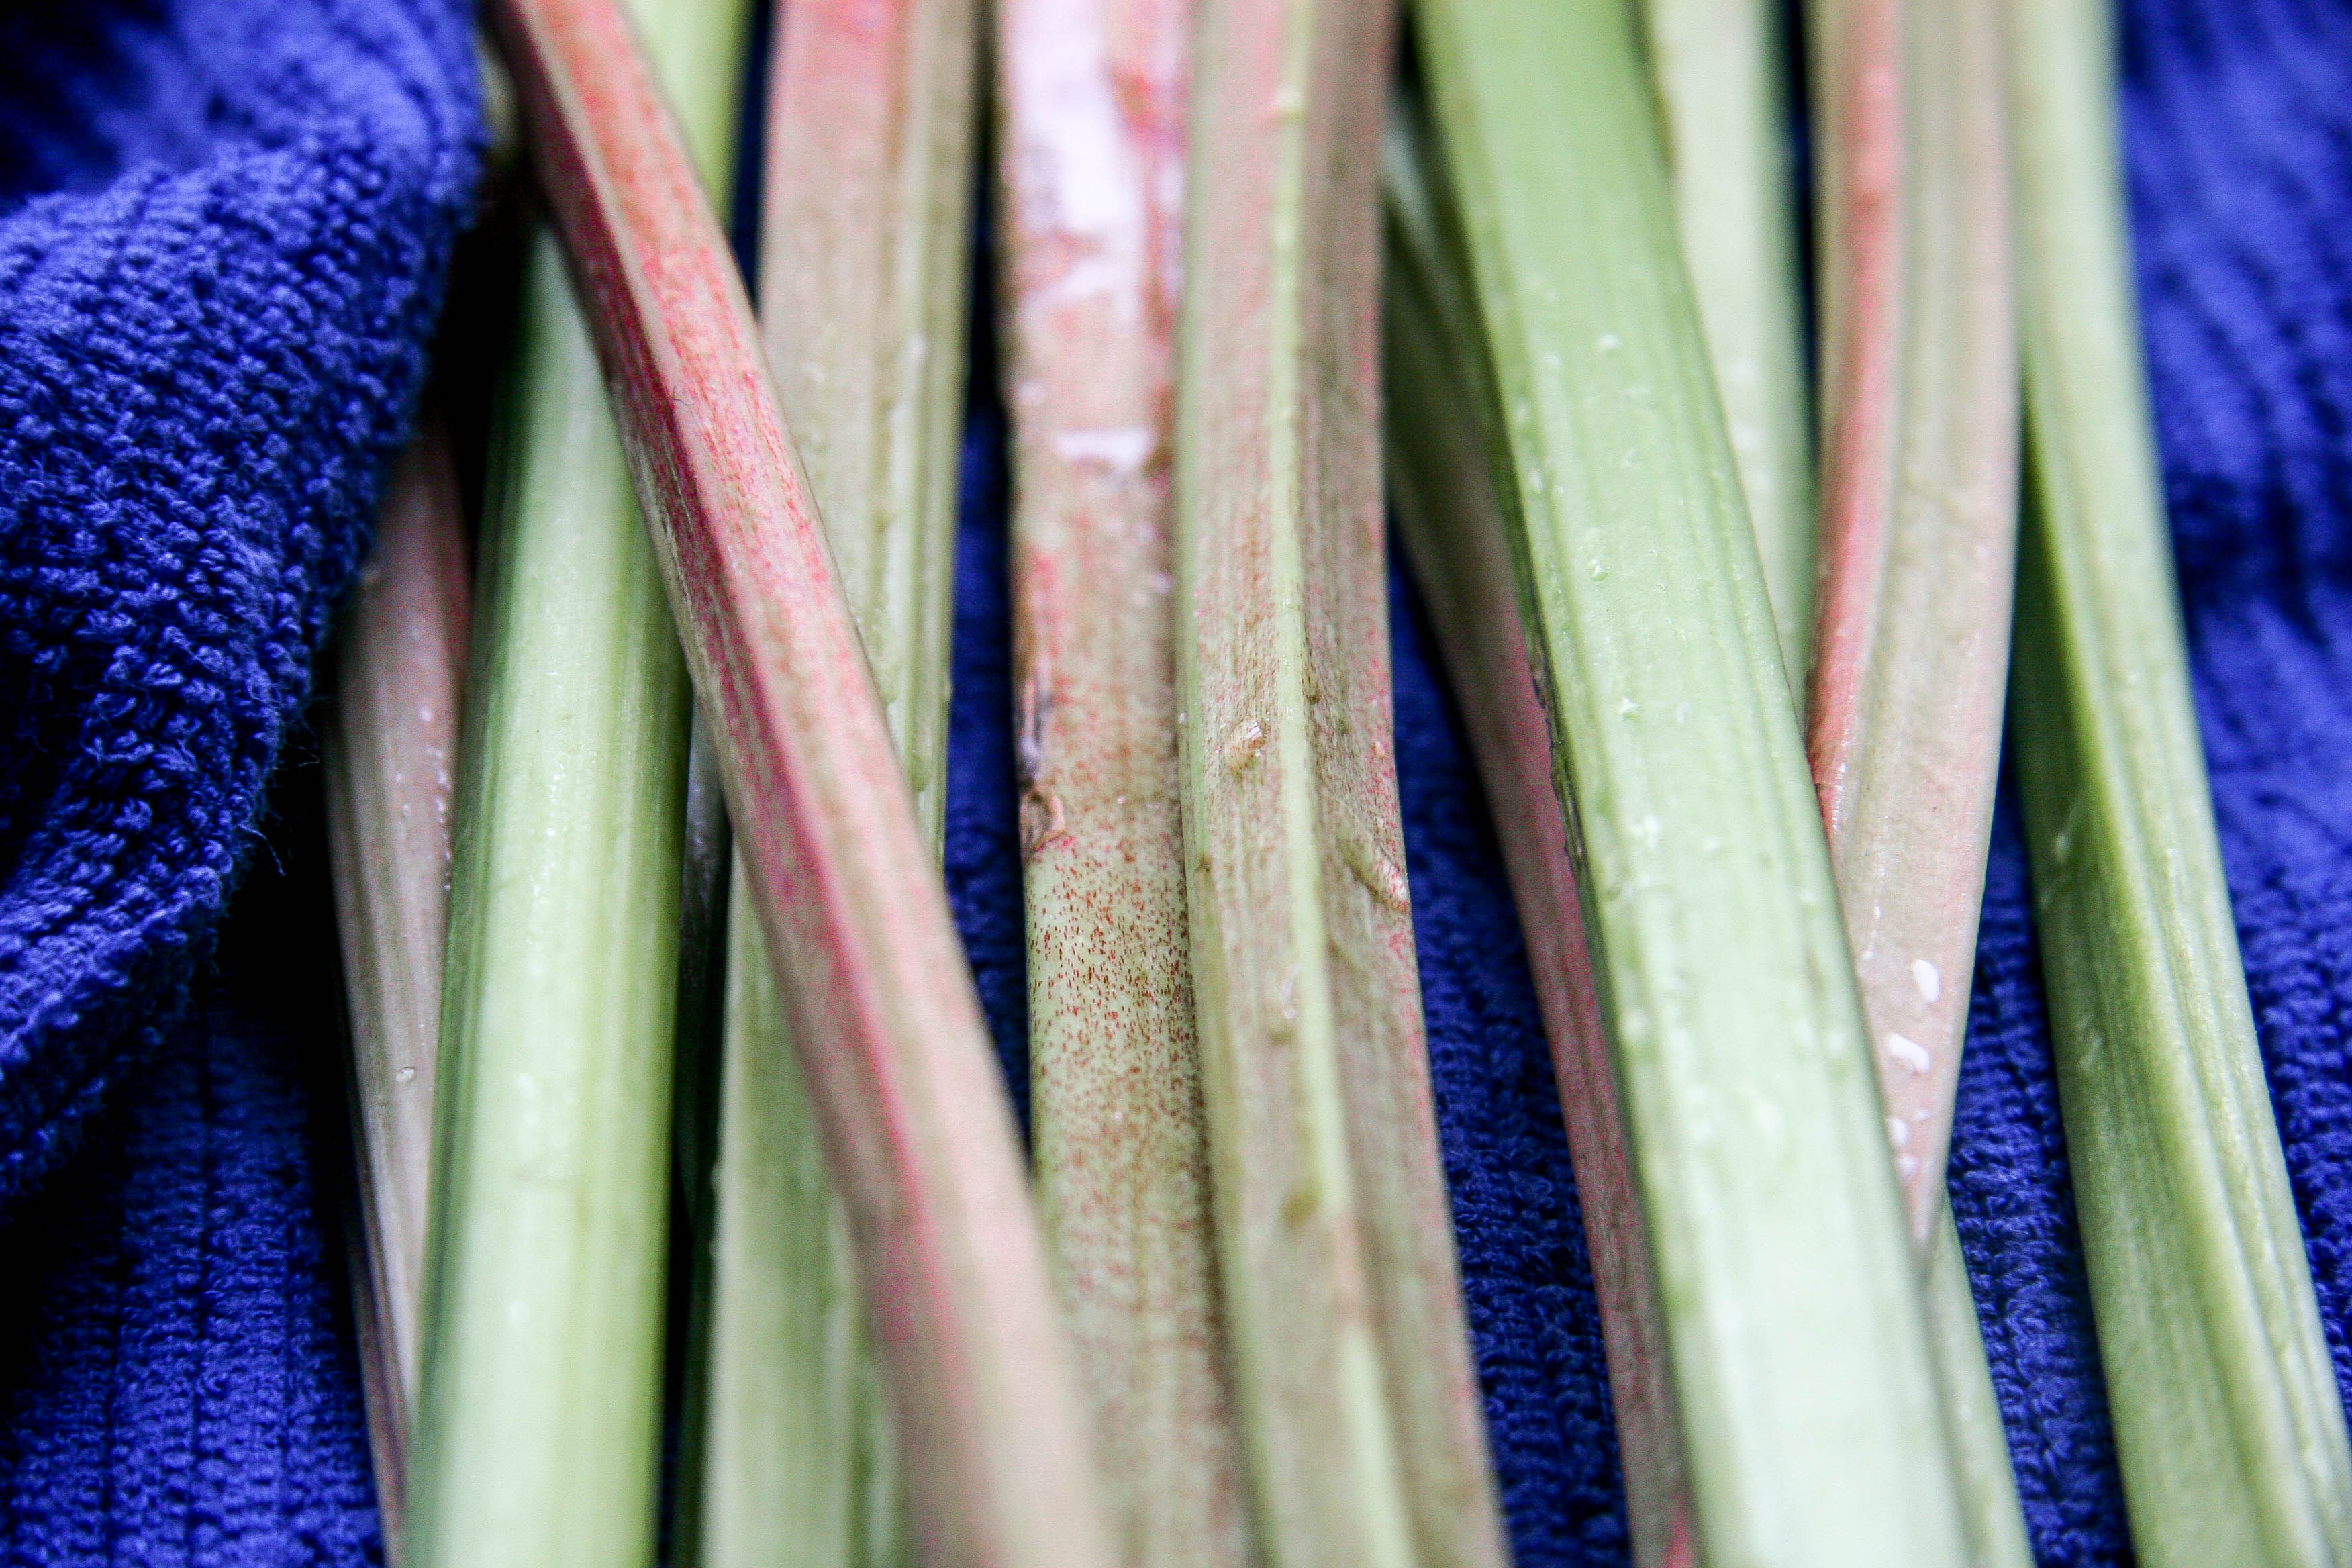
My most recent market-stalking-reward was rhubarb. The woman in front of me “ooohed” at the pile of rhubarb, bought a pound and half and I followed suit. Guess what? The tart, greenish-red vegetable resembling celery stalk happened to be at the height of its season! Which I now know to be between late April and June (around Boston).

strawberry rhubarb pie 1

strawberry rhubarb pie 2

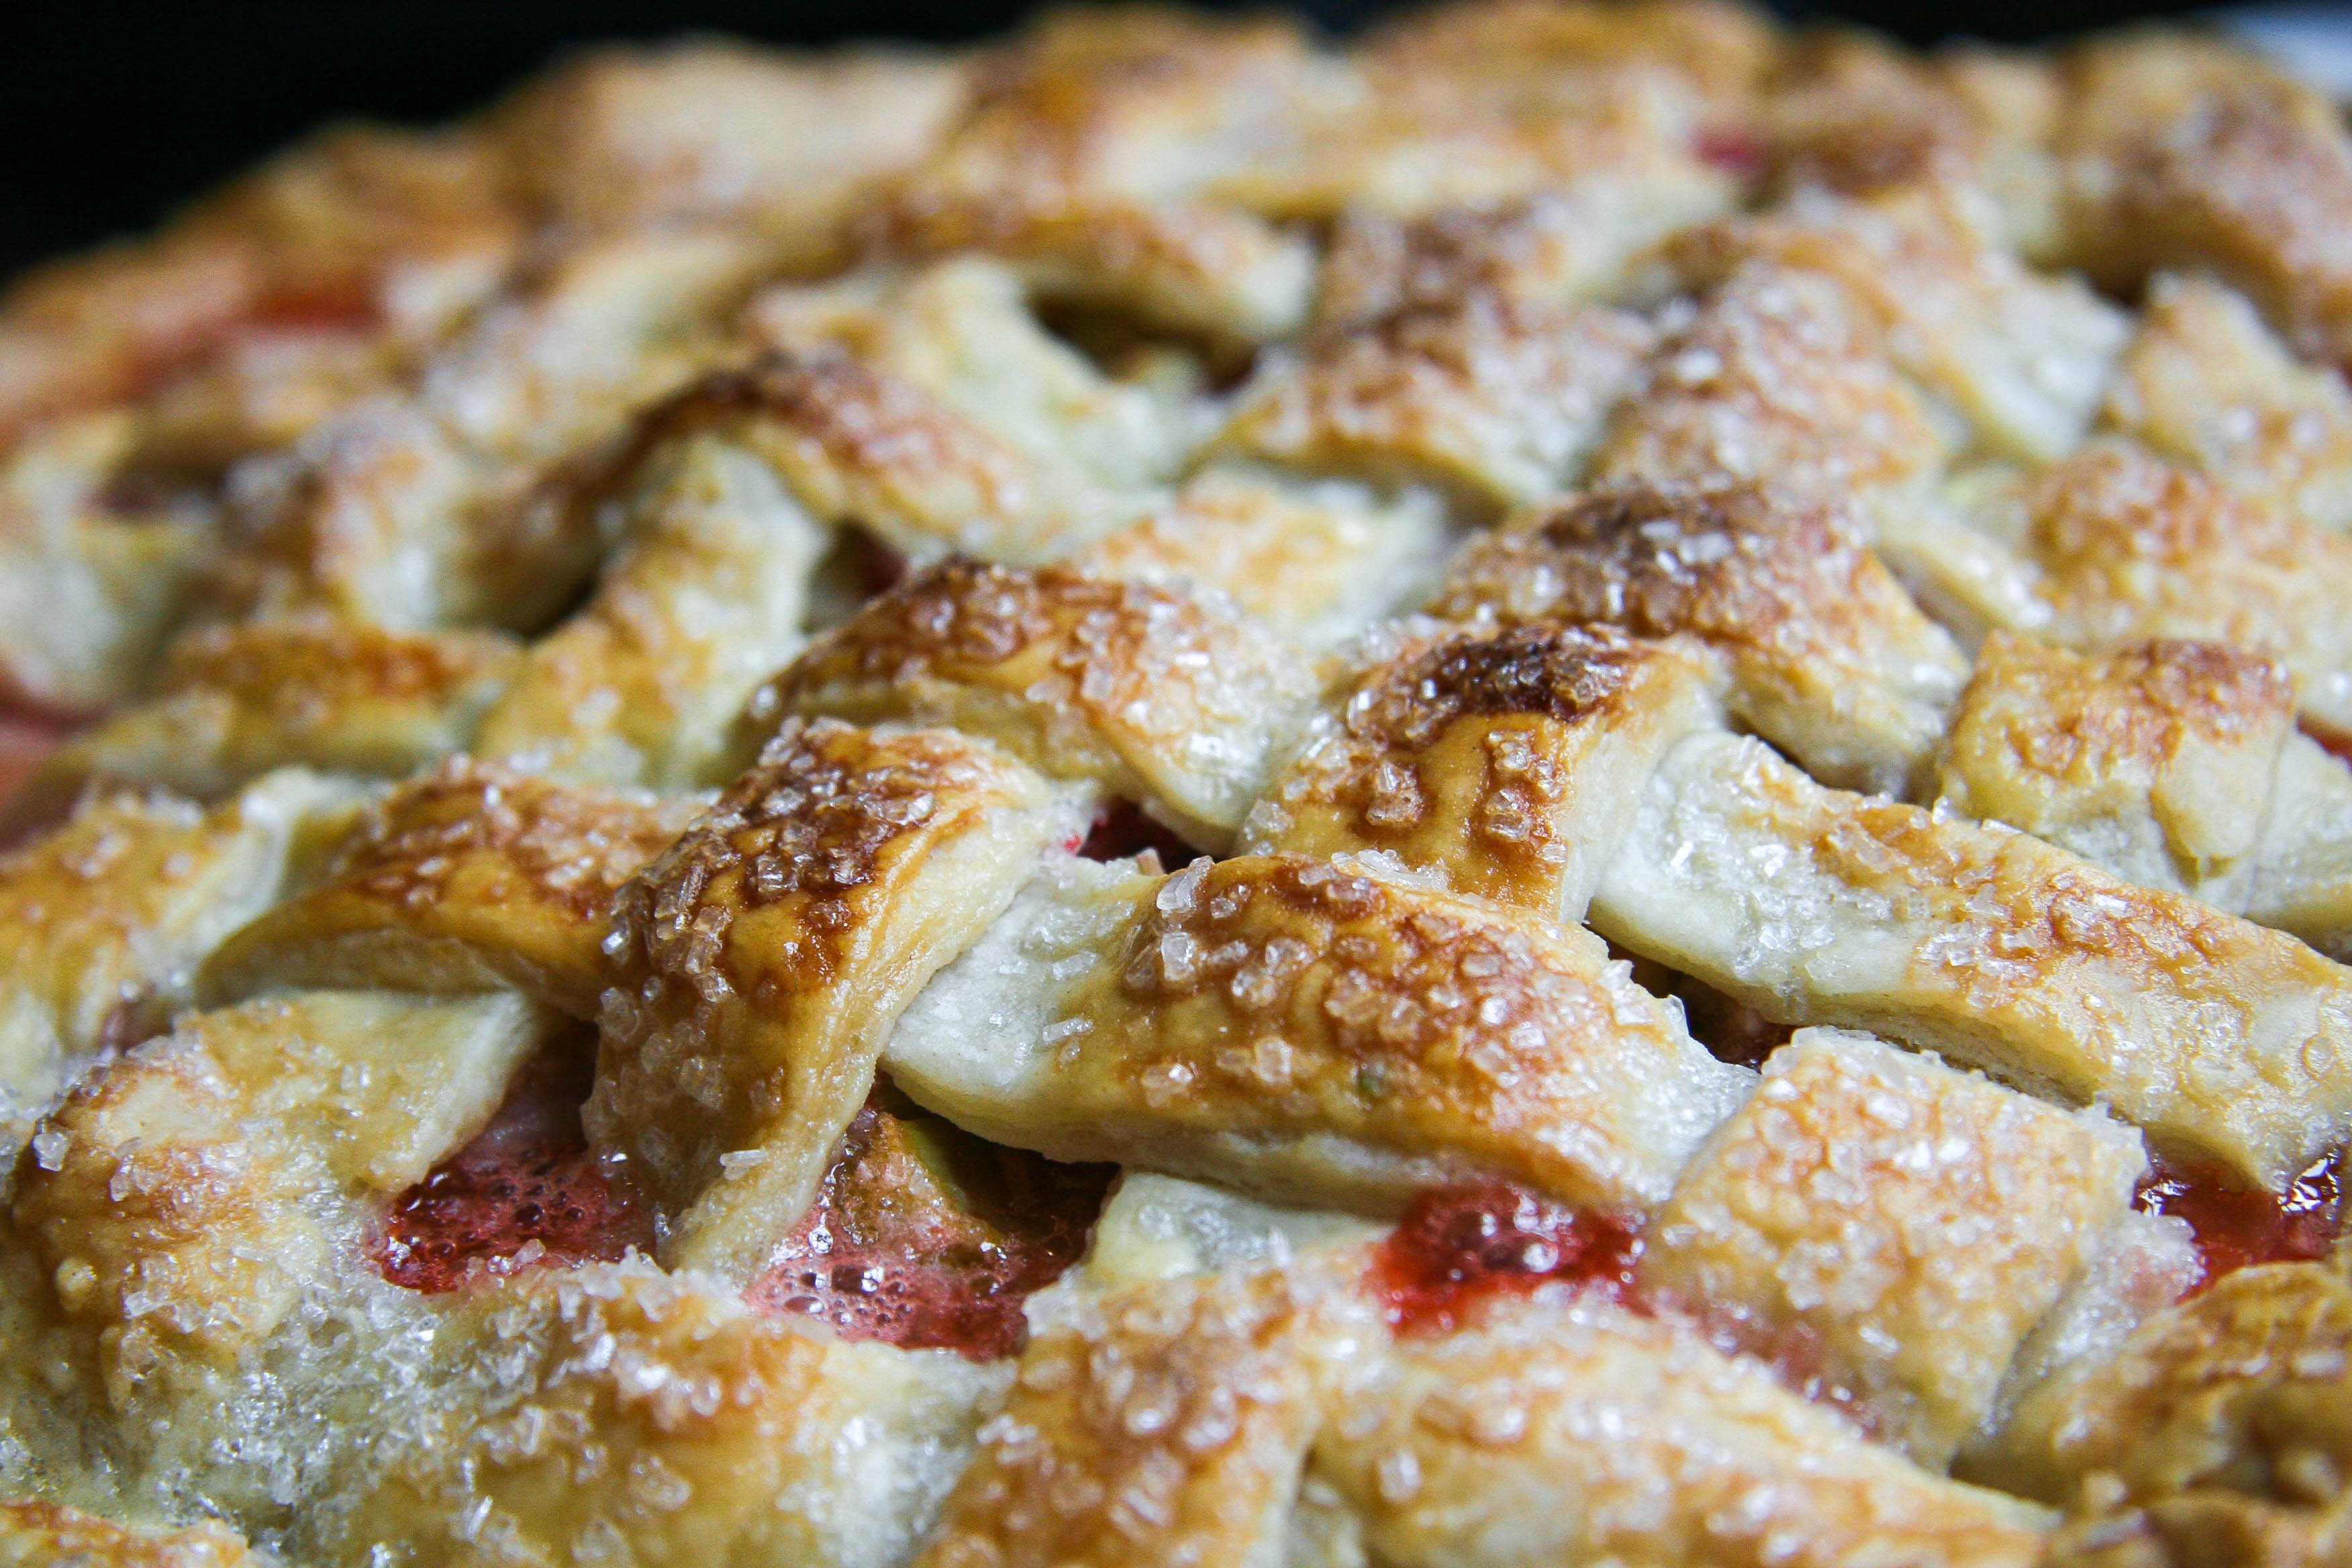
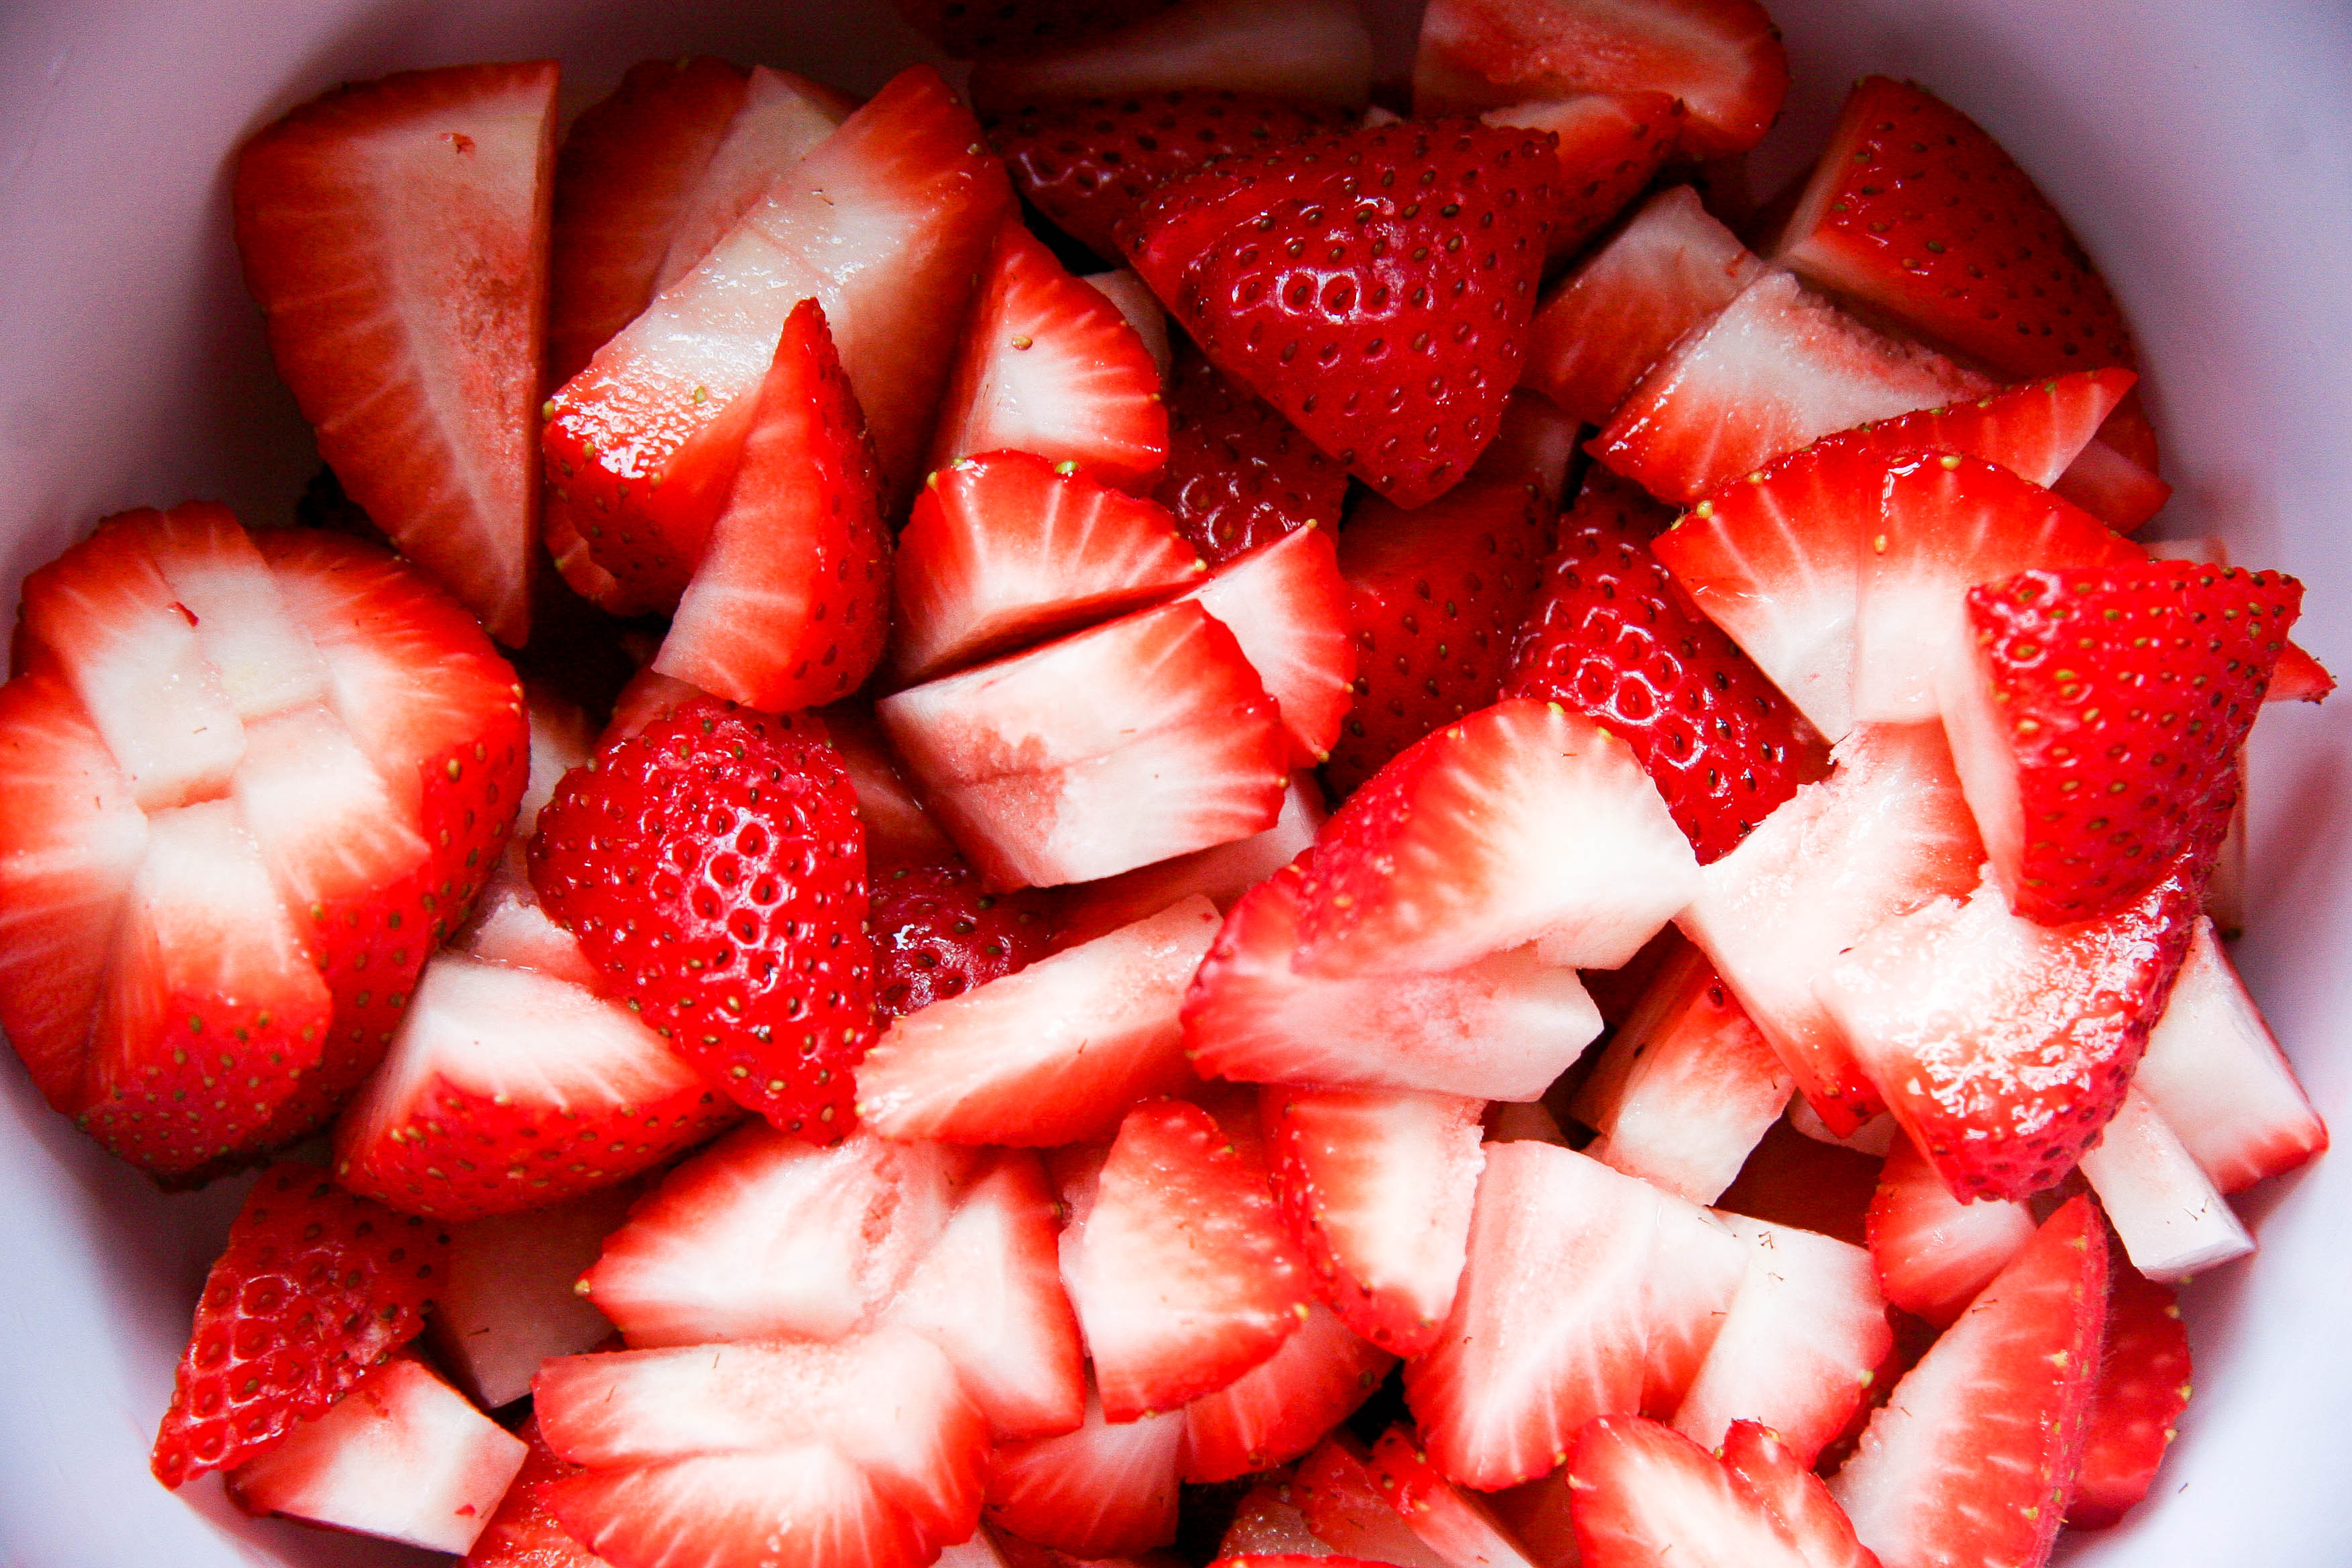
Rhubarb is often linked to strawberry—typically in Strawberry Rhubarb Pie—and it’s no wonder why. Between two flaky, buttery crusts, the sharpness of the rhubarb is balanced by the juices of sweet, sugared strawberries resulting in the perfect spring showcase of fresh-dessert flavors.

strawberry rhubarb pie 3

I’ve made strawberry rhubarb pie only once before and, while it was delicious, it came out very drippy. While I didn’t want to shift completely to the jelly-like viscosity of some store bought pies, I wanted to make sure this pie held its form better.

Deb Perelman of The Smitten Kitchen, not surprisingly, got it just right. Her secret ingredient for thickening the filling is adding a ¼ cup of tiny tapioca pearls. It totally worked. We identified the tiny tapioca balls on our forks—sometimes—but it mostly blended completely into the texture of the fruit and did not change the flavor one bit. I barely changed a thing about Deb’s recipe (I even followed her dough recipe!), so Deb, thank you for the scrumptiousness of this pie!

strawberry rhubarb pie 4

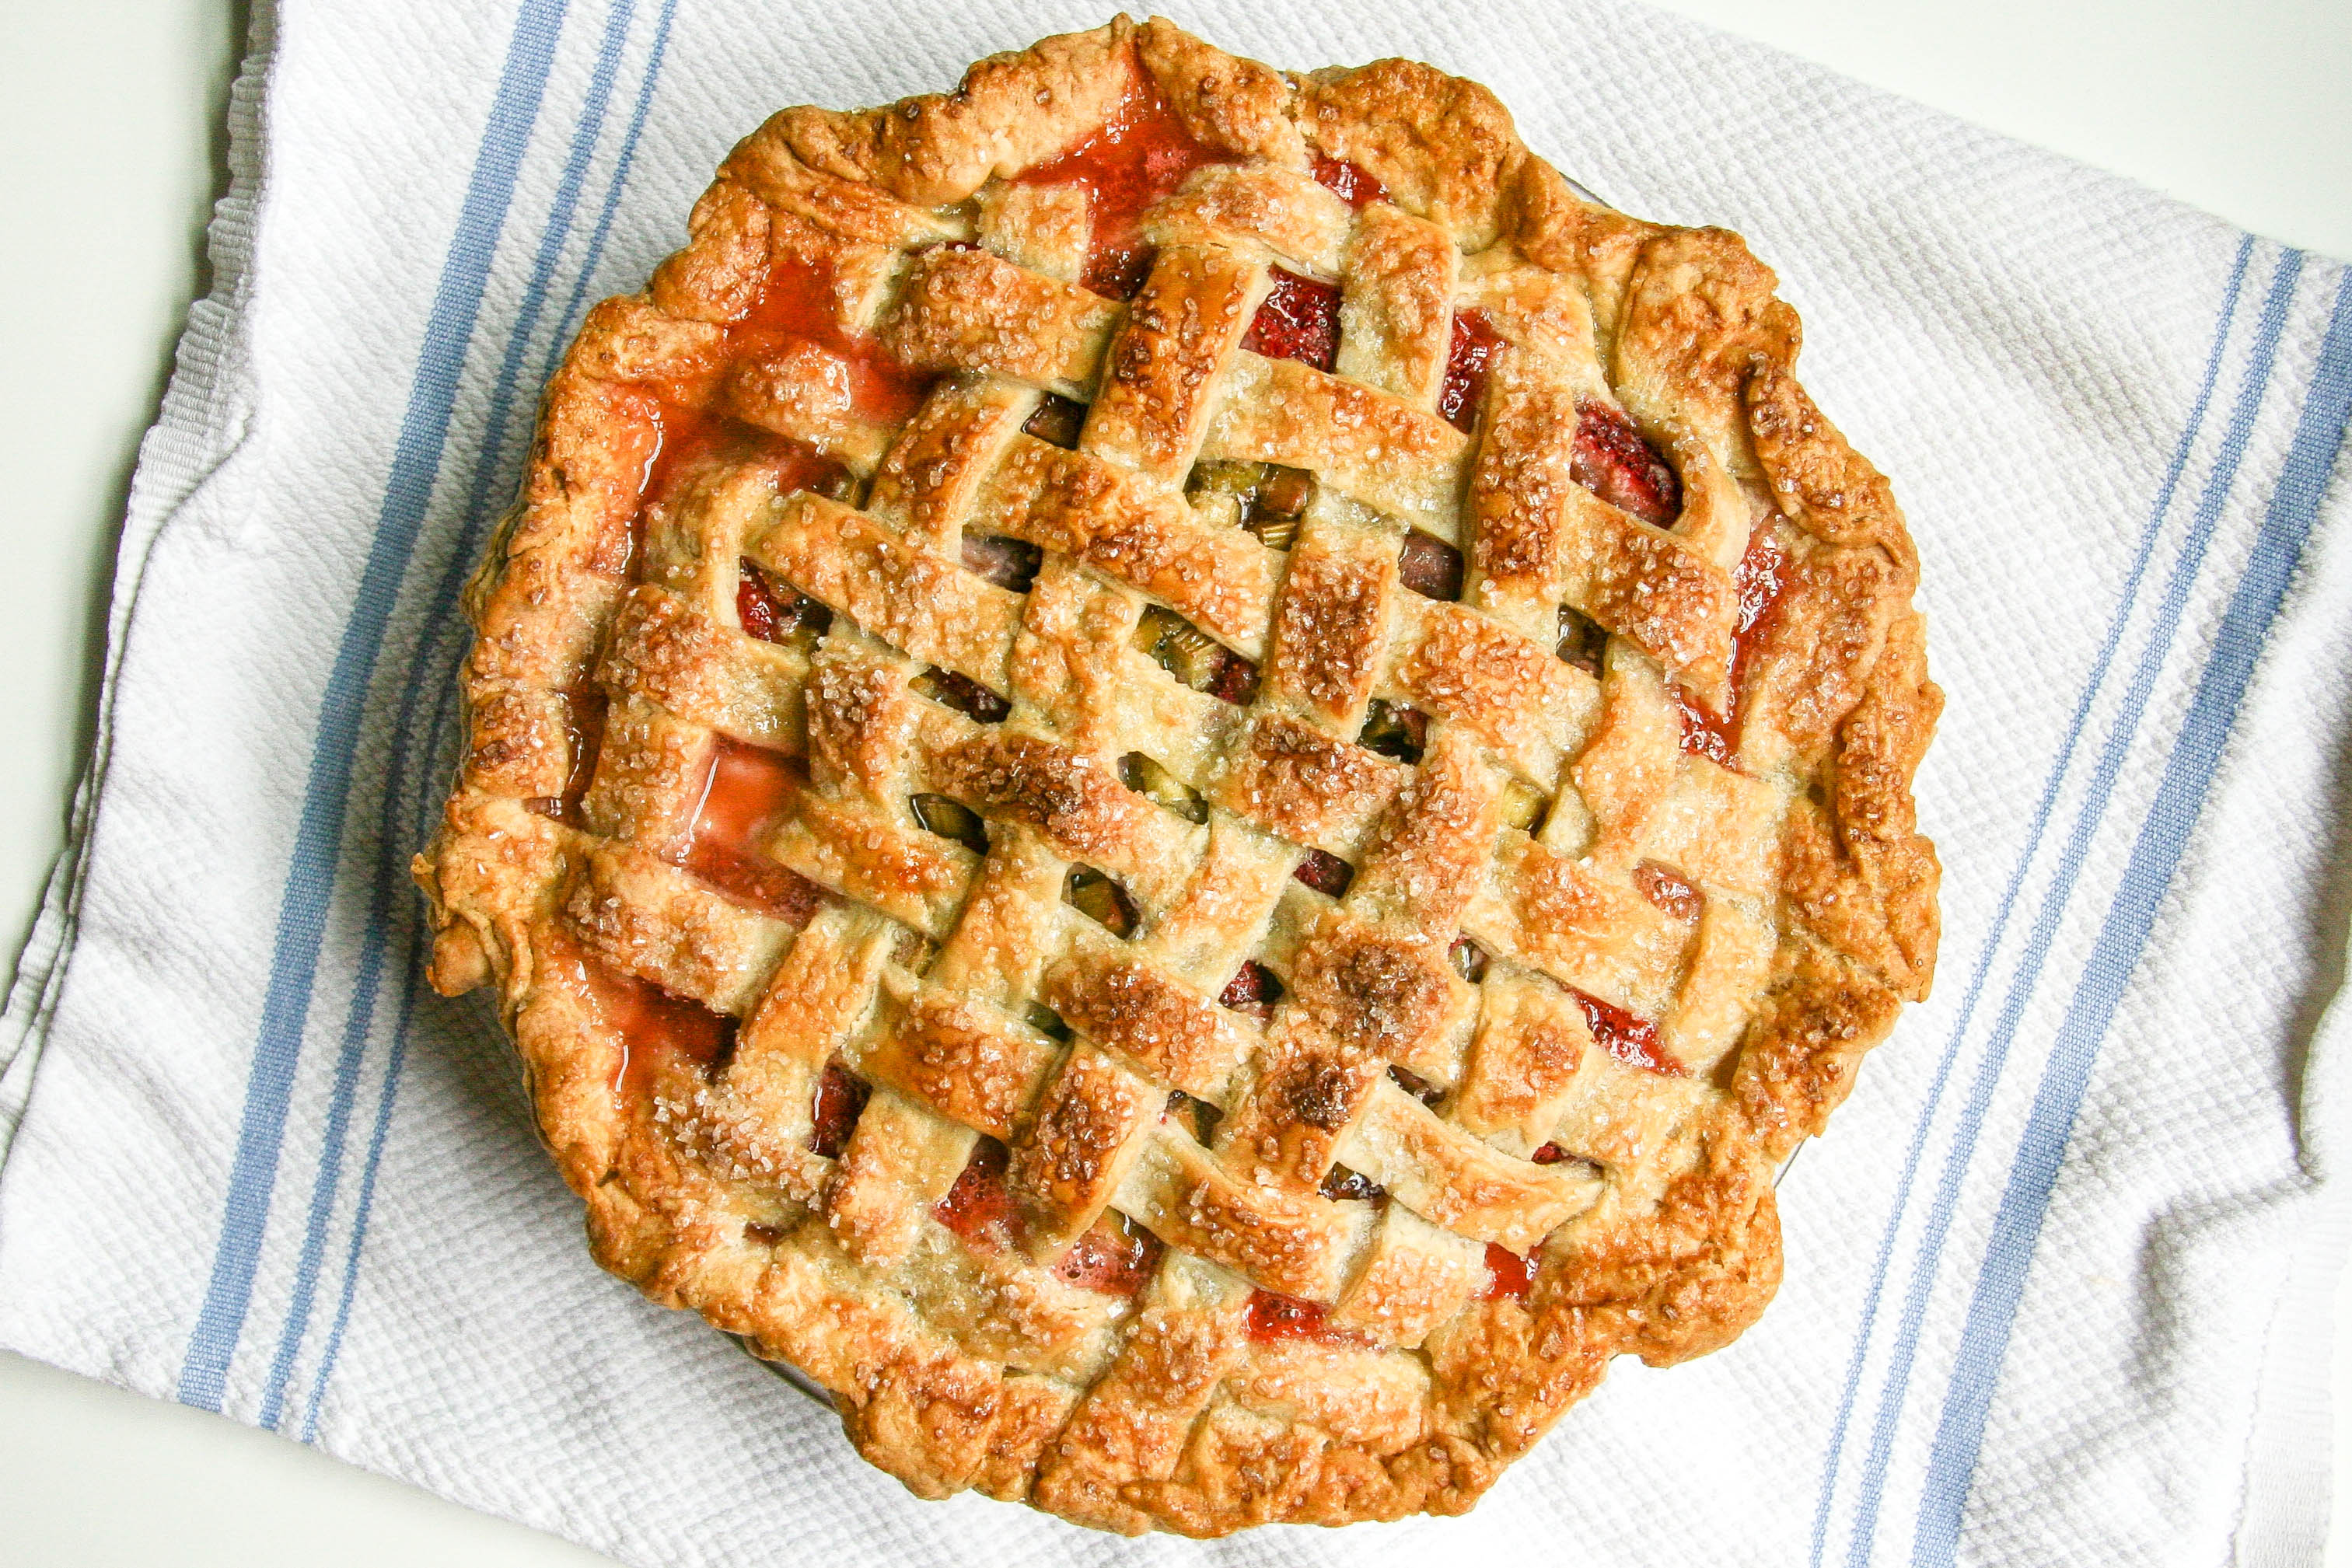
Now, here’s the part where you expect a photo of the inside of the finished pie so you can see the gorgeous pink hues of sweet, tart goodness; proof of a perfect pie slice that’s not too runny and not too gelatinous.

And here’s the part where I disappoint. No strategically placed pie slices smiling for the camera. None. Nothing. I’m sorry! I brought the pie to my parent’s house for a family dinner and after one bite my head was lifted to the pie clouds. One bite and I was swimming through the sky on pie. Before I ever came down from the clouds, we had eaten it all up. And, here’s the part where I beg you to try it anyway. I really don’t think you’ll regret it. And neither will anyone you choose to share with (Or not!).

strawberry rhubarb pie 5

strawberry rhubarb pie 7

strawberry rhubarb pie 9

strawberry rhubarb pie 11

strawberry rhubarb pie 10

strawberry rhubarb pie 12

strawberry rhubarb pie
Adapted, barely, from Deb Perelman of The Smitten Kitchen

Prep Time: 20 minutes (includes rolling out dough, but not making it)
Cook Time: 50 minutes
Total Time: 1 hour 10 minutes (But leave plenty of time for cooling!)
Makes 1 double crusted 9-inch pie

Because rhubarb is tart, the resulting pie isn’t crazy sweet. If you are looking for a pie on the sweeter side, Deb recommends upping the white sugar to ¾ cup. I did not up the sugar and, honestly, think it is just perfect with the ratios listed below.

Ingredients:

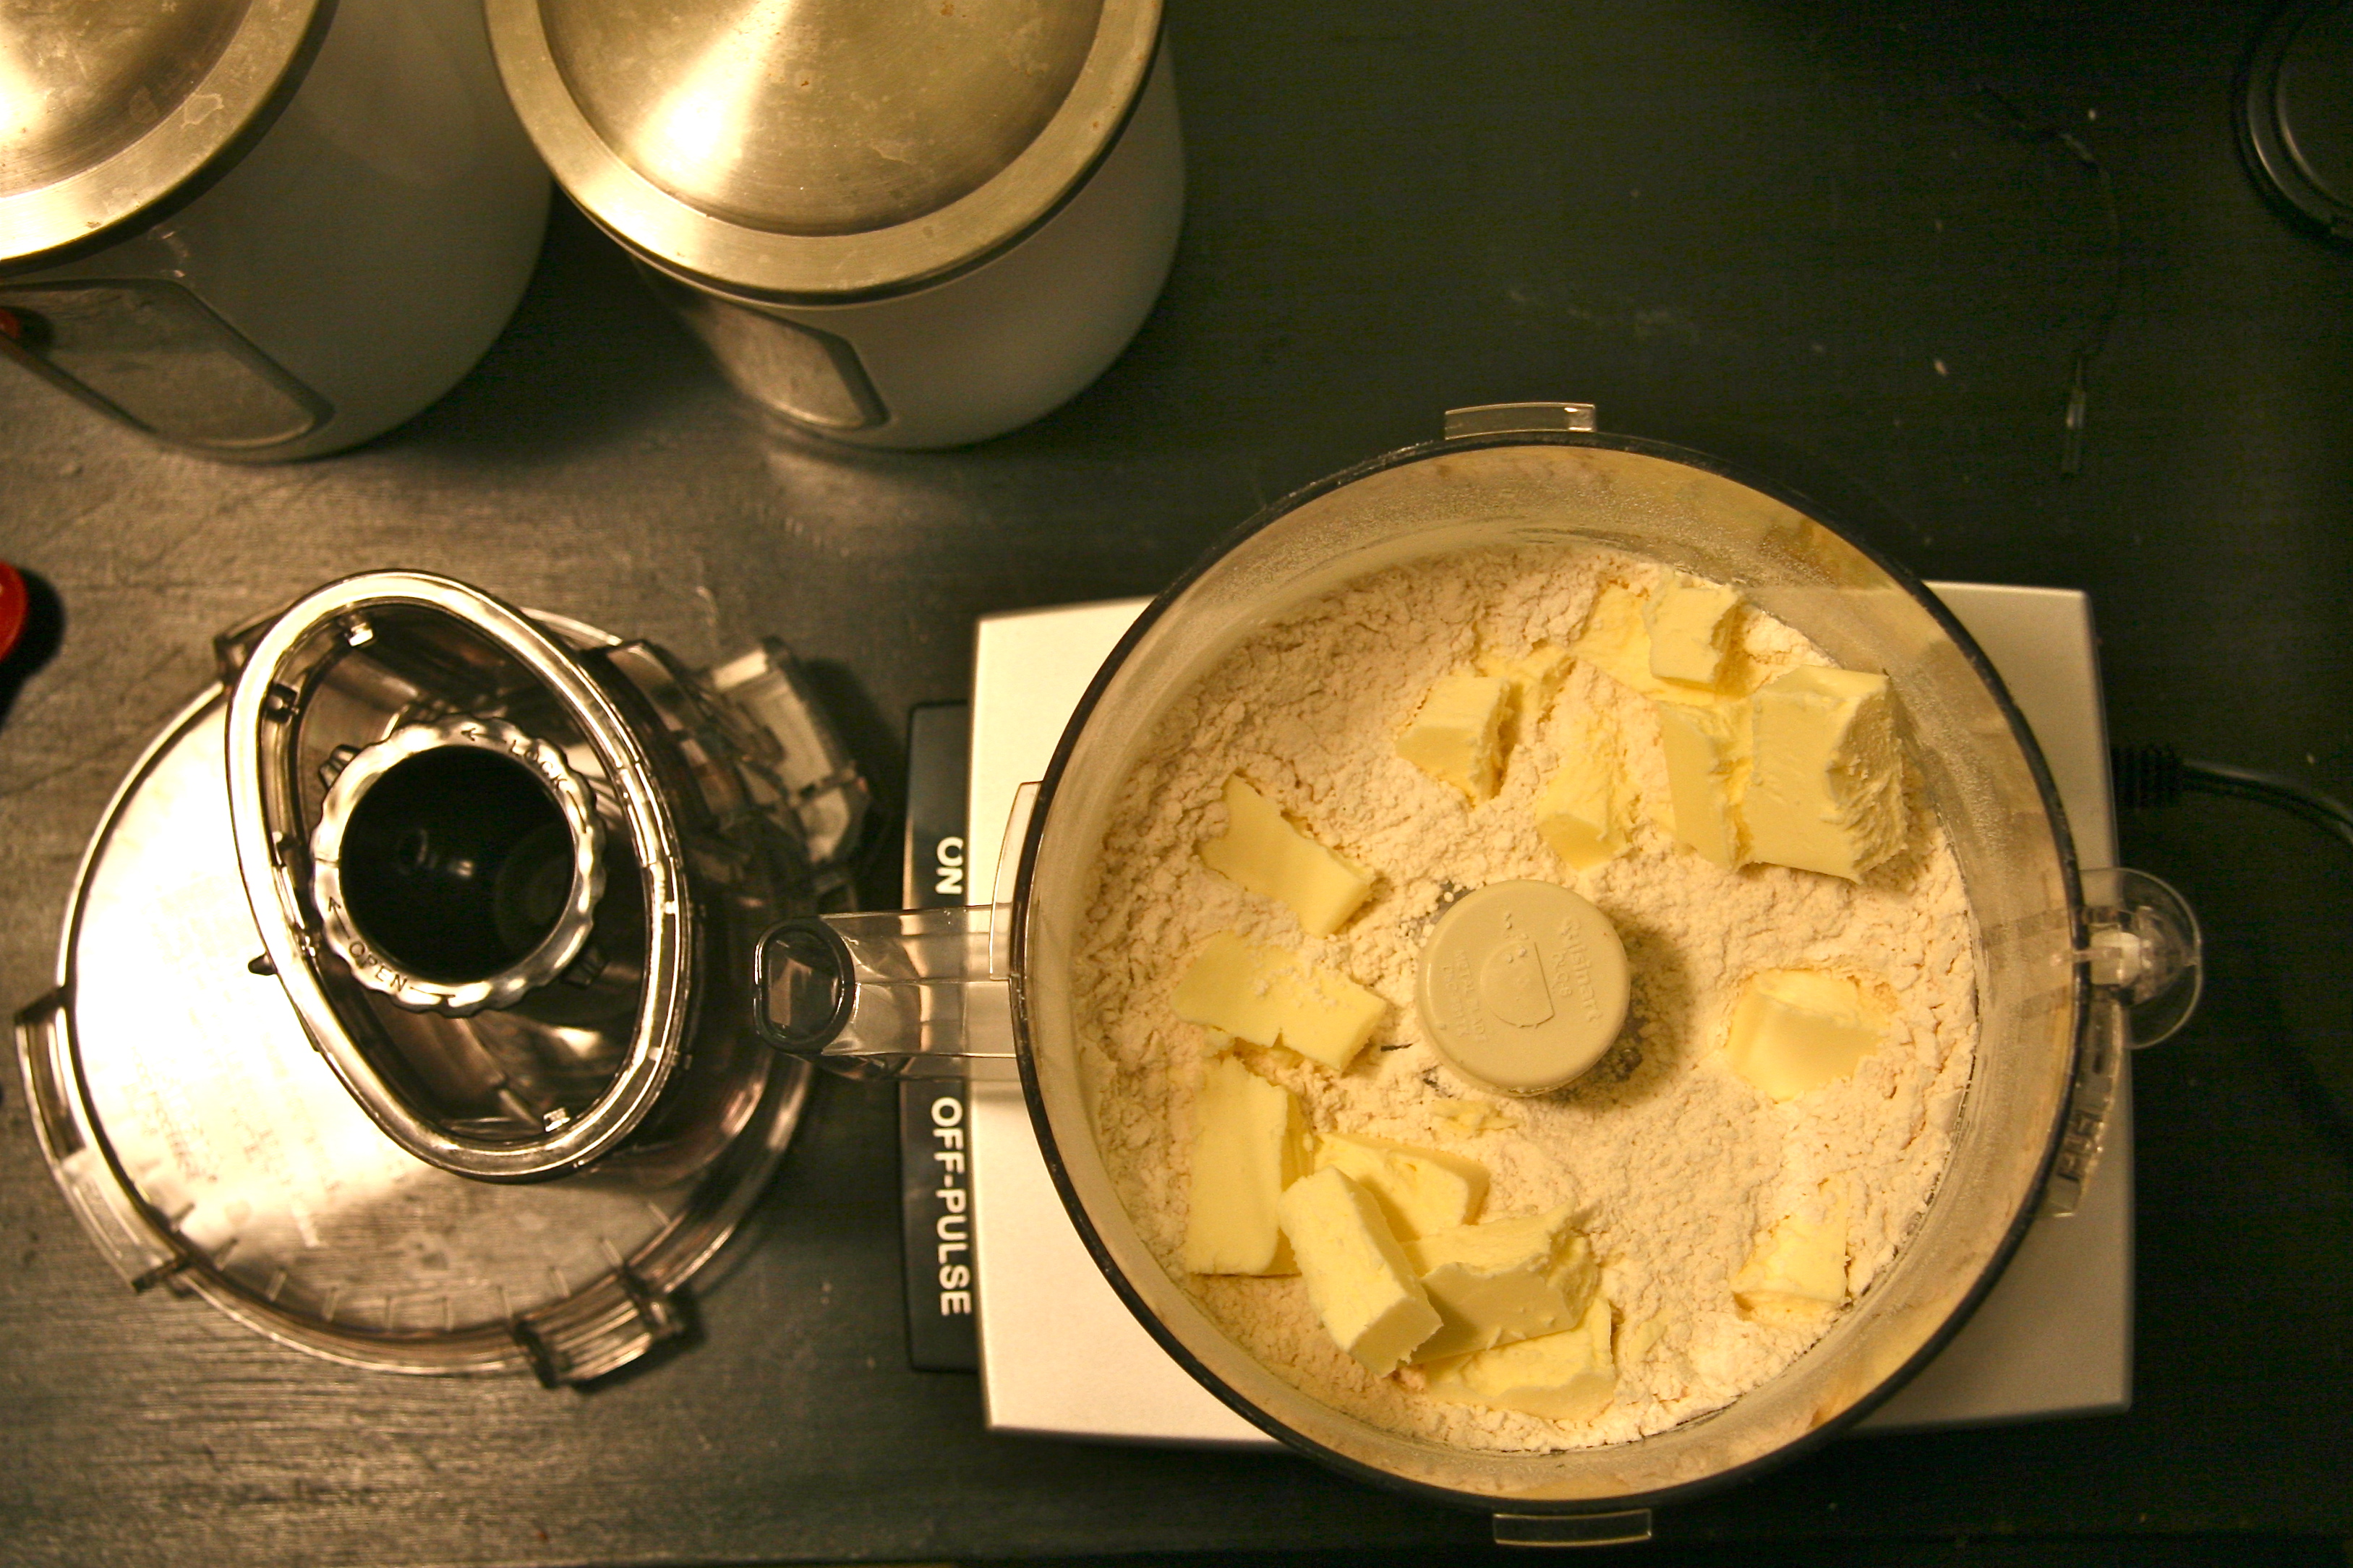
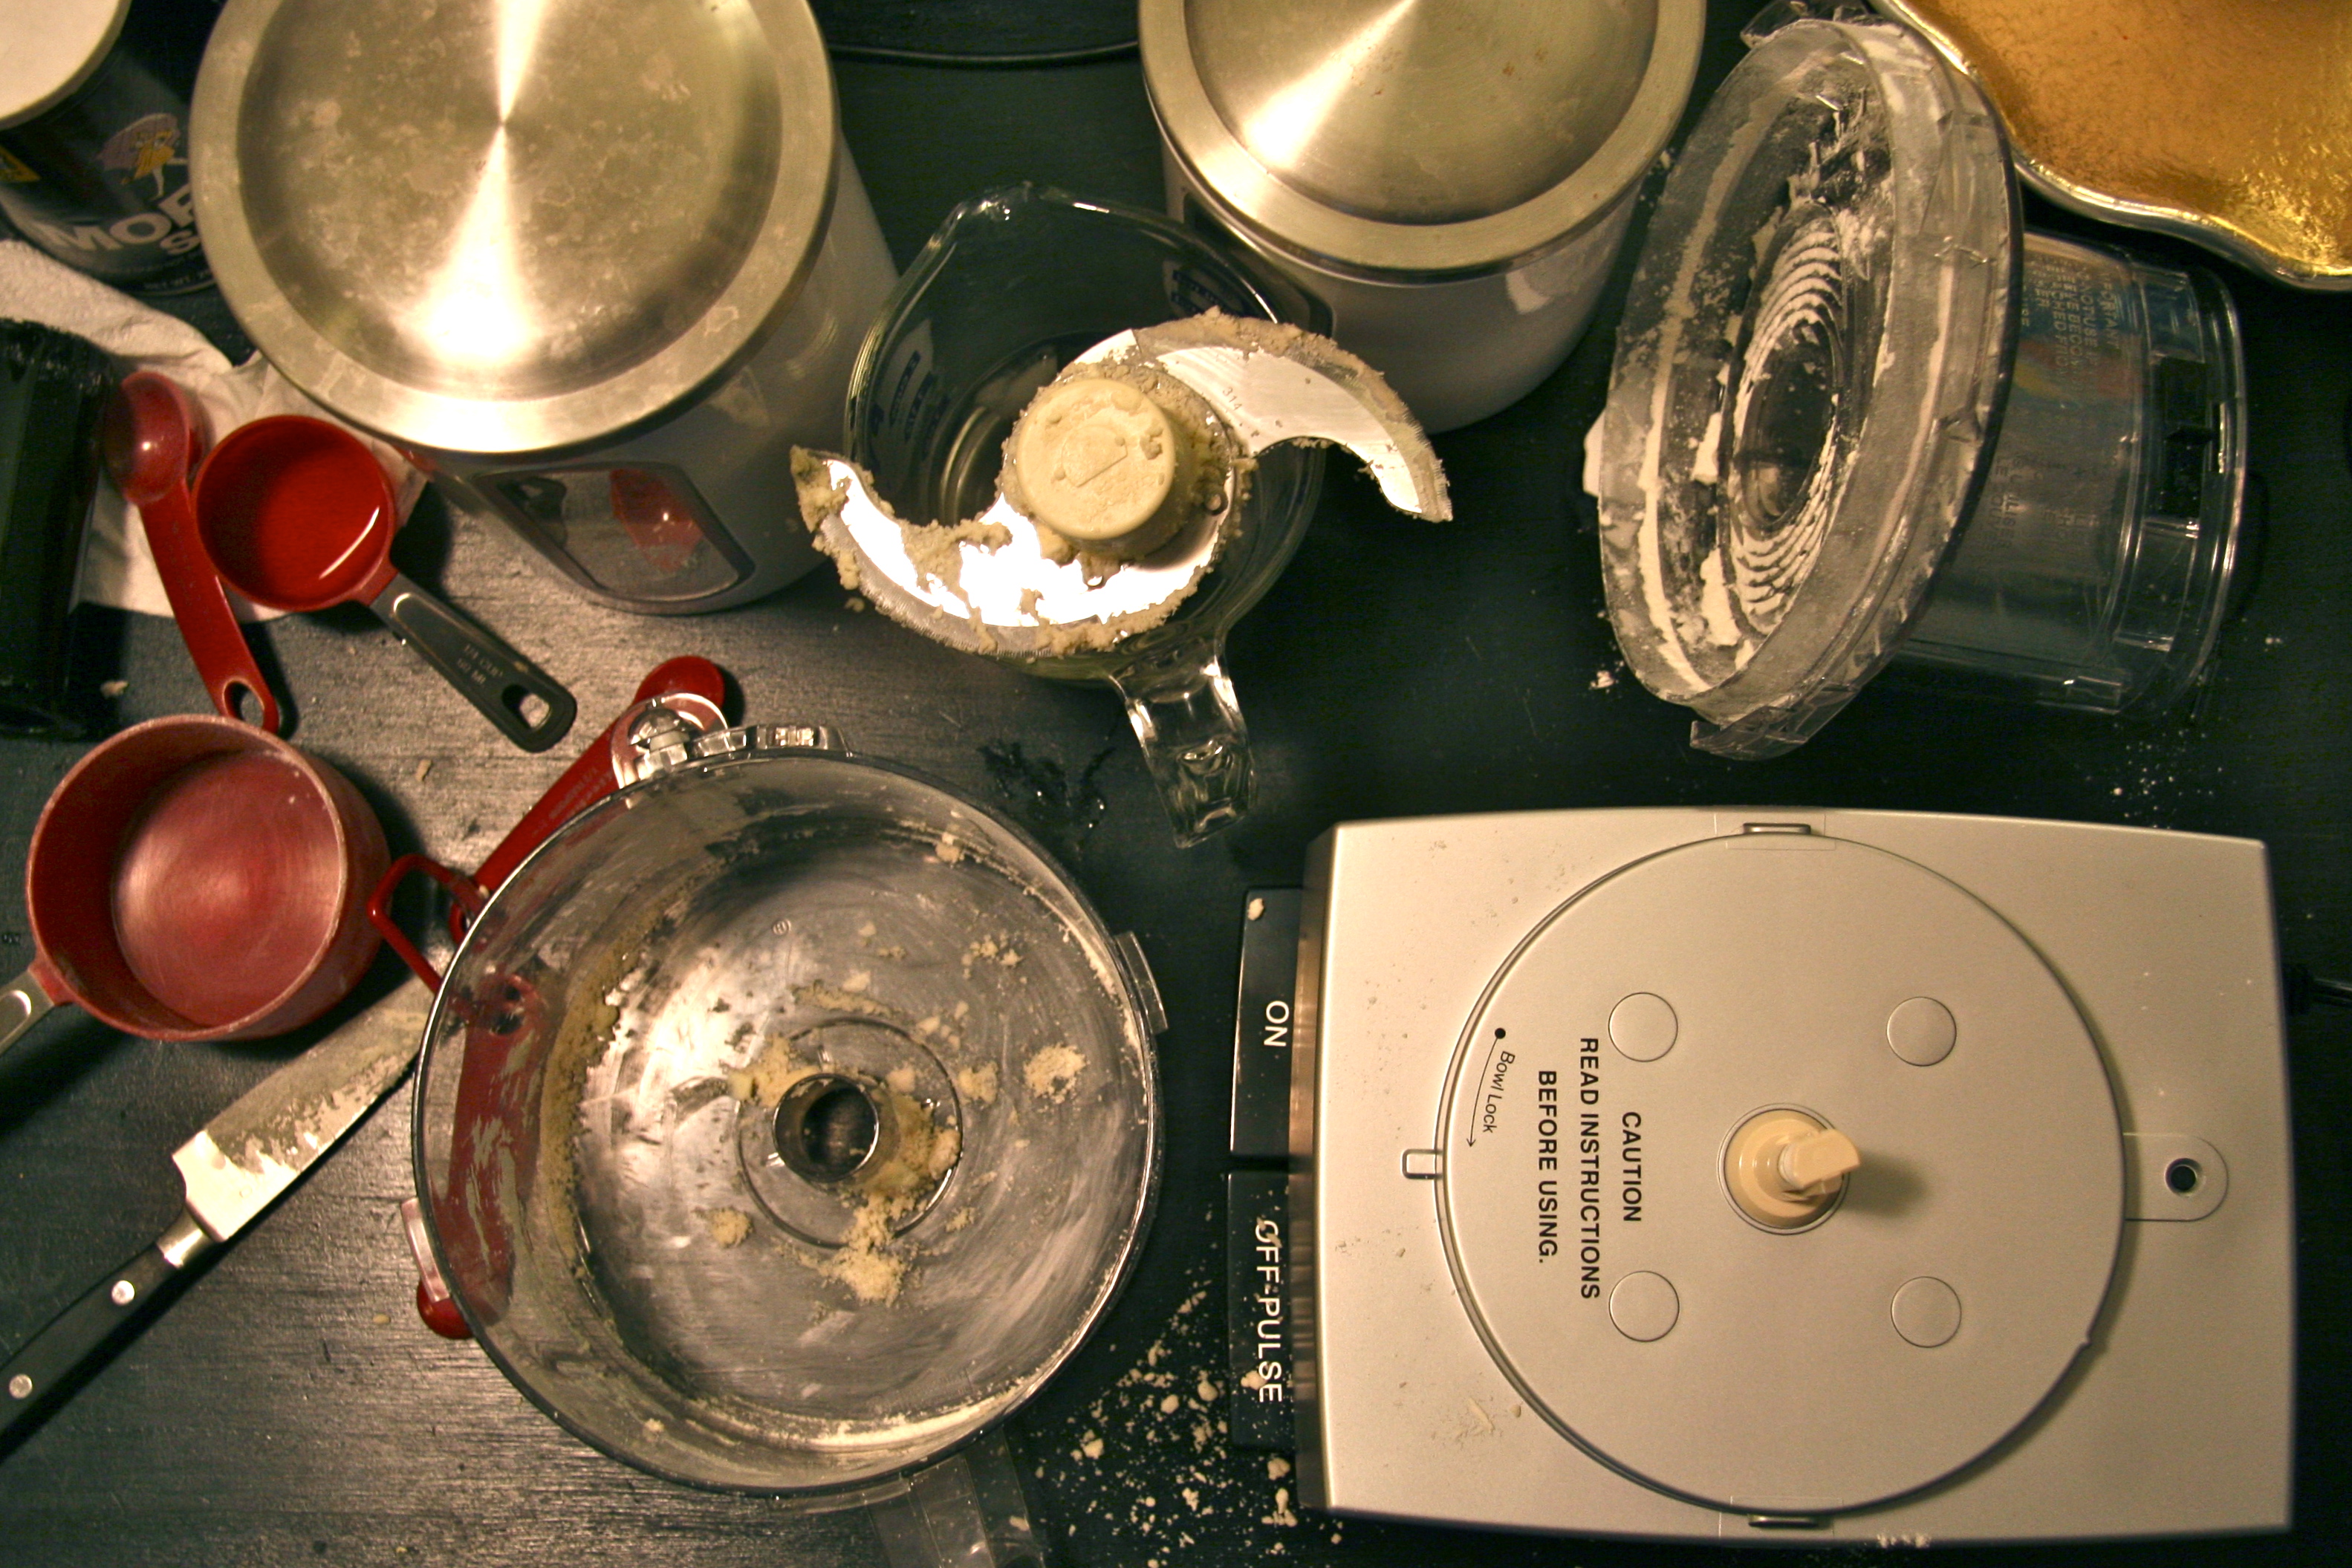
1 All Butter, Really Flaky Pie Dough or double-crust pie dough of your choice (Store bought is okay!), divided in two and chilled
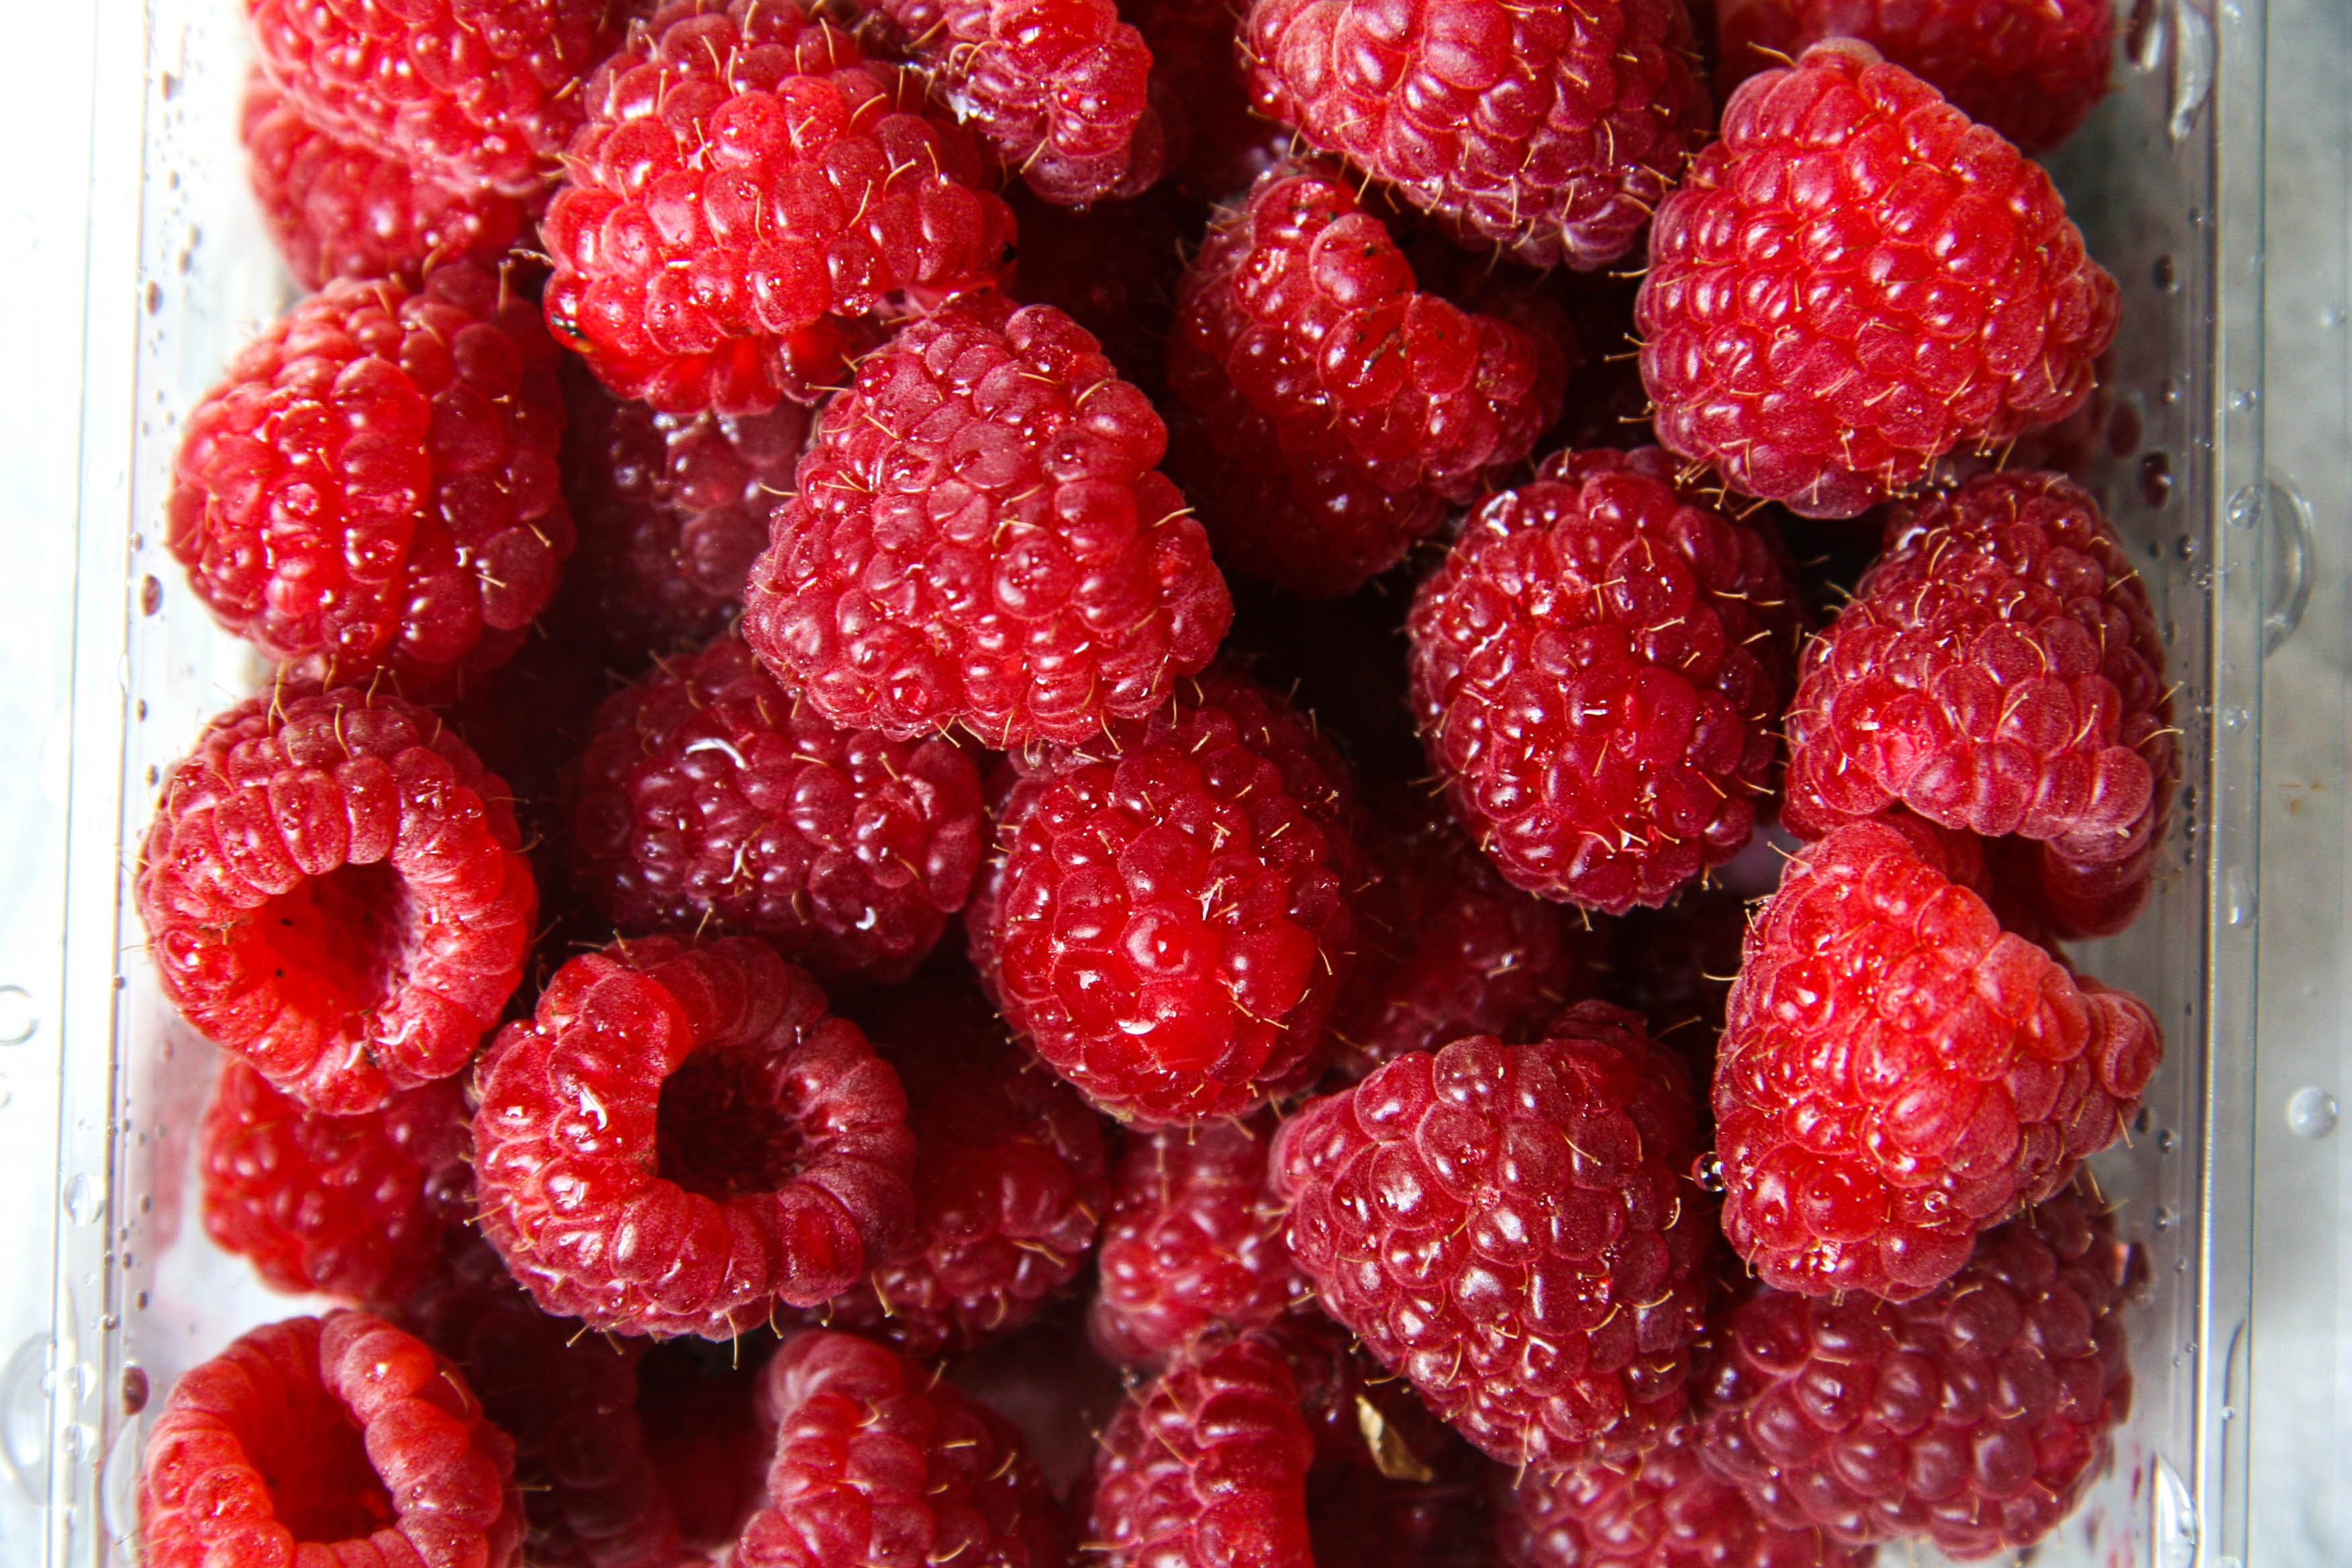
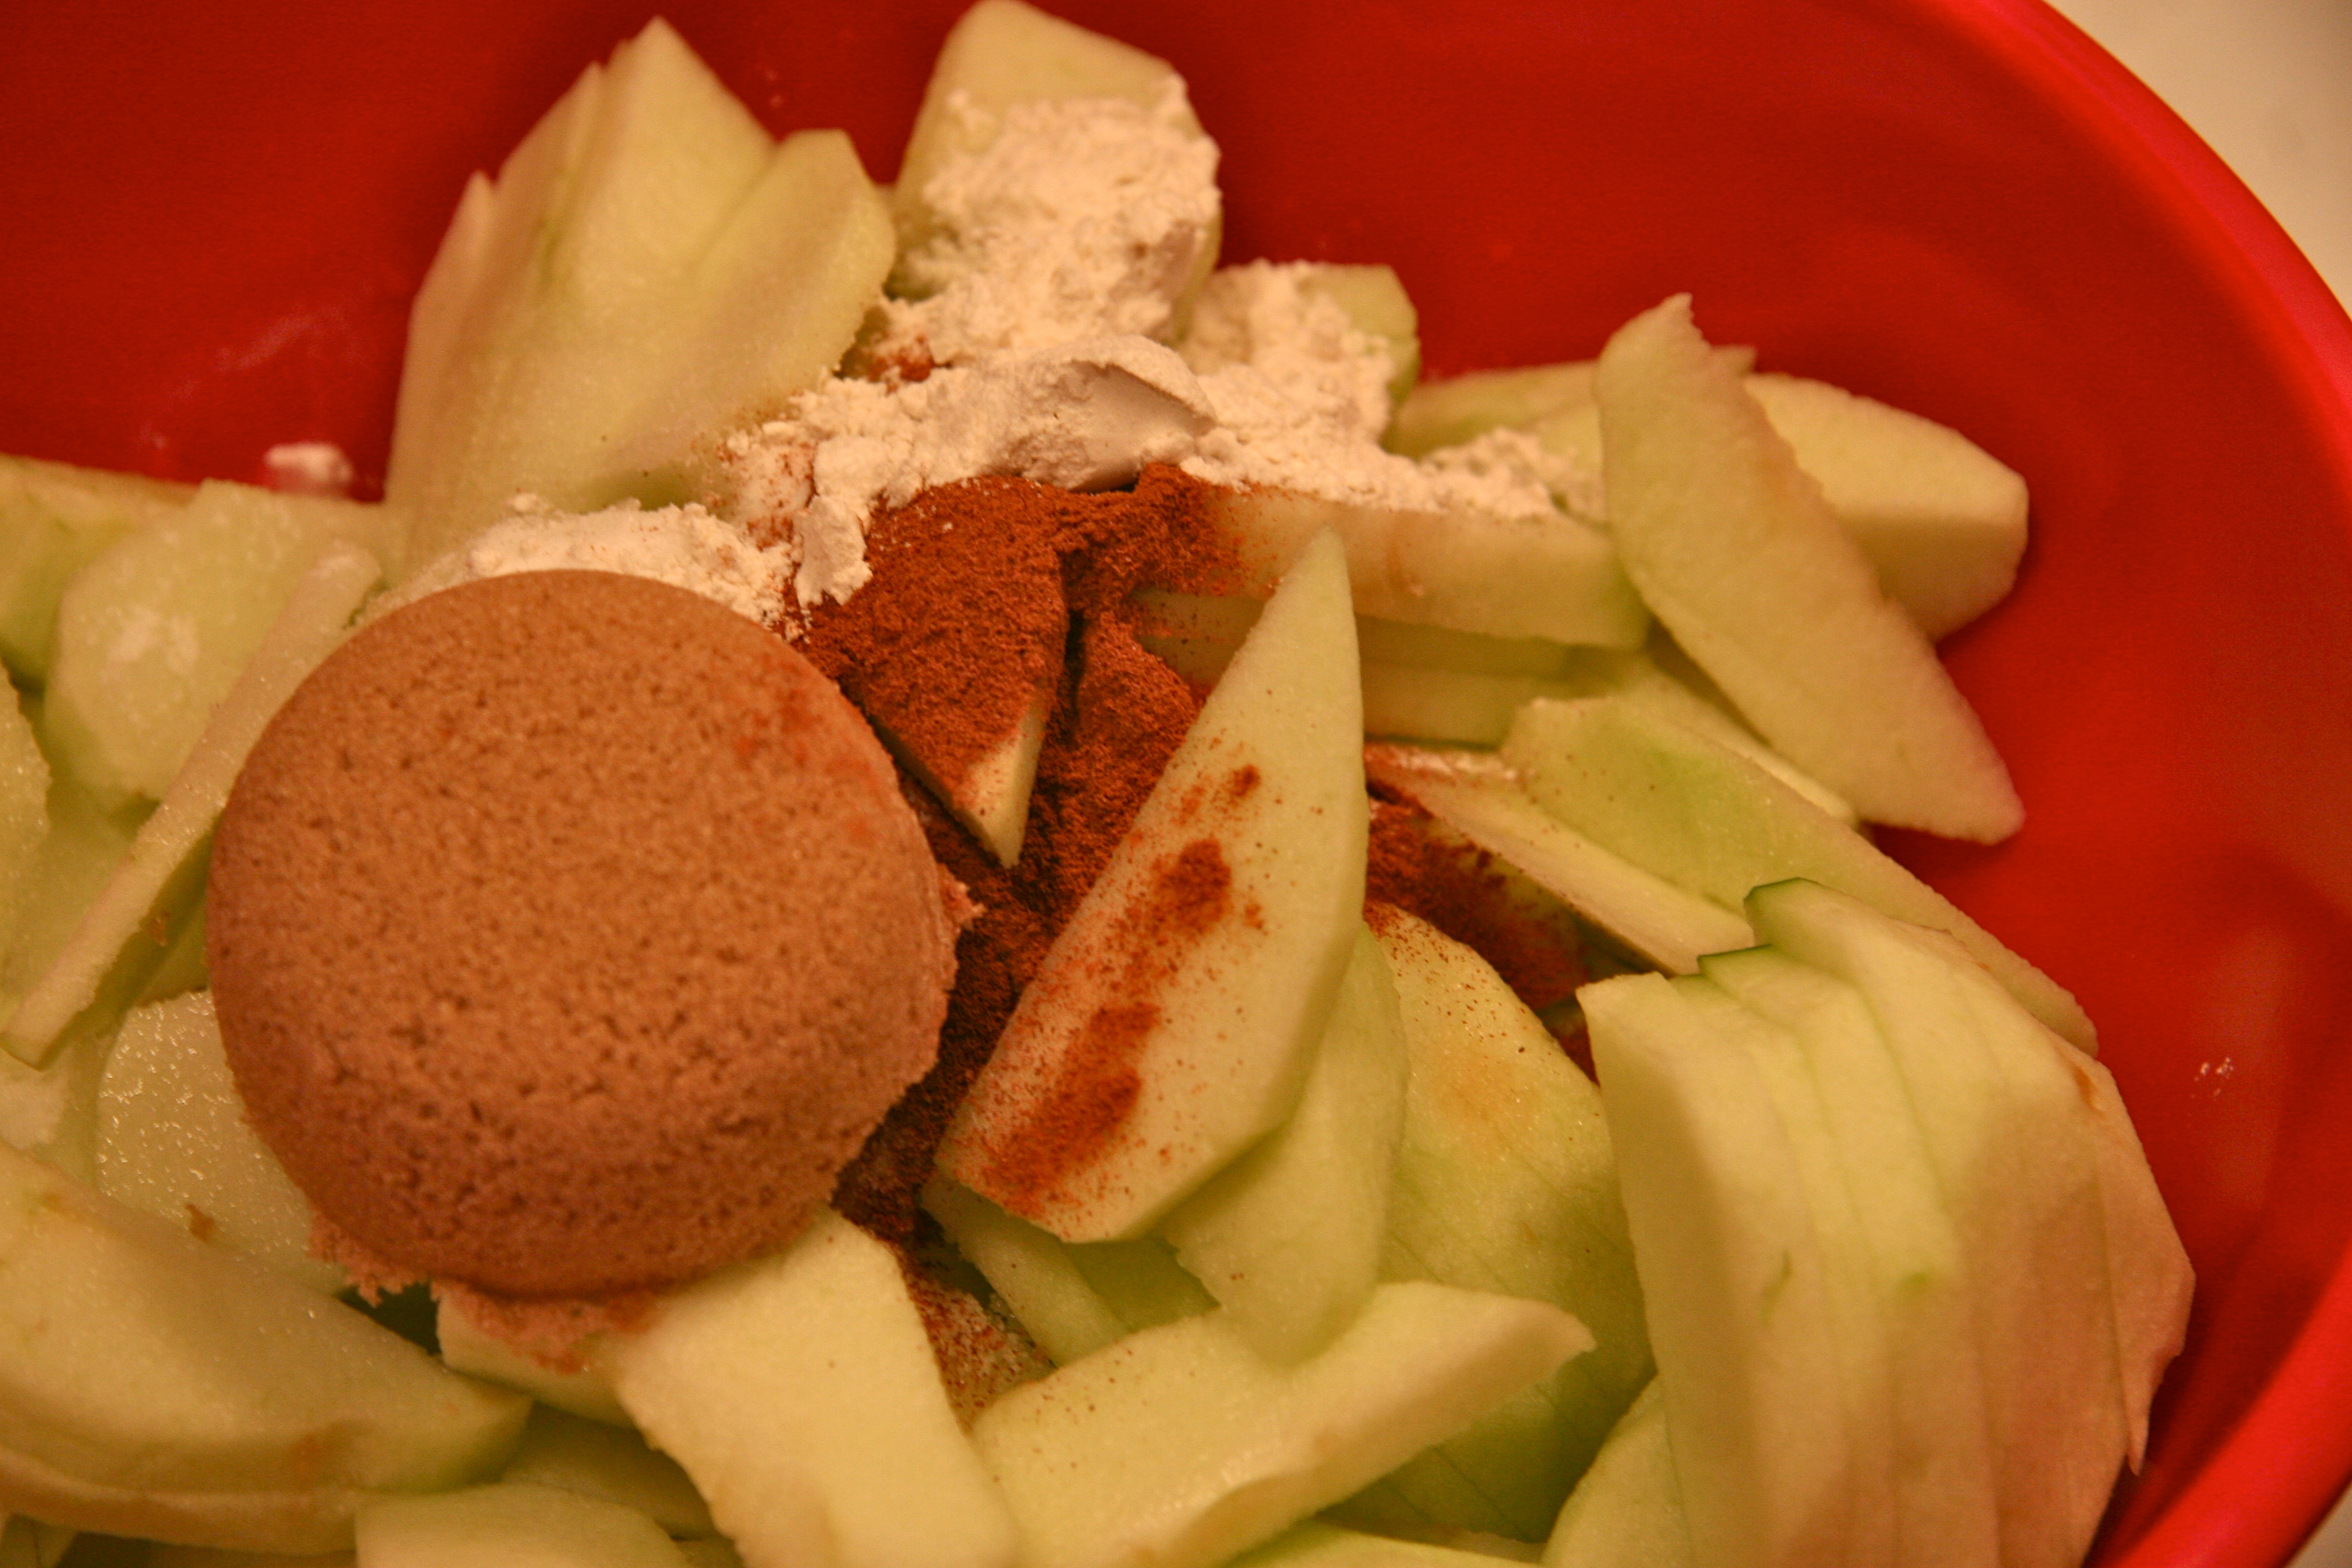
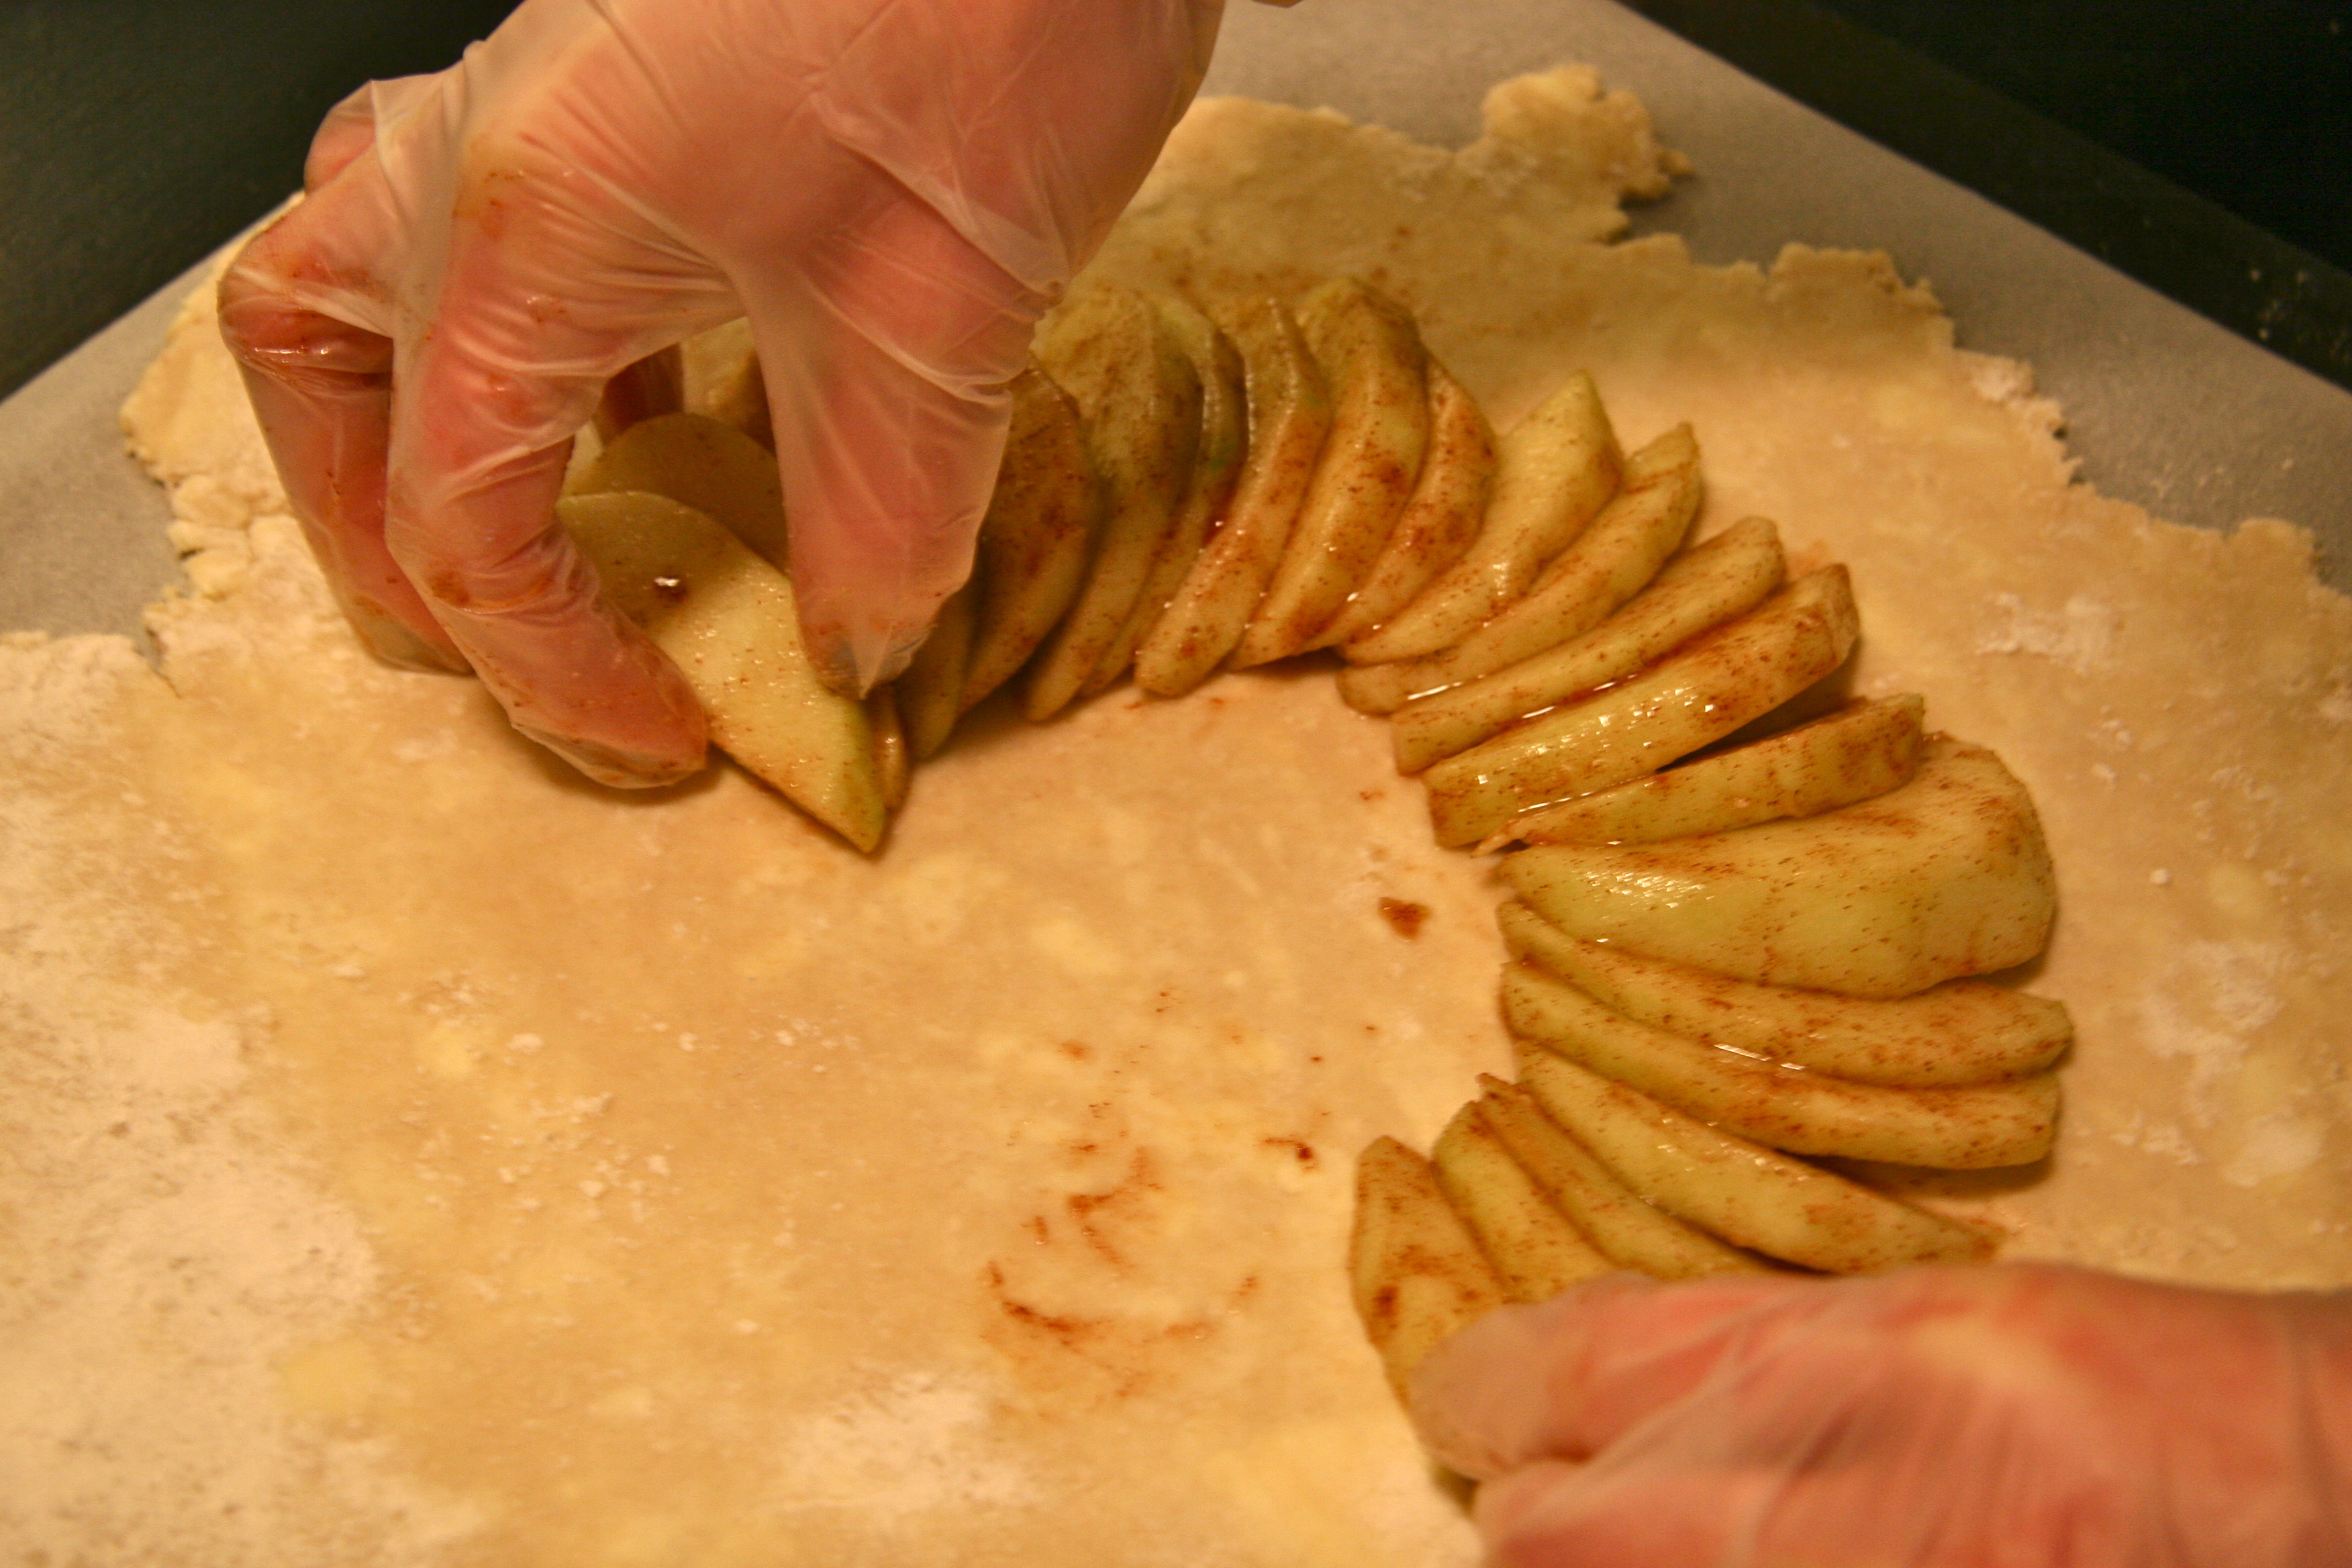
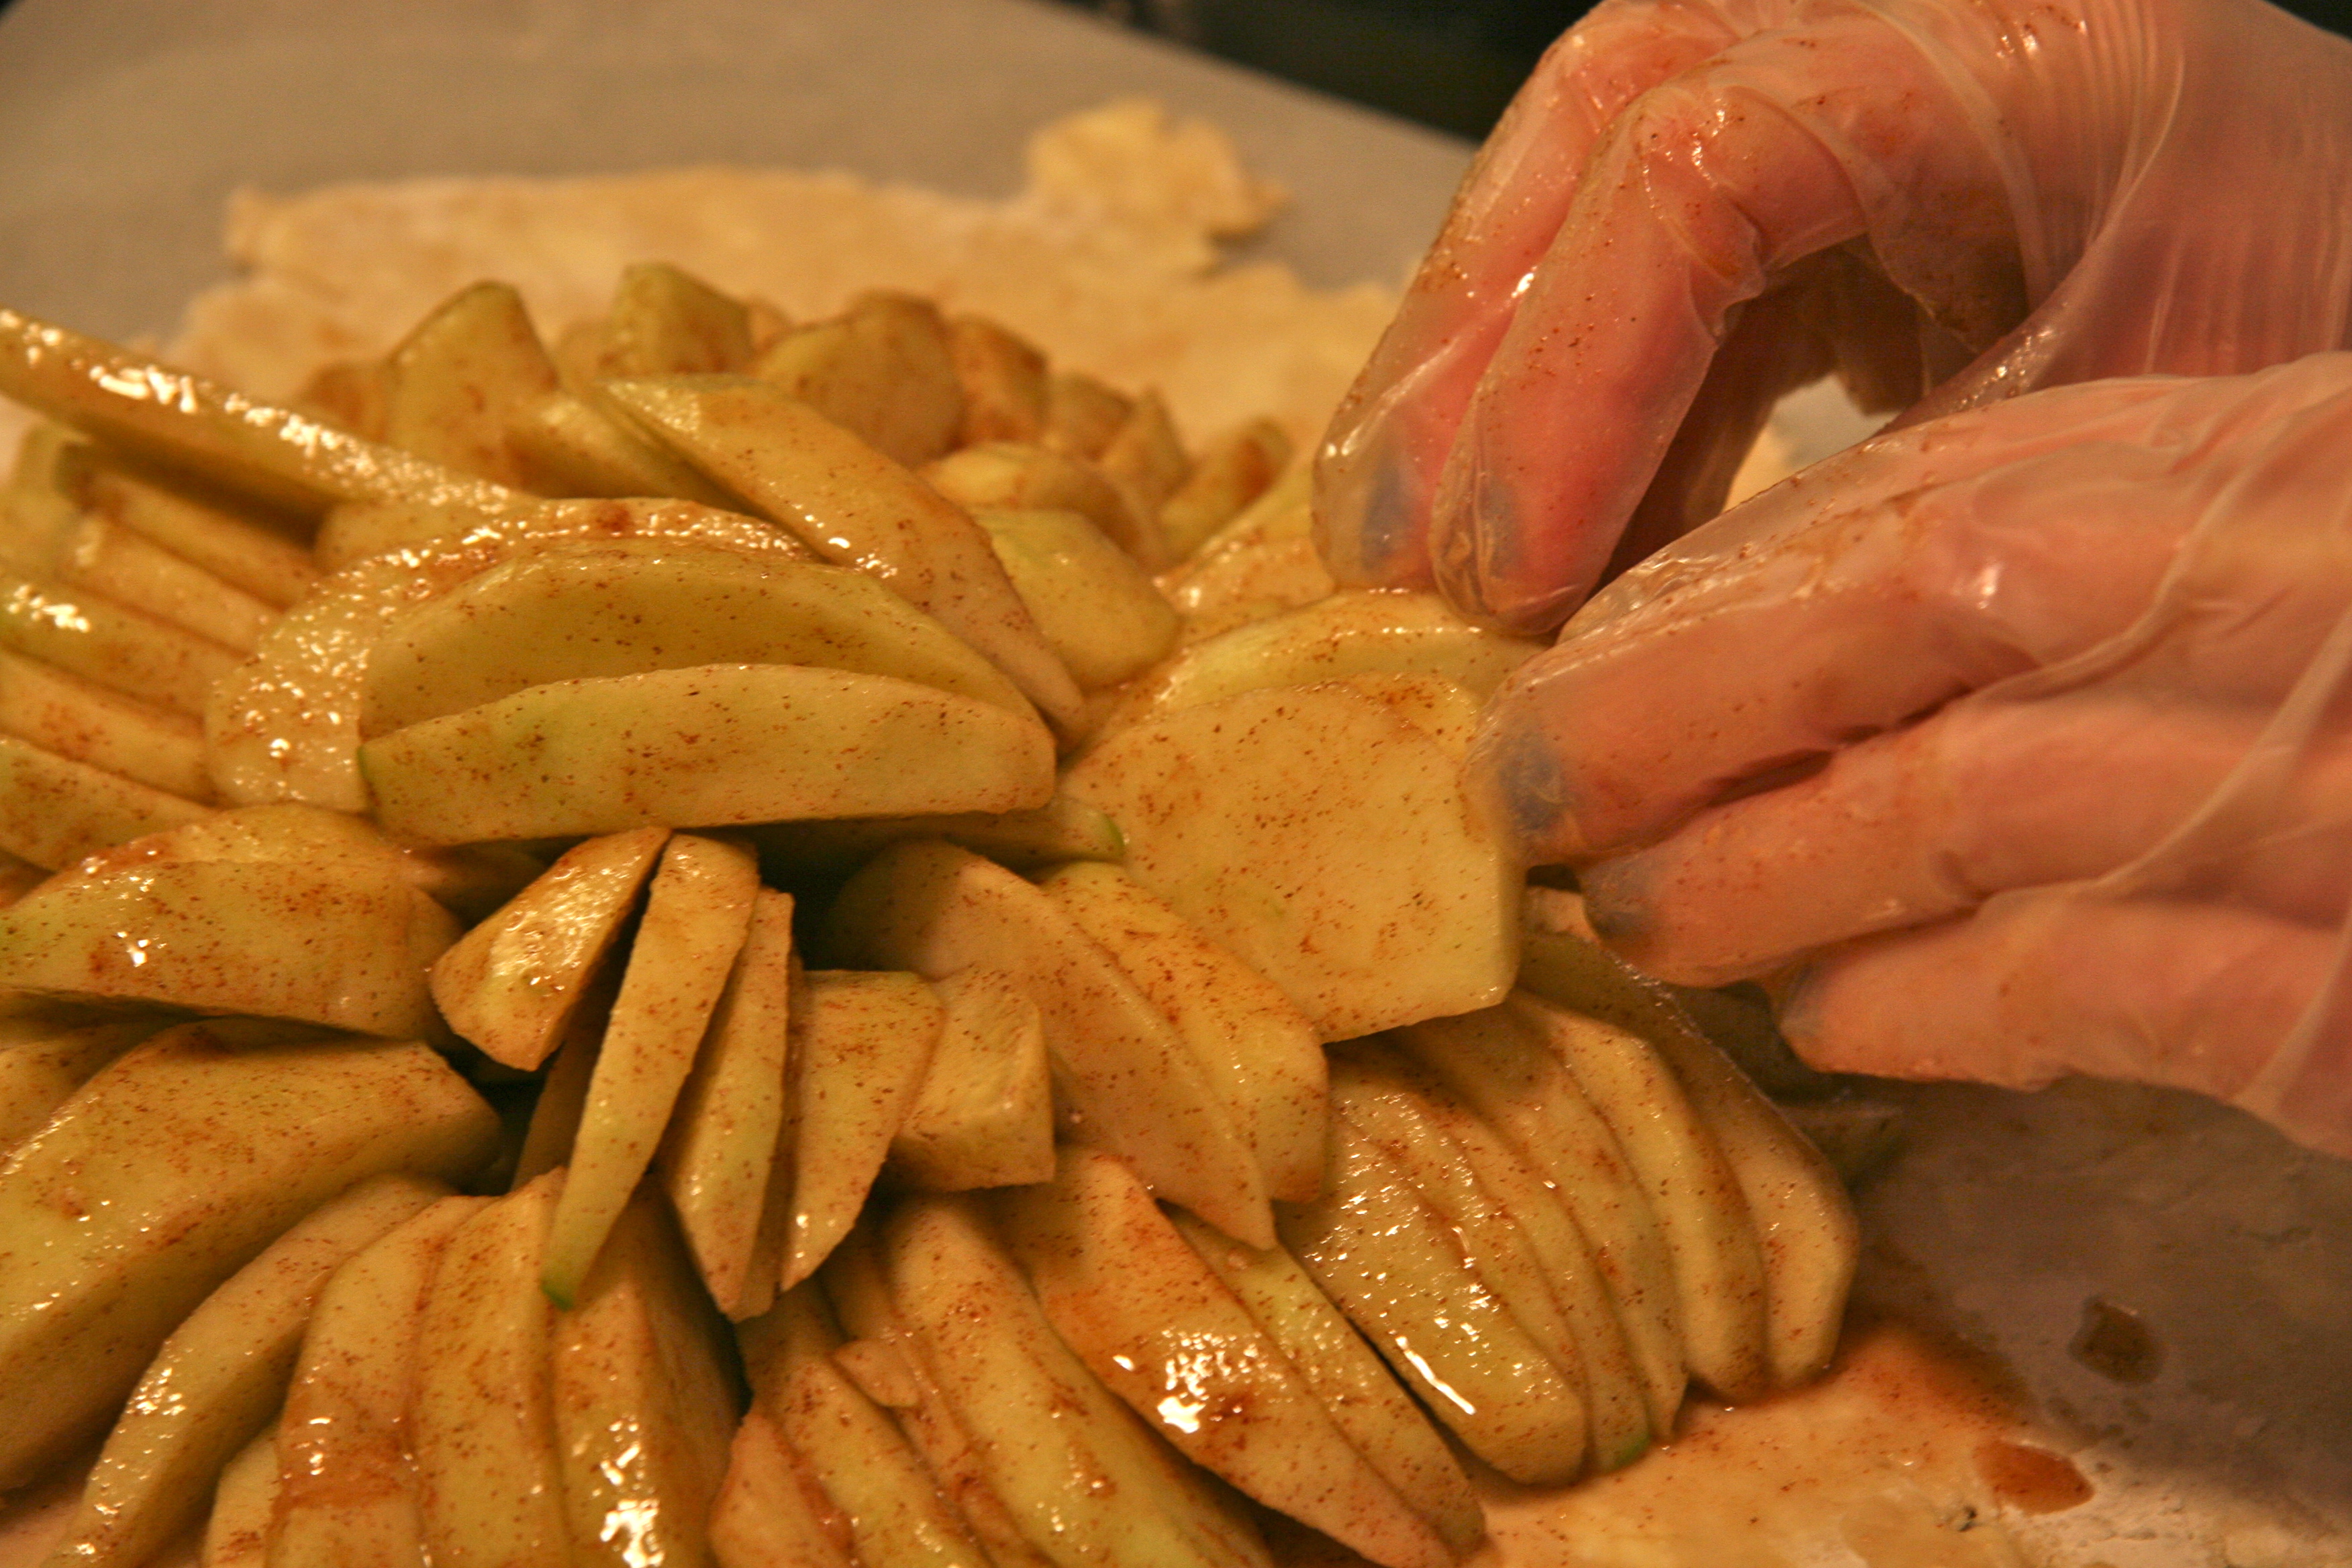
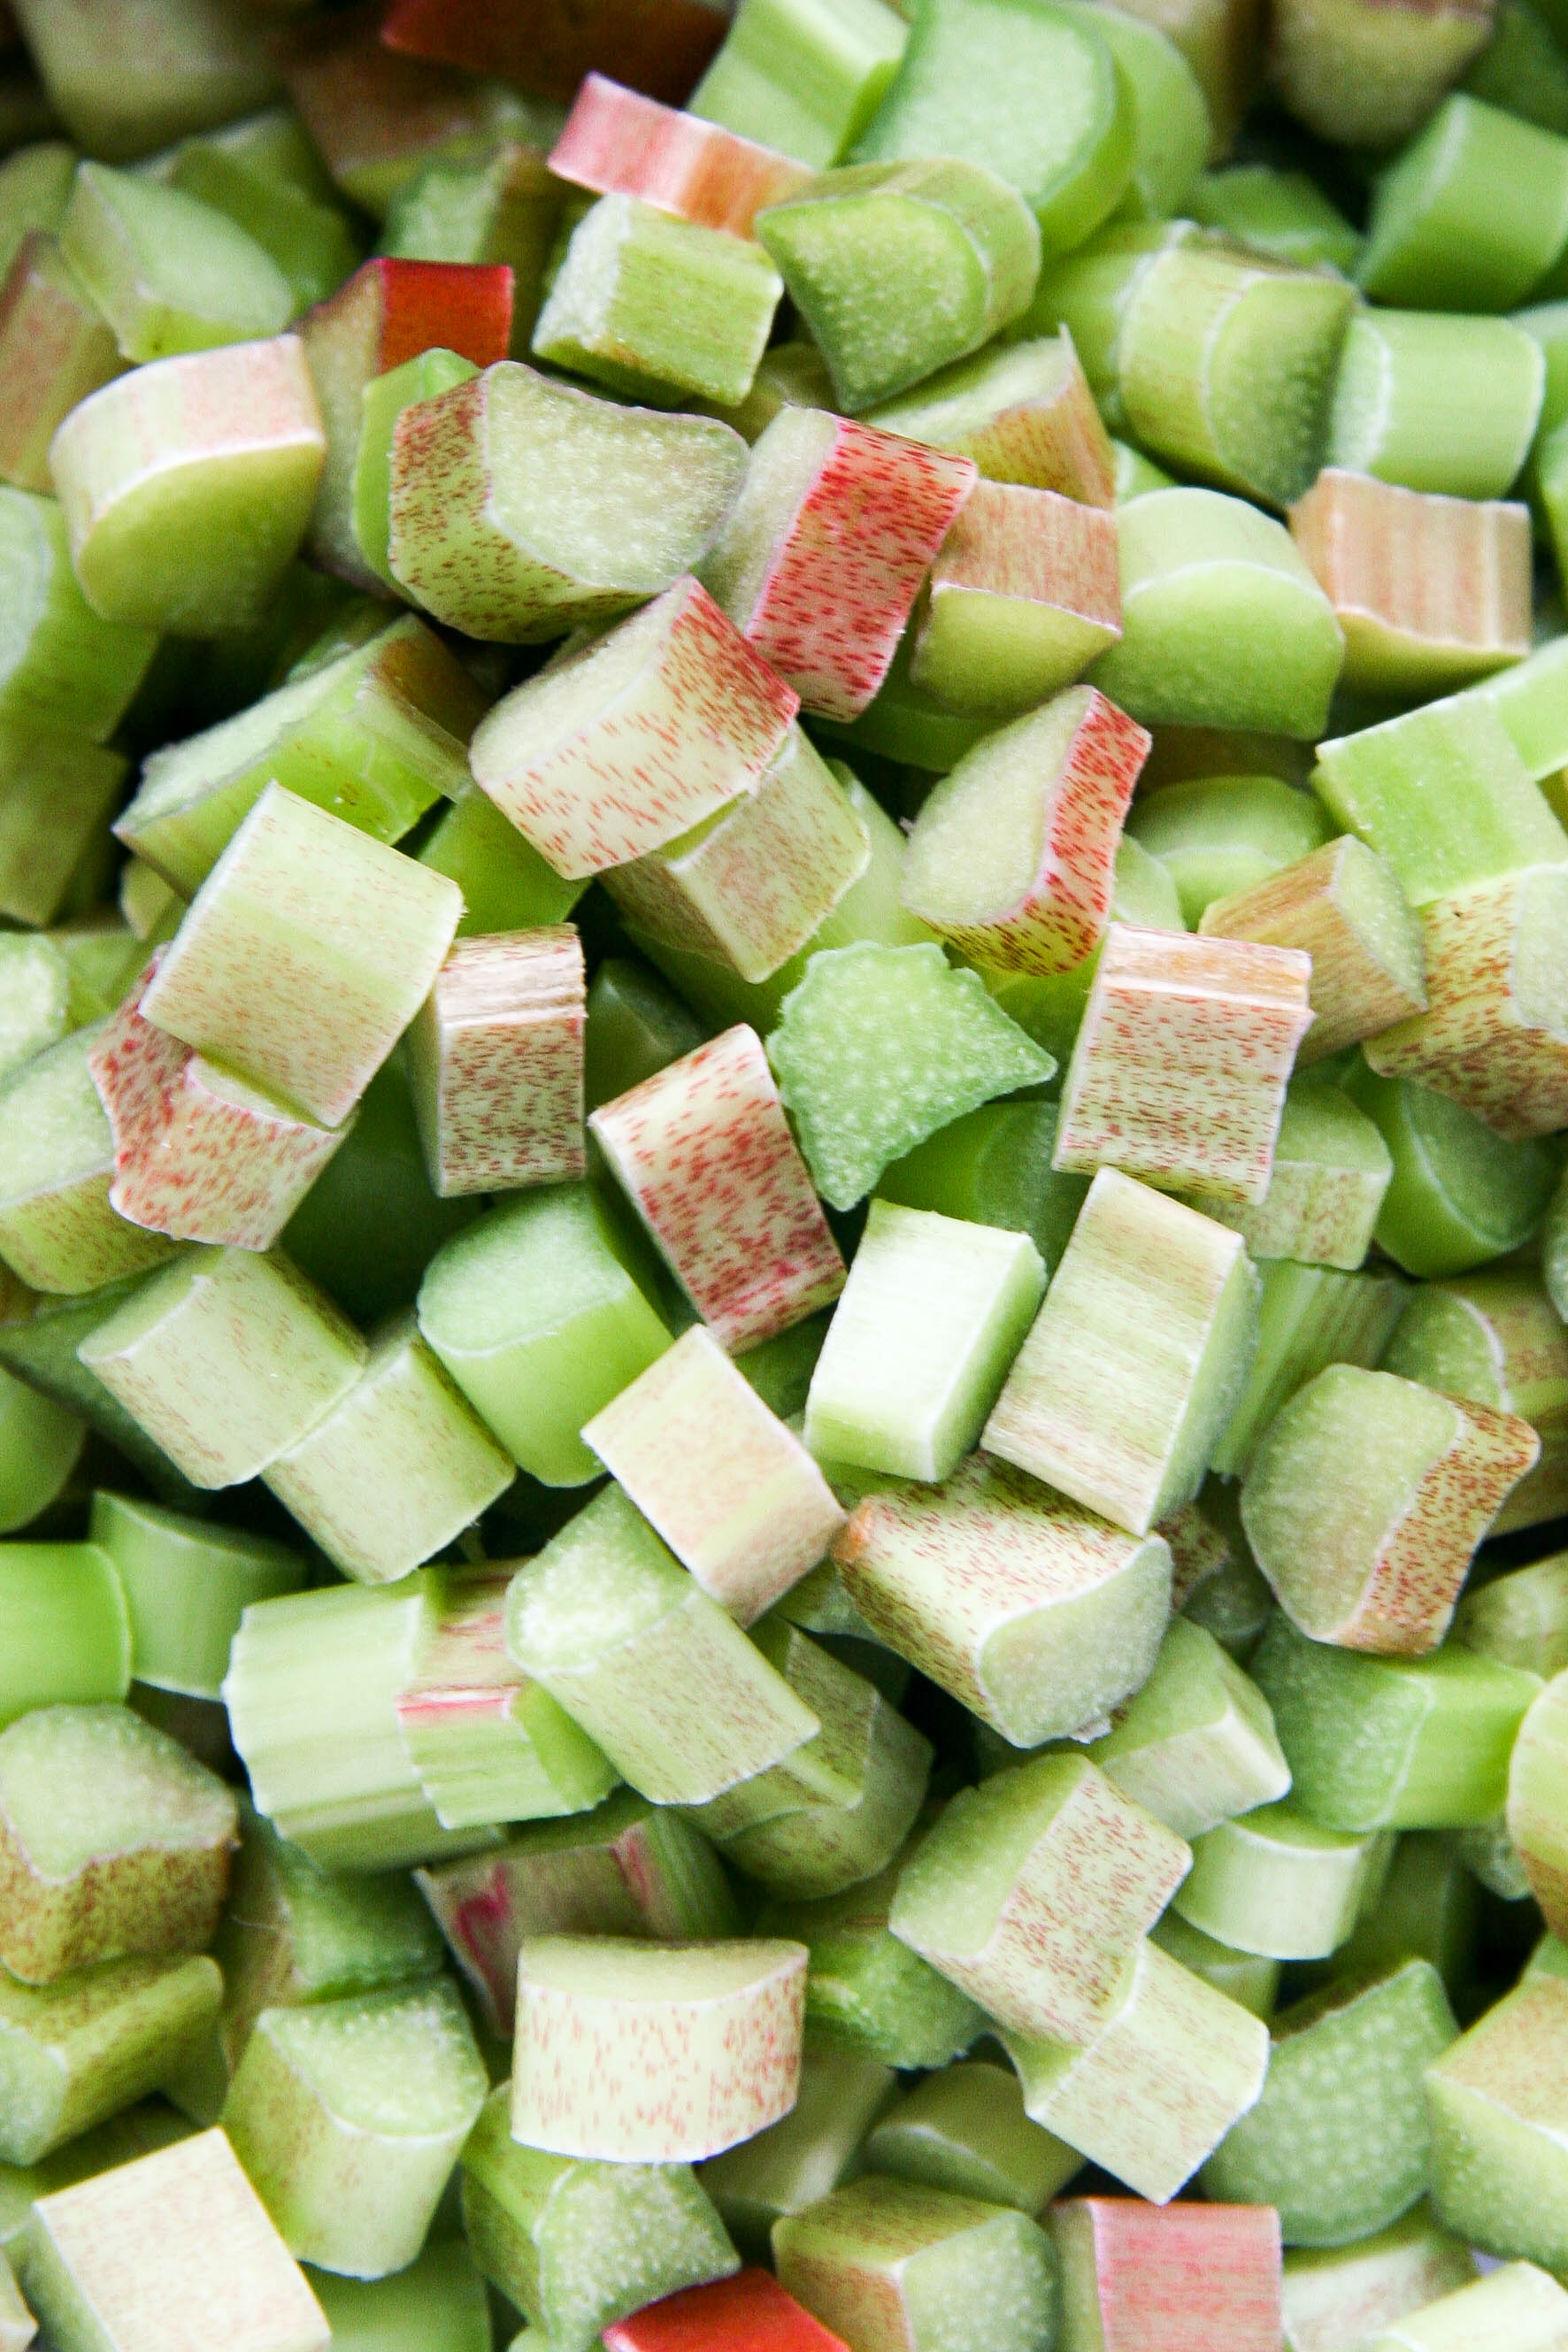
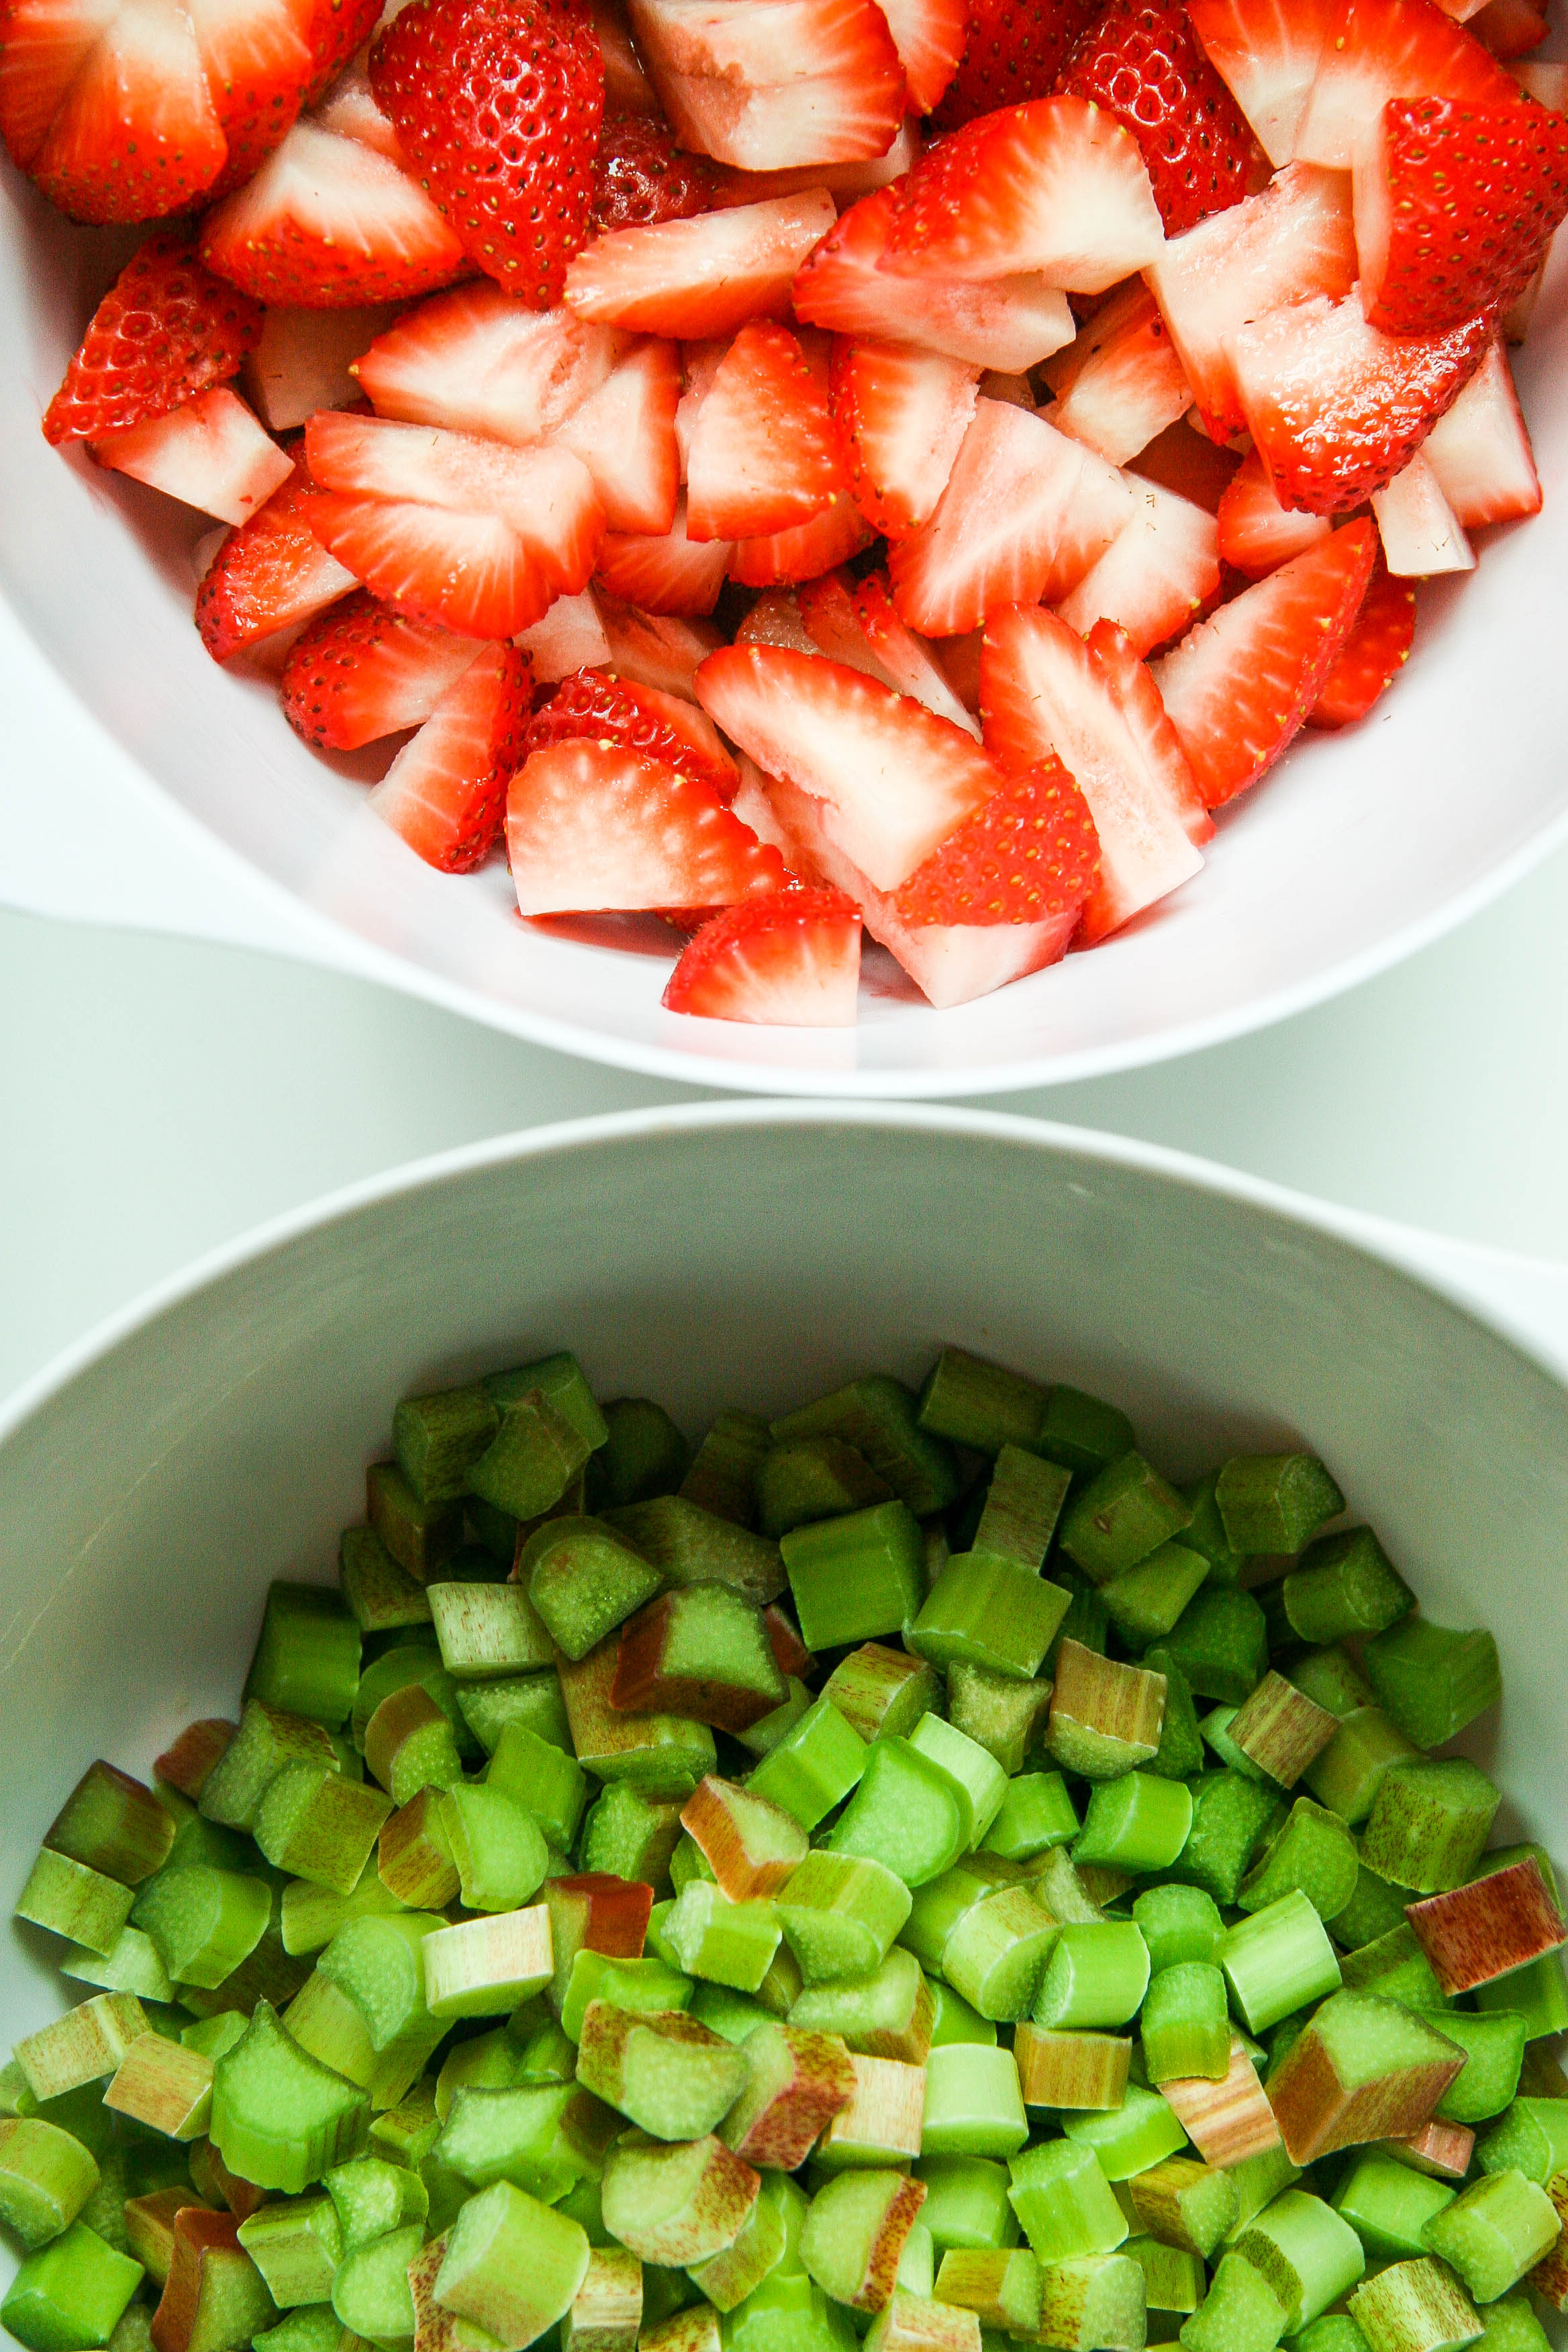
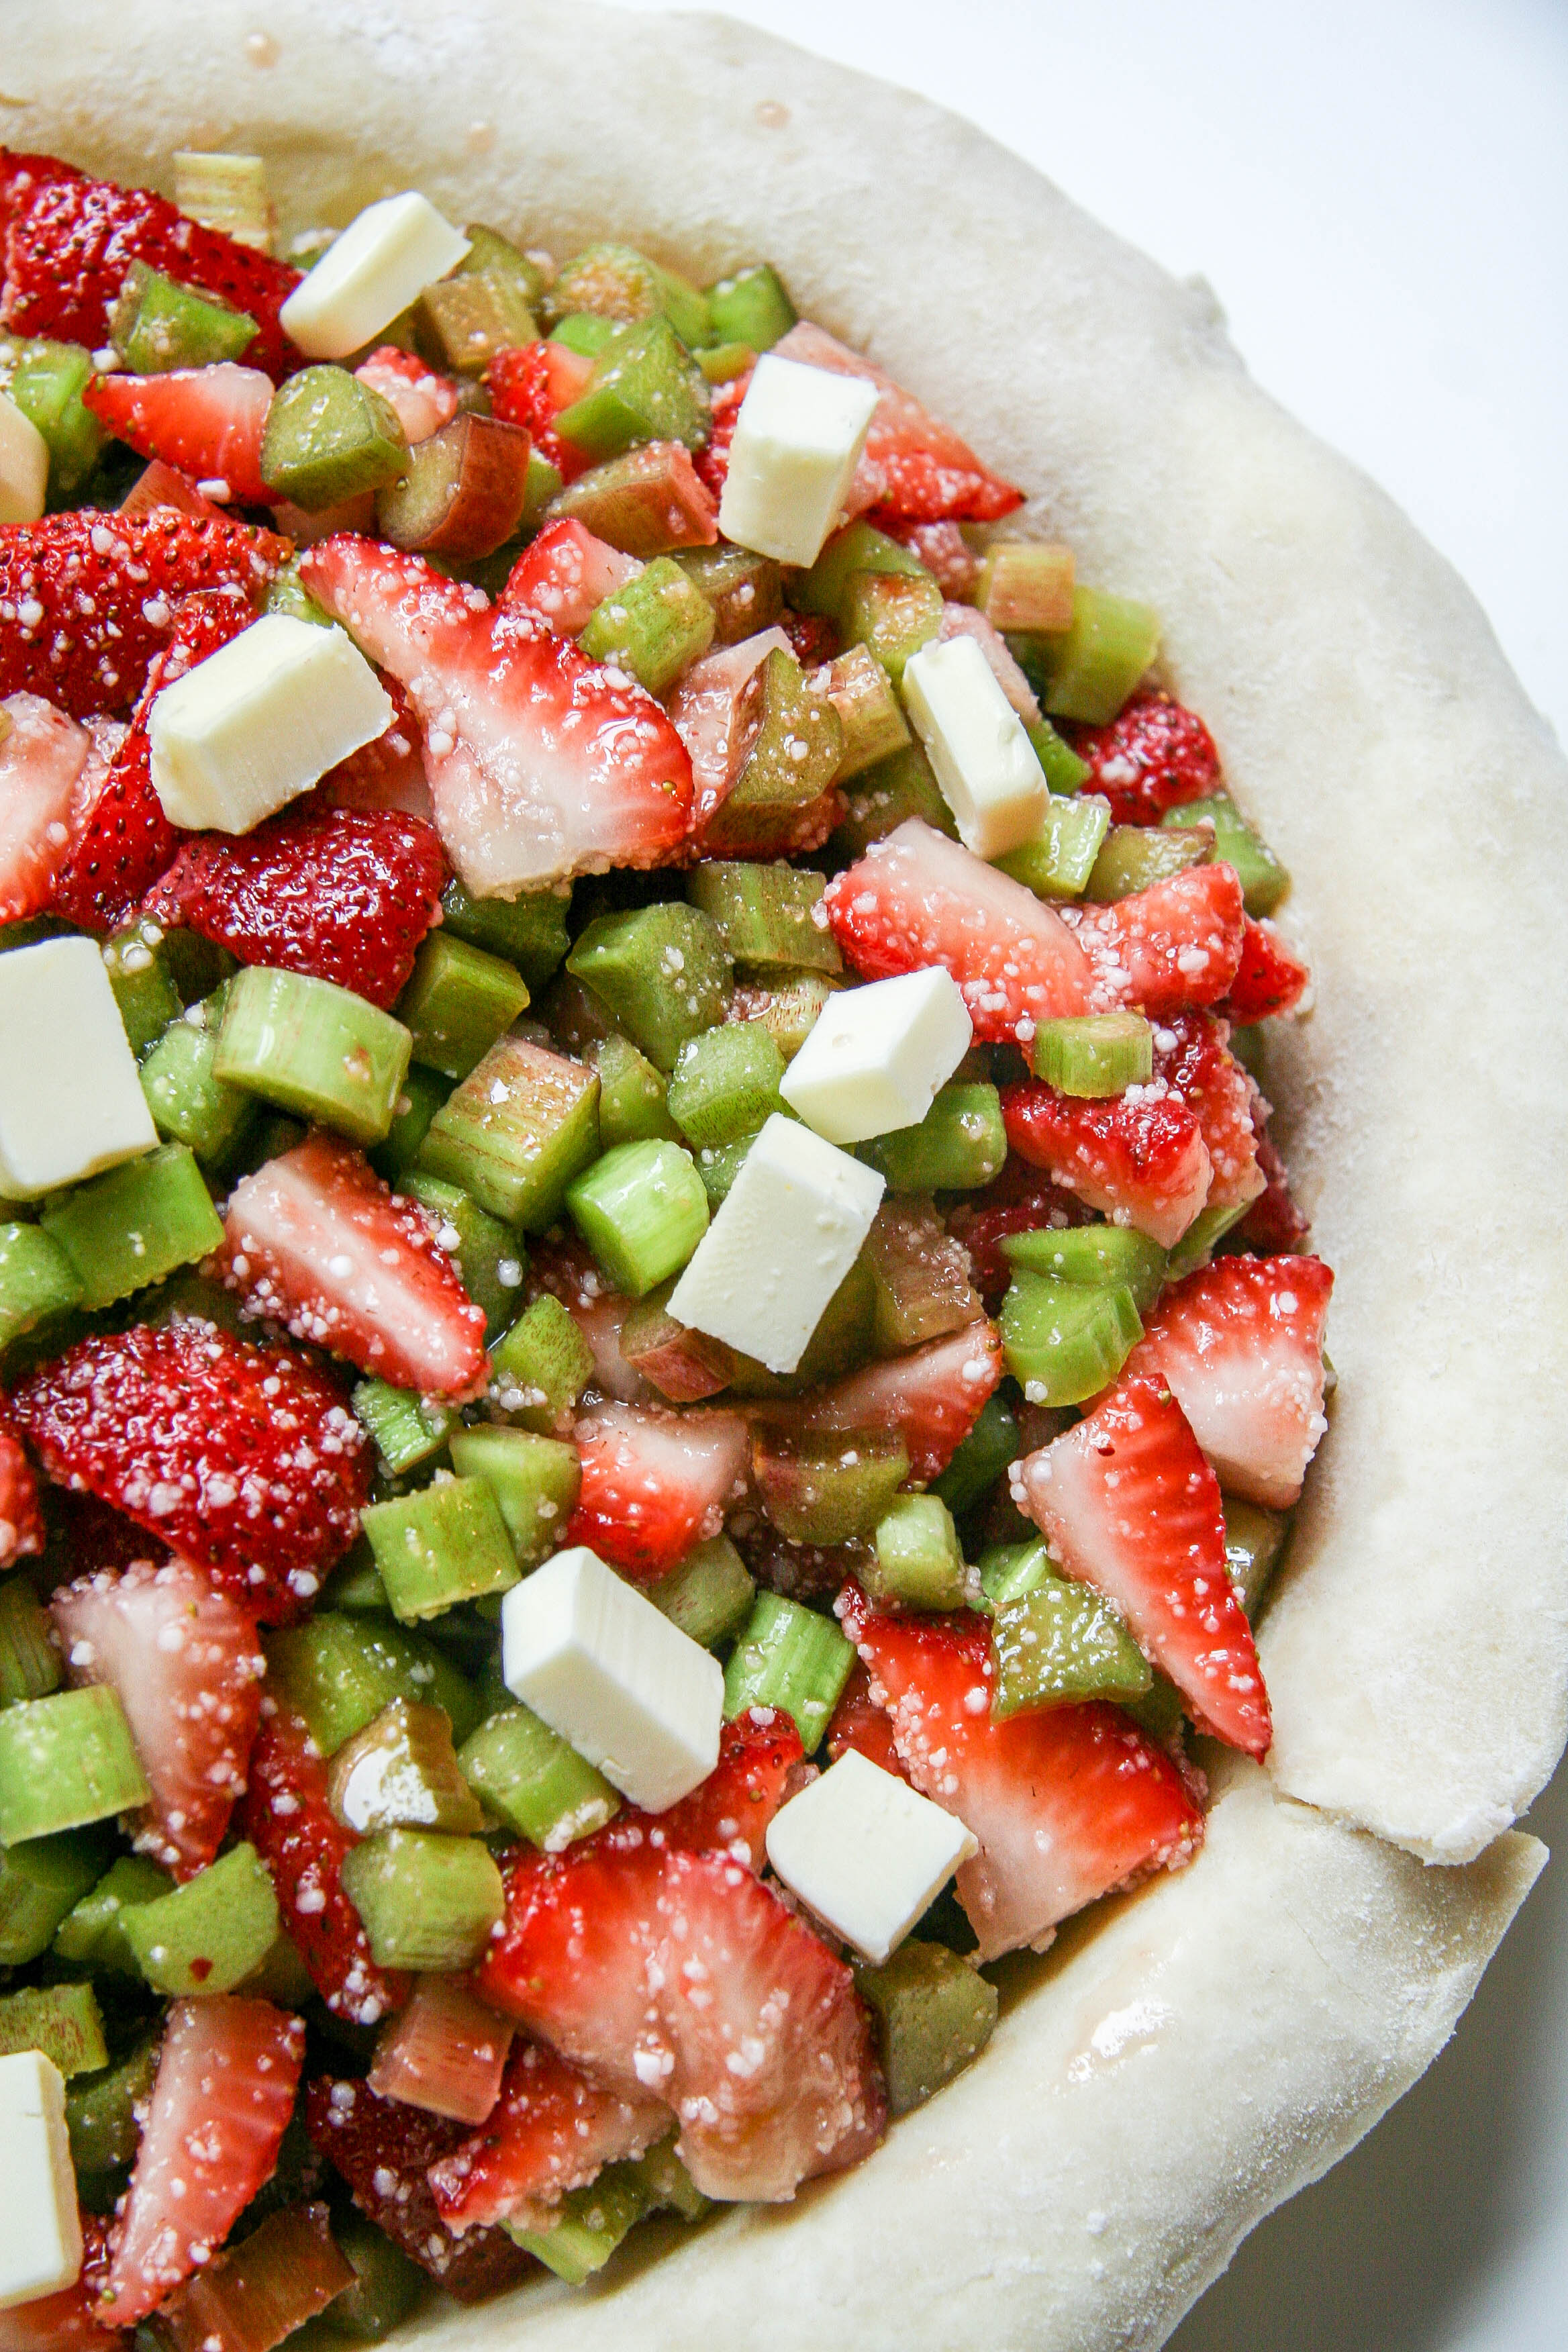
3 ½ cups (about 1 ½ pounds, untrimmed) rhubarb, in ½-inch thick slices
4 cups (about 1 pound) strawberries, hulled and sliced into 4–6 pieces if big, halved if tiny
½ cup granulated sugar
¼ cup light brown sugar
1 tablespoon lemon juice
1 teaspoon finely grated lemon zest
¼ teaspoon salt
¼ cup quick-cooking tapioca
2 tablespoons unsalted butter, cut into small pieces
1 large egg yolk beaten to blend with 1 teaspoon water (for glaze)
Sparkling sugar, optional (for topping)

Instructions:

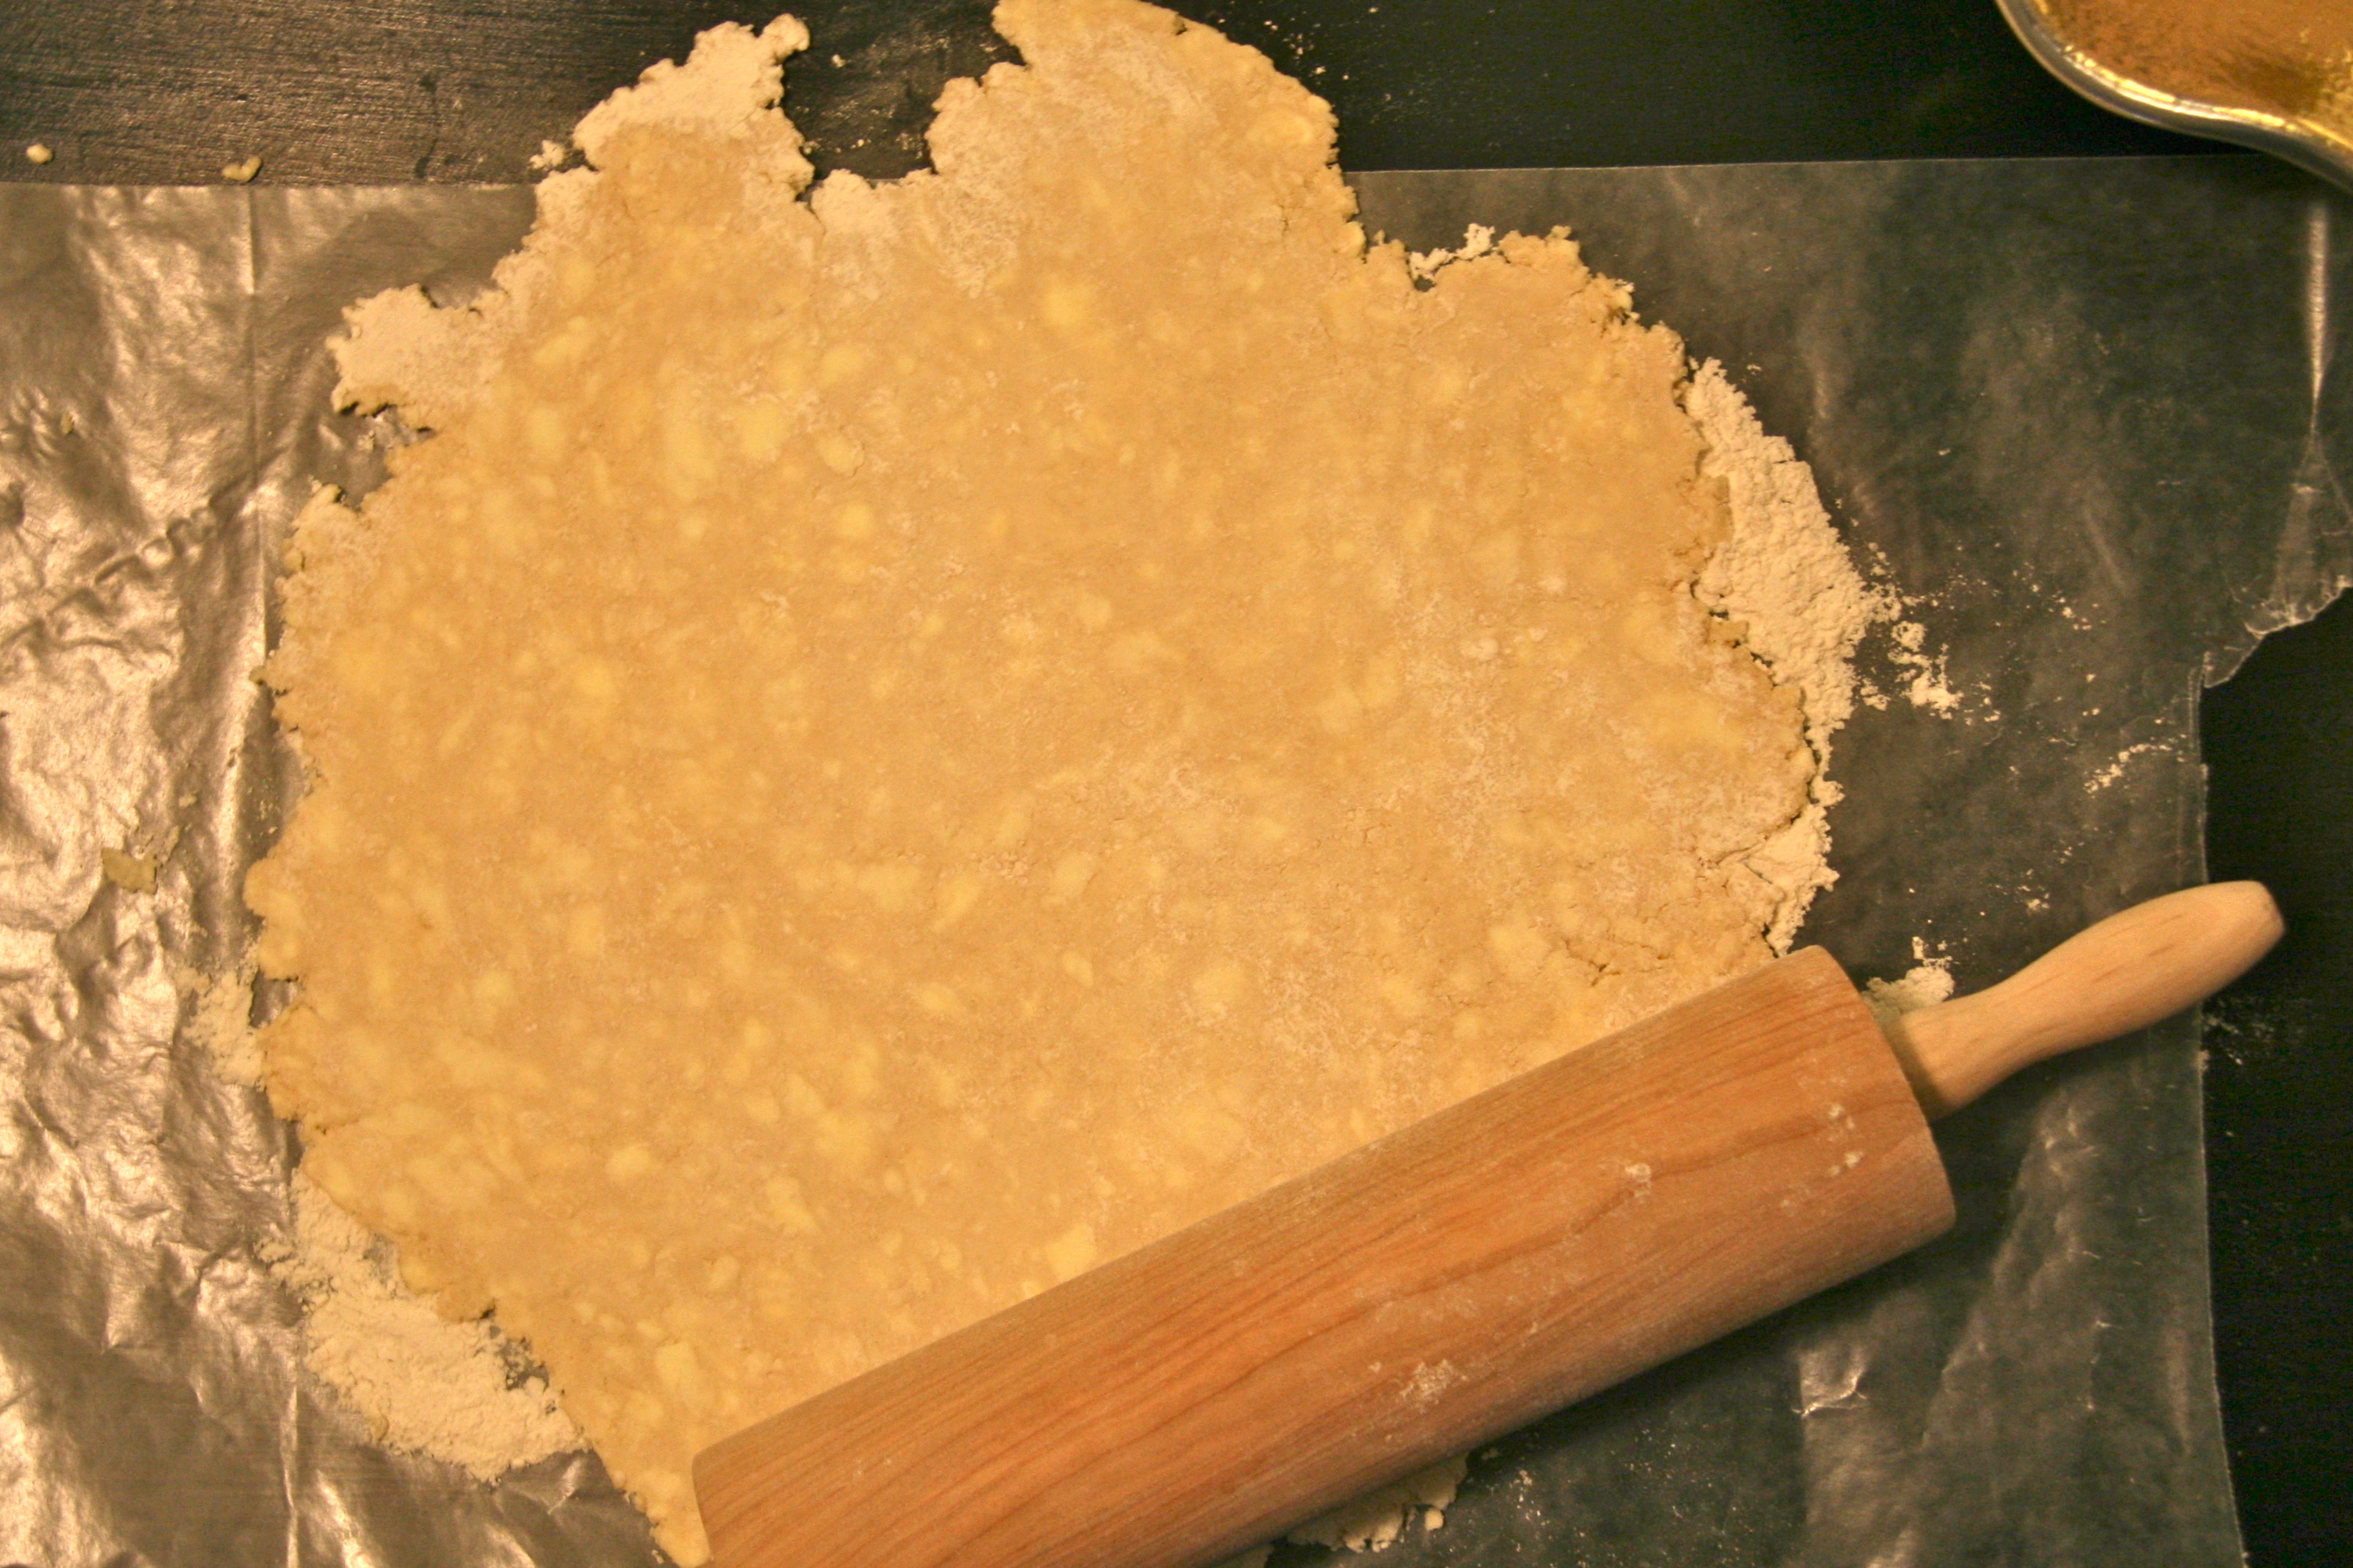
  1. Preheat oven to 400 degrees. On a well-floured counter, roll half of chilled pie dough into a 12-inch circle and carefully transfer to a 9-inch pie plate. Refrigerate while you prepare the filling.
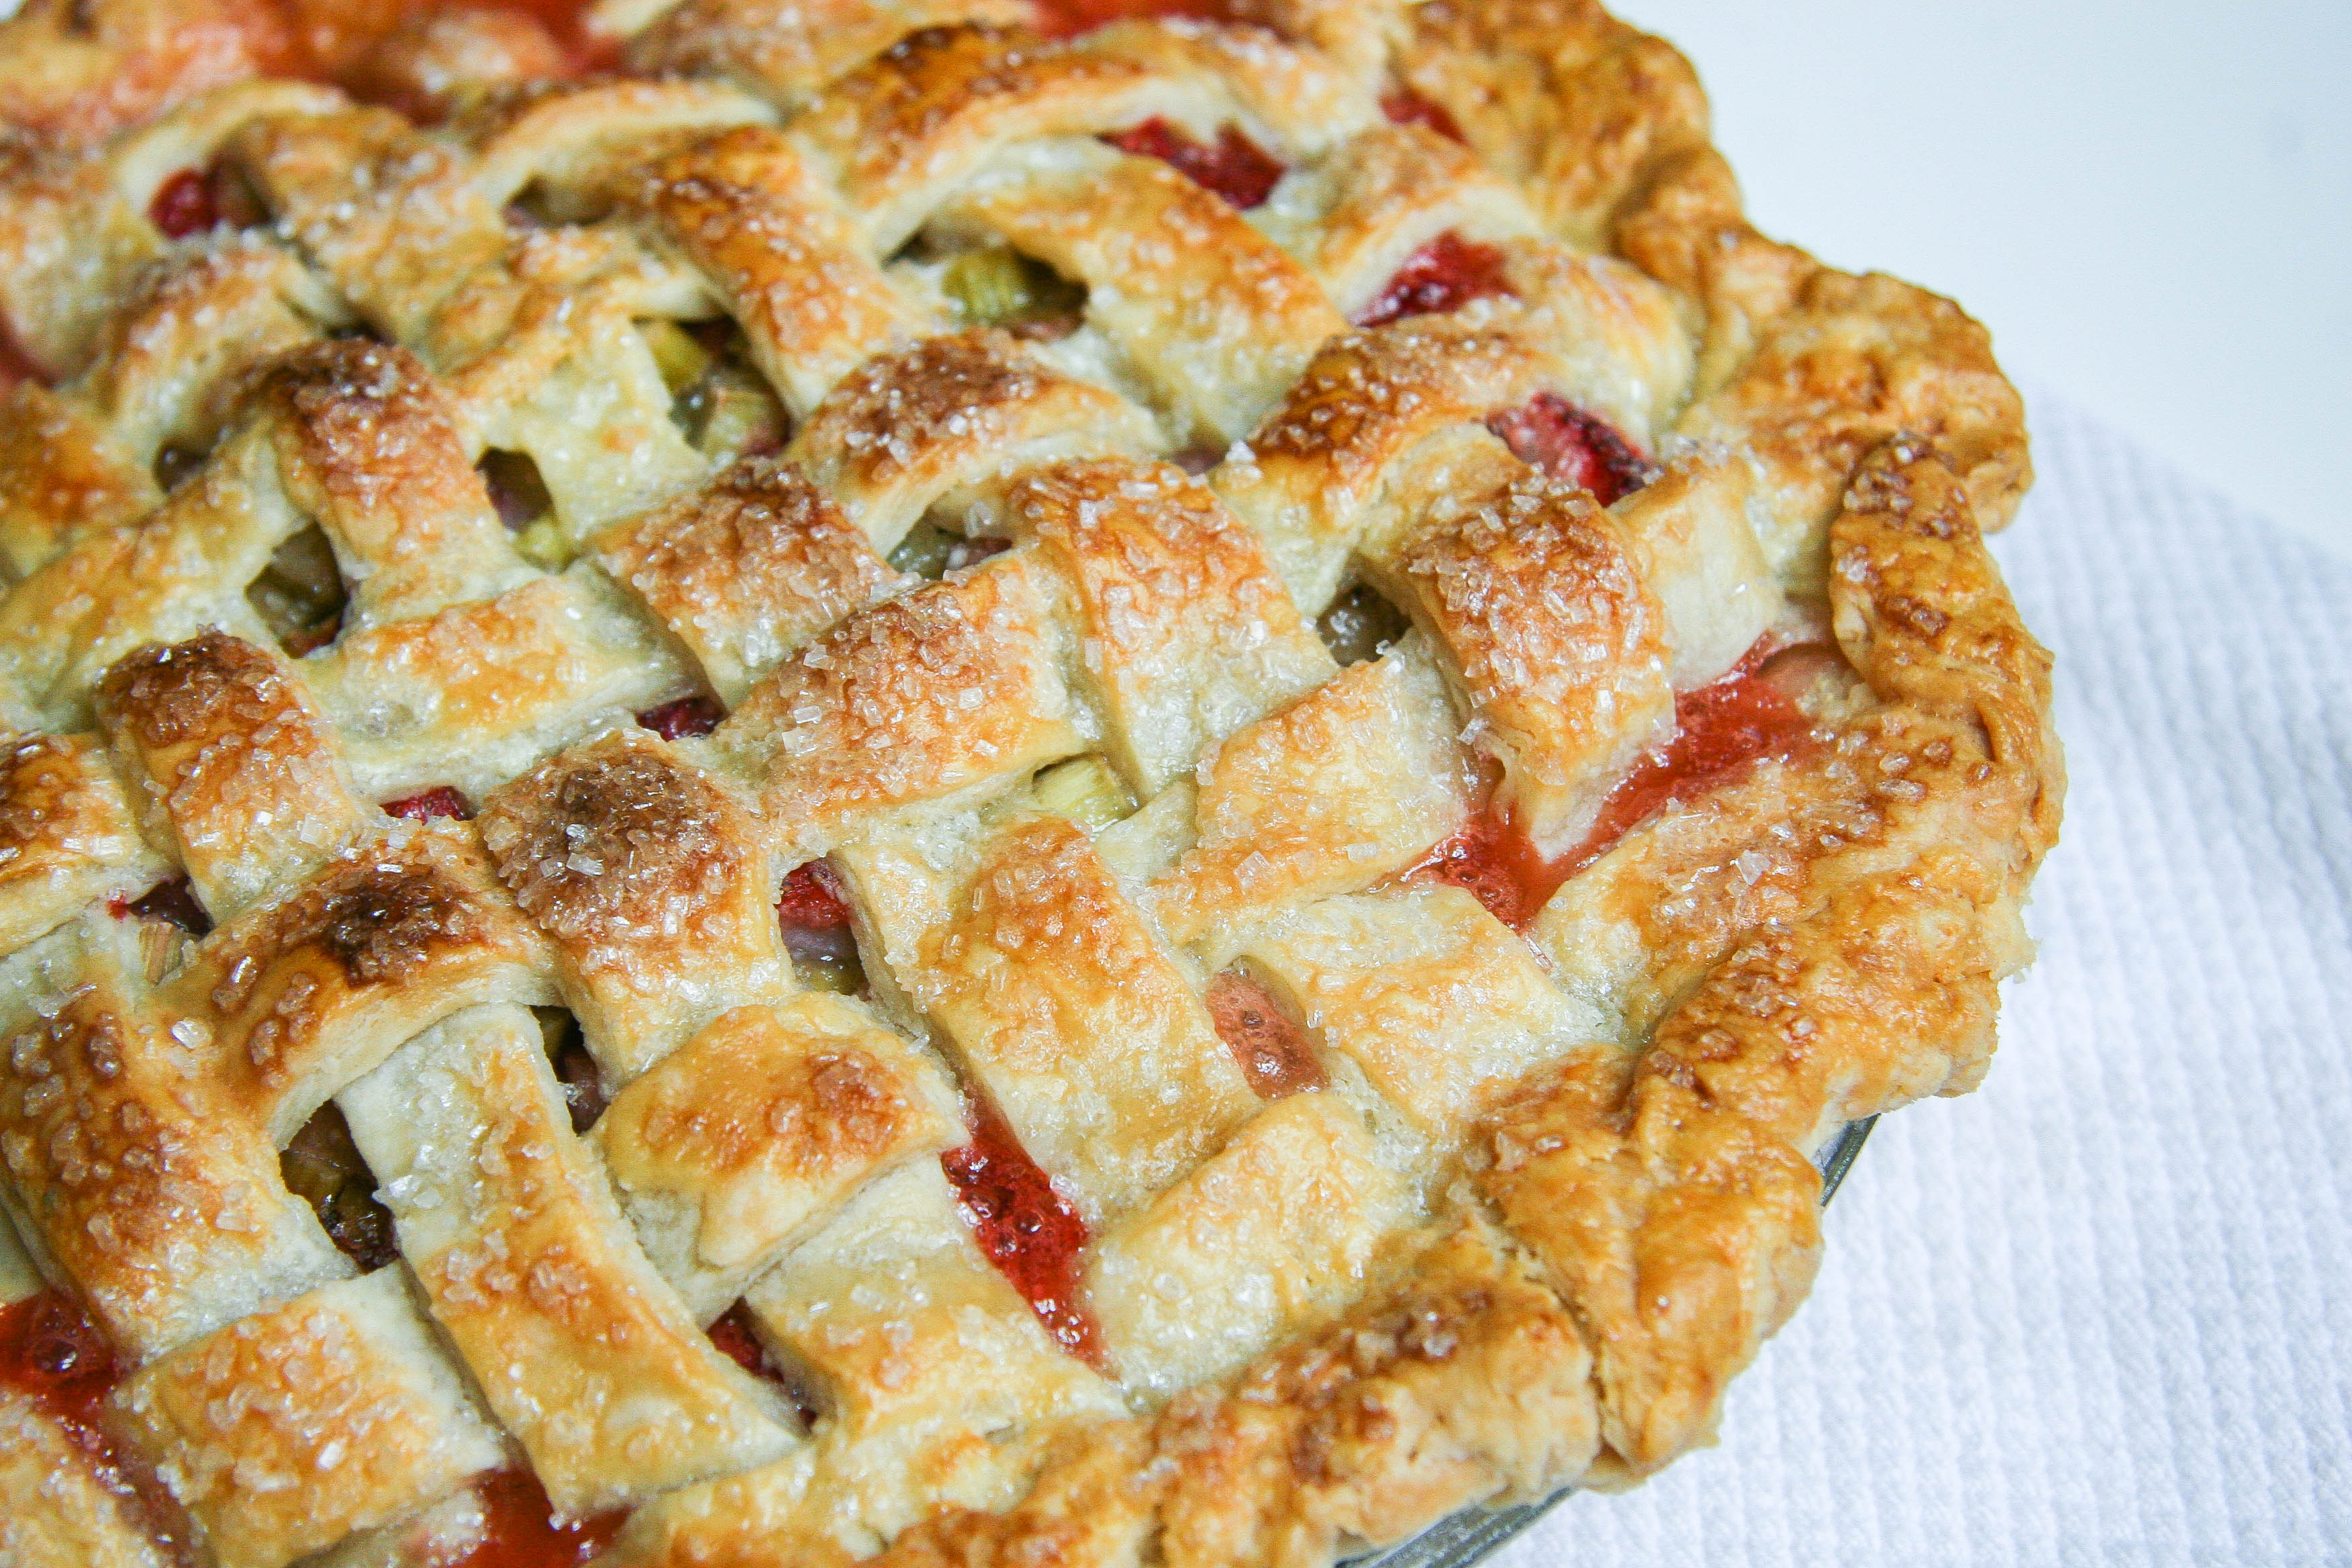
  2. Stir together rhubarb, strawberries, sugars, lemon juice and zest, salt, and tapioca in a large bowl. Roll second half of chilled pie dough into an 11-inch circle and place on a sheet of parchment paper. Cut into 1-inch strips if making a lattice top or cut decorative slits in it if keeping a full crust. I like to weave my lattice tops on the parchment paper similar to the technique used in this old school video, rather than trying to weave it over the filling. Then I slide the full weave onto the pie during the next step. Return dough-topped parchment to the refrigerator for a few minutes to firm up.
  3. Remove pie plate from the refrigerator and pile strawberry-rhubarb filling into it, spreading into the sides. Dot the top with the 2 tablespoons of butter pieces.
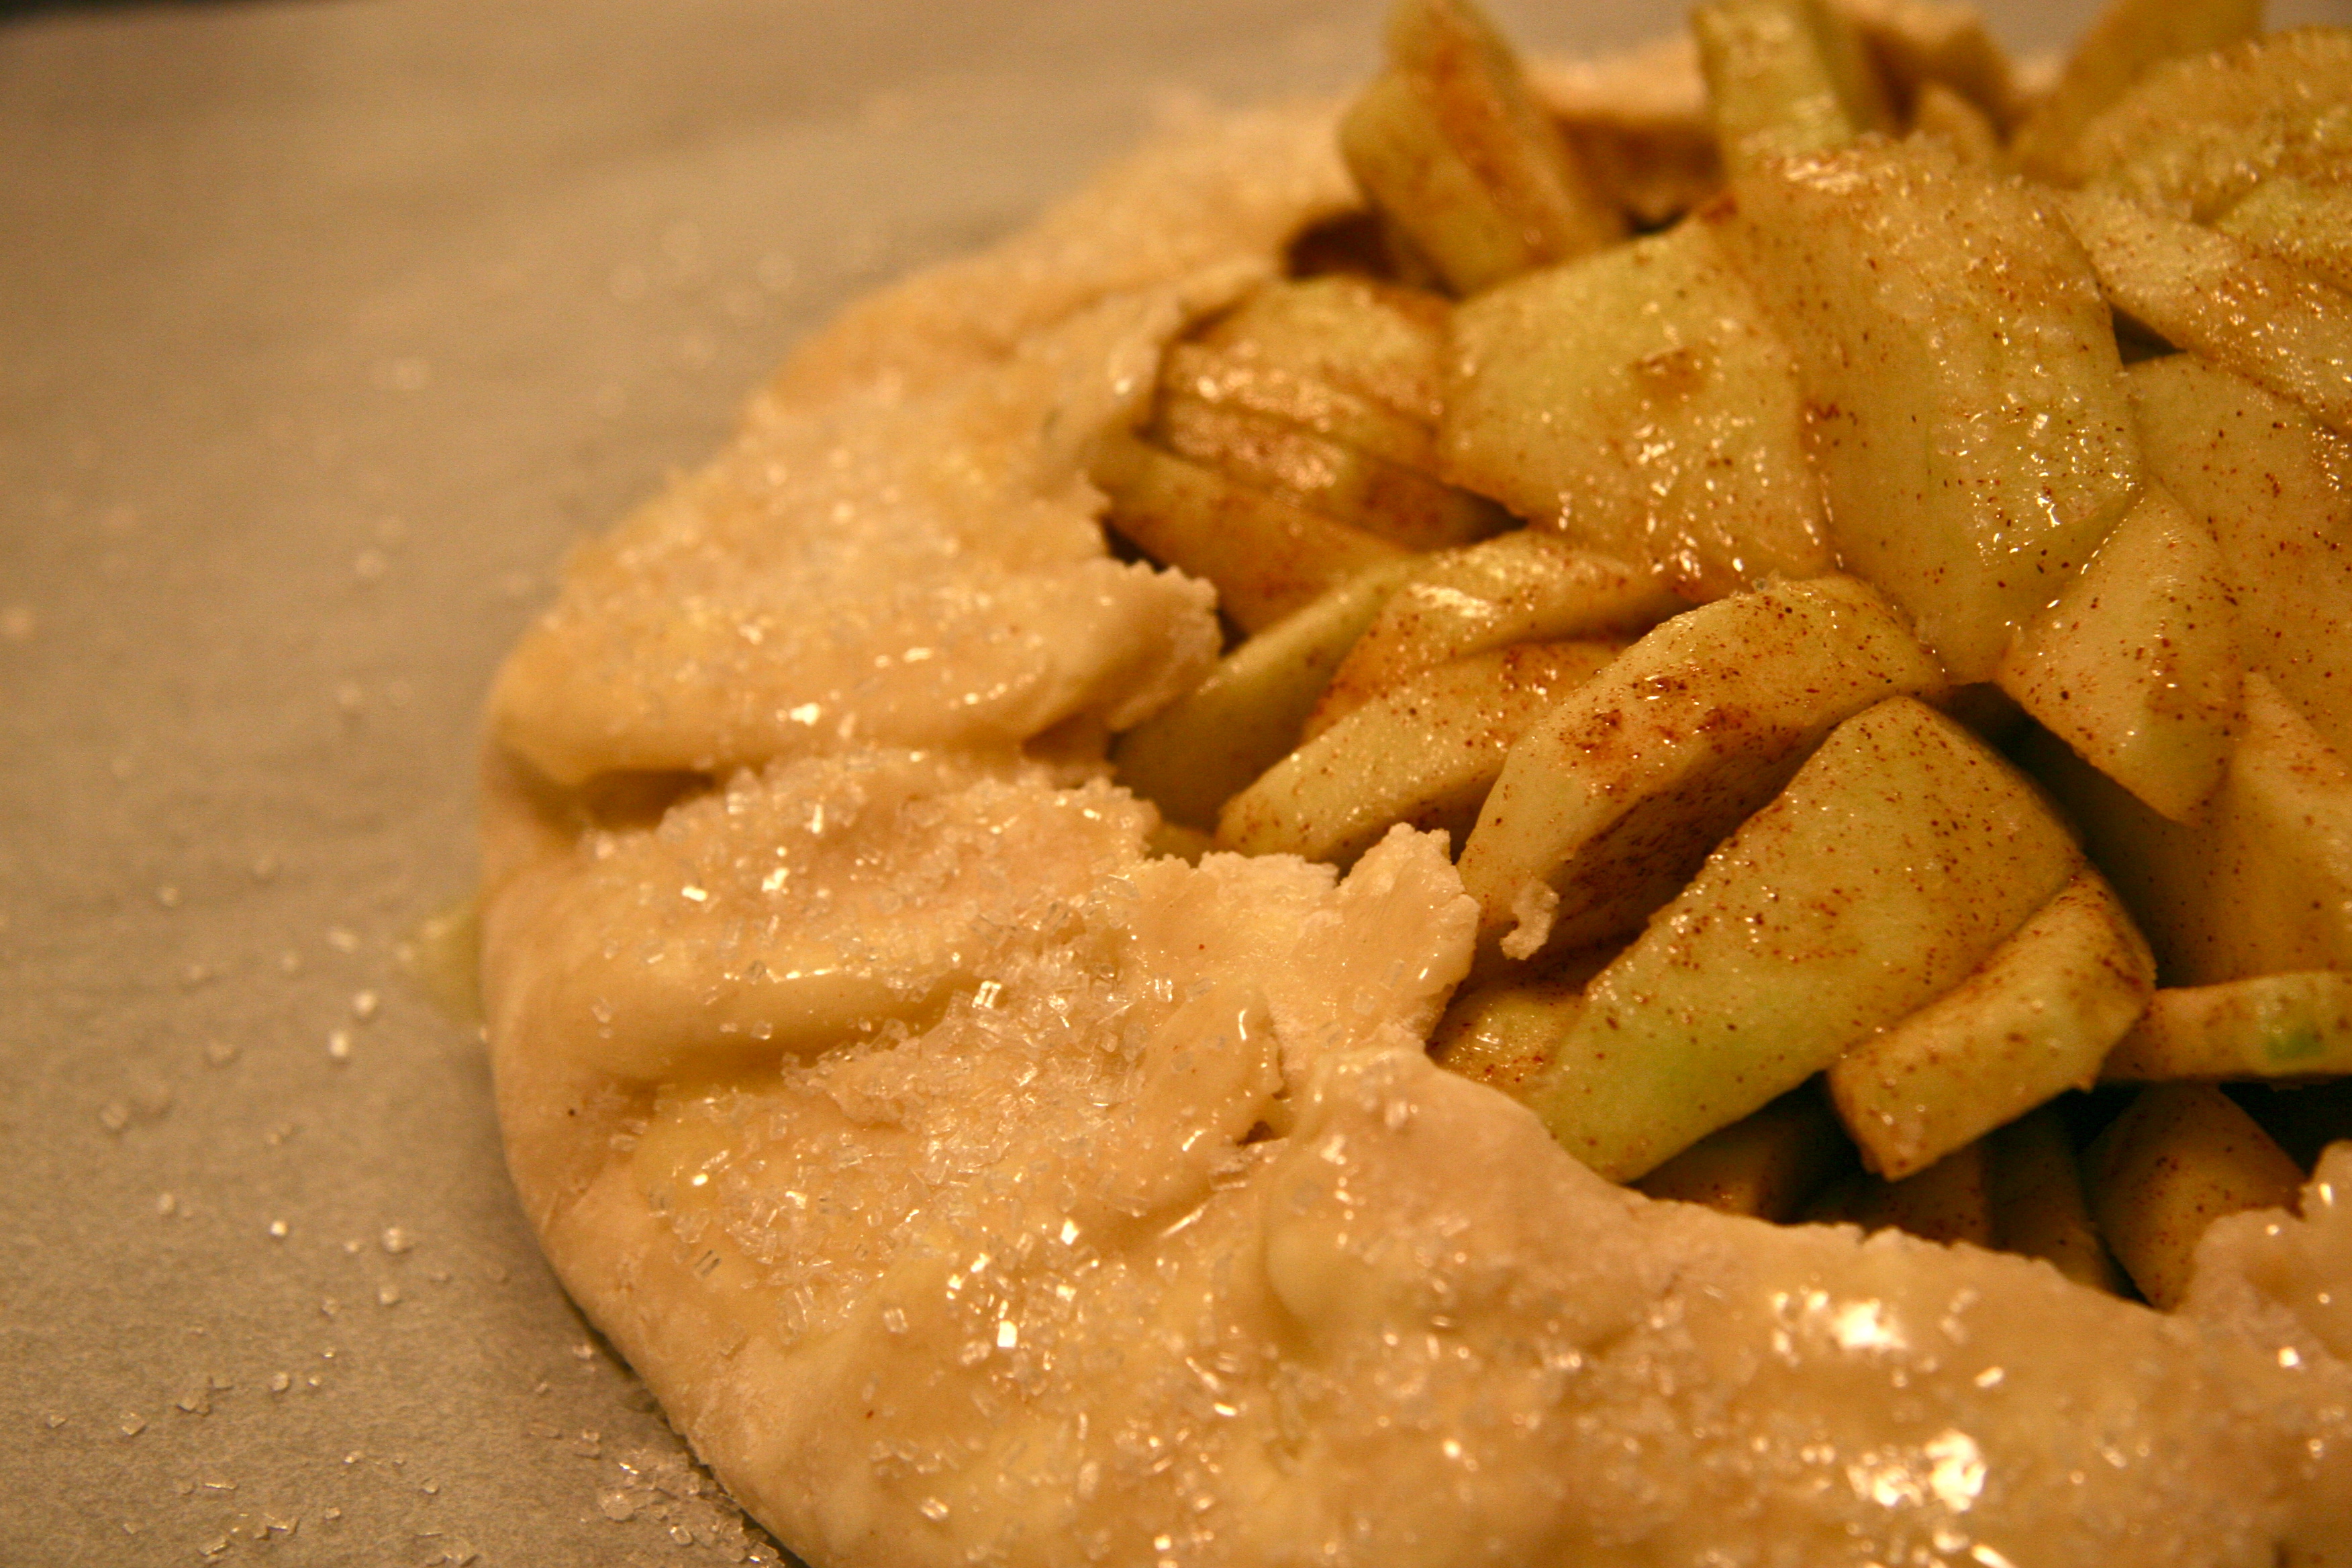
  4. Remove pie top from the refrigerator and slide it off the parchment, centering it on top of the pie. Trim top and bottom pie dough so that the dough hangs over the pie plate edge only ½-inch. Tuck the rim of dough underneath itself and crimp it decoratively. Transfer pie to a baking sheet, brush egg yolk mixture over dough and sprinkle with sugar.
  5. Bake for 20 minutes then reduce temperature to 350 degrees and bake for an additional 25 to 30 minutes, until the pie is golden and the juices bubble visibly. Transfer the pie to wire rack to cool. Allow the pie to cool for at least 2–3 hours before cutting to allow the juices to firm up a little bit.


Filed Under: desserts and sweets, eat Tagged With: dessert, fruit, pie, rhubarb, spring, strawberry

raspberry lime buttermilk cake with coconut cream cheese frosting

April 2, 2014 by Butter Loves Company

raspberry lime buttermilk cake with coconut cream cheese frosting-assembled cake4Light, moist buttermilk layers dotted with fresh raspberry bursts and swirled with lime zest; all topped with tropical coconut cream cheese frosting.

I’m pretty sure the red-eye home from sunny California last night made me crazy this morning. I mean, after indulging on SoCal treats like tacos, churros, baseball game fare, and a delicious key lime pie made by Greg’s cousin (to the entire family, we are so grateful!), I should’ve immediately banished all junk, hit the grocery store, and stocked up on every single green, crunchy vegetable available in preparation for a string of signature “post-vacation detox” salads.

Instead—in my red-eye haze—I made this Raspberry Lime Buttermilk Cake with Coconut Cream Cheese Frosting. I had most of the ingredients staring at me in the fridge; sad we had left them for the palm trees and Hollywood glam of the west coast. What was I supposed to do?

The layers of this cake are incredibly moist because of the buttermilk, and in every other bite you get juicy, tart bursts of raspberry with a citrusy lime undertone. The raspberries could easily be swapped out with any other berry you have on hand. In the past I’ve made it with diced strawberries and Greg and I enjoyed it unfrosted as a breakfast cake. In this case, I decided to layer it with coconut cream cheese frosting for a rich, sweet taste of the tropics—and one last bite of vacation.

raspberry lime buttermilk cake with coconut cream cheese frosting-raspberries

raspberry lime buttermilk cake with coconut cream cheese frosting-lime zest

raspberry lime buttermilk cake with coconut cream cheese frosting-batter1

aspberry lime buttermilk cake with coconut cream cheese frosting-batter2

raspberry lime buttermilk cake with coconut cream cheese frosting-batter3

raspberry lime buttermilk cake with coconut cream cheese frosting-cakes

raspberry lime buttermilk cake with coconut cream cheese frosting-cake4

raspberry lime buttermilk cake with coconut cream cheese frosting-assembled cake5


raspberry lime buttermilk cake with coconut cream cheese frosting-assembled cake3
Raspberry Lime Buttermilk Cake with Coconut Cream Cheese Frosting
Cake adapted from Smitten Kitchen, which was adapted from Gourmet, June 2009
Frosting, my own

Prep Time: 30 minutes
Cook Time: 20 minutes
Total Time: 50–60 minutes
Makes two 8-inch cakes and enough frosting for a “tom-boy” style* cake filling/topping

For the Raspberry Lime Buttermilk Cake:

2 cups all-purpose flour
1 teaspoon baking powder
1 teaspoon baking soda
½ teaspoon salt
1 stick (8 tablespoons) unsalted butter, at room temperature
1⅓ cup granulated sugar
1 teaspoon pure vanilla extract
1½ teaspoons finely grated lime zest (from about two limes)
2 large eggs
1 cup buttermilk, well shaken
1 cup fresh raspberries
¼ cup toasted sweetened shredded coconut, for garnishing (optional)

For the Coconut Cream Cheese Frosting:

8 oz cream cheese (1 standard package)
½ stick (4 tablespoons), unsalted butter at room temperature
½ cup sweetened shredded coconut
2–3 cups powdered sugar
½ teaspoon vanilla extract
⅛ teaspoon coconut extract

Instructions:

  1. Preheat oven to 400 degrees F with rack in middle. Butter and flour a 9-inch round cake pan. (If using toasted coconut for garnishing the cake, you can now spread the ¼ cup sweetened shredded coconut onto a baking sheet or sheet pan and bake in the oven as it heats to 400 degrees until edges are lightly golden, about 5 minutes. Remove from oven and let cook completely).
  2. In a medium bowl, whisk together flour, baking powder, baking soda, and salt and set aside. In a large bowl with a hand mixer or the bowl of an electric mixer fitted with a paddle attachment, beat the butter and sugar at medium-high speed until pale and fluffy. Reduce to low speed and add vanilla and lime zest. Then, beat in the eggs, one at a time, scraping the bowl between additions.
  3. At low speed, mix in flour mixture in three batches, alternating with buttermilk, beginning and ending with flour, and mixing until just combined. Scoop batter into prepared cake pans, smoothing top (batter will be thick). Drop raspberries evenly over top (it won’t matter if they land face up or face down).
  4. Bake until cake is golden and a wooden pick inserted into center comes out clean, 20 to 25 minutes. Cool in pan 10 minutes, then turn out onto a rack and cool completely.
  5. While the cake is cooling, prepare the frosting. In a large bowl, or the bowl of an electric mixer fitted with a paddle attachment, cream the butter and cream cheese on medium speed until light and fluffy. Add the shredded coconut, vanilla, and coconut extracts and mix until combined. With the mixer on low speed, add the 2 to 3 cups of powdered sugar until combined into a light, creamy frosting that is thick enough to spread and hold its form.
  6. To assemble: Place 1 cake layer, flat side up, on platter. Spread just under ½ the frosting over top of cake. Top with second cake layer, flat side up. Spread remaining frosting over the top (you may have enough frosting to cover the sides, if desired). Top with extra fresh raspberries and toasted coconut, if desired. Enjoy! (If not serving immediately, cover with plastic wrap and refrigerate. Remove from refrigerator and bring to room temperature 45 minutes before serving).

*Tom-boy style is with the frosting just between the layers and on top, leaving the sides bare.


raspberry lime buttermilk cake with coconut cream cheese frosting-assembled cake7

Filed Under: desserts and sweets, eat Tagged With: buttermilk, cake, cake recipe, citrus, coconut, cream cheese, dessert, fruit, layer cake, lime, raspberry, tropical

apple galette or free form apple tart or lazy man’s apple pie

January 14, 2014 by Butter Loves Company

Apples are one of those ingredients that you can find anywhere at any time of year in the Northeast. I can even count on the grocery store* down the street from my apartment to have apples consistently, which is truly telling (the store has been less reliable for butter or even eggs in the past). Because of this, an apple galette, or free form apple tart, is never too far away from my dessert table.

The galette begins with a flaky yet sturdy pie crust and the edges of the crust are effortlessly flipped onto simply seasoned apples for a rustic dessert. While it bakes, the apple galette gives off the same luscious sugared sweet and buttery aroma as apple pie around the holidays, because it basically is a lazy man’s apple pie.

I’ll admit this recipe is a lot better in the late summer or early fall when you pick the apples fresh off the tree – maybe while holding a cider donut in the other hand. But it is January and the galette still satisfied my craving for baked apples. It would have been even more satisfying with a scoop of vanilla ice cream on the side, but unfortunately it was too cold for us to go out to grab some (polar vortex!). Greg did make a caramel sauce to drizzle on top of our slices out of the sugars and juices leftover from the spiced apples. I think we may be watching too much of Food Network’s Chopped!

* Using the term very loosely in this case

First, you'll prepare the dough.

First, you’ll prepare the dough.

As you can see, I am a messy baker!

As you can see, I am a messy baker!

While the dough is chilling, prepare the apples.

While the dough is chilling, prepare the apples.

When the dough is firm, roll it out on a floured surface. You can tell this will be flaky because you can see the butter!

When the dough is firm, roll it out on a floured surface. You can tell this will be flaky because you can see the butter!

Arrange the apples on the prepared dough.

Arrange the apples on the prepared dough.

Feel free to pile them on!

Feel free to pile them on!

Fold the edges over and it is ready for the oven.

Fold the edges over and it is ready for the oven.

Ready to eat!

Ready to eat!


Needed to give the caramel sauce a shout out!

Needed to give the caramel sauce a shout out!


apple galette or free form apple tart or lazy man’s apple pie
Recipe Type: Dessert
Author: Butter Loves Company
Prep time: 1 hour 30 mins
Cook time: 1 hour
Total time: 2 hours 30 mins
Serves: 6-8
Ingredients
  • Dough:
  • 1 ¼ cups flour
  • 1 tablespoon sugar
  • ½ teaspoon salt
  • ½ cup (1 stick) unsalted butter, diced and re-refrigerated
  • ½-¾ cup cold water
  • 1 tablespoon unsalted butter, melted
  • Filling:
  • 4-5 baking apples peeled and sliced ¼-1/2 inch thick (Cortland, Granny Smith, or Pink Lady are some options but feel free to pick whatever you prefer, or mix varieties)
  • 1 tablespoon fresh lemon juice
  • ½ cup granulated sugar
  • ½ cup light brown sugar
  • 1 teaspoon cinnamon
  • 1 tablespoon flour
Instructions
  1. In a food processor, combine flour, sugar, and salt and pulse for 10 seconds to combine.
  2. Drop in the diced, cold butter and pulse until the butter is the size of small marbles but larger than peas.
  3. Begin adding ice water in 1/8th cup increments, pulsing between additions, until the dough comes together and the butter is pea sized but still visible. You may not need the full amount of iced water.
  4. Transfer the dough to a work surface, gather it together and pat into a disk. Wrap the dough in plastic and refrigerate until chilled, one to two hours.
  5. While the dough is chilling, peel and slice the apples.
  6. In a large bowl, combine the apples with lemon juice, both sugars, cinnamon, and flour.
  7. Once the dough is chilled, preheat the oven to 400 degrees and line a baking sheet with parchment paper.
  8. Transfer the dough to a floured surface and roll out into a circle about 12 inches in diameter and 1/8th inch thick. Shake off excess flour and transfer dough to the prepared baking sheet.
  9. Arrange apples on the dough, leaving 2 inches of pastry around all sides. Fold edges of the dough onto the apples and crimp edges to create the crust.
  10. Brush the entire crust with 1 tablespoon melted butter and sprinkle with sugar.
  11. Bake until the crust is golden and the apples are tender, 55-60 minutes.
  12. Remove from oven and let cool for at least 15 minutes before serving.
3.2.1275


Filed Under: desserts and sweets, eat Tagged With: apple, dessert, fruit, galette, pie, tart

Welcome!

jenna of butterlovescompany

Pull up a chair

Hi! I’m Jenna. Story seeker, food lover, recipe developer based in NYC. Firm believer in making every day delicious! Read more…

looking for something?

  • Email
  • Facebook
  • Instagram
  • Pinterest
  • RSS
  • Twitter

Latest Posts

  • Freezer Meals to Make Before Baby: How We Meal Prepped Before Baby
  • mom’s famous spiced pecans
  • funfetti cookie dough truffles (no-bake)
  • maple coconut cookies
  • snickerdoodle blondies

popular now

brown butter banana bread, with crumble
crunchy chewy bakery-style sugar cookies
tourte milanese
rosemary honey buttermilk biscuits
chocolate marble loaf cake
pecan sticky bun babka recipe

grammin’

Hi! I'm Jenna, founder of butter loves company. From holidays to Tuesdays, let's find a way to make every meal special.
  • Email
  • Facebook
  • Instagram
  • Pinterest
  • RSS
  • Twitter
a2f54ba1dcf0635e58c8be4aa2035ce84863a9d9606a428ab3

© 2013-2019 BUTTER LOVES COMPANY, LLC.

Copyright © 2026 · Foodie Pro Theme by Shay Bocks · Built on the Genesis Framework · Powered by WordPress