butter loves company

new york food blogger and lifestyle influencer

  • home
  • Recipes
  • travel
  • lifestyle
  • cookie orders
  • about
  • contact

mom’s famous spiced pecans

October 11, 2020 by Butter Loves Company

These Spiced Pecans are a perfect combination of sweet, salted, spicy, and crunchy. They are a staple on our tables during the holidays. While our holiday celebrations may look a little different this year, we will 100% have these spiced nuts to snack on while we watch movies and snuggle up.
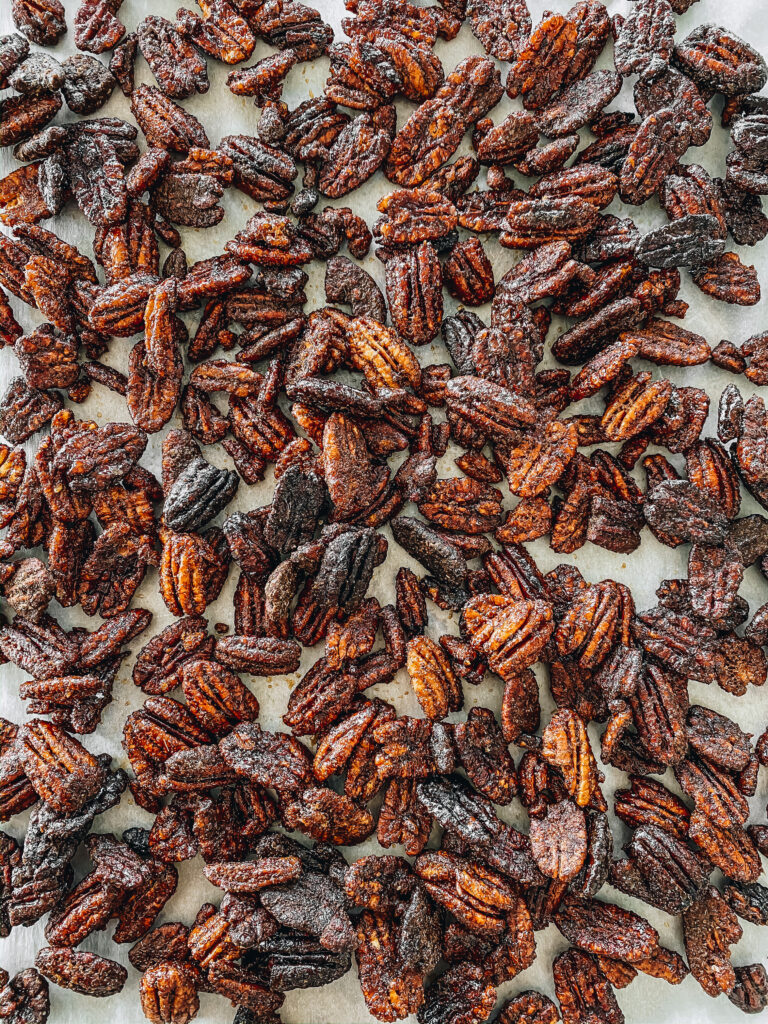
moms-spiced-pecans-2

As for spices, cayenne pepper and cumin are doing most of the work here, but the nuts are made sweet with a sugary glaze and are contrasted by a bit of salt. My mom’s original recipe doesn’t call for cinnamon, but I like to add a bit to warm up the flavor a little. The pecans are first boiled and then fried, bringing out the nuttiness and creating a super crunchy texture.

These are extremely hard to stop snacking on once you start and throughout the years have become  a comforting flavor around this house. They are great for a holiday appetizer, an on-the-go snack, or for an edible gift for friends, family, or neighbors.

These spiced nuts are easy to make but I highly encourage you to read through the full recipe twice before starting. It is extremely helpful to prepare your workstation before you start any of the boiling and frying. The first time I made these I was running around looking for bowls and things. Everything worked out fine but it is a much more seamless experience if you are prepped!

Print
mom's famous spiced pecans

Prep Time: 15 minutes

Cook Time: 6 minutes

Total Time: 21 minutes

Category: Snacks

Servings: Makes 4 cups of spiced nuts

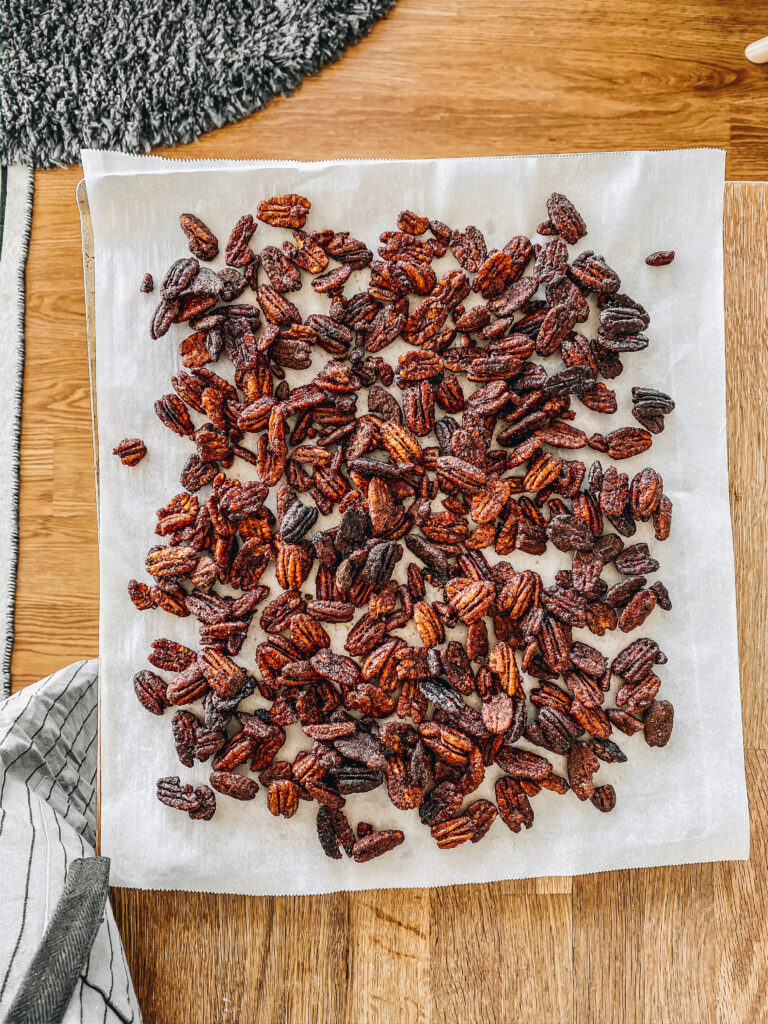
moms-spiced-pecans-2

Ingredients

  • 1/2 cup sugar
  • 2 teaspoons cayenne pepper
  • 1 1/2 teaspoon salt
  • 2 teaspoon cumin
  • 1 teaspoon cinnamon
  • 4 cups pecan halves (you could also use walnuts)
  • 2 cups canola or peanut oil (for frying)

Instructions

  1. Prepare your spice mixes: In a large mixing bowl, combine the sugar and cayenne pepper. Set aside. In another small bowl, combine the salt, cumin, and cinnamon. Set aside. Have a second large bowl nearby as well as a baking sheet or two lined with parchment for cooling.
  2. In a pot, bring 6 cups of water to a boil, add the nuts and boil for 1 to 2 minutes then drain in a colander. Pour into your bowl with sugar and cayenne pepper and toss to coat.
  3. In a heavy-bottomed pan heat oil to 350°F (should be about 1 to 2 inches deep). Add half the nuts and fry, stirring occasionally until lightly browned, 3 to 5 minutes (They can go from lightly browned to dark really quickly so keep your eye on them!). Remove from the pan and drain (my mom does this on newspaper, but I like to put some paper towels on the bottom of the cooled pan I boiled the nuts in and then set the colander on top of that and drain them in there). Then toss in a large bowl with half the salt and cumin mixture while nuts are STILL HOT! Toss occasionally to keep from sticking and then spread onto a baking sheet. Fry and season remaining nuts.

Notes

You can easily double or triple this recipe. And they freeze really well too.
6.1.0
https://www.butterlovescompany.com/2020/10/11/moms-famous-spiced-pecans/
butter loves company | jenna larsson

Filed Under: appetizers, eat, sides, soups and salads Tagged With: appetizers, holiday appetizers, spiced nuts

the springiest snack spread

March 29, 2019 by Butter Loves Company

Spring is HERE! Thank goodness, amirite? I don’t care if winter coats are still necessary in New York, as soon at Daylight Savings hit and the temperatures rose above 50 degrees, I decided I would force warm weather feels in the kitchen. Bring on all the fresh herbs, veggies, and spring appetizer recipes.
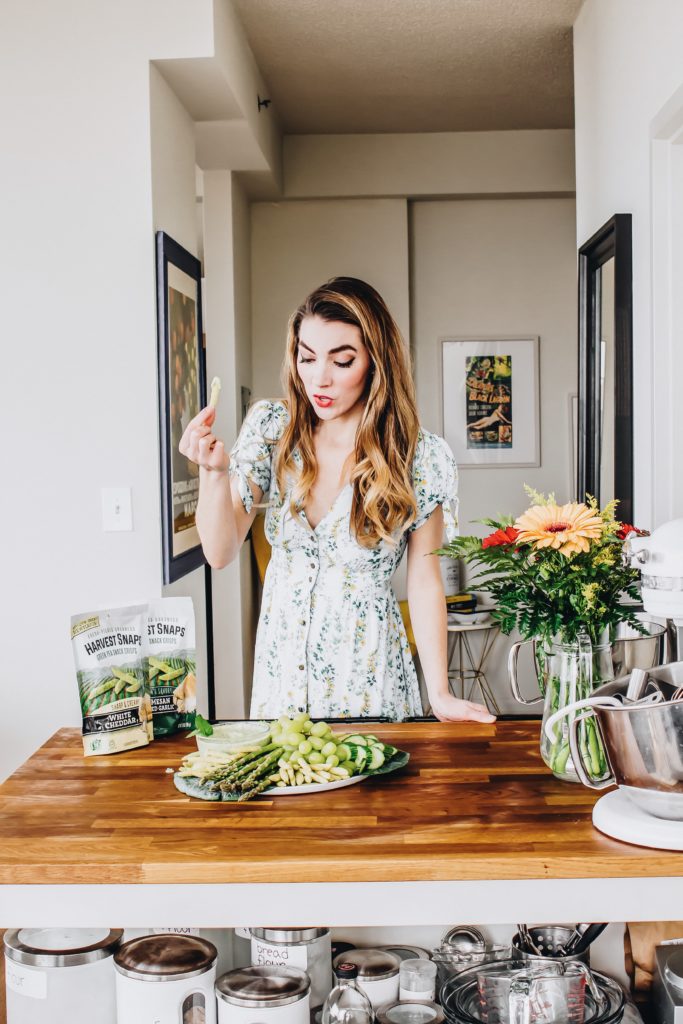
One of my favorite things to do during the summer months is to take out a cheese board around 5 or 6 pm, when the sun is angling down to bless us with golden hour, opening a crisp bottle of wine, and put out a snack board for a pre-dinner bite.

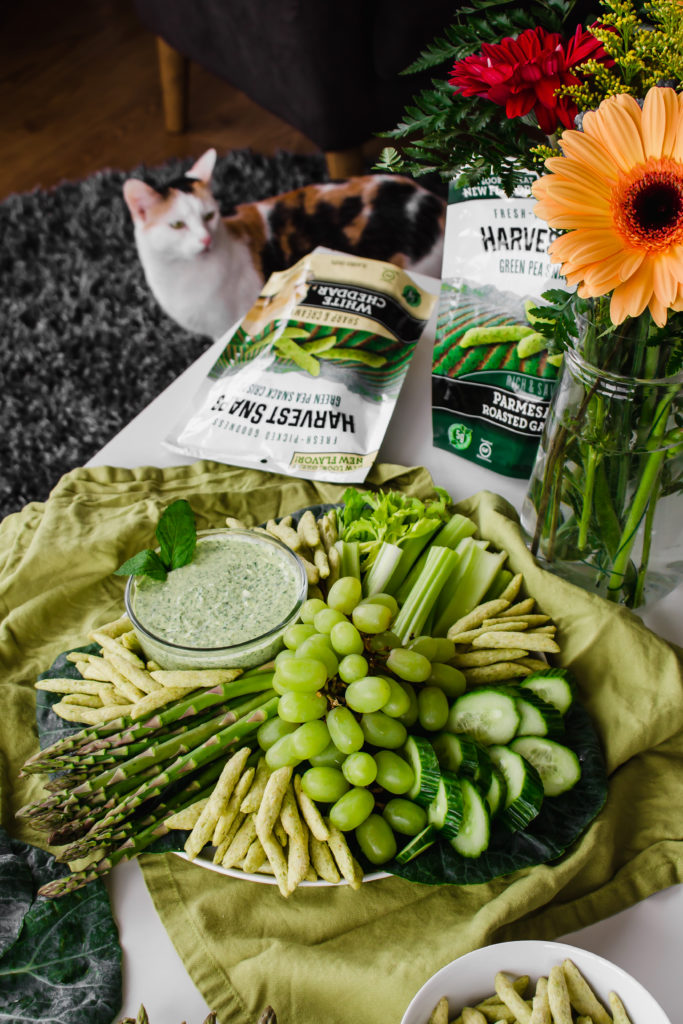
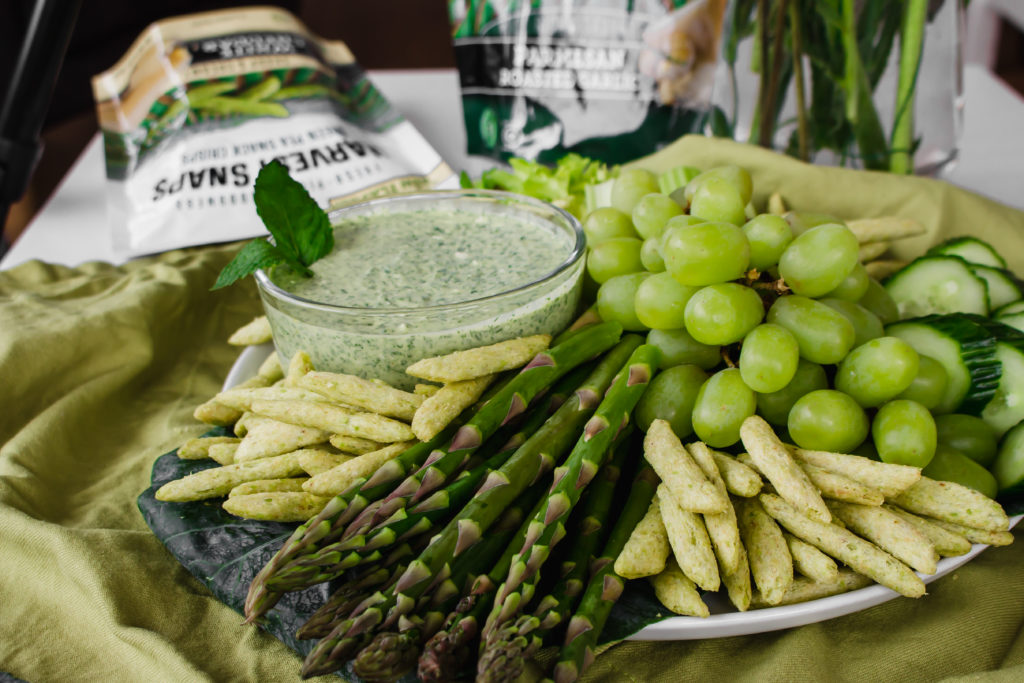
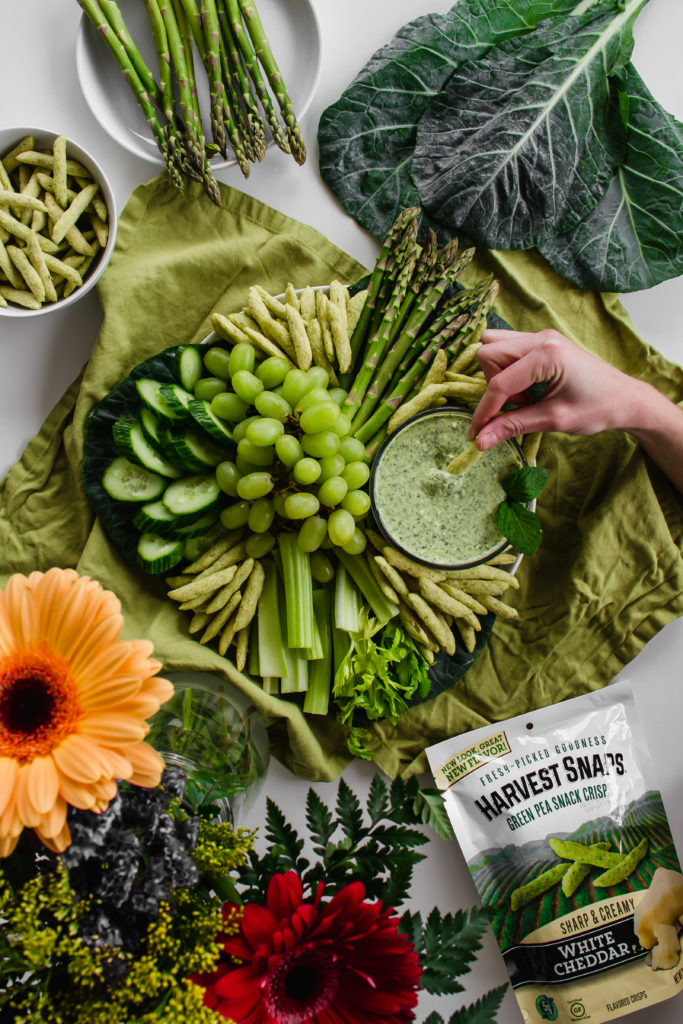
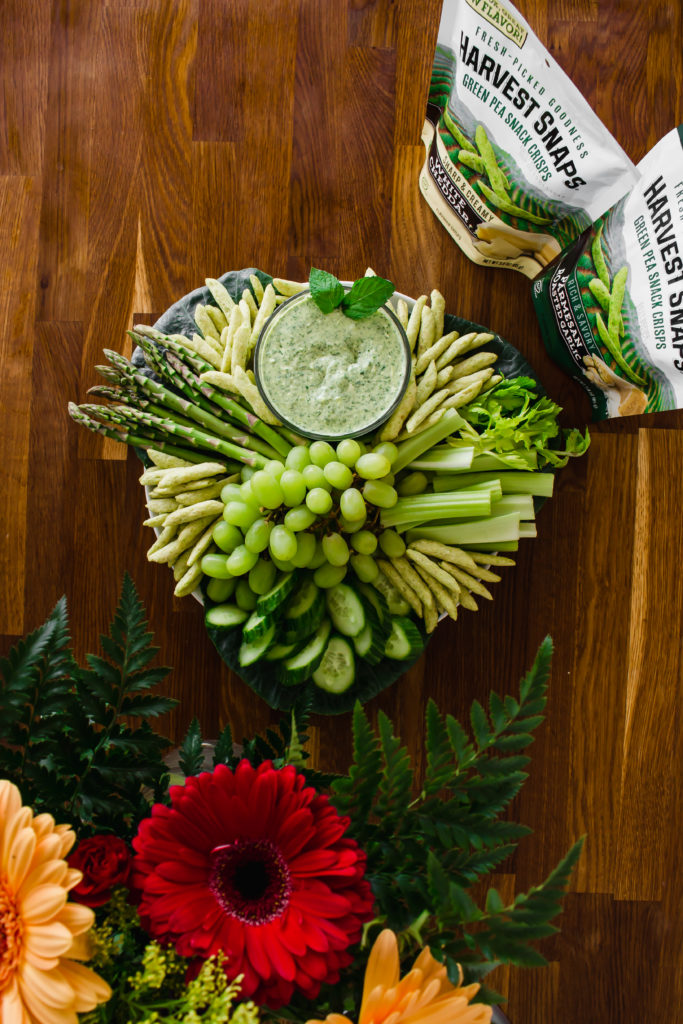
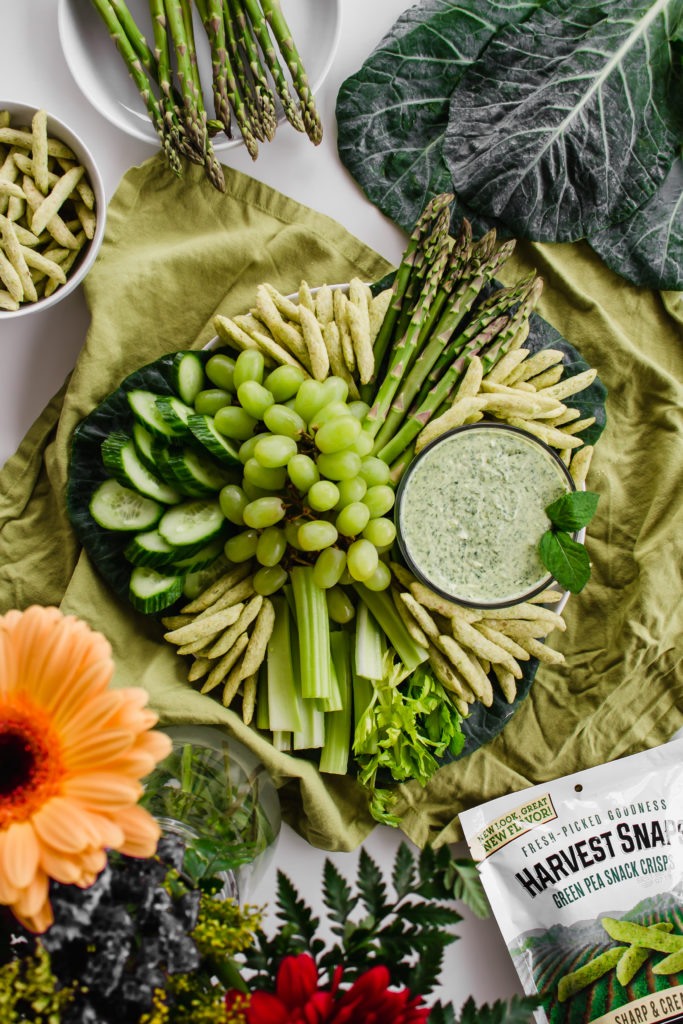
We’ll nibble on all the juicy produce, savory cheese, and always, always, something salted and crunchy, like Harvest Snaps. I’m kicking off spring with this snack board filled with a super herb-filled green goddess dip (we’re talking dill, parsley, mint, basil and more), crispy greens like blanched asparagus and sliced cucumbers, rounded out with cheesy Harvest Snaps in their Parmesan Roasted Garlic and White Cheddar Flavors because, duh, a cheesy snack is destined for your snack board. I love that all the items on this board feel like wholesome options for starting the season.

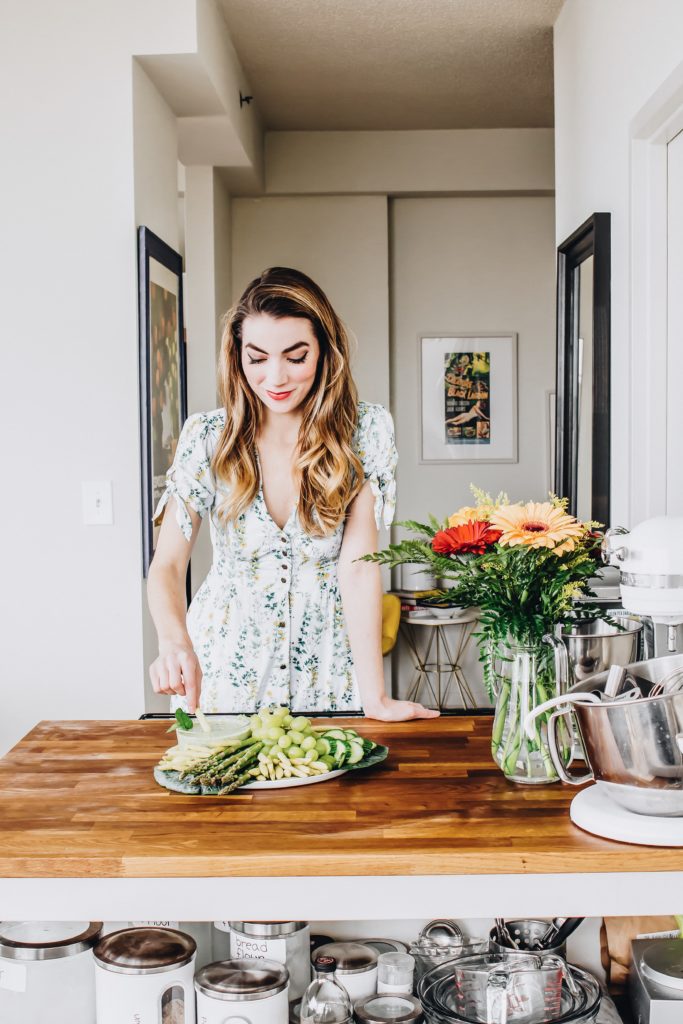
This is the type of snack board you could pack up into little bags and take with you on a picnic in the park or put together really quickly for a last-minute plate to bring to a friend’s house. You can customize it with whatever dip or veggies you prefer, and Harvest Snaps also have so many flavors so you could try out a different one to mix it up!

Harvest Snaps are made from wholesome green peas, red lentils or black beans. Quick tip: if you are looking for Harvest Snaps in your grocery store, mosey over to the produce section and that’s where they’ll be. Find them near you here!

Happy Spring loves!

The Springiest Snack Spread

Ingredients

Green Goddess Dip (adapted from New York Times):

  • 1/2 cup fresh dill
  • 1/2 cup fresh mint
  • 1/2 cup fresh parsley
  • 1/3 cup fresh basil
  • 1 garlic clove
  • 2 scallions, white and green parts
  • Juice of one lemon
  • Pinch kosher salt, plus more to taste
  • 1/2 cup extra virgin olive oil
  • 1/2 cup feta cheese
  • 1/2 cup Greek yogurt
  • 1/4 cup mayonnaise, optional

Celery Sticks

Sliced Cucumber

Green Grapes

Blanched Asparagus

Harvest Snaps in your favorite flavor (I used Parmesan Roasted Garlic and White Cheddar)

Instructions

  1. In the bowl of a food processor, add all of the ingredients for the Green Goddess Dip, and pulse until blended into a nearly smooth puree. Scrape into a small serving bowl.
  2. On a medium flat platter, place the dip bowl on one side of the plate. Add the celery sticks, grapes, and cheese slices in clusters, saving a spot for crackers or Harvest Snaps. At this point you can refrigerate until close to serving time.
  3. When ready to serve, remove from the fridge and add the Harvest Snaps. Serve!

Thank you to Harvest Snaps for sponsoring this post. As always, all opinions are my own.

harvest snaps snack appetizers

Filed Under: appetizers Tagged With: appetizers, dip

homemade gravlax

December 29, 2016 by Butter Loves Company

homemade gravlax | butter loves company
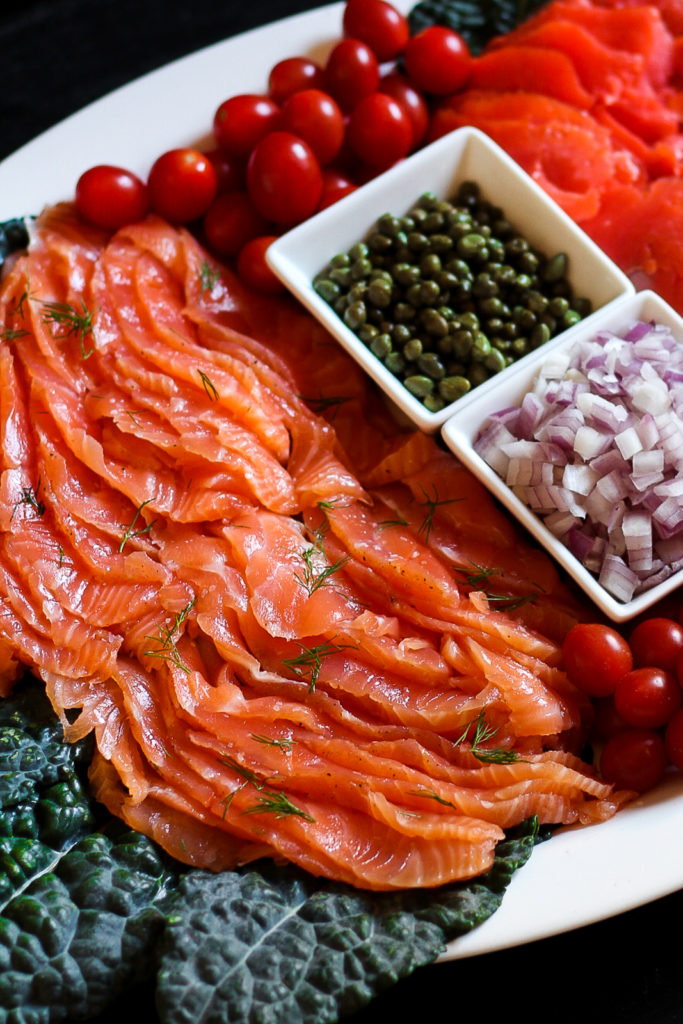
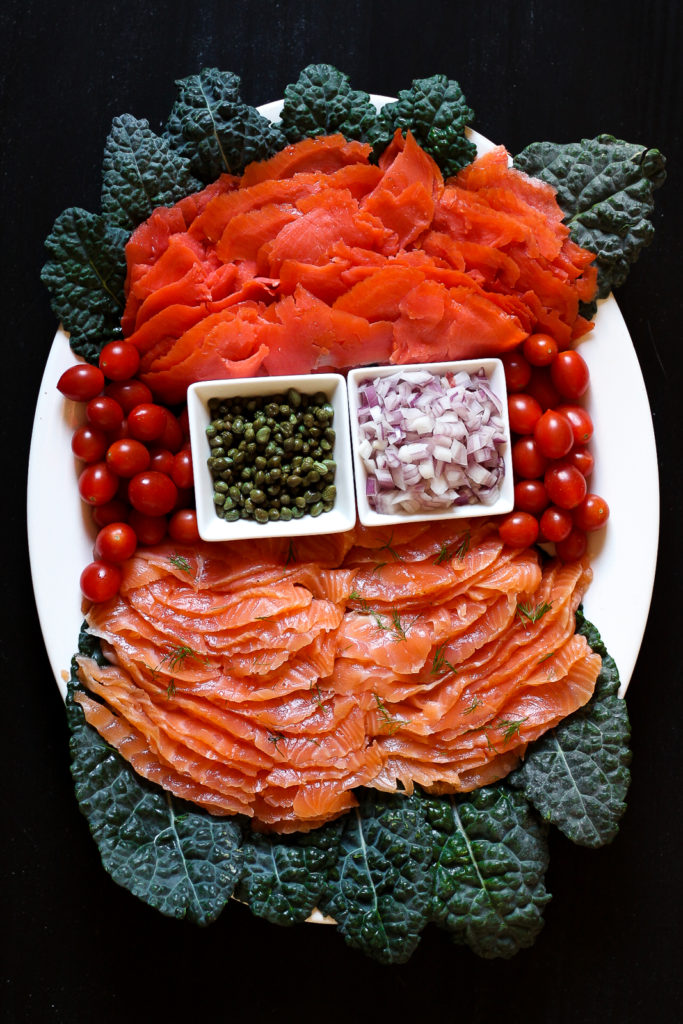
Ever since I can remember, gravlax have been a staple on my family’s holiday table. No matter what the occasion, they’ve always been a sure sign of celebration. A magnet for cousins and friends to gather ‘round and share their latest updates and adventures. Grab a piece of toast, slather it with a dill or horseradish sauce, sprinkle that with sharp diced red onions, and dot it all with salty capers. Grab a teeny fork and peel away a slice or two of dilled gravlax to lay on top. With the comfort of family around, you take a big bite of your toast. Ah, yes. It’ll be a fun day.

While seemingly complicated, gravlax—originally from Scandinavia—are actually a breeze to make yourself. All it takes is fresh salmon, a few seasonings, and a day or two for them all to meld together. You’ll need salt as the cure, and then my mom always supplements with a combination of light brown sugar, dill, and coriander. She often uses lemongrass as well, but fresh lemongrass can be hard to come by so for the sake of this recipe, we’ll omit.

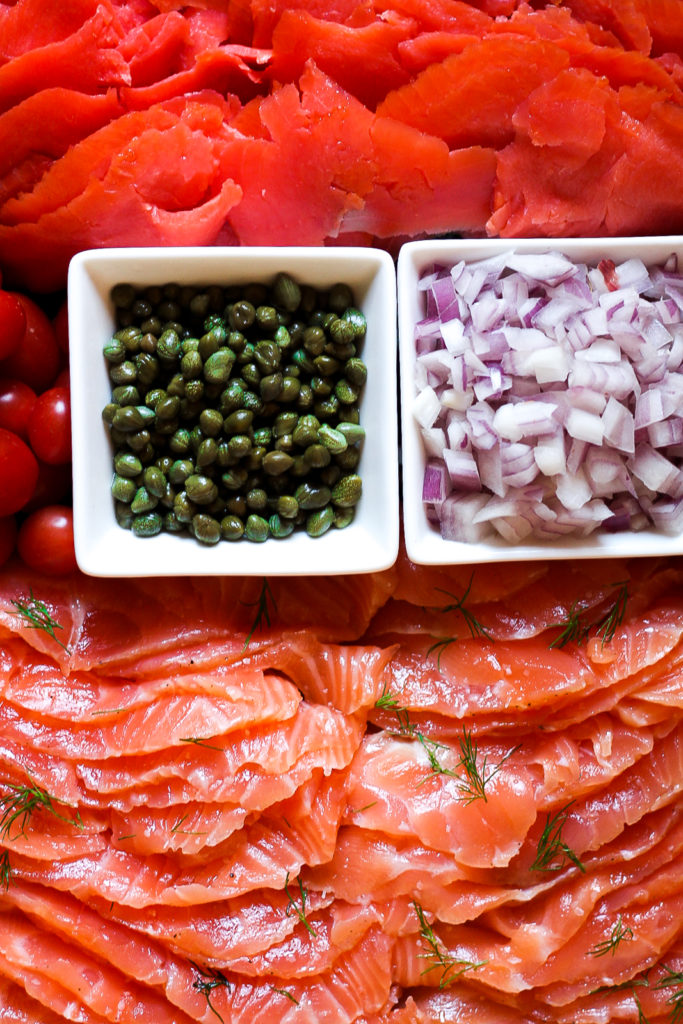
Wondering the difference between smoked salmon and gravlax? Gravlax are salt cured with spices (not cooked or smoked) and smoked salmon is either cold or hot-smoked—often resulting in a firmer, flakier texture. The Huffington Post delves a little deeper in this article.

Though salt-cured, because the gravlax are not cooked, you’ll want to make sure you start with the freshest salmon. Great accompaniments are bagels and cream cheese, dill sauce (even a quick mix of dill, Greek yogurt, lemon, salt and pepper), and horseradish.

So, as promised, here is the recipe for homemade gravlax, one of my favorite things. Hope you enjoy!

homemade gravlax | butter loves company

Note: the Gravlax are on the bottom of the dish–on the top is smoked salmon. You can see the difference in texture!

Print
homemade gravlax

Prep Time: 30 minutes

homemade gravlax | butter loves company

Ingredients

  • 2 lb salmon filet, skin on, deboned
  • 1/4 cup coarse sea salt
  • 3 tablespoons light brown sugar
  • 1 tablespoon fresh ground black pepper
  • 1 tablespoon ground coriander
  • 1 bunch fresh dill
  • 1/4 cup vodka

Instructions

  1. Lay plastic wrap over a baking dish that will fit nicely in your fridge. Set nearby.
  2. In a small bowl, mix together salt, brown sugar, pepper, and coriander.
  3. On a cutting board, cut salmon in half lengthwise and turn so the skin side is up. Sprinkle a fourth of the salt mixture over the skin of one half of the salmon and place that piece skin side down in the prepared baking dish and rub the salmon flesh with a fourth of the salt mixture and top that with the fresh dill, and pour the vodka over the top of that.
  4. Sprinkle the remaining salt mixture over the flesh of the remaining half of the salmon. Place over the salmon in the dish, skin side up (the salmon skin sides should be outside, with the flesh sides in the inside, dill nestled between them). Top with the final fourth of the salt mixture. Fold the plastic wrap snuggly over the entire salmon. Wrap a second sheet of plastic wrap around the salmon if needed to seal tightly. Place in the refrigerator and top with a heavy object like a brick or a few heavy cans of food (this pressure will help draw the moisture out of the salmon).
  5. Refrigerate fish for 24 to 48 hours, turning every 12 hours. I tend to like the texture after 36 hours. To serve, separate the filets, and quickly yet gently rinse off the salt mixture and dill. Cut into very thin slices on a diagonal with a sharp knife.
6.1.0
https://www.butterlovescompany.com/2016/12/29/homemade-gravlax/
butter loves company | jenna larsson

homemade gravlax | butter loves company

Filed Under: appetizers, eat Tagged With: appetizers, cured, salmon, Scandinavian, seafood

homemade cheese crackers

December 16, 2016 by Butter Loves Company

homemade cheese crackers | butter loves company
A few weeks ago, my best friend became my *fiancé*—what a word and what a whirlwind! I really can’t imagine having anyone else by my side to laugh with for life. Supergreg, as you know him via this site, is the most thoughtful person I’ve ever met. I’m one lucky girl!

Despite all of the many things we’ve been through together since we’ve met, and how much we’ve learned and changed personally, there is one thing that still rings true. Greg can demolish a box of Cheez-It crackers in one sitting (Love you boo!).

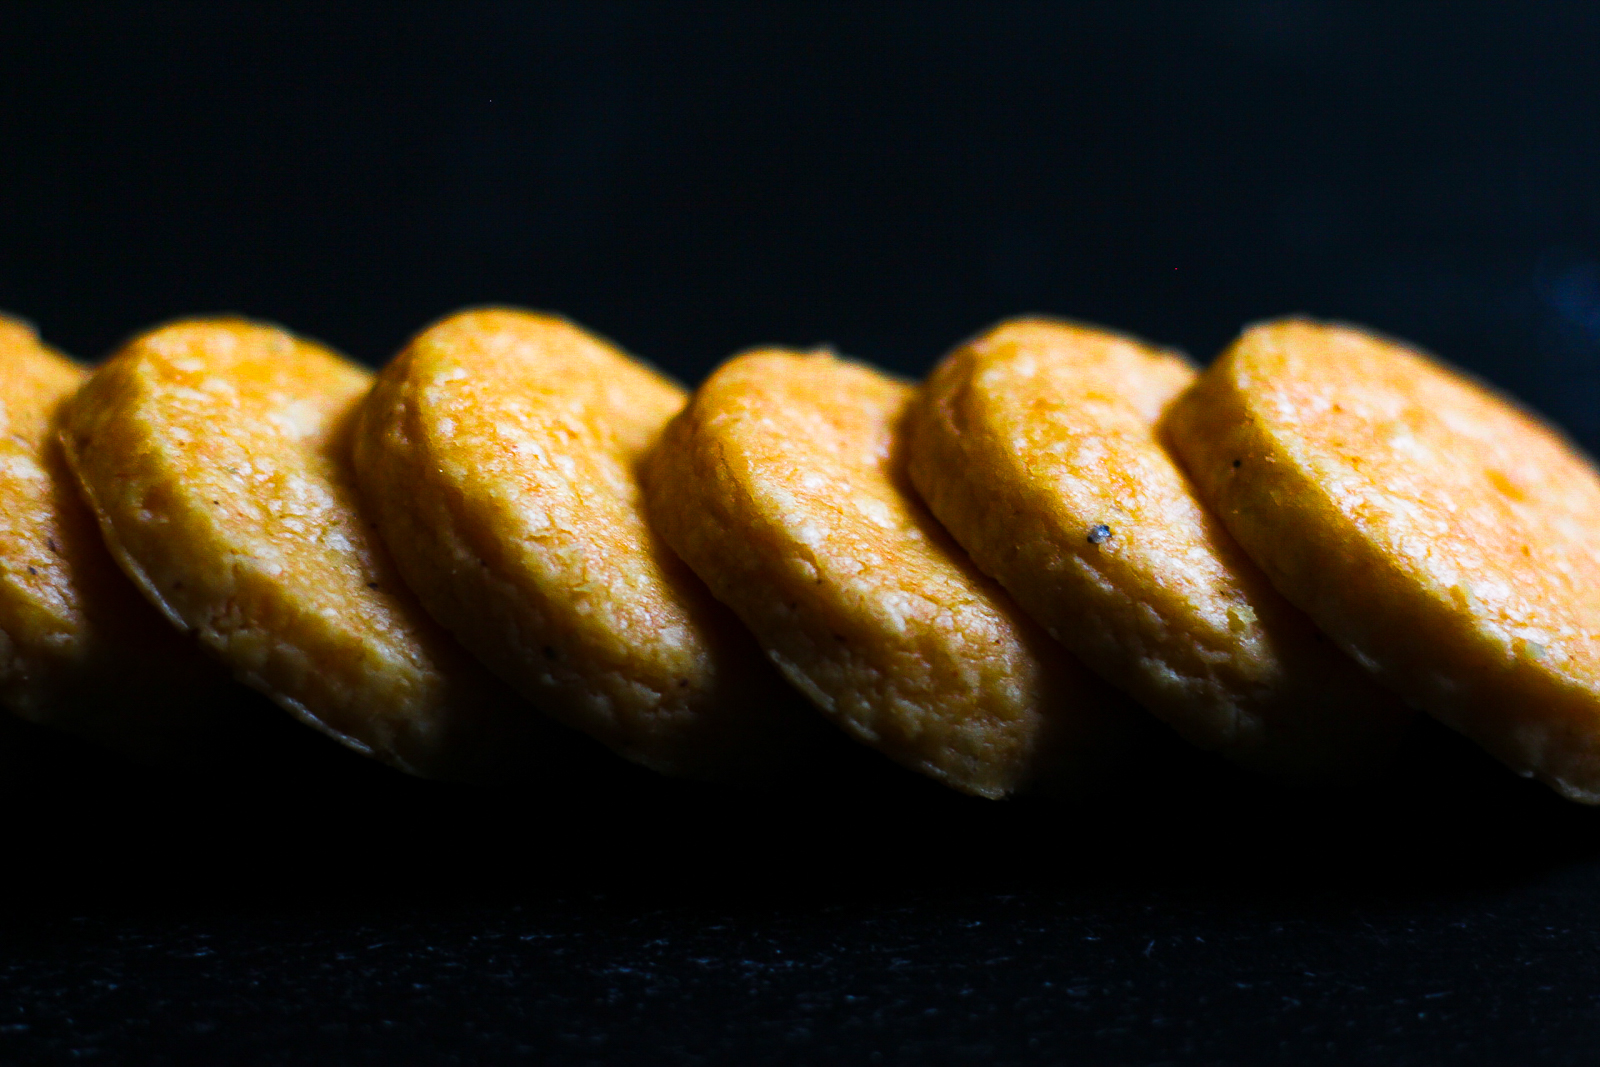
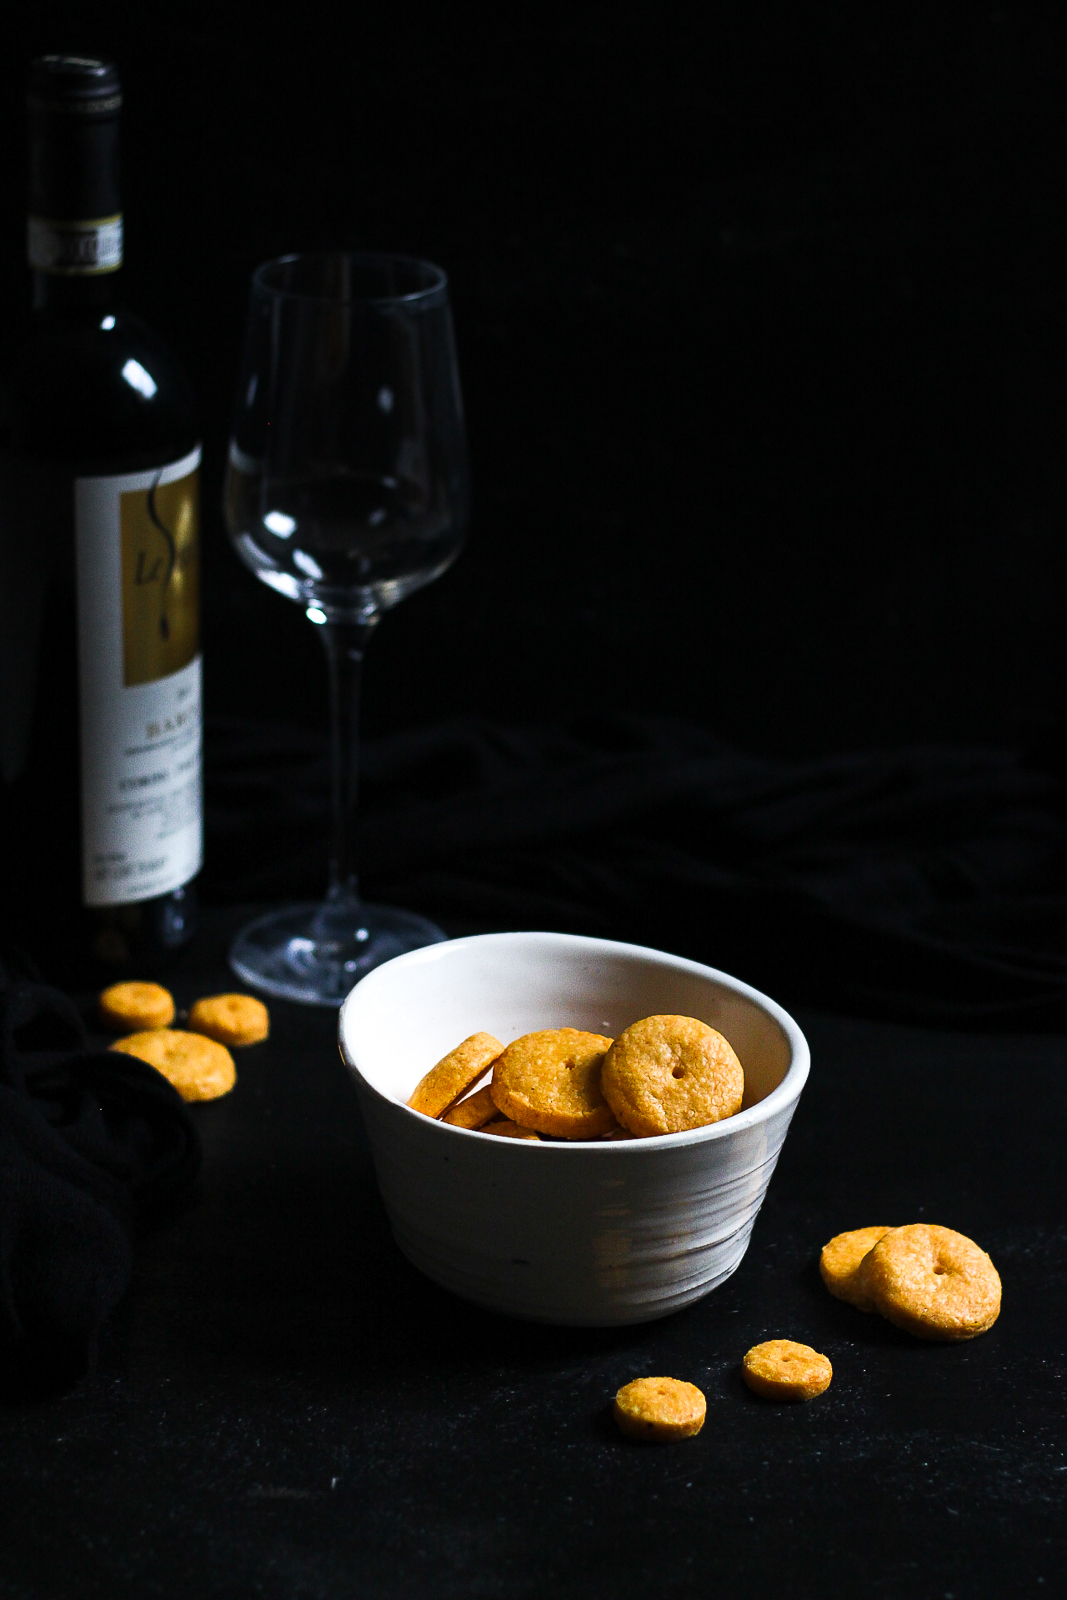
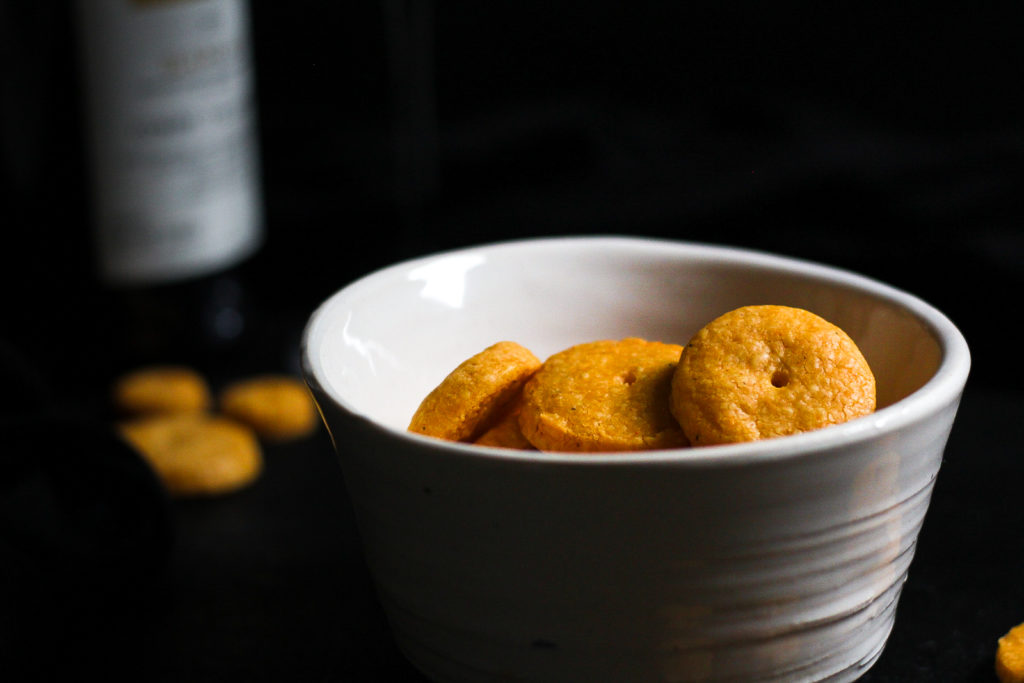
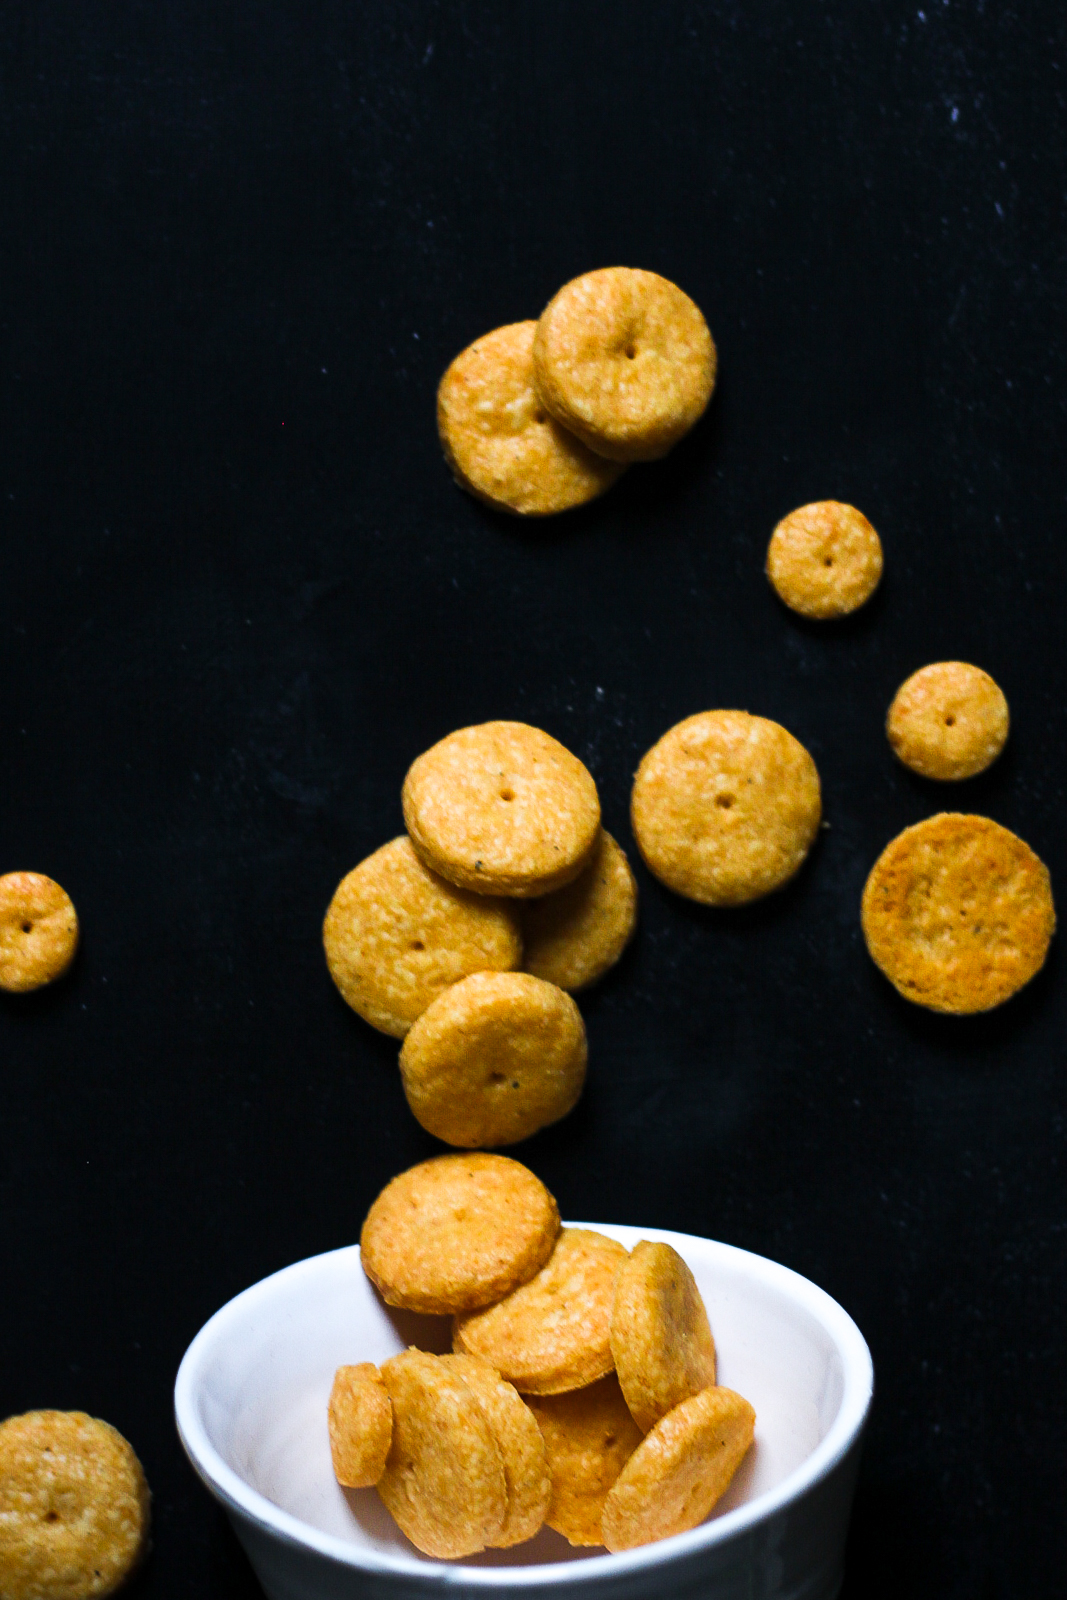
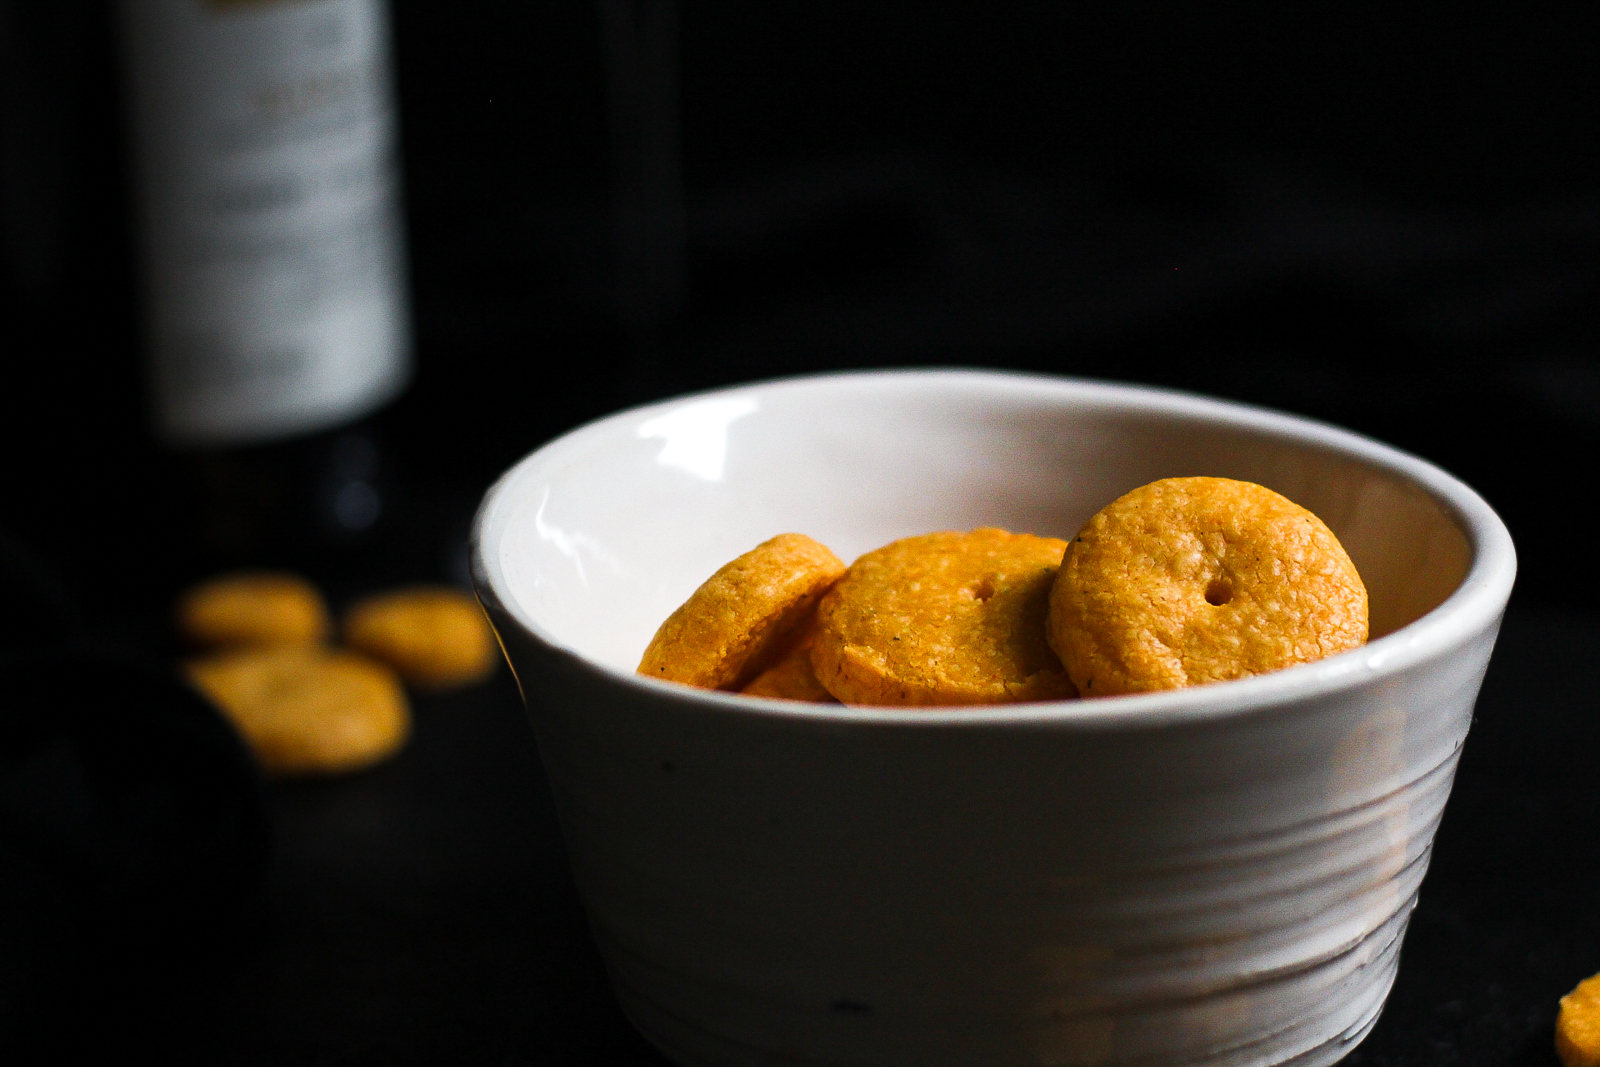
This recipe for homemade cheese crackers is my personal gift to Greg. A cracker honoring the great Cheez-It that we can from this point forward make at home. These are your adult Cheez-Its: deeply cheesy, salt-forward with a smoky undertone thanks to paprika and cayenne. Sharp cheddar cheese leads the way with Gouda by its side. If you can find aged Gouda—I used 3-year aged—it is wonderful for adding a funky-in-a-good-way cheesy stink. I’m really selling it, huh? If you can’t find aged Gouda, a smoked Gouda could be substituted for a slightly smokier alternative.

These homemade cheesy crackers teeter on the cookie line, since they don’t shatter like some crackers as they meet your teeth, but if you roll them thin, you’ll achieve that cracker-y crunch. They also pair perfectly with wine or beer as a cocktail hour snack.

Go on and enjoy the marriage of cheeses!

homemade cheese crackers | butter loves company

Print
homemade cheese crackers

Prep Time: 30 minutes

Cook Time: 18 minutes

Servings: Makes about 60 little crackers.

homemade cheese crackers

Ingredients

  • 1/2 cup (1 stick) cold unsalted butter, cut into 16 cubes, and re-chilled
  • 1 cup sharp cheddar cheese, grated
  • 1/4 cup aged Gouda cheese, grated (can substitute a firm smoked Gouda)
  • 3/4 teaspoon salt
  • 1/4 teaspoon pepper
  • 1/4 teaspoon smoked paprika
  • 1/8 teaspoon cayenne pepper
  • 1 1/4 cups all-purpose flour

Instructions

  1. In the bowl of a food processer, pulse together the cold butter, the cheeses, salt, pepper, paprika, and cayenne until the butter is in little distinguishable bits and the mixture is crumbly. Add in the flour and pulse until absorbed and the mixture starts to come together in moist chunks. Transfer dough onto a clean sheet of parchment paper and pat together into a disk with your hands. Top the disk with another sheet of parchment so the dough is sandwiched between the two sheets and, using a rolling pin, roll the dough out to 1/4-inch thick (or thinner for crispier crackers). Freeze for at least 30 minutes.
  2. When you’re ready to bake, preheat the oven to 350°F. Peel the top layer of the parchment off the dough and set it on a cookie sheet. Set nearby. Using a cookie cutter or knife, cut the dough into desired shapes and place shapes on prepared cookie sheet, leaving 1 1/2 inches between each. Bake for 16 to 18 minutes or until the edges appear golden brown. Remove from oven and let cool completely on the cookie sheets.

Notes

Adapted from Dorie Greenspan's Smoked Cheese Cookies

6.1.0
https://www.butterlovescompany.com/2016/12/16/homemade-cheese-crackers/
butter loves company | jenna larsson

homemade cheese crackers | butter loves company

homemade cheese crackers | butter loves company

Filed Under: appetizers, eat, sides, soups and salads Tagged With: cheddar, cheese, crackers, gouda, happy hour

cheddar cheese gougères

December 27, 2015 by Butter Loves Company

cheese-gougere-recipe-16

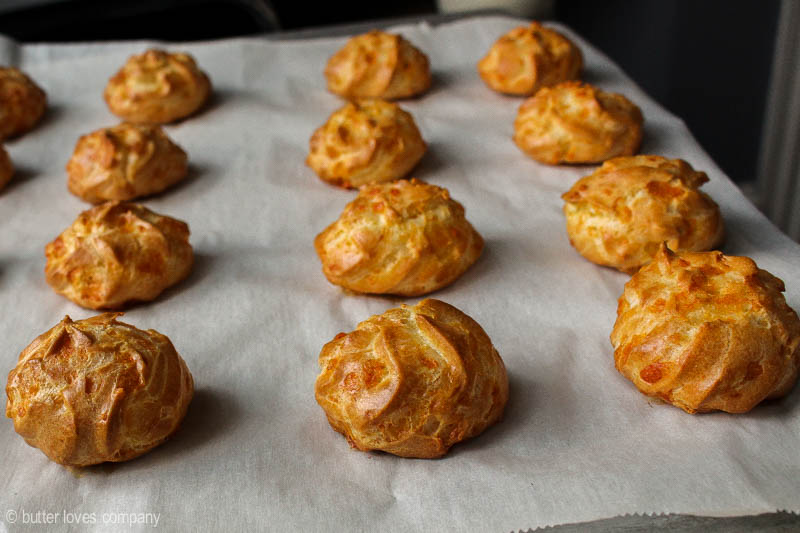
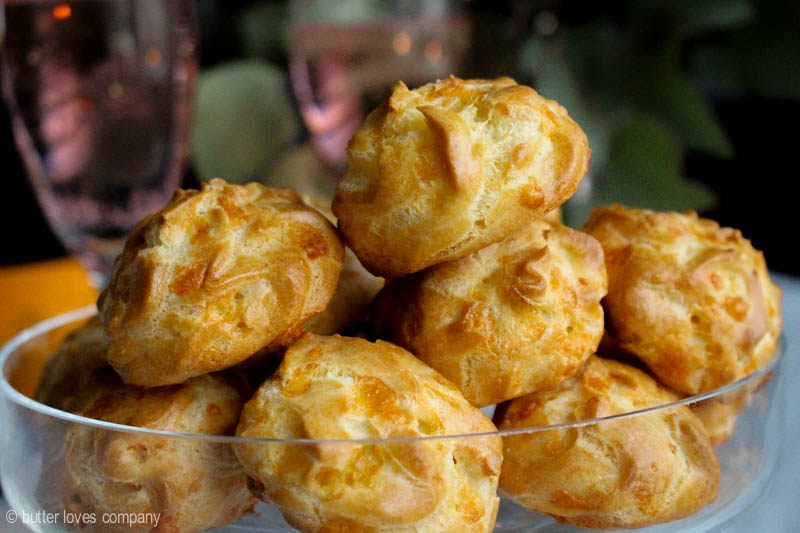
These cheddar cheese gougères are the perfect nibble for a New Year’s Eve gathering. They are flavorfully cheesy, yet light and uncomplicated—allowing you to really appreciate the flavor of any champagne or bubbly you might be sipping on for the festivities.

cheese-gougere-recipe-1

Gougères might seem fancy, with their golden crust, eggy insides, and distinctly hollow cores. However, they do most of the work on their own—the dough is simply spooned or piped onto baking sheets and the cores are a natural result of the dough puffing up during the baking process…an example of baking magic if you ask me! You could easily turn these into a heartier appetizer by piping a savory filling into the baked puffs, just as you would pipe sweet cream into their spherical cousins, cream puffs or profiteroles (both made using the same magical pâte à choux dough).

cheese-gougere-recipe-6

These are undeniably cheesy thanks to a generous addition of extra sharp cheddar cheese—while untraditional, I like how they create a flavor reminiscent to that of a Cheez-It cracker. For a more traditional version of the French gougère, feel free to substitute grated gruyère cheese. You could even sprinkle a little nutmeg or cayenne into to the batter, or top the uncooked scoops with a little fresh cracked pepper to make them your own.

cheese-gougere-recipe-9

Grab a glass of champagne, laugh about the year’s (sometimes failed) resolutions, and grab a light and fluffy gougère. Now you’re ready to ring in the New Year!

NOTE: You can make the dough and freeze the uncooked, shaped mounds ahead of time and bake right before eating. Hot, cheesy gougères on demand? Nothing wrong with that!

cheese-gougere-recipe-14

cheese-gougere-recipe-12

Print
cheddar cheese gougères

Prep Time: 15 minutes

Cook Time: 27 minutes

Servings: about 36 gougères

cheese-gougere-recipe-12

Cheddar cheese gougères recipe perfect for a New Year’s Eve gathering (make ahead optional). Undeniably cheesy and seemingly fancy, with their golden crust, eggy insides, and distinctly hollow cores. Add a glass of champagne and you're in business!

Ingredients

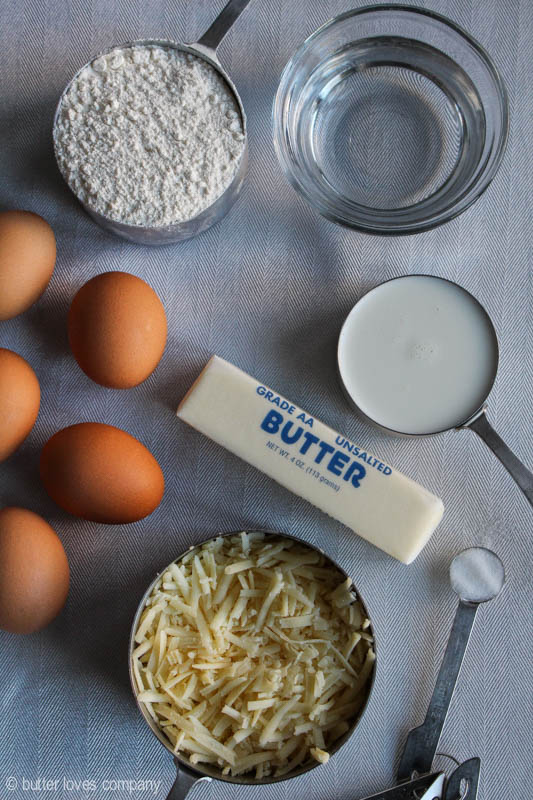
  • 1/2 cup whole milk
  • 1/2 cup water
  • 8 tablespoons (1 stick) unsalted butter, at room temperature
  • 3/4 teaspoon table salt
  • 1 cup all-purpose flour
  • 5 large eggs, at room temperature
  • 1 1/2 cups coarsely grated sharp cheddar cheese (about 6 ounces)

Instructions

  1. Position two racks in the upper and lower third of the oven and preheat to 425°F. Line two baking sheets parchment paper.
  2. In a medium saucepan, combine the milk, water, butter, and salt over high heat until the butter is melted and everything comes to a rolling boil. Pour in the flour and immediately lower the heat to medium-low, and whisk vigorously until the dough comes together. A light crust may form on the bottom of the pan. Stir energetically for another minute to help dry the dough. The dough should now be very smooth.
  3. Turn off the heat and transfer dough into the bowl of a stand mixer fitted with the paddle attachment. Let the dough sit for a few minutes to cool down to warm (versus hot), then mix on low speed for about 30 seconds to release some of the steam. Beat in the eggs one-by-one, making sure each egg is completely incorporated before adding the next. Beat until the dough is thick and shiny. Mix in the grated cheese. Once the dough is made, it should be used immediately.
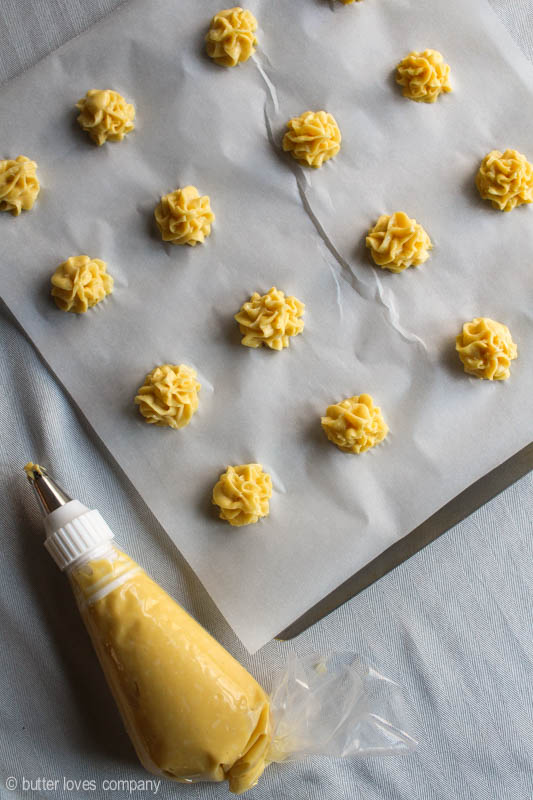
  4. Scoop or pipe out about 1 tablespoon of dough for each gougère onto the lined baking sheet, leaving about 2 inches between them. (MAKE AHEAD TIP: At this point, you can place the sheets with the scooped gougères in the freezer and then pack the frozen gougère mounds in Ziploc bags and freeze until you’re ready to use. Bake them straight from the freezer). Place the baking sheets in the oven and immediately turn the oven temperature down to 375 degrees°F. Bake for 12 minutes, rotate the pans and bake until the gougères are golden, firm, and, puffed, another 12 to 15 minutes or a few minutes longer if you are baking previously frozen gougère dough. Serve warm, or transfer the pans to racks to cool. They pair wonderfully with a glass of champagne!

Notes

Adapted slight from Dorie Greenspan's Around My French Table

6.1.0
https://www.butterlovescompany.com/2015/12/27/cheddar-cheese-gougeres-recipe/
butter loves company | jenna larsson

cheese-gougere-recipe-17

Filed Under: appetizers, eat Tagged With: champagne, cheddar, cocktail party, gougeres, make ahead, new years eve

warm, lemony crab dip

November 18, 2014 by Butter Loves Company

crab-dip-lemon-appetizer-recipe-10 copy

Circa late-fall 2002, I was preparing to put on my first ‘cocktail party.’ I was around 15 years old and the ‘cocktail’ menu consisted of childhood staples such as Sunny Delight, Arizona Iced Tea and Surge—the seemingly radioactive green soda that was later banned due to its high caffeine content. I flipped through my mom’s copy of the cookbook, Finger Foods, marking up every page that jumped out at me as perfect for my teen attendees. I most definitely went through an entire stack of Post-its. What can I say? I’m a sucker for bite-sized foods and vehicles for consuming bread.

crab-dip-lemon-appetizer-recipe-1

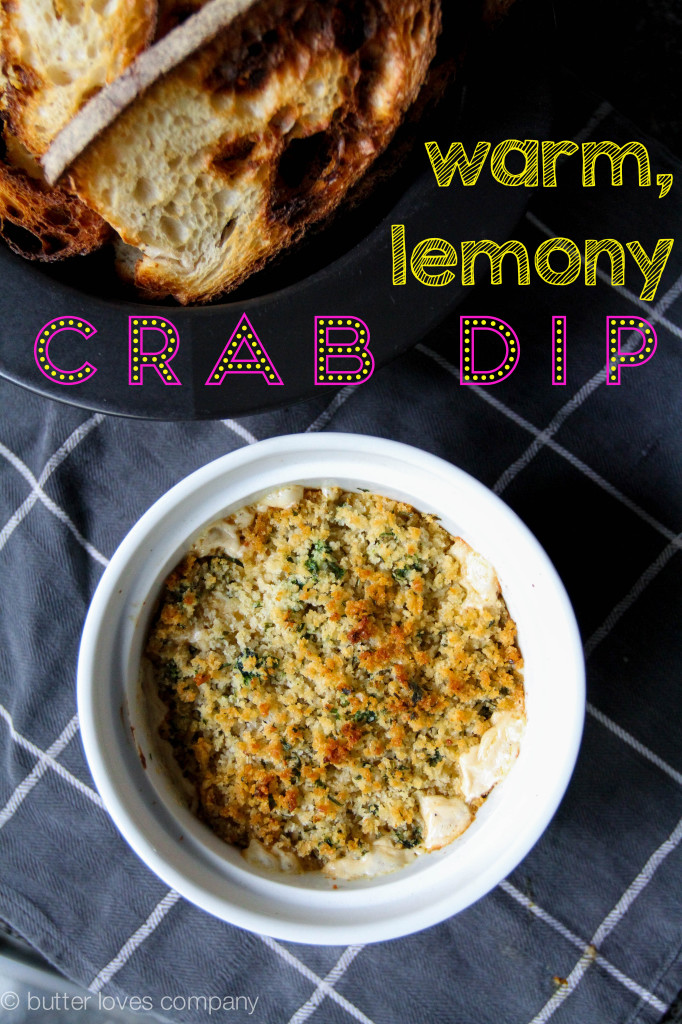
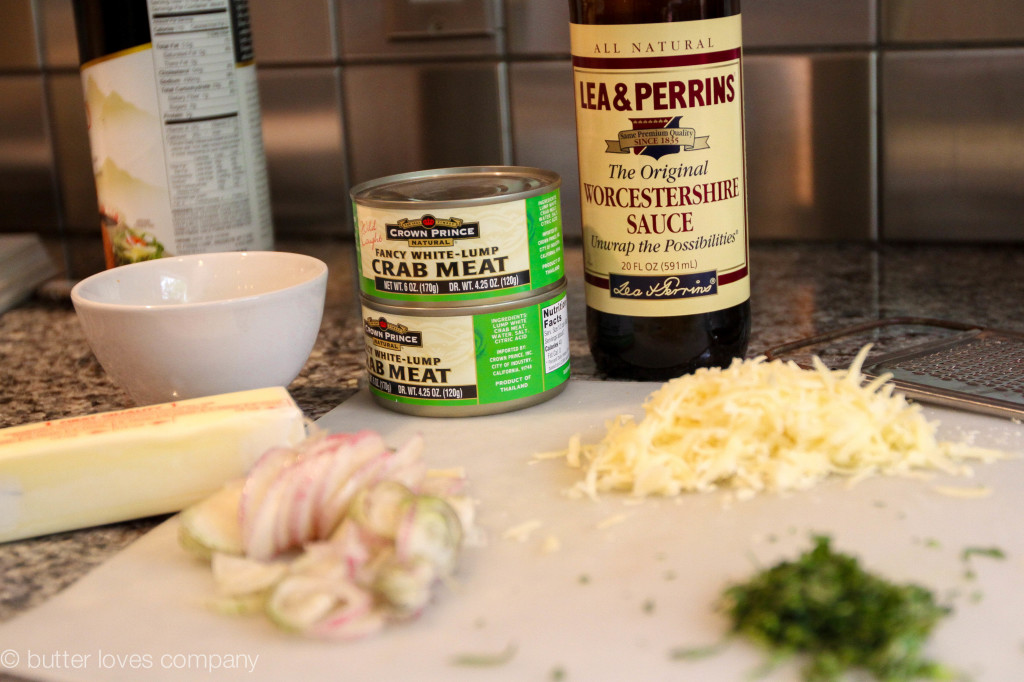
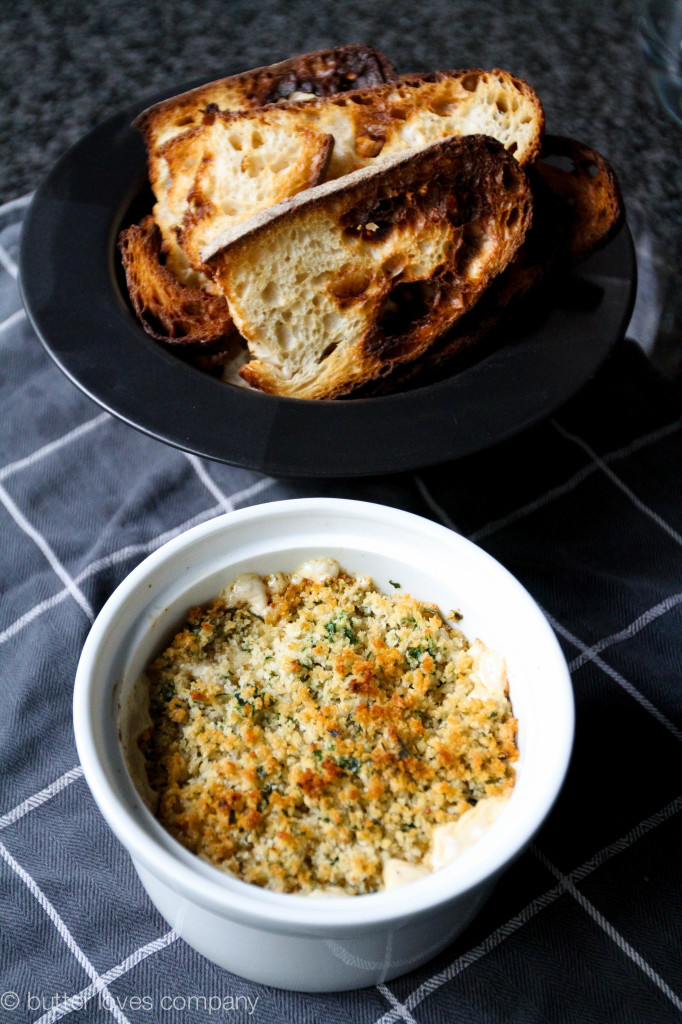
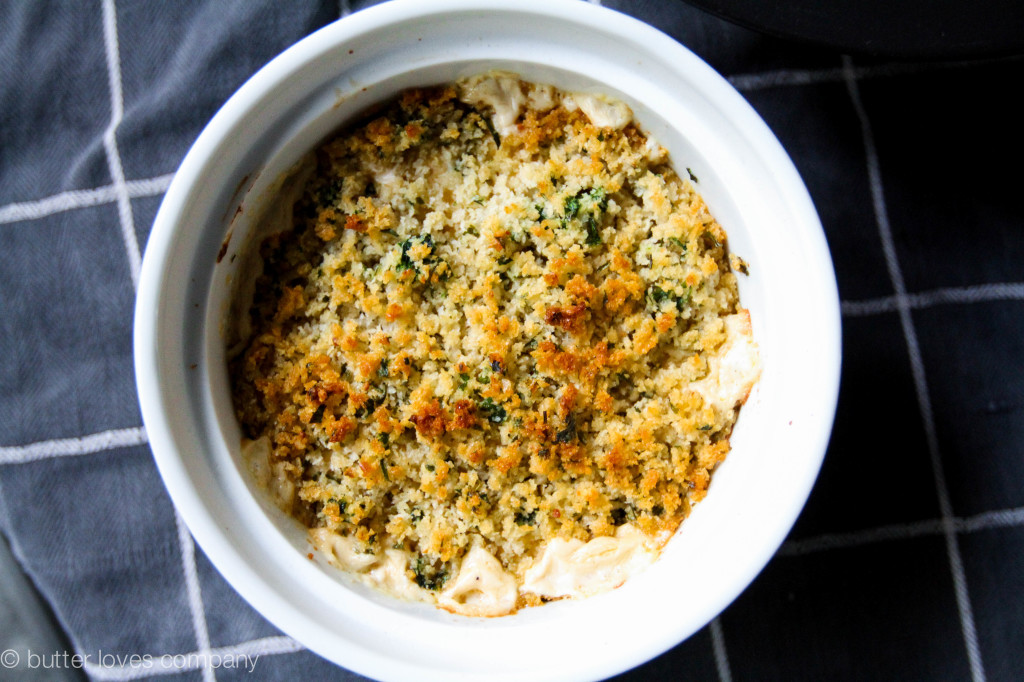
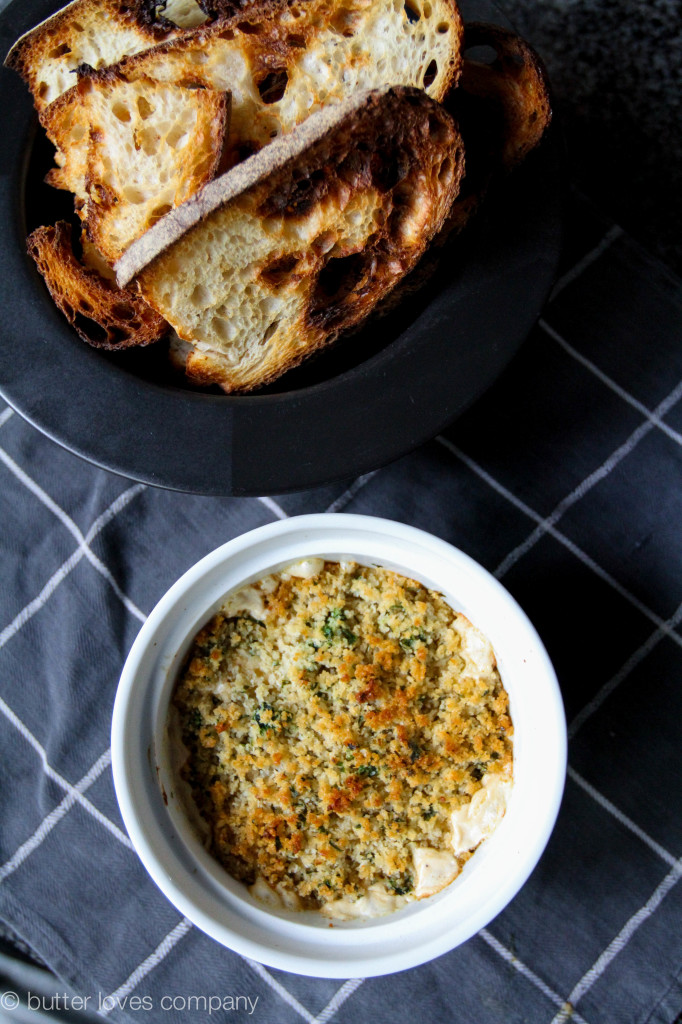
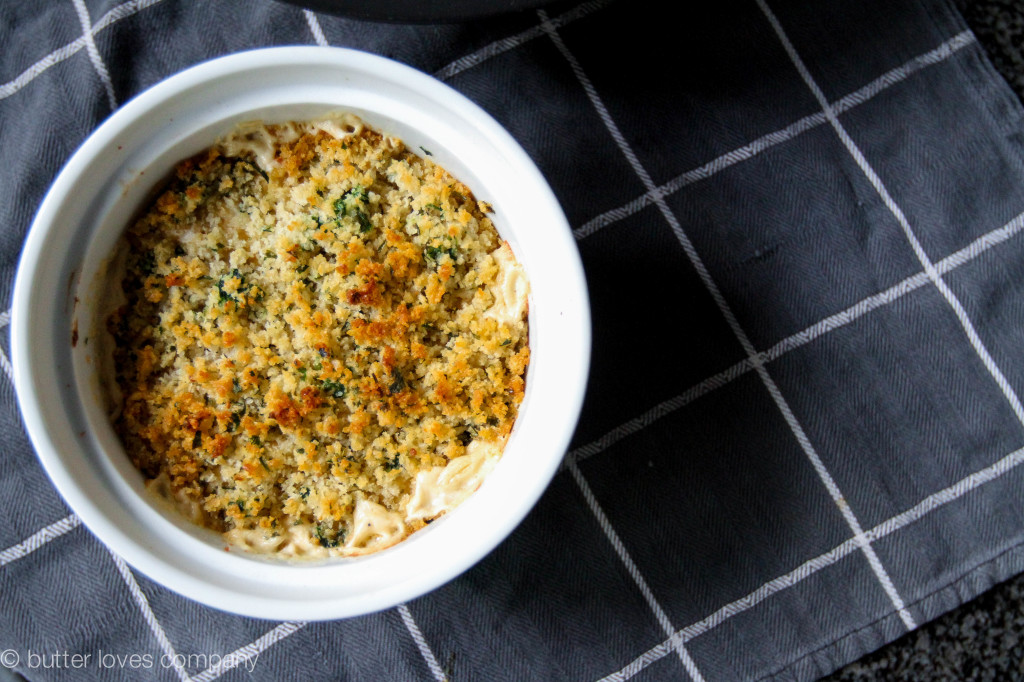
Flash forward to a few weeks ago, I was planning for another cocktail party—this time for adults—and once again scanned my mom’s cookbook wall for inspiration. The same blue Post-its that were stuck on during the Fall of 2002 jutted out of Finger Foods. Turns out, I hadn’t made all 200 recipes I had marked for that ‘cocktail party’ years ago (shocker). Among those that didn’t make the initial cut was this warm, lemony crab dip. Because crab may very well be the queen of the cocktail party, I decided to test the recipe. I added more crab than the recipe called for because I’m always disappointed by wimpy dips. Oh boy, was it just the perfect bread topper in all its warm, creamy, savory, lump crab-filled glory. Chopped tarragon added a sophisticated can’t-put-my-finger-on-it complement to the citrus and a pinch of cayenne enhanced the creaminess of the heavy base with just enough heat.

crab-dip-lemon-appetizer-recipe-3

Now, my cocktail party attendees must be scratching their heads because they didn’t see this dip last Saturday. It passed the test run with rave reviews and I promise it was absent only because the table had hit its dip quota. Don’t worry though because Finger Foods is still on the kitchen shelf for next time; a Post-it marked “delicious” sticking out of page 17.

crab-dip-lemon-appetizer-recipe-5

crab-dip-lemon-appetizer-recipe-6

crab-dip-lemon-appetizer-recipe-7

crab-dip-lemon-appetizer-recipe-8

crab-dip-lemon-appetizer-recipe-12

crab-dip-lemon-appetizer-recipe-11

crab-dip-lemon-appetizer-recipe-13

warm, lemony crab dip
adapted from Bay Book’s Finger Foods

prep time: 20 minutes
cook time: 20 minutes
total time: 40–45 minutes
makes 2 1/2 cups

Ingredients:

1/3 cup unsalted butter
2 cloves garlic, minced
3 shallots, thinly sliced
1 teaspoon mustard powder
1/2 teaspoon cayenne pepper
1/2 cup heavy cream
2/3 cup cream cheese
1/2 cup cheddar cheese, grated
14-oz. lump crabmeat (drained if using canned)
2 tablespoons fresh lemon juice
2 teaspoons Worcestershire sauce
3 teaspoons chopped, fresh tarragon
3/4 cup fresh breadcrumbs (I used Panko)
1 tablespoon chopped, fresh parsley

Instructions:

  1. Center a rack in the middle of the oven and preheat to 325 degrees. Grab a small baking dish out and set it aside for later (must fit 2 1/2 cups).
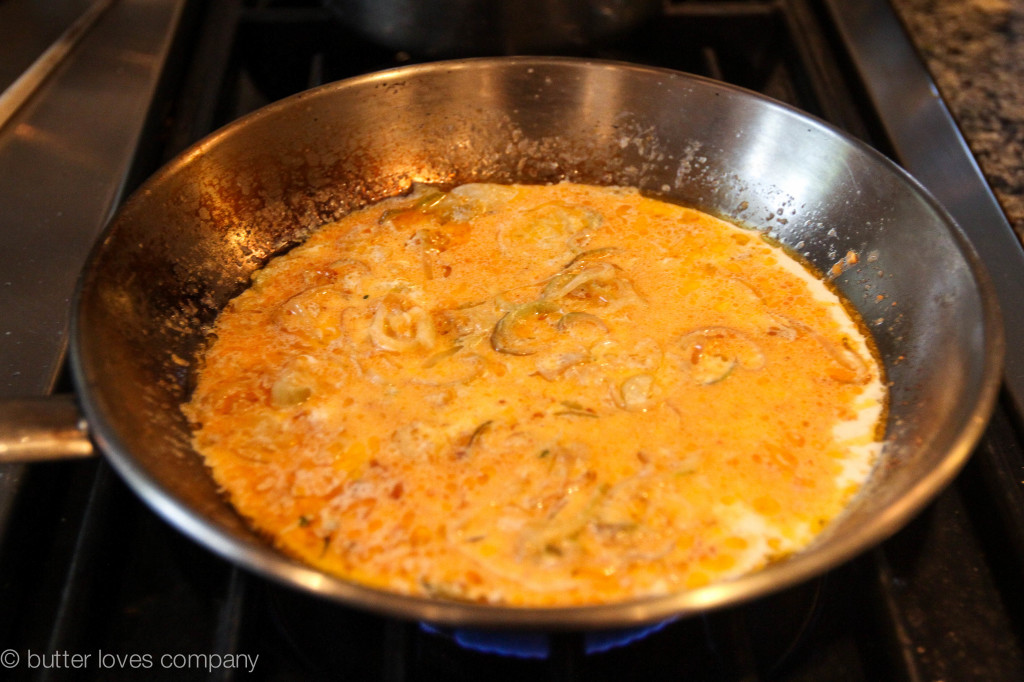
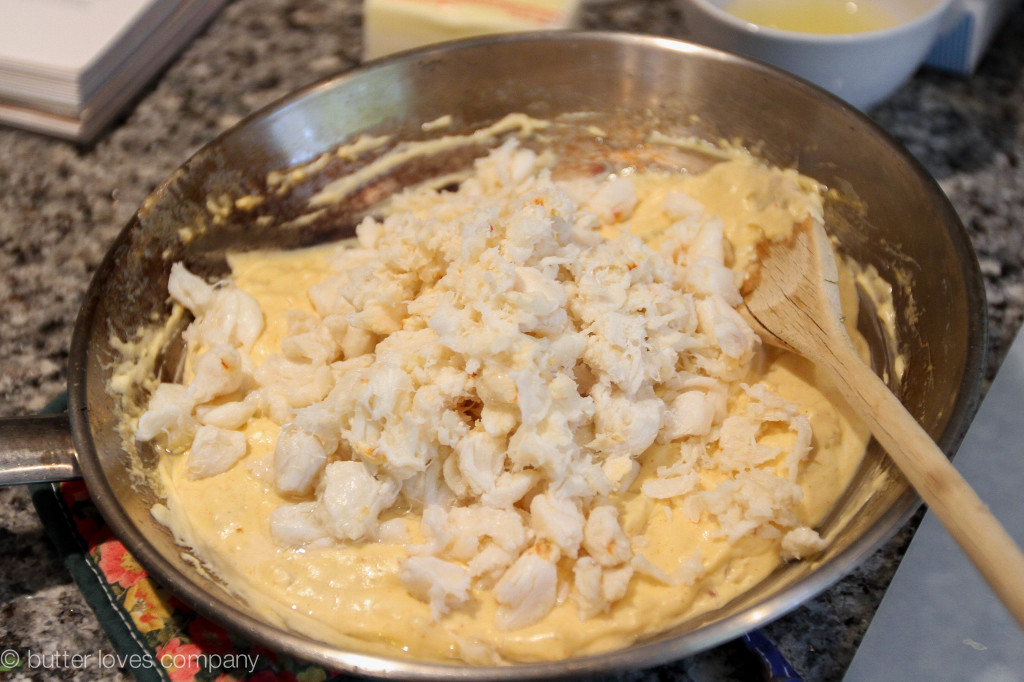
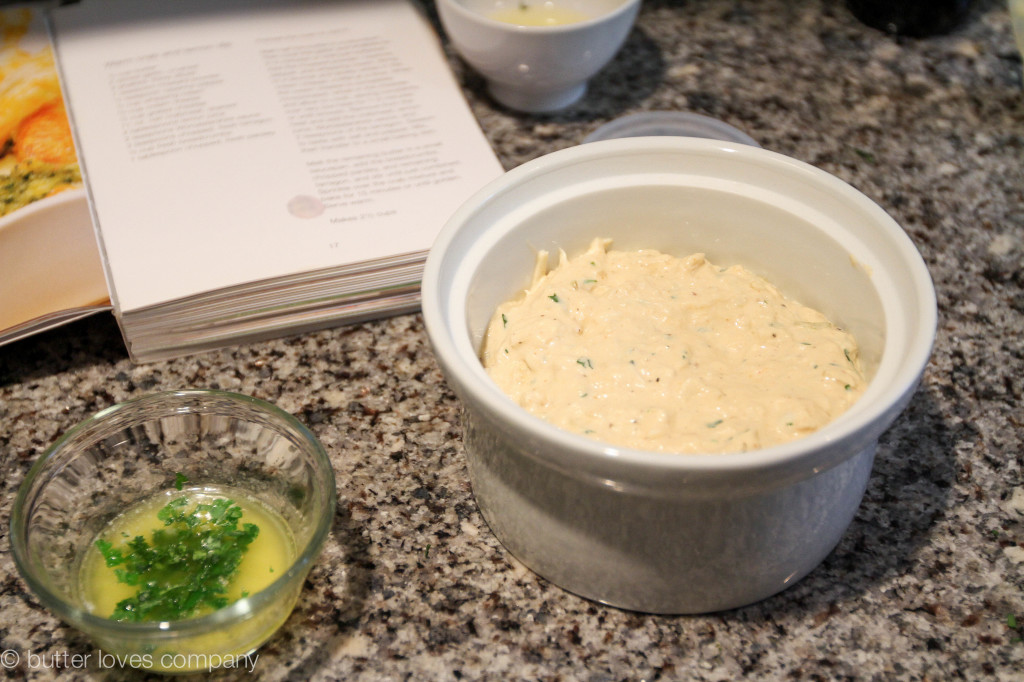
  2. Melt half the butter in a medium saucepan over medium heat. Add the garlic and shallots to the saucepan and cook until just softened, about 3 minutes. Stir in the mustard powder, cayenne, and whipping cream. Bring to a simmer and slowly whisk in the cream cheese, a little bit at a time. When the cream cheese is completely incorporated, whisk in the cheddar and stir constantly over very low heat until smooth, about 1–2 minutes. Remove from heat and add in the crabmeat, lemon juice, Worcestershire sauce, and 2 teaspoons of the tarragon. Season to taste with salt and pepper. Stir well and then transfer into your small baking dish.
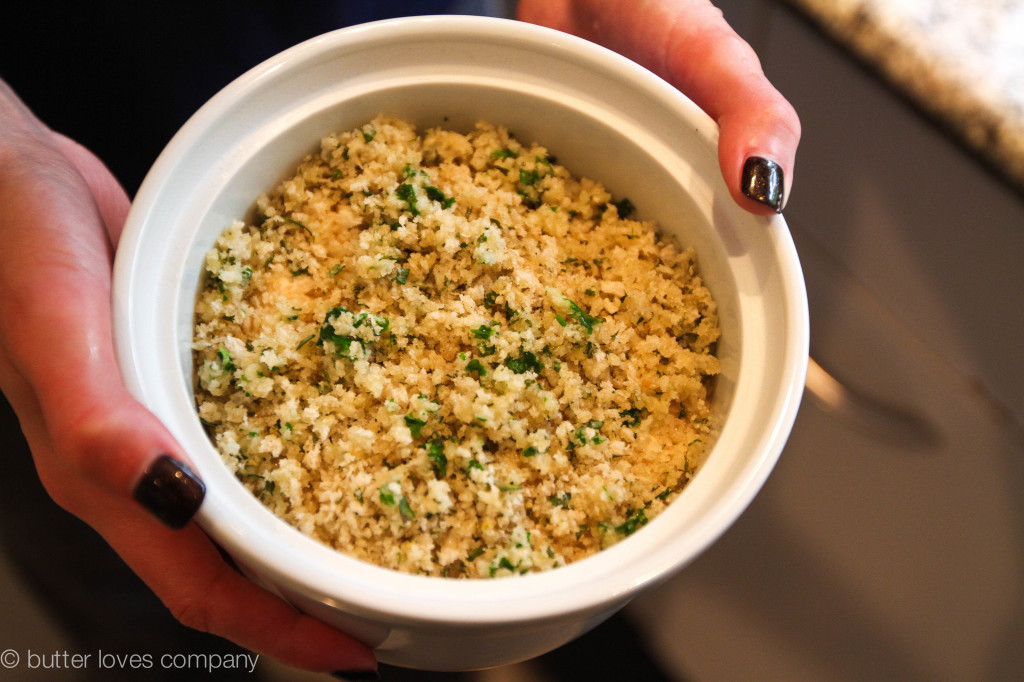
  3. Melt the remaining butter in the microwave in a separate small microwave safe bowl. Add the breadcrumbs, chopped parsley, and remaining tarragon, and stir until combined. Sprinkle over the crab mixture and bake for 15–20 minutes or until bubbling and golden. Serve warm with toasted bread or crackers.

Filed Under: appetizers, eat Tagged With: cocktail party, crab, crowd-pleaser, dip, easy appetizers, lemon, seafood, warm dip

jerk shrimp

May 17, 2014 by Butter Loves Company

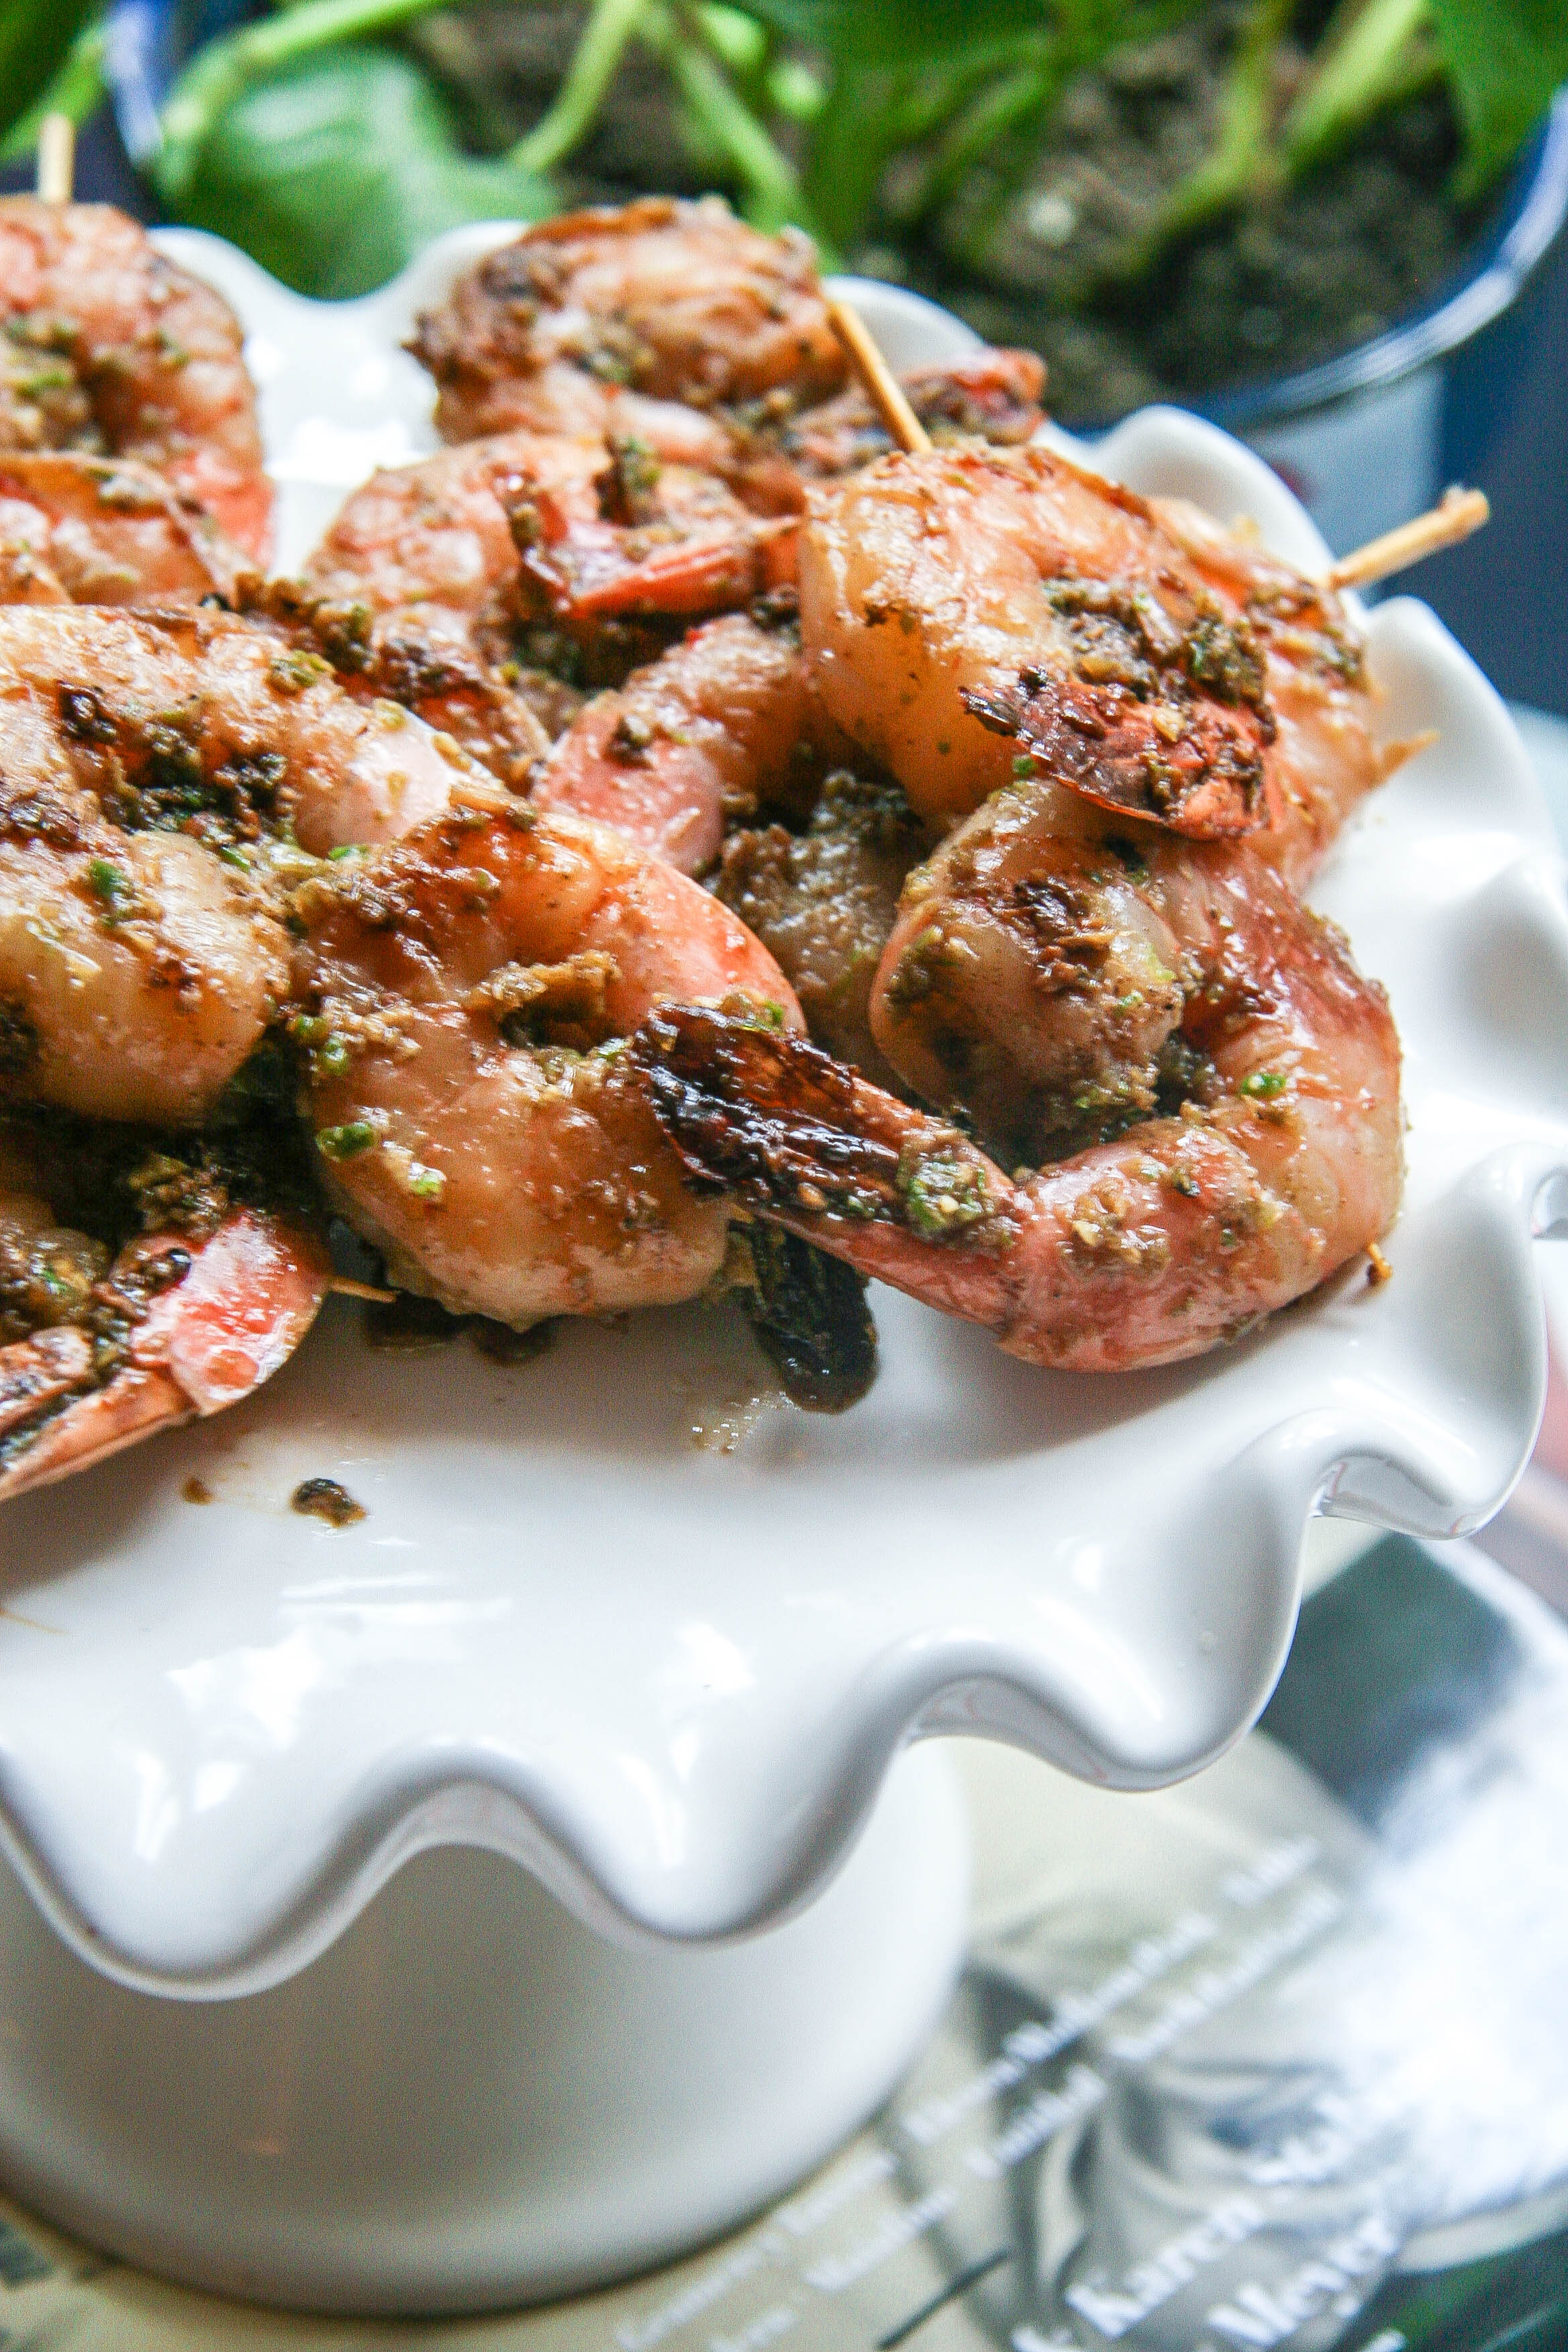
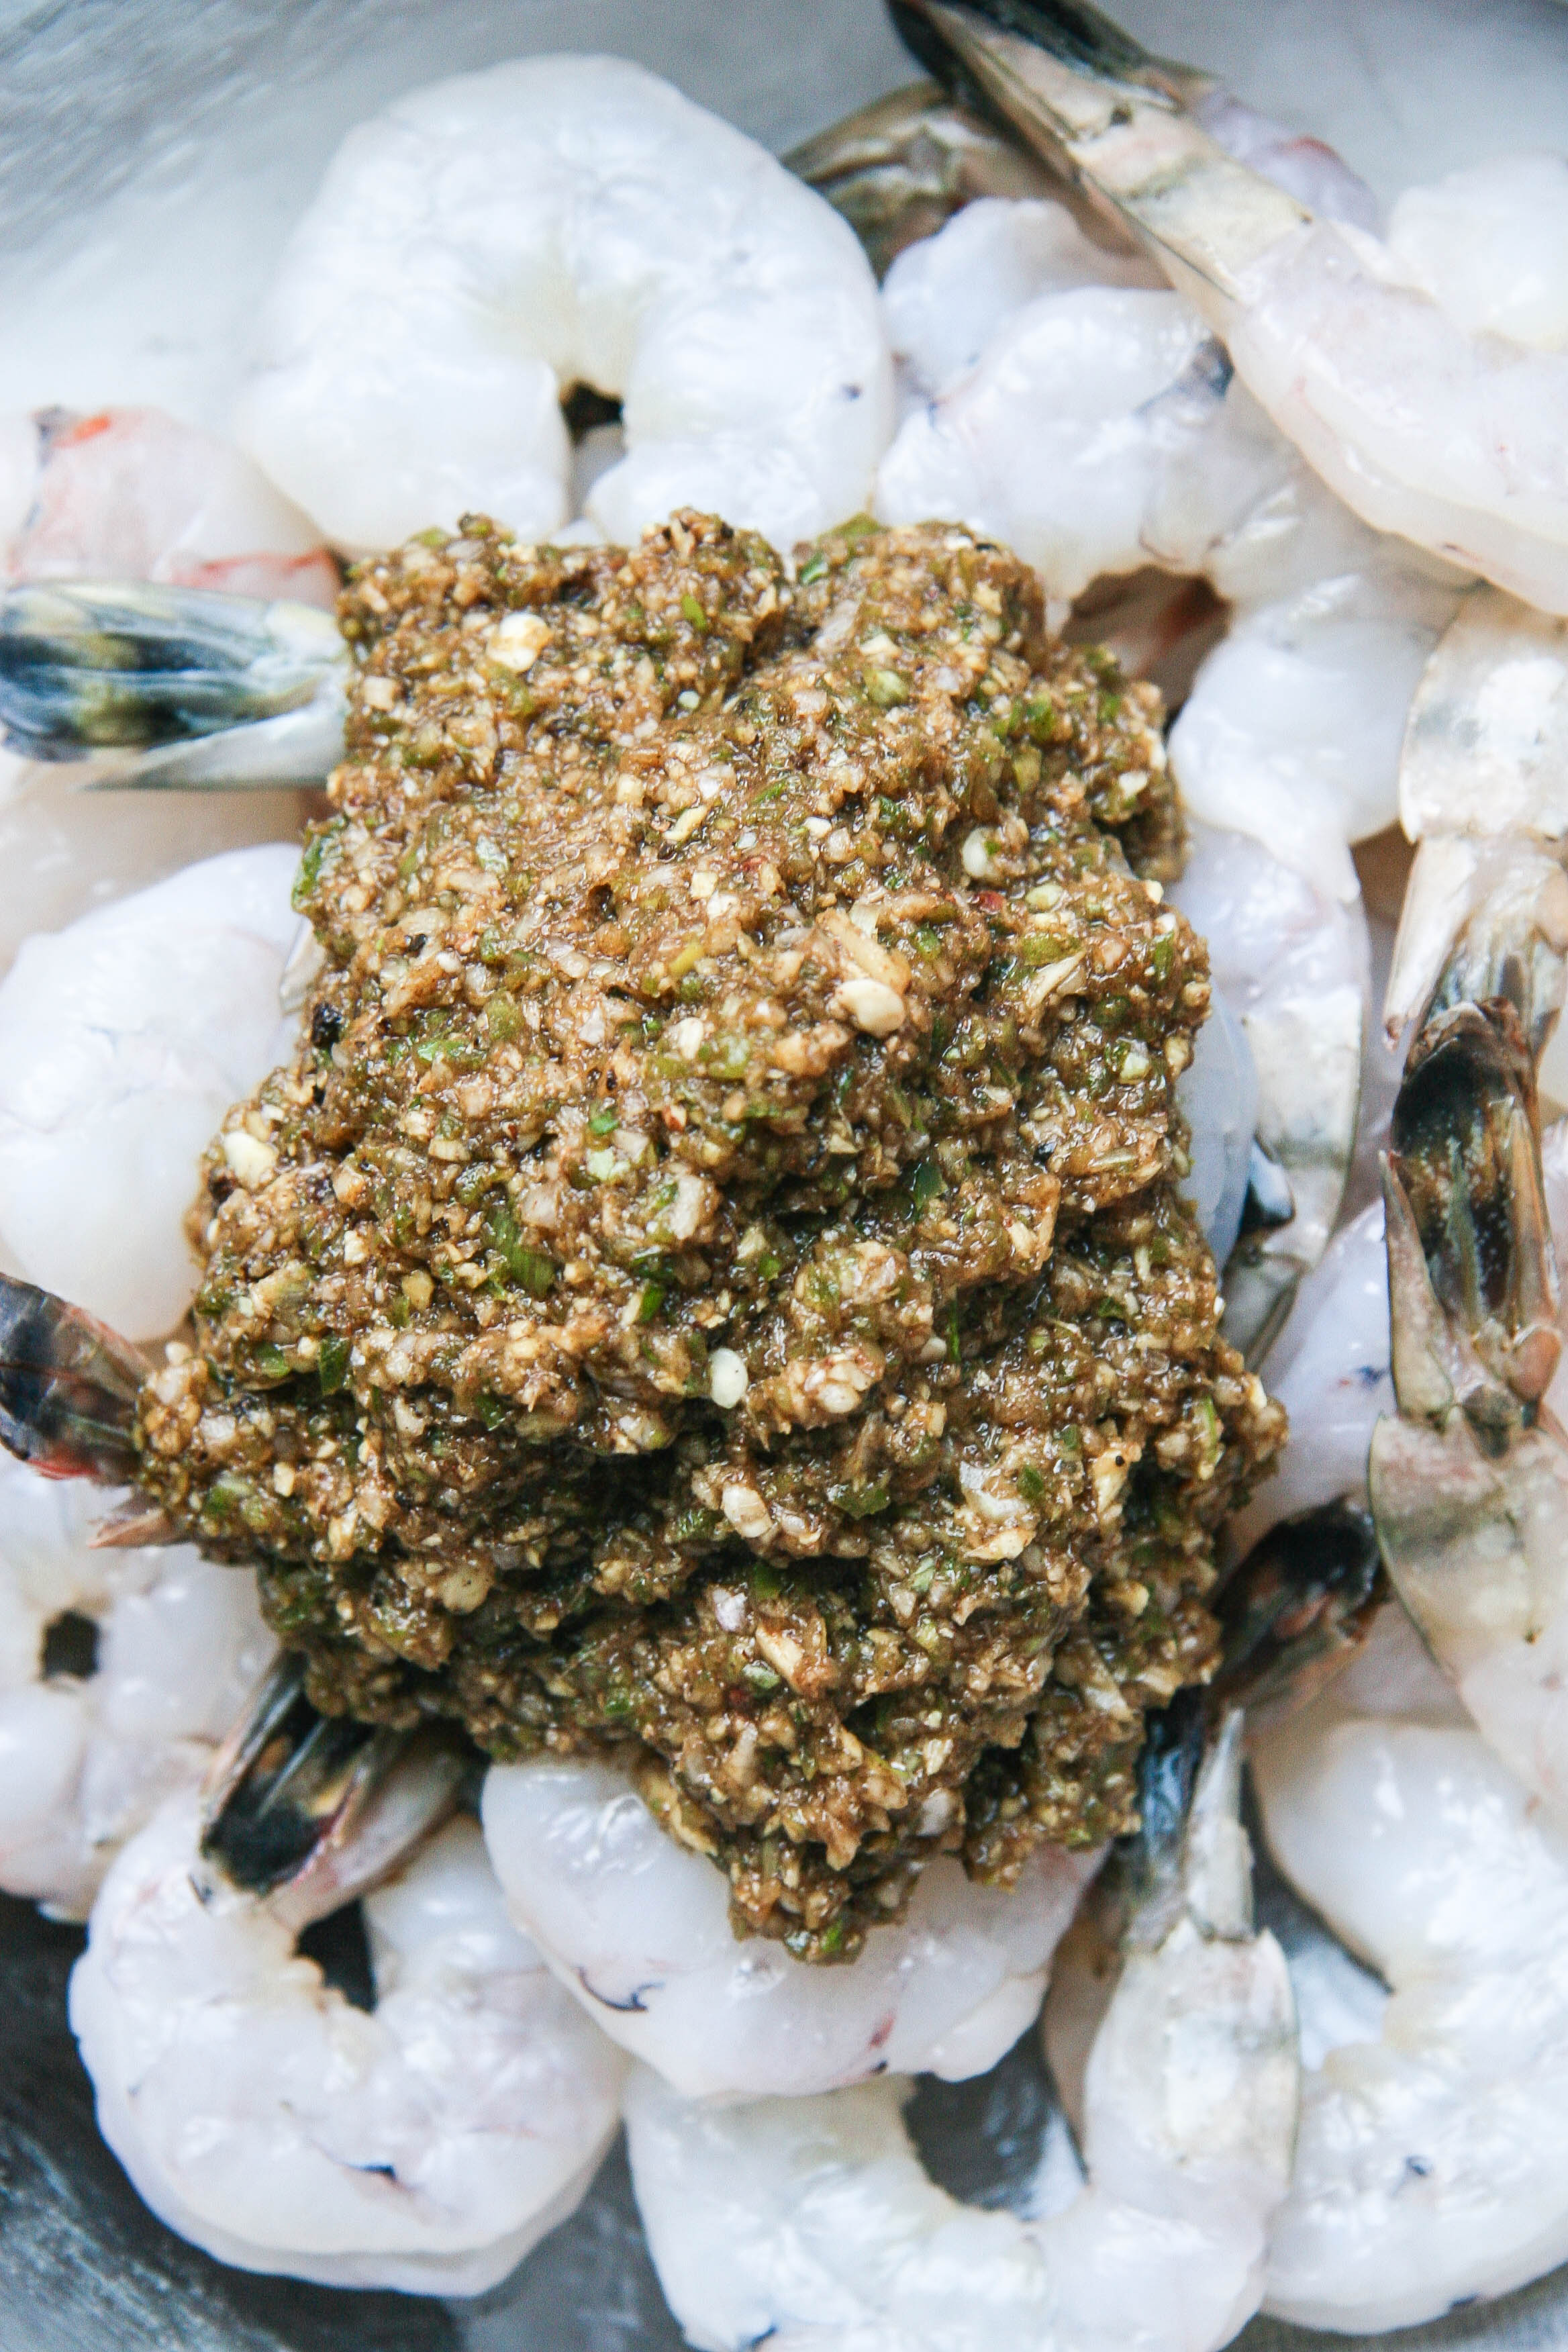
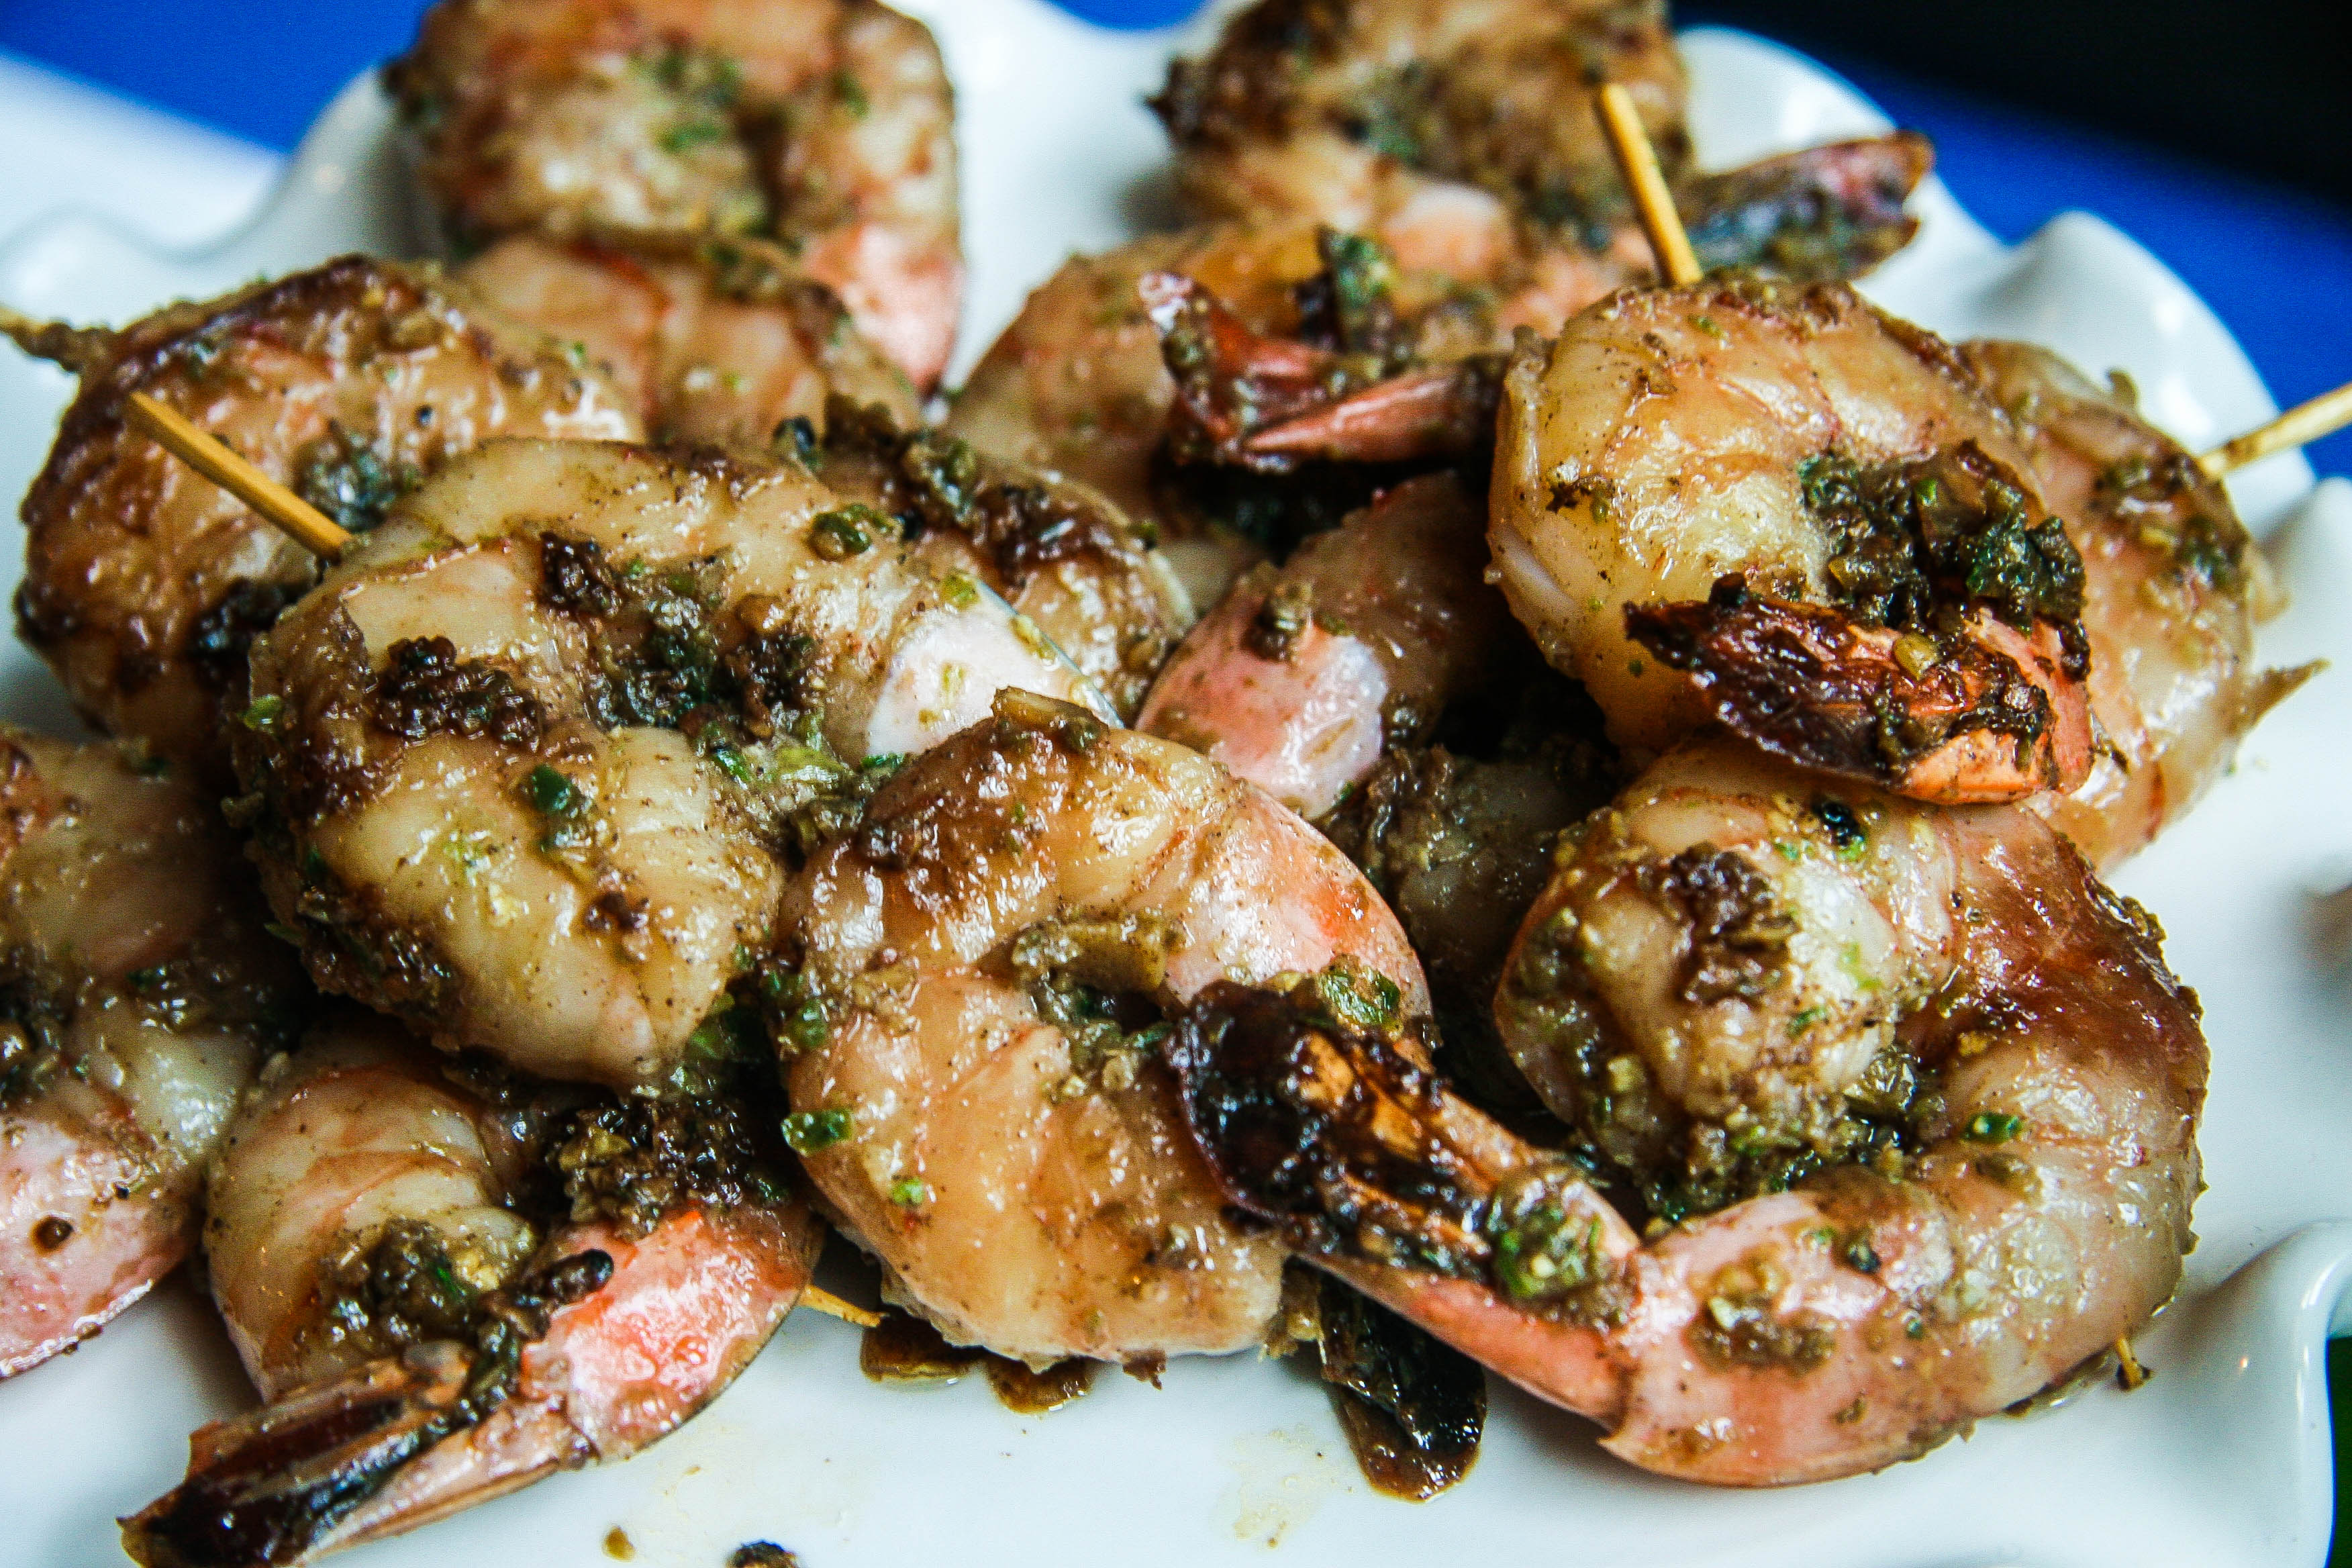
jerk shrimp recipe 6

There are two kinds of jerks in this world. The first is the kind that, on a rainy day, accelerates their car through a puddle to drench pedestrians walking on an adjacent sidewalk. Bitter? Me? No way. And the second, ladies and gents, is the seasoning.  If only it were limited to that, the world would be a happier place!

Anyways, today, we’ll be talking about the latter. The dry or wet—in this case wet—meat, poultry or seafood—in this case seafood—Jamaican marinade with a signature sweet heat. When I showed this recipe for jerk shrimp from Family Table to Greg, he told me it was right up his alley; which is funny because he is neither a jerk nor a shrimp.

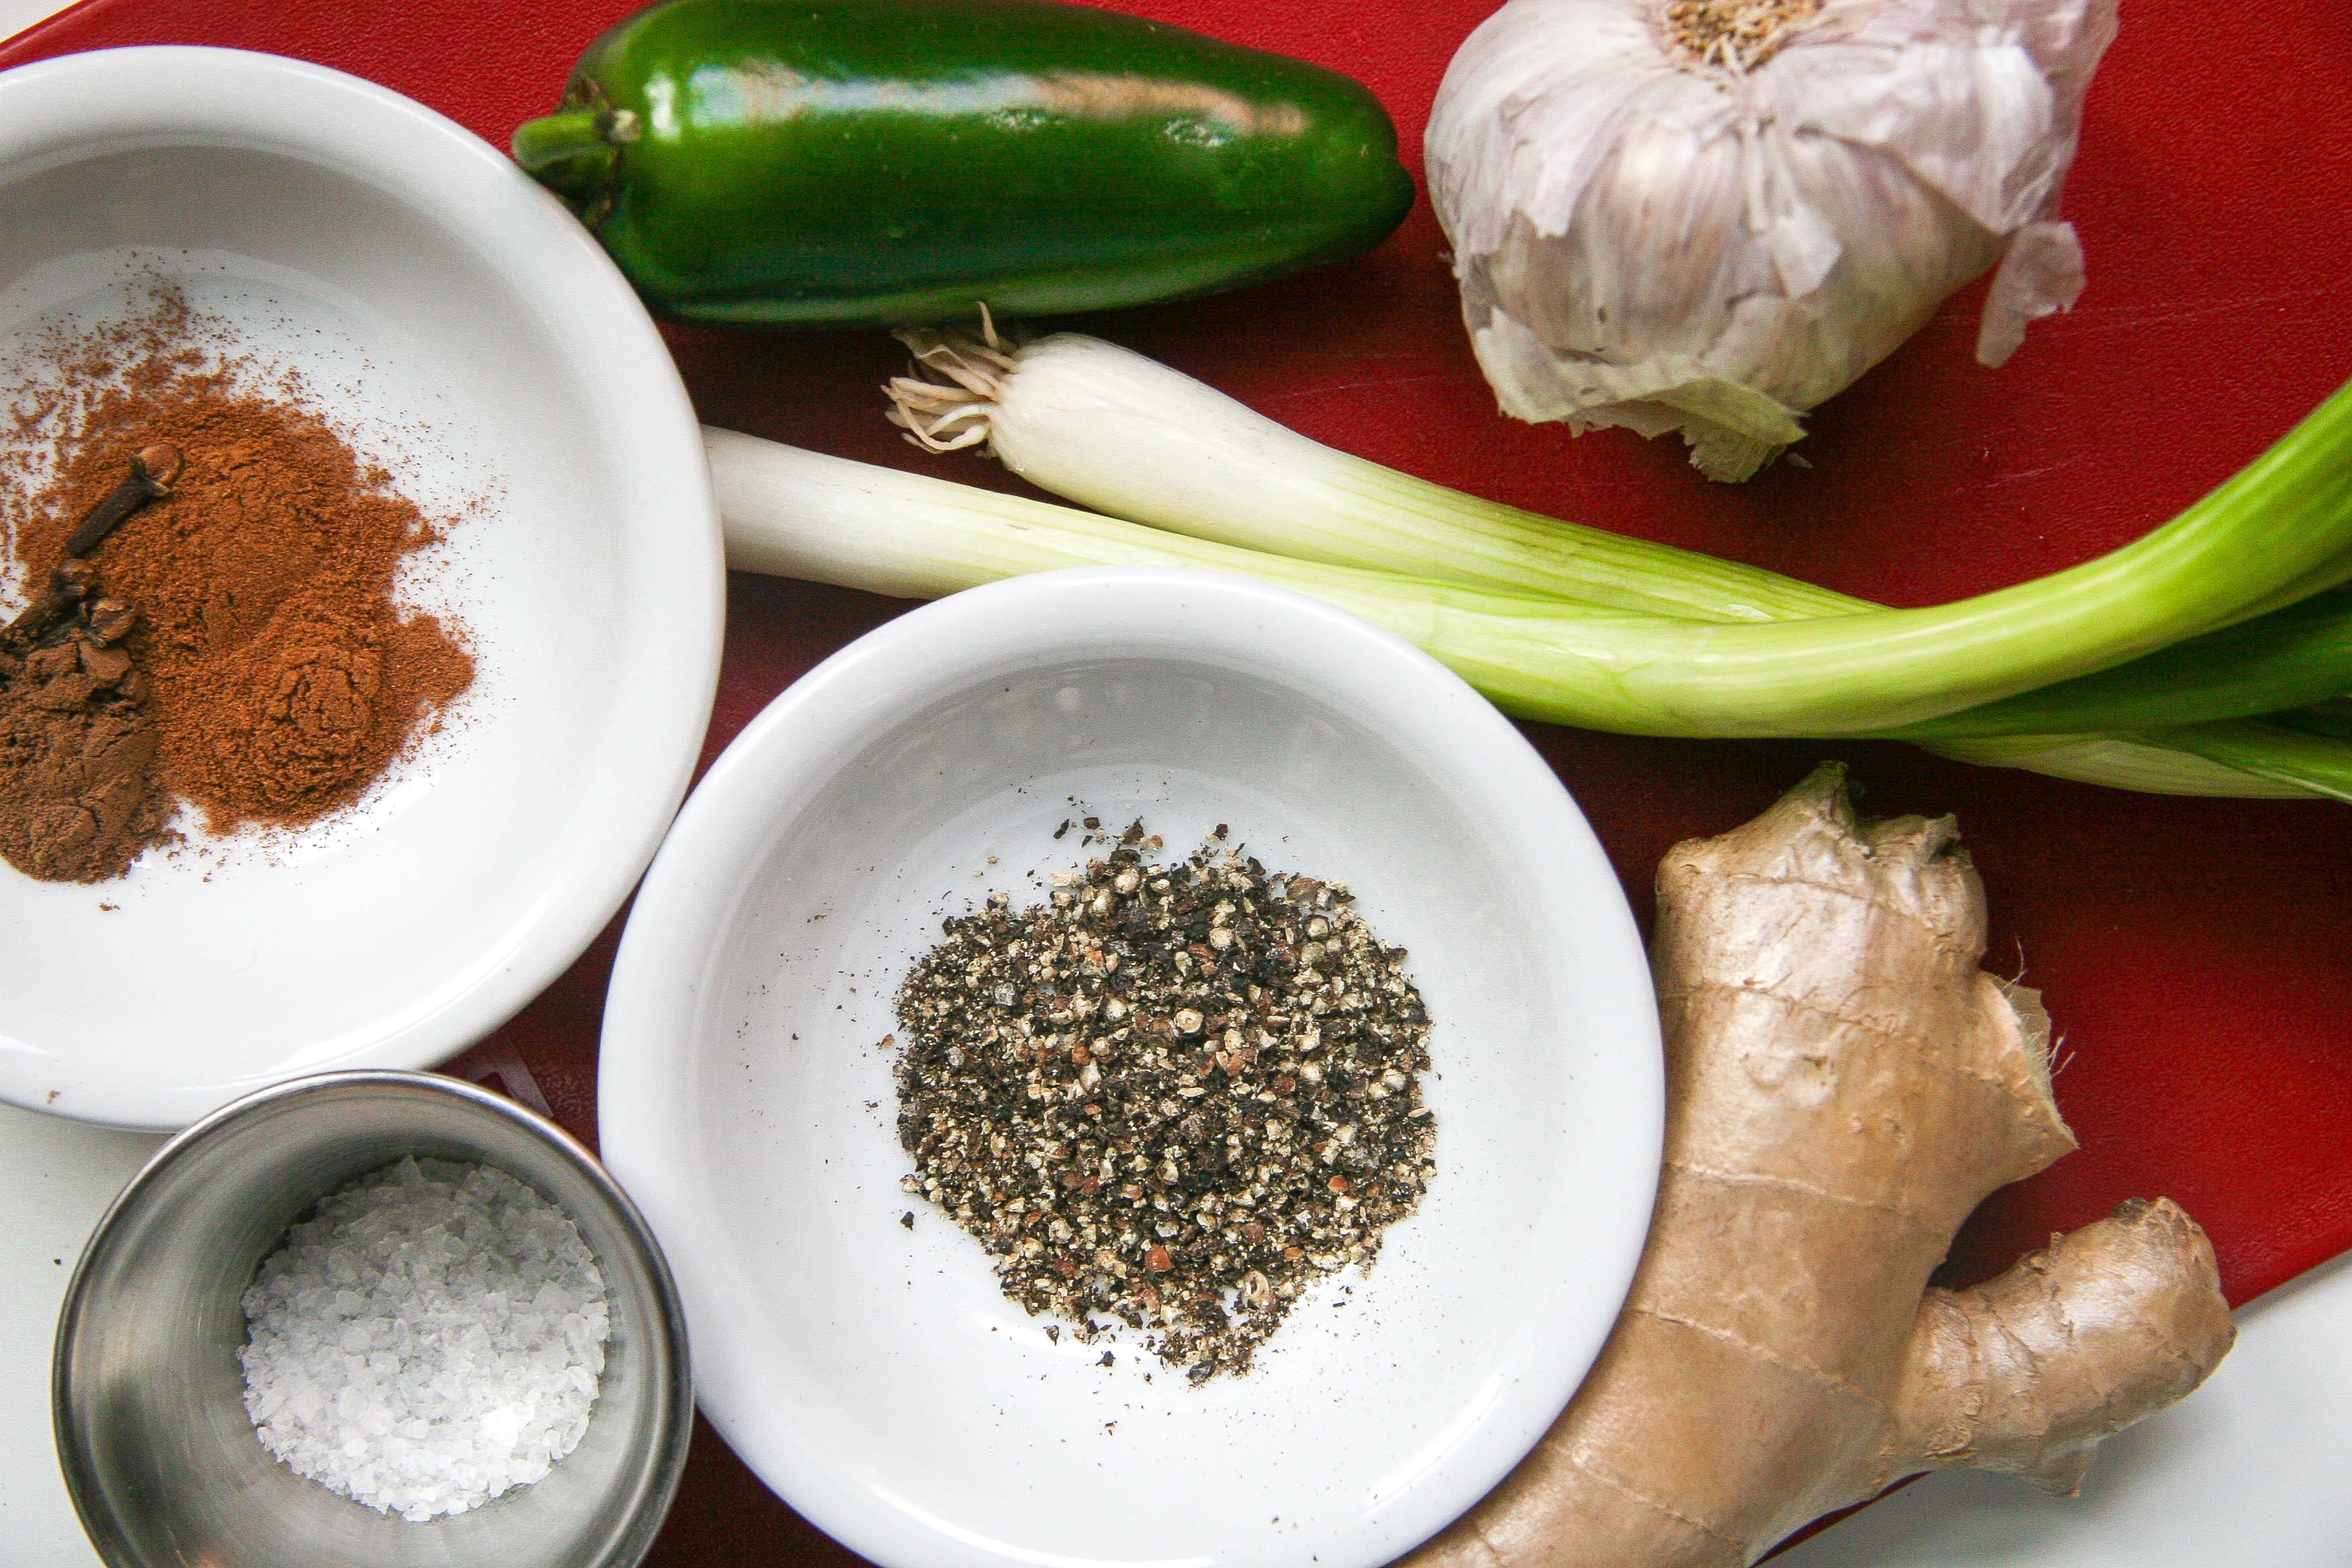
What jumped out at him though were the bold flavors of the seasoning’s ingredients: spicy ginger and jalapeno, warm cloves, cinnamon and allspice, salty soy sauce, garlic and scallions. If you’re like me and are wondering why jerk is called jerk, my research says the terms comes from the word charqui, a Spanish term of Quechua (native South American) origin for jerked or dried meat. The term eventually evolved to jerky in English; hence beef jerky.

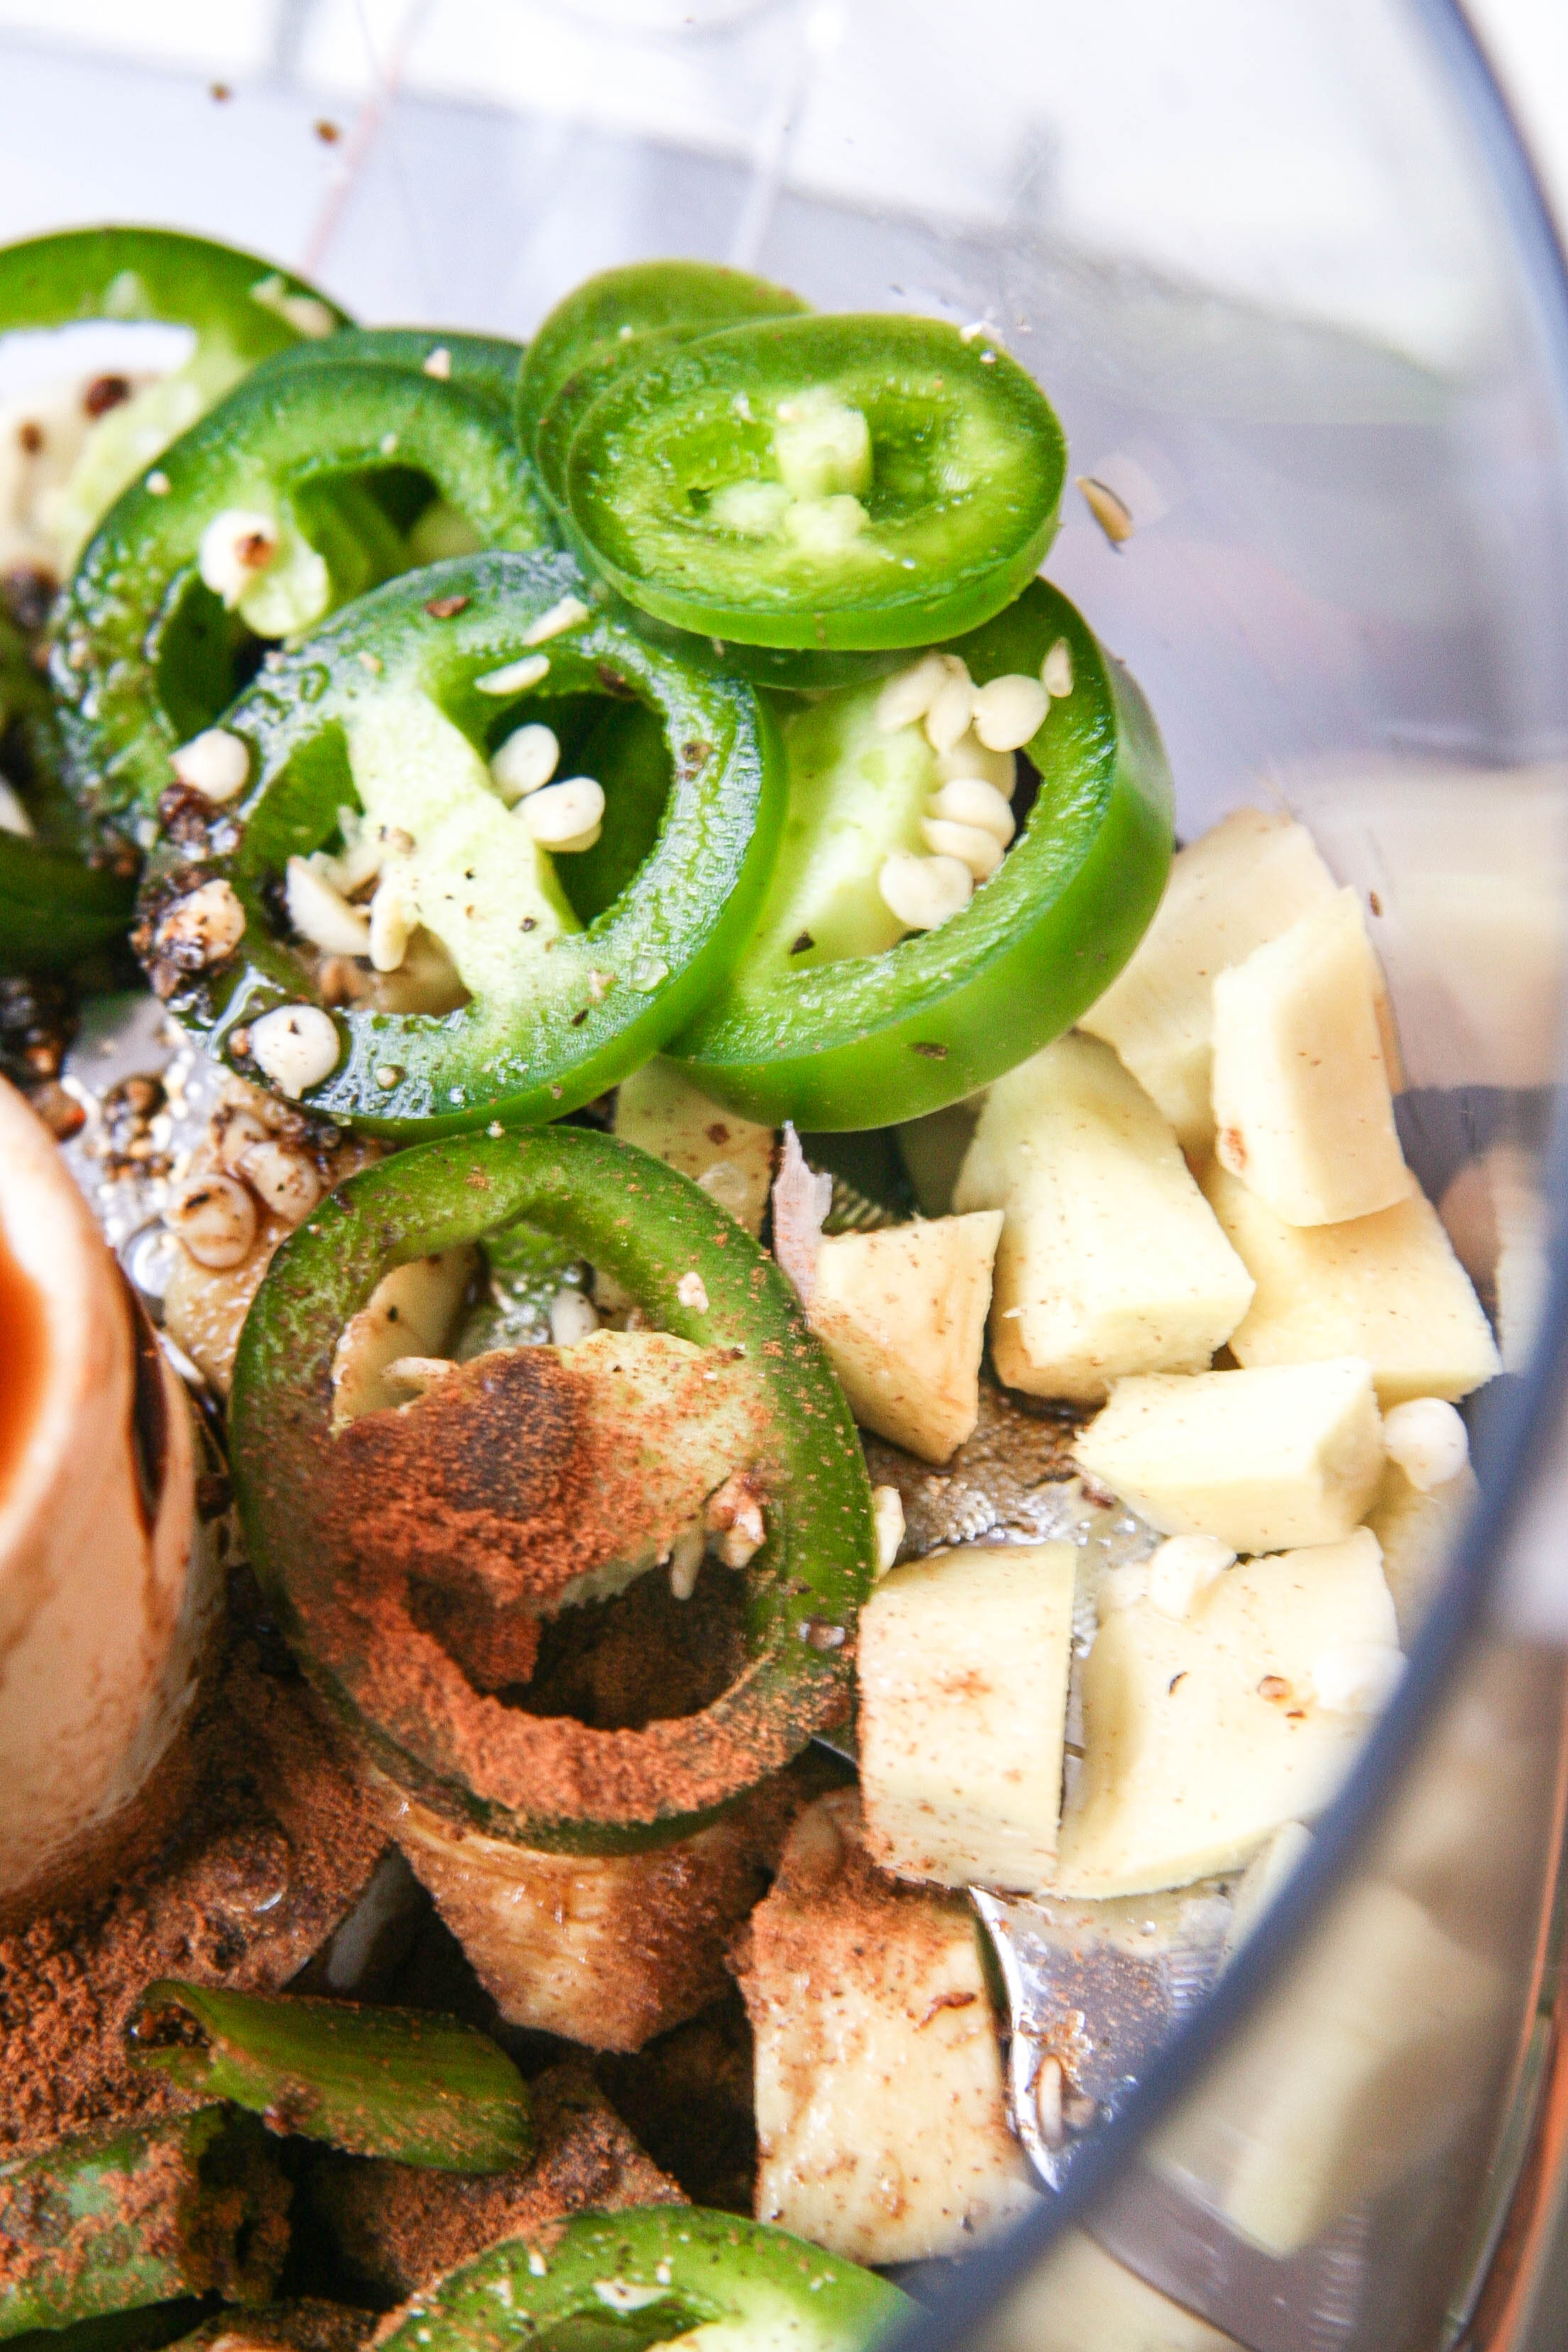
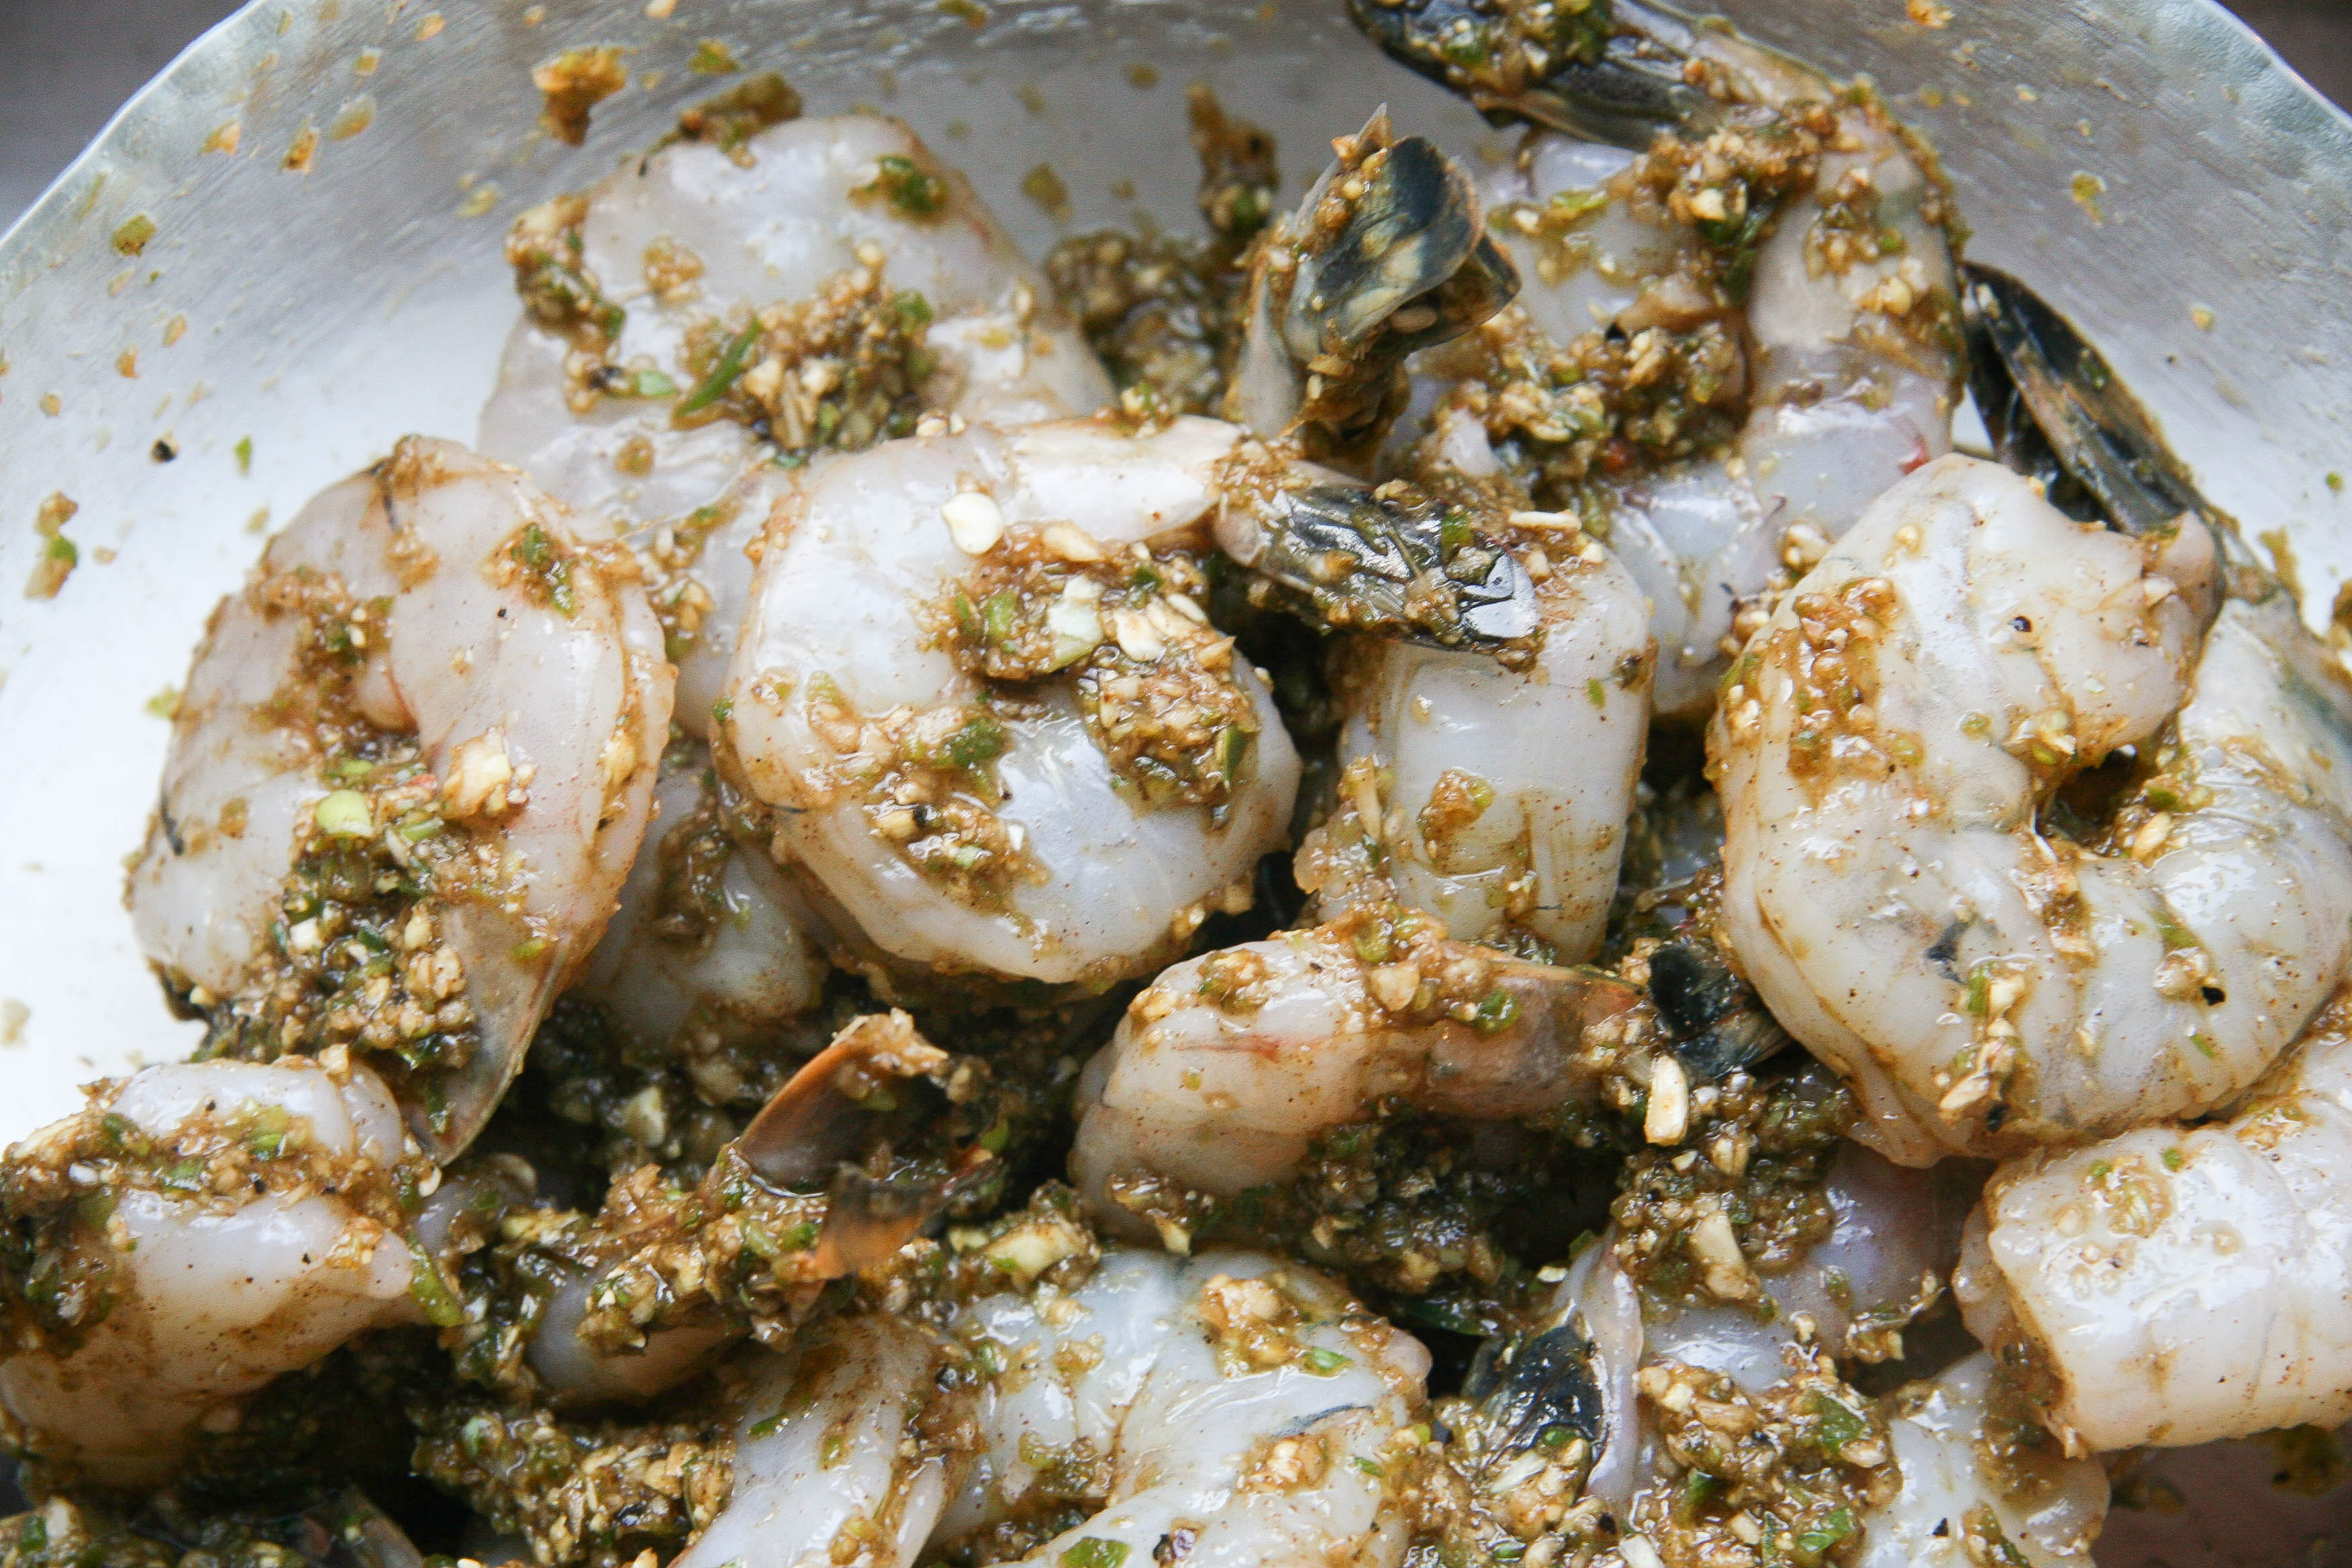
While this jerk shrimp may not be the most traditional jerk, it is easy and tasty. All you do is throw the ingredients in a food processor or blender until they form a paste. Then, slather over raw shrimp and refrigerate for an hour. Finally, you sauté the shrimp in a saucepan turning once (keep in mind that shrimp cook super fast) and voila! The original recipe calls for fresh Italian parsley, which I omitted because I didn’t have any and am honestly not the herb’s number-one-fan. After just one hour of marinating, the result is shrimp with layers of flavor and a slight, lingering heat. The shrimp are great on top of salads, in a pita or as an appetizer served alongside a simple yogurt dip.

jerk shrimp recipe 1

jerk shrimp recipe 3

jerk shrimp recipe 2

jerk shrimp recipe 4

jerk shrimp recipe 5

jerk shrimp recipe 7

jerk shrimp
Adapted, barely, from Family Table

Prep Time: 10 minutes
Cook Time: 5-10 minutes
Total Time: 1 hour 15 minutes
Makes 1 pound shrimp (about 4 entrée servings or more if used as an app)

Ingredients:

½ cup coarsely chopped scallion (about 2-3)
¼ cup coarsely chopped peeled fresh ginger
¼ cup chopped fresh Italian parsley (I omitted)
8 garlic cloves, peeled
1 coarsely chopped jalapeno, seeds included
¼ teaspoon salt, plus more to taste
¾ teaspoon ground cinnamon
¼ teaspoon ground cloves
¼ teaspoon ground allspice
2 tablespoons canola or vegetable oil
2 tablespoons soy sauce, low-sodium if you have it
¼ teaspoon sugar
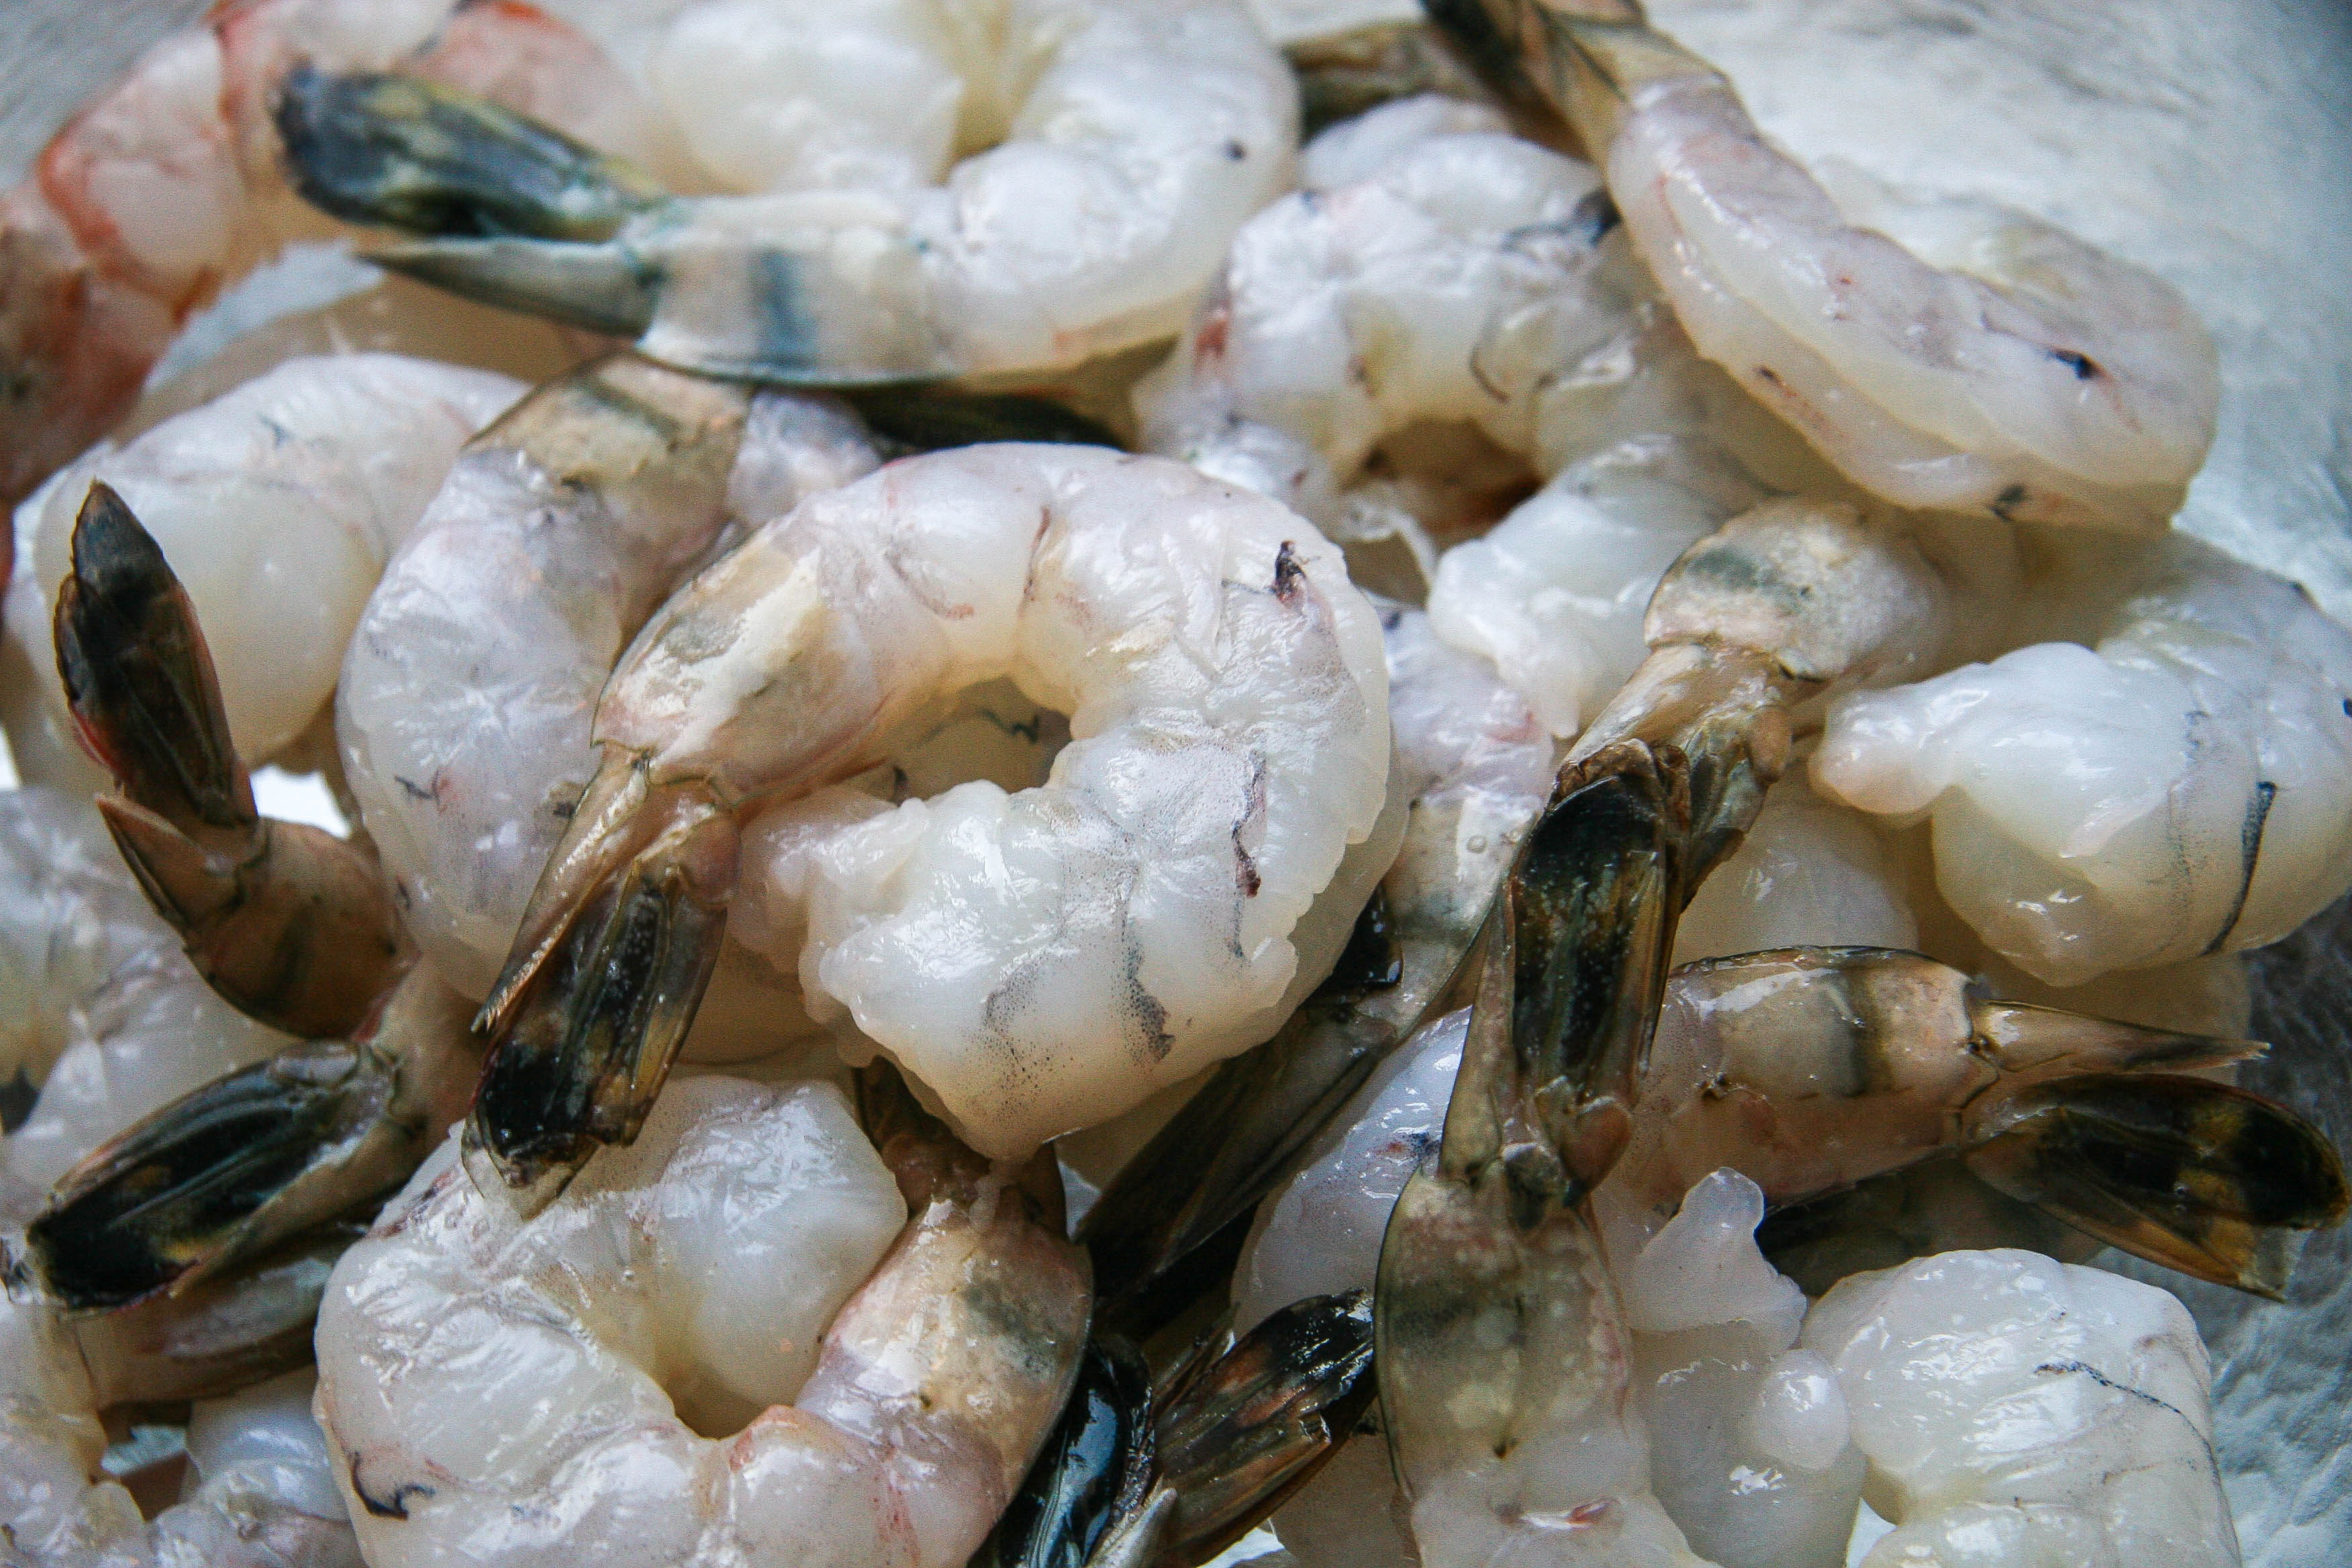
1 pound raw shrimp, peeled and deveined (20-24 medium, 25-30 small)

Instructions:

  1. Place shrimp in a medium sized bowl.
  2. In the work bowl of a food processor or in a blender, combine all ingredients from the scallion down to the sugar. Process until it resembles a paste. Pour over shrimp and stir to coat. Cover the bowl with plastic wrap and refrigerate for 1 hour.
  3. Remove the shrimp from the refrigerator. Heat a large non-stick skillet over medium heat and add 1-2 tablespoons olive or canola oil (just enough to coat the bottom of the pan). Remove the shrimp from the bowl, skewer if desired, and put them in the pan (you can do this in batches if not all the shrimp fit in a single layer). Cook the shrimp, turning once, until browned on both sides, about 2 ½ minutes per side. Enjoy!

Filed Under: appetizers, eat, mains Tagged With: easy appetizers, jerk, jerk seasoning, marinated, seafood, shrimp

Welcome!

jenna of butterlovescompany

Pull up a chair

Hi! I’m Jenna. Story seeker, food lover, recipe developer based in NYC. Firm believer in making every day delicious! Read more…

looking for something?

  • Email
  • Facebook
  • Instagram
  • Pinterest
  • RSS
  • Twitter

Latest Posts

  • Freezer Meals to Make Before Baby: How We Meal Prepped Before Baby
  • mom’s famous spiced pecans
  • funfetti cookie dough truffles (no-bake)
  • maple coconut cookies
  • snickerdoodle blondies

popular now

strawberry cinnamon rolls
braised short rib pasta sauce (short rib ragu)
rosemary honey buttermilk biscuits
peach blueberry pie
bourbon banana bread
chocolate marble loaf cake

grammin’

Let’s get ready to bake throughout the holidays! Let’s get ready to bake throughout the holidays! I’ve teamed up with @lucky_leaf_fruit_filling, @diamondnuts and #Kids360 to give away some delicious baking ingredients to make your spirits bright this season. 

To enter:
-Follow @lucky_leaf_fruit_filling, @diamondnuts and @butterlovescompany
-Comment and tag a friend and the name of your favorite holiday dessert
-Enter by December 1. Winner will be selected at random and DM’d! 

You’ll win: 
•(1) Can of Lucky Leaf Premium Blueberry Filling
•(1) Can of Lucky Leaf Premium Apple Filling
•(1) Can of Lucky Leaf Premium Cherry Filling
•(1) Can of Lucky Leaf Premium Strawberry Filling
•(1) Can of Lucky Leaf Premium Peach Filling
•(1) Recipe Book
•(2) Dish Towels
•(1) Pot-Holder
•(1) Picnic Basket

#ad NO PURCHASE NECESSARY. Open to legal residents of the United States (including its commonwealths, territories, and possessions) who are legal age of majority. Enter by 11:59 pm ET on December 1, 2021. Odds of winning depend on # of entries received. Void where prohibited. This is not sponsored or endorsed by Instagram or Facebook.
This was the best photo we could get with an alway This was the best photo we could get with an always moving toddler. 🥸 Happy Thanksgiving to you and yours! ♥️
Something that the past year or so has taught me: Something that the past year or so has taught me: stock your pantry! Having a stocked kitchen has made it super easy to cook and bake without having to run out to the store. Crucial when you get a craving for an Apple Walnut Cake and need to make one stat. With @lucky_leaf_fruit_filling and @diamondnuts, you can put together a delicious cake SO easily with no peeling and slicing of apples. 🍎🌰You get all the beautiful warm spice flavor with sweet, tart apples, and crunchy, hearty walnuts. #ad Get the recipe below: 

Apple Walnut Cake

* 1 box (15.25 oz.) spice cake mix
* 1 can (21 oz.) Lucky Leaf® Premium Apple Fruit Filling
* 2 large eggs
* 1 tbsp. pure vanilla extract
* 1/4 cup whole milk
* 1/4 cup brown sugar
* 1 tsp. ground cinnamon
* 1/2 cup finely chopped Diamond of California® Shelled Walnuts
* 1 container (8 oz.) whipped topping, thawed

Instructions
1. Preheat oven to 350° F and grease 9x13-inch pan. 
2. Combine dry cake mix, apple filling, eggs, vanilla & milk in large bowl. Beat for 2 minutes. Spread half of the batter in the pan. 
3. Make the Walnut Cinnamon filling: Combine brown sugar, cinnamon and walnuts. Sprinkle half the mixture on top of batter. Top with remaining batter and then sprinkle remaining walnut mixture on top.
4. Bake cake for 28-33 minutes. Cool cake. Top with whipped topping and sprinkle with walnut pieces.

Don’t miss my upcoming chance to W I N with #kids360, Diamond and Lucky Leaf!
Spiced pecans, wedding cookies, chocolate turtles, Spiced pecans, wedding cookies, chocolate turtles, pecan pie, sticky buns…just a few of the treats on my standard holiday baking agenda. What do they have in common? NUTS! @diamondnuts are a staple around here for the holidays (and all year, let’s be honest) and I want to share the love. Thanks to Diamond and #kids360, we are giving someone ✨15 FREE product coupons for @diamondnuts ✨to help you bake your holiday treats this year. Go nuts!

To enter:
* Follow @diamondnuts and @butterlovescompany
* Comment and tag a friend who deserves a day off to go nuts! 
* Enter by end of day November 25th. Winner will be selected at random and DM’d! 

#ad NO PURCHASE NECESSARY. Open to legal residents of the United States (including its commonwealths, territories, and possessions) who are the legal age of majority. Enter by 11:59 pm ET on November 25, 2021. Odds of winning depend on # of entries received. Void where prohibited. This is not sponsored or endorsed by Instagram or Facebook.
No gimmicks, no “just for the ‘gram” razzle No gimmicks, no “just for the ‘gram” razzle dazzle here. Just really good chocolate chip cookies.🍪
Fun fact: Layered Magic Cookie Bars were one of th Fun fact: Layered Magic Cookie Bars were one of the first things I ever baked. Making them again with @diamondnuts makes me super nostalgic. Brought me directly back to middle school. Watch out or you may find me in butterfly clips doodling I <3 SOS on my binder soon. There is a reason this recipe is awesome: first, the cookie bars are incredibly delicious. And, second, they are SO easy to put together. Honestly, they are the PERFECT treat to make with your kids. Pecans and walnuts give the bars the best crunch, nuttiness, and heartiness. You could totally customize if there is a certain kind of jam you love, or a combination of nuts that the family loves. #ad Get the recipe below: 

Seven Layer Magic Cookie Bars

* 1/2 cup (1 stick) butter, melted
* 2 cups graham cracker crumbs
* 1 cup raspberry jam
* 1 cup shredded coconut
* 1 cup Diamond of California® walnuts
* 1 cup Diamond of California® pecans
* 1 cup semi-sweet or bittersweet chocolate chips
* 1 (14-ounce) can sweetened condensed milk

Instructions
1. Preheat oven to 350°F. To toast walnuts and pecans, spread evenly on a baking sheet or in a shallow pan. Bake, stirring once or twice, until lightly browned and fragrant, 7 to 10 minutes. Line a 9×13-inch pan with parchment paper.
2. In a medium bowl, combine the melted butter and graham cracker crumbs; mix well. Transfer the crumbs to the prepared pan and using your finger tips, or the flat bottom of a small measuring cup, press firmly and evenly on the bottom of the pan. Spread the raspberry jam evenly over the crumbs. Sprinkle coconut in an even layer over the jam, followed by the chocolate chips, walnuts and pecans. Drizzle the condensed milk evenly over the top.
3. Bake until bubbling and golden brown, 30-35 minutes. Let cool completely in the pan. If lined with parchment, lift out and place on a cutting board. With a sharp knife, cut into bars.

Look out for an upcoming chance to ✨ w i n ✨with @diamondnuts and #kids360!
Raise your hand if you could use a cup of coffee. Raise your hand if you could use a cup of coffee. 🙋 We are giving away some @timhortonsus coffee goodies so you can get your cozy cool morning on with Canada’s favorite cup of joe. Make my Pumpkin Coffee Coffee Cake for a buzzy morning snack or just brew a strong cup for a little pep in your step (as tired parents over here, we could surely use it). 🍂

To enter:
● Follow @butterlovescompany and @timhortonsus
● Comment and tag a friend you would love to grab coffee with ☕ (each comment=1 entry)
● Enter by midnight November 18. Winner will be selected at random and DM’d!
 
You’ll win:
•(1) Colombian Ground Coffee
•(1) Dark Roast Ground Coffee
•(1) Decaf Ground Coffee
•(1) Whole Bean Original Blend Coffee
•(1) Keurig Variety 30-Pack
•(1) Mug
•(1) Branded Notebook
•(1) Branded Baseball Cap
 
 
ad #timhortons #kids360 NO PURCHASE NECESSARY. Open to legal residents of the United States (including its commonwealths, territories, and possessions) who are legal age of majority. Enter by 11:59 pm ET on November  18, 2021. Odds of winning depend on # of entries received. Void where prohibited. This is not sponsored or endorsed by Instagram or Facebook.
Can’t beat a classic. 🥧 Apple streusel pie fo Can’t beat a classic. 🥧 Apple streusel pie for yesterday’s friendsgiving.🥰 Grateful for time with friends enjoying great food. Remy had so much fun playing that he slept until 7am so we are hopefully out of the 4am daylight savings nightmare (knock on wood). 

Sunday includes a farmers market bop, movies, and cooking for the week. Wouldn’t change a thing. 🥳
Cannot. Get. Enough. Fall. Baking. Who’s with me Cannot. Get. Enough. Fall. Baking. Who’s with me? 🍁  This coffee cake packs a punch because it is made with @timhortonsus brewed coffee in the batter and the glaze. A true *coffee* cake. The texture is dreamy and the coffee is perfectly balanced and smooth. It is goood. #ad Get the recipe below:
 
Pumpkin Coffee Coffee Cake
 
Topping
● 2/3 cup granulated sugar
● pinch of salt
● 2/3 cup flour
● 1 teaspoon cinnamon
● 4 tablespoons butter, melted

Filling
● 1/3 cup brown sugar, packed
● 1 teaspoon cinnamon
● 1 teaspoon unsweetened cocoa powder, optional

Cake
● 1/3 cup vegetable oil
● 2 large eggs, at room temperature
● 1 cup granulated sugar
● 1 cup pumpkin purée
● 1 teaspoon pumpkin pie spice
● 1 teaspoon salt
● 1 teaspoon baking powder
● 1/2 cup brewed @timhortonsus Coffee
● 2 cups flour

Glaze
● 1 cup powdered sugar
● 2 tablespoons brewed @timhortonsus coffee
 
Instructions
1. Preheat the oven to 350°F and grease an 8 inch square pan and line with parchment.
2. Make topping: Stir together the sugar, salt, flour, cinnamon, and melted butter until combined into pea sized lumps. Stirring just until well combined. Set aside.
3. Make filling: Mix together the brown sugar, spice, and cocoa powder. Set it aside.
4. Make cake: Beat together the oil, eggs, sugar, pumpkin, pie spice, salt, and baking powder until smooth. Add the brewed coffee followed by the flour, alternating in two additions, and stir until combined.
5. Spread half the batter into the prepared pan. Sprinkle the filling evenly on top of the batter. Top with the remaining batter. Sprinkle the topping over the batter in the pan.
6. Bake until a toothpick inserted into the center comes out clean, about 40 to 45 minutes. Let cool.
7. Make glaze: Combine the powdered sugar and brewed coffee until smooth and thick but drizzle-able. Using a fork, drizzle it over the cake.

Don’t miss our upcoming chance to ⚡️W I N⚡️ thanks to @timhortonsus and #Kids360!

#timhortons #kids360fanclub
One of the hardest parts about being a working mom One of the hardest parts about being a working mom is how little time you get to spend with your sweet bean during the week. Between wake up and getting to daycare, to pickup and bedtime it’s often an hour at best (which is also filled with making dinner, bath time, etc). I soak up ALL the minutes and the weekends are an absolute snuggle and play fest. It’s so tough though! If you are in the same boat, know that you aren’t alone and you’re doing a good job!! ♥️

This photo has nothing to do with this but I made the cookies for our neighbors and regretting not keeping one for myself right now. 😬🤣
✨W I N !✨ I’ve teamed up with @nielsenmassey ✨W I N !✨ I’ve teamed up with @nielsenmassey and #Kids360 to give away some seriously amazing ingredients to make your desserts sing. 🎶 I love their products and have been using them for years—the vanilla is 💯!!
 
To enter:
● Follow @nielsenmassey and @butterlovescompany 
● Comment and tag a friend you’d love to bake with
● Enter by Thursday November 11th. Winner will be selected at random and DM’d!
 
You’ll win:
•(1) Madagascar Bourbon Pure Vanilla Powder
•(1) Madagascar Bourbon Pure Vanilla Sugar
•(1) Ugandan Pure Vanilla Extract
•(1) Pure Coffee Extract
•(1) Pure Peppermint Extract
•(1) Rose Water
•(1) Pure Lemon Extract
•(1) Tahitian Two Vanilla Beans
•(1) Tahitian Pure Vanilla Extract
•(1) Mexican Two Vanilla Beans
•(1) Mexican Pure Vanilla Extract
•(1) Madagascar Bourbon Two Vanilla Beans
•(1) Madagascar Bourbon Pure Vanilla Extract
•(1) Madagascar Bourbon Pure Vanilla Bean Paste
•(1) Orange Blossom Water
•(1) Pure Orange Extract
•(1) Pure Almond Extract
•(1) Pure Chocolate Extract
.
#ad NO PURCHASE NECESSARY. Open to legal residents of the United States (including its commonwealths, territories, and possessions) who are legal age of majority. Enter by 11:59 pm ET on November  11, 2021. Odds of winning depend on # of entries received. Void where prohibited. This giveaway is not sponsored or endorsed by Instagram or Facebook.
Brainstorming dessert recipes for Thanksgiving and Brainstorming dessert recipes for Thanksgiving and it’s hard not to think about this Black Forest Pie. 🍒🍫 It was such an indulgent tart-sweet chocolate-y treat. It has a chocolate all butter pie crust, a layer of dark chocolate ganache, a layer of chocolate pudding, a cherry topping, and whipped cream. Oh, and a cherry on top! Recipe is from @emcdowell #thebookonpie! 

This one *might* be too rich for the menu but there WILL be pie (duh)🥧. What kind of pie do you need to have on your Thanksgiving table?
This error message is only visible to WordPress admins
Hi! I'm Jenna, founder of butter loves company. From holidays to Tuesdays, let's find a way to make every meal special.
  • Email
  • Facebook
  • Instagram
  • Pinterest
  • RSS
  • Twitter
a2f54ba1dcf0635e58c8be4aa2035ce84863a9d9606a428ab3

© 2013-2019 BUTTER LOVES COMPANY, LLC.

Copyright © 2025 · Foodie Pro Theme by Shay Bocks · Built on the Genesis Framework · Powered by WordPress