butter loves company

new york food blogger and lifestyle influencer

  • home
  • Recipes
  • travel
  • lifestyle
  • cookie orders
  • about
  • contact

perfect white chocolate macadamia cookies

September 15, 2016 by Butter Loves Company

white chocolate macadamia cookies

Nestled into a tiny nook in the corner of the kitchen of my parents’ house sits a shoddy convection oven. Place a piece of bread inside (potato sandwich bread to be specific), twist the knob to high, and an hour later you may return to find a faintly golden browned toast. And that’s if you’re lucky. Atop the dud electronic, sits a package of cookies. While they are most definitely from Costco, the residual heat from the oven below warmed them up to a faux homemade fresh-from-the-oven temperature.

white chocolate macadamia cookies

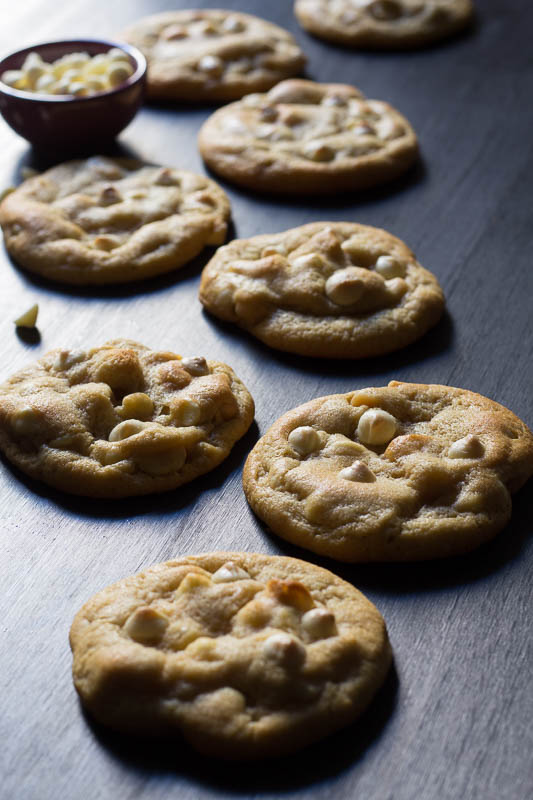
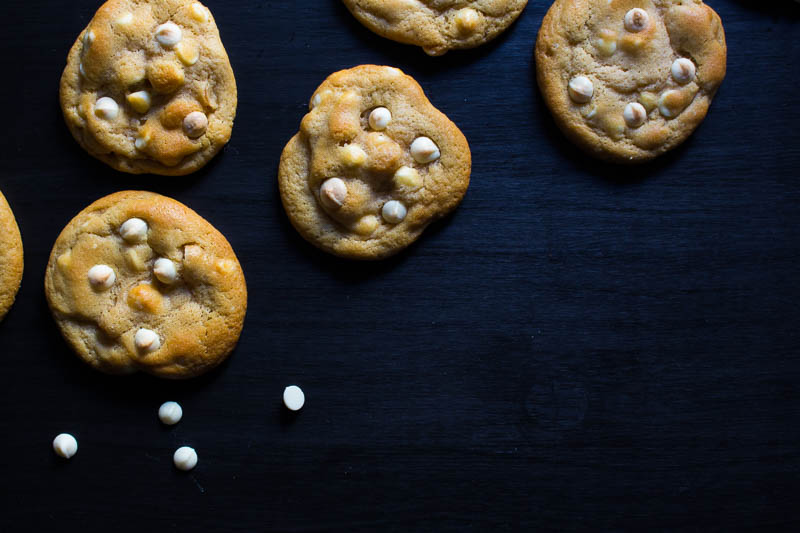
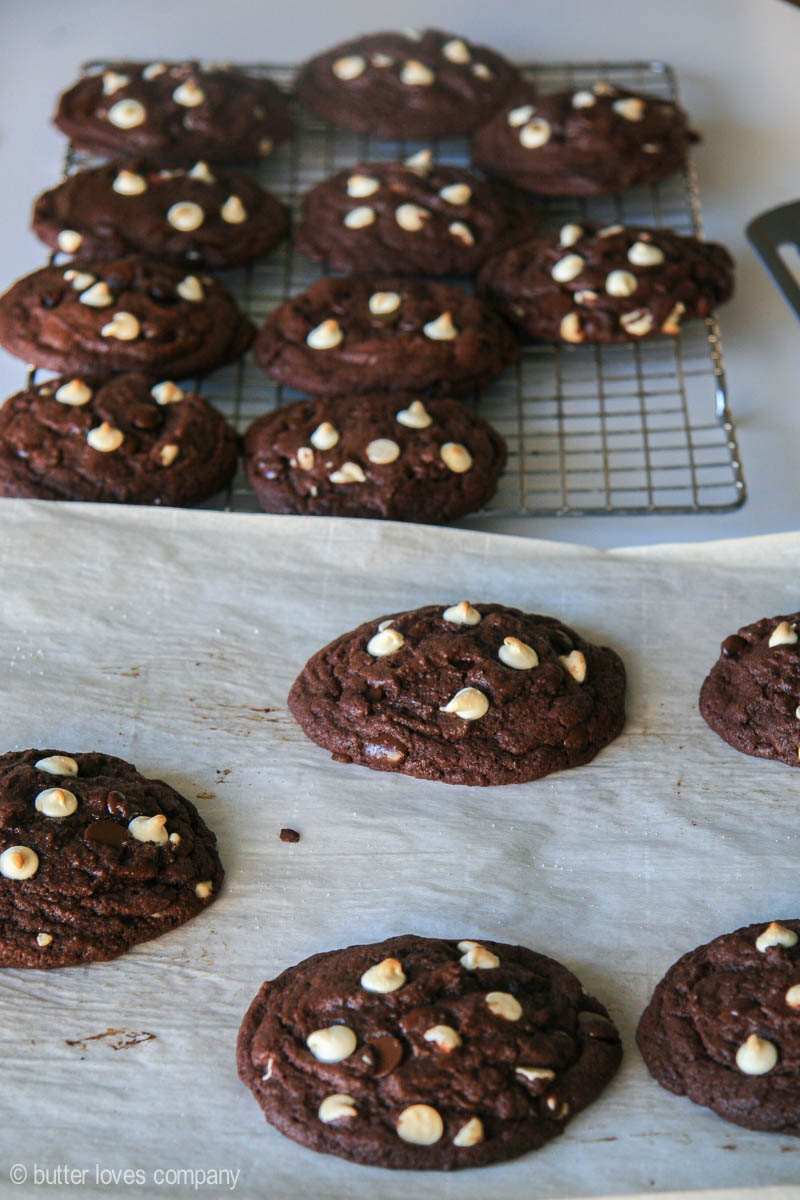
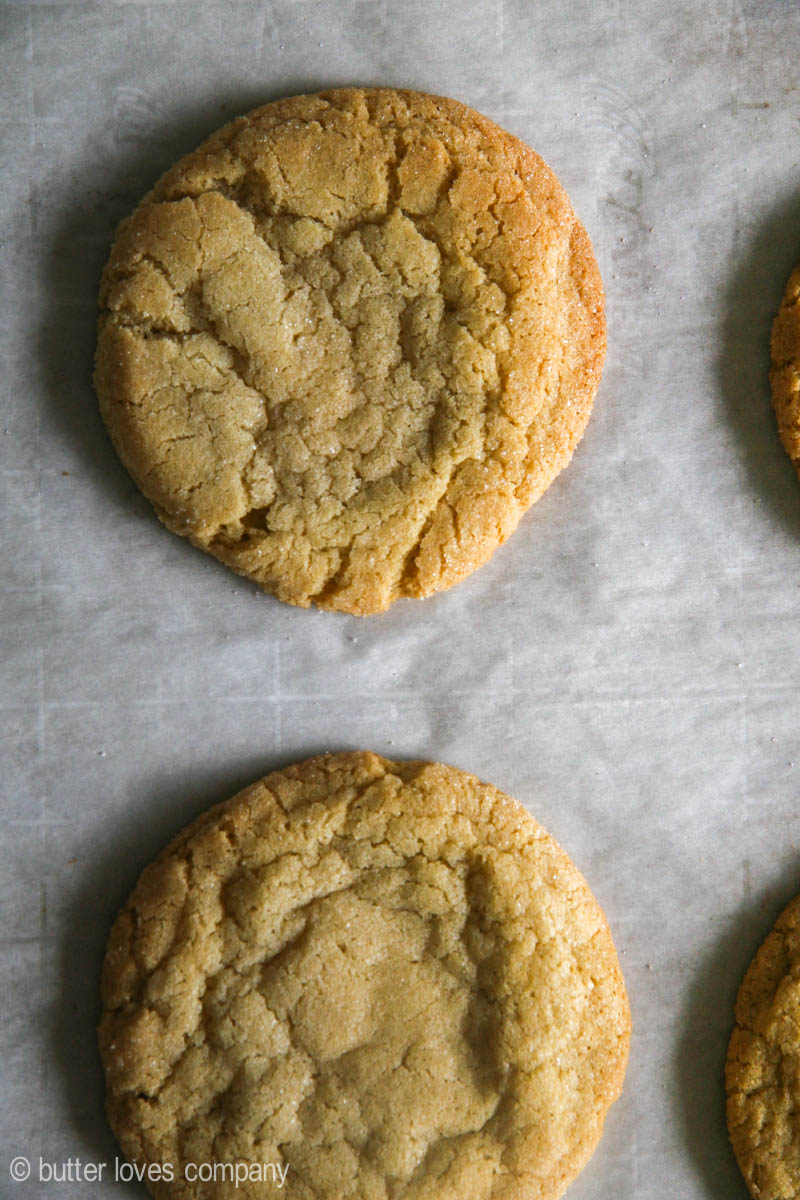
Three types of cookies line up in rows within the container: chocolate chip, oatmeal raisin, and white chocolate macadamia nut. Oooh, those white chocolate macadamia cookies. They are so good. They’re sweet from the milkiness of white chocolate, crunchy and nutty from the thick macadamia nuts, and doughy in the centers—the sign they were under-baked to perfection.

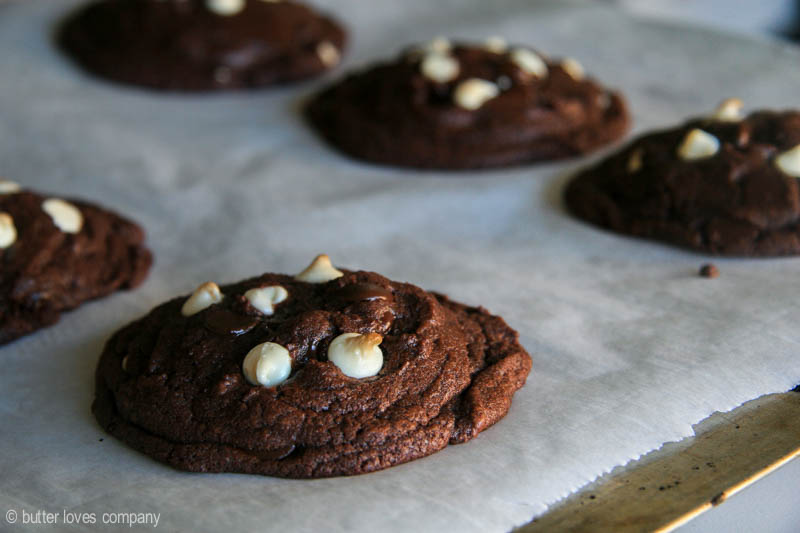
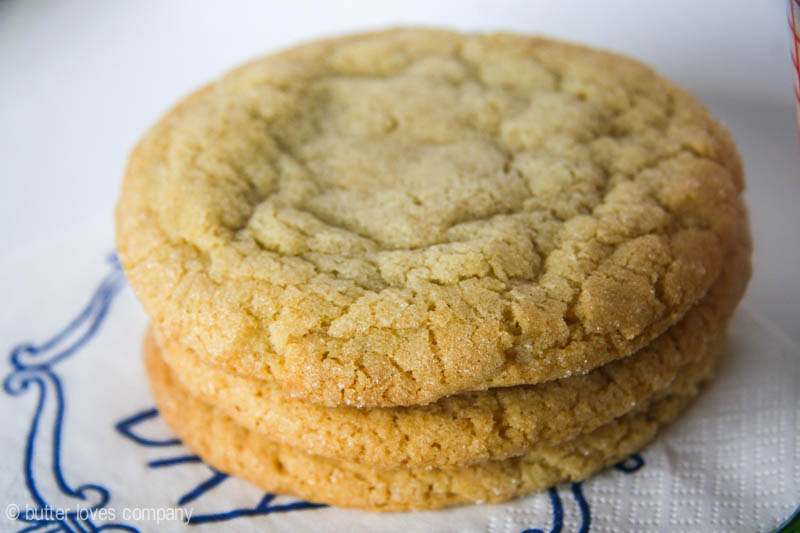
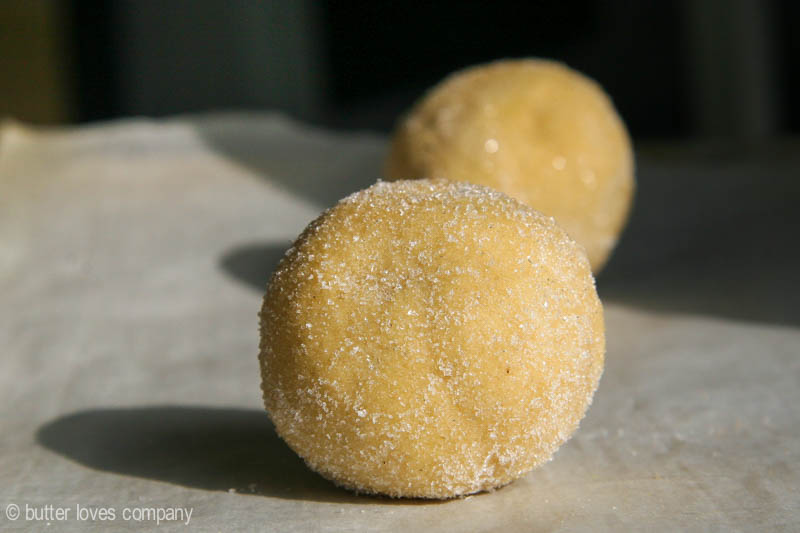
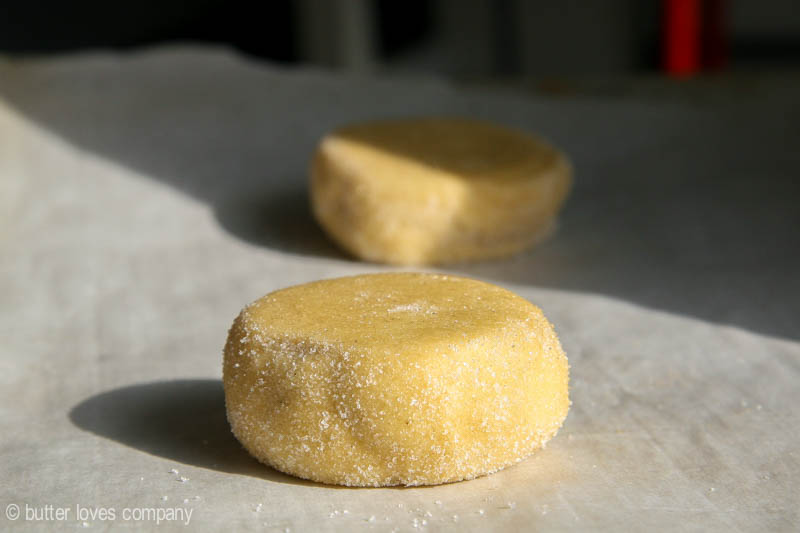
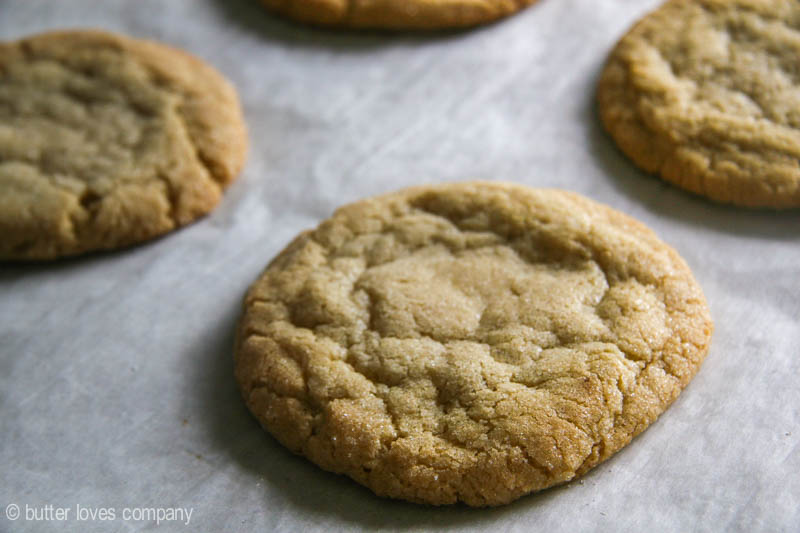
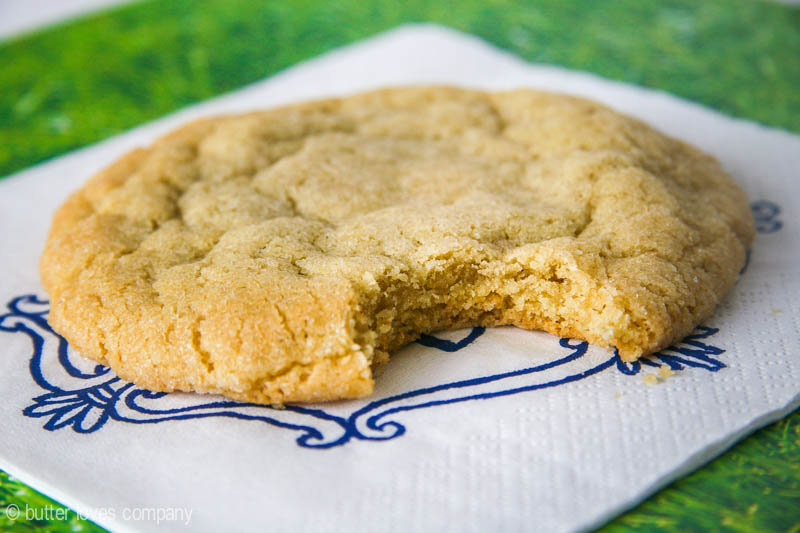
This recipe for white chocolate macadamia cookies brings me right back to my parents’ kitchen, nibbling on Costco cookies “fresh” off the top of the convection oven. Though, these are even better than I remember, as homemade most often seems to be. They have crispy edges and soft chewy centers. Buttery and sweet with an even spread from a pre-bake chill. I think it is the addition of a dash of almond extract that makes them reminiscent of birthday cake batter too (Skillet cookie birthday cake, anyone?).

white chocolate macadamia cookies

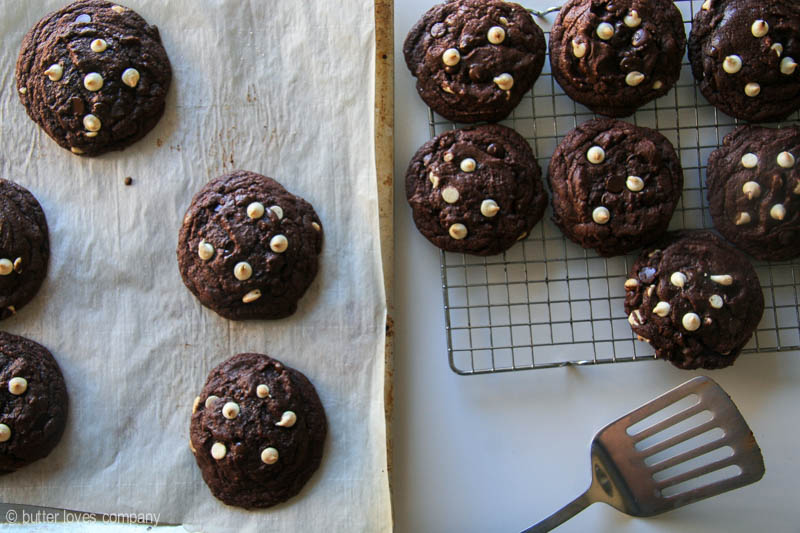
This makes a big batch of white chocolate macadamia cookies, nearly three-dozen 2 1/2-inch cookies. You could save half the dough in the freezer for a future craving if you’re so inclined. Mix up a batch and enjoy fresh from the oven, warmed to perfection, no shoddy convection oven required.

Not a white chocolate fan or craving more cookies? Why not give these triple chocolate cookies a try. Or, my favorite M&M cookies are always a winner.

white chocolate macadamia cookies

Print
Perfect White Chocolate Macadamia Cookies

Prep Time: 15 minutes

Cook Time: 14 minutes

Servings: 3 dozen 2 1/2 inch cookies

Perfect White Chocolate Macadamia Cookies

Ingredients

  • 1 cup unsalted butter (2 sticks), at room temperature
  • 3/4 cup packed light brown sugar
  • 1/2 cup white sugar
  • 2 large eggs, at room temperature
  • 1 tablespoon vanilla extract
  • 1/4 teaspoon almond extract
  • 2 3/4 cups all-purpose flour
  • 1 teaspoon baking soda
  • 1/4 teaspoon salt (if using unsalted macadamia nuts, increase to 1/2 teaspoon)
  • 1 cup coarsely chopped, lightly salted macadamia nuts
  • 1 1/3 cup white chocolate chips

Instructions

  1. In a large bowl or the bowl of an electric mixer fitted with the paddle attachment, cream together the butter, brown sugar, and white sugar until light and fluffy, about 5 minutes. Beat in the eggs, one at a time. Mix in the vanilla and almond extracts until combined. With the mixer off, pour in the flour, baking soda, and salt. Then, beginning on low speed, mix to until flour is fully incorporated. Stir in the macadamia nuts and white chocolate to distribute evenly. Wrap dough in plastic and refrigerate at least 2 hours, or up to 48 hours.
  2. When ready to bake, preheat oven to 350°F and line cookie sheets with parchment paper. Scoop heaping tablespoon-sized balls of the chilled dough, roll into balls, and arrange on the sheets, leaving 3 inches between each ball (you may need to bake in batches).
  3. Bake for 12¬–14 minutes in the preheated oven, or until golden brown. Enjoy warm or cool completely before storing in a sealed container for up to a week (they will lose some of the crisp edges over time).
6.1.0
https://www.butterlovescompany.com/2016/09/15/white-chocolate-macadamia-cookies/
butter loves company | jenna larsson

white chocolate macadamia cookies

Filed Under: desserts and sweets, eat Tagged With: cookies, macadamia, nuts, white chocolate

quick peach compote

September 10, 2016 by Butter Loves Company

stewed-peaches-3

Growing up in New England, the first few weeks of fall kicked off my favorite time of year. The sweep of crisp air pushes out the summer humidity as colorful leaves crinkle beneath your boots. This meant soccer season, cider doughnuts, apple picking, and holiday events with friends and family. If you’re a holiday season nut like I am, you surely understand the stomach butterflies of excitement that arrive around this time of year.

While autumn in Los Angeles doesn’t quite compare to the fall back east—the summer heat seems to stick around through October here—there is one constant of the fall season no matter where you are: fall baking. The warm spices of cinnamon and nutmeg rush in. Apple pie and pumpkin bread are begging to be in your oven, filling your kitchen with an almost tangible comfort and calmness.

stewed-peaches-5

While we hold onto the final official moments of summer (and summer produce) and anticipate the beauty of fall, let’s grab a few last peaches from the market and celebrate the two seasons together with this quick peach compote.

This easy recipe uses juicy fresh summer peaches and borrows warm scents of cinnamon and nutmeg from the impending fall to ease you seamlessly from beach days to sweater weather. Simply slice or dice the peaches, simmer, and fifteen minutes later your compote is ready. The result is a terrific sweet, tangy, and spiced topping for morning yogurt bowls or evening ice cream. You could also spread atop toast, perhaps along with some ricotta cheese.

stewed-peaches-1

Print
quick peach compote

Servings: about 1 1/2 cups compote

quick peach compote

Ingredients

  • 1-pound yellow flesh peaches, peeled and cut into 1/2 inch thick slices or cubes (whichever you prefer)—about 3 small/medium or 2 large peaches
  • 1/4 cup light brown sugar, packed
  • 1/4 cup water
  • 1/2 teaspoon ground cinnamon
  • 1/4 teaspoon ground nutmeg
  • pinch of salt
  • 1 tablespoon brandy (optional)
  • Yogurt, granola, or ice cream, for serving (optional)

Instructions

  1. In a medium saucepan over medium heat, combine the peaches, brown sugar, water, cinnamon, nutmeg, salt, and brandy (if using). Cook mixture until liquid is reduced to and becomes a medium-thick syrup, stirring occasionally, about 15 minutes. Serve warm or transfer to a heat-safe container and let cool. Stores well in the fridge for up to 4 days.
6.1.0
https://www.butterlovescompany.com/2016/09/10/quick-peach-compote/
butter loves company | jenna larsson

stewed-peaches-2

Filed Under: breakfast and breads, condiments, bases and sauces, desserts and sweets Tagged With: breakfast, fall, peach, summer

plum hand pies

August 24, 2016 by Butter Loves Company

plum hand pies 3

A few precarious Waze drives across Los Angeles scoping out the neighborhood’s farmers’ market and we’ve finally found our favorite. Just so happens it is right in our Hollywood backyard.

It was love at first sight or, more specifically, love at first sight of the oysters being freshly shucked at the first stall.

plum hand pies 5

Continue up the pavement a few steps, past the casual cool parents with arms around their stylish kids and the effortless beauties holding baskets with flowers fluttering over the wicker edges. Keep going by the chef piling up the freshest ingredients for the night’s service and the person you swear you recognize from Law & Order SVU, and you’ll arrive at a most-colorful stall.

It’s mid- to late-summer and stone fruits are the cream of the crop. Mounds and mounds of peaches, nectarines, plums, apricots, and pluots await you. Each fruit wearing a different jewel toned coat. Who knew there were twelve varieties of plum? From a golden yellow with a soft and sugar sweet flavor to a deep dark indigo with a tart skin and apricot-esque taste, this farm’s stand has it all. Stock up and enjoy with everything. But most importantly, in my opinion, bake!

plum hand pies 4

Is there a better showcase for summer fruit than pie? There’s something about wrapping peaches or plums in a tender buttery crust and letting the oven bring out the fruit’s fresh and tangy juices that feels incredibly homey and effortless. The fresh ingredients really do the work.

plum hand pies 2

So here we are with Plum Hand Pies; a portable version of your favorite summer pie. I always prefer a homemade crust but feel free to use store bought if that is your preference or if you’re tight on time.

blc signature

plum hand pies 1

Print
Plum Hand Pies

Prep Time: 2 hours, 30 minutes

Cook Time: 35 minutes

Total Time: 2 hours, 30 minutes

Servings: 6 hand pies

plum hand pies 4

Ingredients

    For the dough (if making from scratch):
  • 1 1/2 cups all-purpose flour
  • 1 1/2 tablespoons sugar
  • 1/4 teaspoon kosher salt
  • 1/2 cup (1 stick) cold unsalted butter, cut into 1/2-inch pieces and chilled
  • 1/4 cup ice water, plus up to 1/4 cup more if needed
    For the filling + assembly:
  • 4 medium plums or pluots, halved and pitted and then cut into 1/4-inch slices
  • 1/4 cup sugar
  • 1 tablespoon flour
  • 1 teaspoon lemon zest
  • 1/2 teaspoon ground ginger
  • 1/2 teaspoon ground cinnamon
  • 1/4 teaspoon salt
  • 1 large egg, beaten with 1 teaspoon water, for egg wash
  • sugar, for sprinkling on top

Instructions

  1. In the bowl of the food processor, prepare the dough by pulsing the flour, sugar, and salt to combine. Drop in the chilled butter and pulse for about 15 seconds, or just until the butter is dispersed and the pieces are the size of peas. Pour in 1/4 cup ice water and pulse just until dough comes together in clumps, adding more water 1 tablespoon at a time, if necessary to moisten. Grab the dough and pat into a square, wrap in plastic and refrigerate until firm, about 2 hours (can be made and chilled up to 3 days ahead).
  2. When the dough is chilled, preheat the oven to 375°F. Line a baking sheet with parchment and set aside. Prepare the filling by gently mixing the sliced plum, sugar, flour, zest, ginger, cinnamon, and salt in a medium bowl until the fruit is coated.
  3. On a lightly floured surface, roll out chilled dough to an approximate 15 x 12-inch rectangle. Slice the dough in half the long way, and then in thirds the short way, to create a total of 6 rectangles.
  4. Brush edges of rectangles with the egg wash; layer the filling across one side of each rectangle, leaving a 1/2 inch border of dough. Fold the empty side of dough over the fruit and press edges to seal. Crimp with a fork, for an extra seal if you desire (I did). Place each hand pie on the prepared baking sheet and brush with egg wash and sprinkle with sugar. Cut slits in tops as little air vents.
  5. Bake hand pies at 375°F for 30¬–35 minutes, until juices are bubbling and pastry is golden brown, rotating sheet halfway through. Serve warm or at room temperature.
6.1.0
https://www.butterlovescompany.com/2016/08/24/plum-hand-pies/
butter loves company | jenna larsson


plum hand pies 6

Filed Under: desserts and sweets, eat Tagged With: pie, plum, pluot, portable, summer fruit

sugared brioche doughnuts

August 11, 2016 by Butter Loves Company

brioche-doughnut-recipe-6

Check. Check 1-2. Check 1-2-3-4.

Hello…

it’s me!

I am (honestly) in California dreaming about who we used to be. That is, food friends! Life has been quite busy lately and I’m going to blame my temporary break on the new doughnut in my life. No, I’m not talking about these sugared brioche doughnuts that I hope you’re grabbing for on the screen (they are that good, I promise). I’m referring to the newest member of the Butter Loves Company family, our precious calico kitten—say hello to Nori! She is my new kitchen assistant, contributing mostly by sleeping curled into an adorable doughnut shape. I couldn’t be happier to be her mama.

nori2

Cute cats aside, I am bursting with excitement to share this recipe with you. Imagine biting into a sweet, buttery cloud with egg-y richness and a kiss of vanilla. Sounds pretty amazing, right? That’s what you’ll get with this perfect sugared brioche doughnut recipe. As soon as I tried Thomas Keller’s recipe from Bouchon Bakery, it was game over.

brioche-doughnut-recipe-1

If you’re thinking, “Homemade doughnuts? That seems difficult,” let’s take it step-by-step. You’ll prepare a simple dough, which is a mostly hands-off process, allowing your stand mixer to do the heavy lifting. You’ll let the dough proof for an hour and then again overnight in the fridge. You’ll roll out and cut the dough into your doughnut shapes. You’ll heat the oil and fry those pretties for just a couple minutes. Remove from the oil, let cool and toss them in vanilla sugar. Give one to everyone you see around you—well, maybe not the cats!

blc signature

brioche-doughnut-recipe-4

Print
sugared brioche doughnuts

Prep Time: 10 hours

Cook Time: 30 minutes

Servings: 8 doughnuts, plus 8 munchkins!

brioche-donut-recipe-5

Ingredients

  • 518 grams all-purpose flour (3 1/2 cups plus 3 tablespoons)
  • 10 grams instant yeast (1 tablespoon)
  • 74 grams granulated sugar (1/4 cup plus 2 tablespoons)
  • 9 grams table salt (1 tablespoon)
  • 212 grams warm whole milk (3/4 cup plus 1 1/2 tablespoons; at about 75°F)
  • 111 grams egg (1/4 cup plus 3 tablespoons; about 2 large eggs)
  • 9 grams vanilla extract, vanilla bean paste, or vanilla bean caviar (1 1/2 teaspoons)
  • 55 grams unsalted butter, at room temperature, cut into cubes (2 ounces)
  • Canola oil, for frying (enough to fill your Dutch oven or pot 3 inches deep)
  • 300 grams granulated sugar or vanilla sugar (1 1/2 cups; sugar massaged with leftover vanilla bean pod)
  • Other tools:
  • Round doughnut cutter or circular cookie cutters (you could use two round cookie cutters: one large one for the outside and one small one to cut out the doughnut centers)
  • Candy thermometer

Instructions

    Prepare the Dough
  1. Spray a medium bowl with non-stick spray and set aside.
  2. In the bowl of a stand mixer fitted with the dough hook, mix together the flour and yeast. Add the sugar, salt, milk, egg, and vanilla and mix on low speed until incorporated. Continue mixing on low speed for 30 minutes (the dough may stick to the side of the bowl).
  3. With the mixer running, gradually add the butter, a cube at a time, incorporating each cube completely before adding the next. Continue until you’ve added all the butter, scraping down the bowl periodically. Mix for 5 more minutes.
  4. Scrape the dough onto a lightly floured surface and pat into a rectangular shape, using only enough flour so it doesn’t stick to the surface. Stretch and fold the left side of the dough to over 2/3 of the dough, and then stretch the right side and folder over the left (Like you would fold a letter, if people still sent letters!). Repeat once more, this time folding the top down and then the bottom up. Place in prepared bowl seam-side down. Cover with plastic wrap or a clean dishtowel and let sit at room temperature for an hour.
  5. Turn the dough out onto a lightly floured surface and gently pat the dough down pressing large air bubbles to the edge to release. Repeat the stretching and folding process and then return the dough to the bowl, seam-side down, cover, and refrigerate overnight.
    Roll and Shape
  1. Line a baking sheet with parchment paper, spray with non-stick spray, and set nearby. Turn the chilled dough out onto a lightly floured surface and roll it out to about 11-inches wide and about 1-inch thick. Working quickly using your doughnut cutter or round cookies cutters, cut rounds from the dough. Dust off excess flour and place onto prepared pan. Gently lay a sheet of plastic wrap over the dough and allow to proof at room temperature for 1 to 1 1/2 hours, or until the dough has doubled in size and when you gently press with your finger, the imprint remains.
    Fry Doughnuts!
  1. Fill a Dutch oven or heavy stockpot with 3 inches of canola oil. Fit with your candy thermometer and heat oil to 350°F/177°C. Set a cooling rack over a baking sheet and pour your sugar or vanilla sugar into a wide, shallow bowl—ready for dipping! Gently lower 2 to 4 doughnuts (depending on how large your pot is—the doughnuts should be able to float freely) into the oil and fry for 30 seconds, without moving them. Flip doughnuts over with tongs, a spoon, or chopsticks and fry for 45 seconds. Flip back over once more and fry another 45 seconds, or until they are golden brown. Adjust the heat as needed throughout frying to maintain the temperature. Transfer the doughnuts to the prepared rack to cool while you start the second batch. While the second batch is frying, toss the first batch in the sugar to coat on all sides, and transfer to a serving platter. Repeat with remaining batches.
  2. The doughnuts are best enjoyed the day they are fried—heavenly eaten fresh, fresh, fresh! They do last another day or two in a covered container but their texture will be much more dense and the sugar coating will moisten.

Notes

Recipe by Thomas Keller from the Bouchon Bakery cookbook, process adapted slightly.

6.1.0
https://www.butterlovescompany.com/2016/08/11/brioche-doughnut-recipe/
butter loves company | jenna larsson

brioche-doughnut-recipe-2

Filed Under: breakfast and breads, desserts and sweets, eat Tagged With: breakfast, breakfast bread, brioche, donuts, doughnuts

triple chocolate cookies

September 9, 2015 by Butter Loves Company

triple-chocolate-cookies-recipe-6

“I keep a bag of dark chocolate candies in the freezer and then just have one at night after dinner as my dessert. It is just sweet enough to curb all my chocolate cravings.”

Have you ever heard anyone say something like this? I’ve heard this a lot coming from a family that doesn’t necessarily love sweet treats. I’m not even a chocolate person and all I can say is that sounds like real life magic. One bite of bitter dark chocolate and all your dreams of chocolate layer cake or brownies or ice cream subside? I’m not buying it.

triple-chocolate-cookies-recipe-1

These triple chocolate cookies are for the people who don’t believe that a teensy bite of chocolate is enough. They are filled with mouth-coating, fudgy, rich chocolate flavor. On top of that, they are studded with melty, bittersweet chocolate chips and creamy white chocolate chips. There is no ‘hint of chocolate’ here. These are cookies that need a side of milk, in the best way. Every bite is deeply chocolatey.

If you make a batch, you could then tell everyone that you too just have one piece of dark chocolate at night. Feel free to omit that the dark chocolate is actually a palm-sized cookie that has three kinds of chocolate in it and is basically fudge in the middle. I’ll never tell.

Note: These cookies are made with Dutch processed cocoa powder. If you have questions about different types of cocoa powder or are unsure which you have, please check out this post before baking!

triple-chocolate-cookies-recipe-2

triple-chocolate-cookies-recipe-3

triple-chocolate-cookies-recipe-5

One month ago: Fresh Fig and Almond Cake
Six months ago: Brown Butter Cinnamon Sugar Pull-Apart Bread
One year ago: Apple Pie Buttermilk Biscuits

Print
triple chocolate cookies

Prep Time: 15 minutes

Cook Time: 12 minutes

Servings: Makes about 15 large cookies

triple-chocolate-cookies-recipe-6

WARNING: These triple chocolate cookies are for serious chocolate lovers only. They are filled with mouth-coating, fudgy, rich chocolate flavor and are studded with melty, bittersweet chocolate chips and creamy white chocolate chips. There is no subtlety here. These are cookies that need a side of milk, in the best way. Every bite is so deeply chocolatey and they’re basically like fudge in the middle!

Ingredients

  • 1 cup (2 sticks or 16 tablespoons) unsalted butter, at room temperature
  • 1 1/2 cup granulated sugar
  • 2 large eggs, at room temperature
  • 1 vanilla bean scraped or 1 teaspoon vanilla extract
  • 2 1/4 cups all-purpose flour
  • 1/2 cup Dutch processed cocoa powder
  • 2 teaspoons baking powder
  • 1/2 teaspoon table salt
  • 1 cup bittersweet chocolate chips
  • 1/2 cup white chocolate chips

Instructions

  1. Preheat the oven to 350°F and line two cookie sheets with parchment paper. Set aside.
  2. In the bowl of an electric mixer fitted with the paddle attachment, cream the butter and granulated sugar until fluffy, about 4 minutes. Add the eggs, one at a time, and mix to combine. Mix in the vanilla.
  3. In a separate medium bowl, whisk together the flour, cocoa powder, baking powder, and salt. Gradually add this to the butter mixture, mixing on low to combine. Add the dark and white chocolate chips and mix to distribute evenly.
  4. Scoop out heaping tablespoons of the dough, rolling them in your hands to even out the rough edges, and place each ball on the prepared cookie sheets leaving at least 3 inches between each ball. Bake for 10 to 12 minutes or until the edges begin to pull away from the parchment and the centers are just set. Be careful not to over bake as these are best when the centers are fudgy. Allow the cookies to cool on the baking sheets for 5 to 10 minutes before transferring to a wire rack to cool completely.
6.1.0
https://www.butterlovescompany.com/2015/09/09/triple-chocolate-cookies/
butter loves company | jenna larsson

triple-chocolate-cookies-recipe-7triple-chocolate-cookies-recipe-4

Filed Under: desserts and sweets, eat Tagged With: chocolate, chocolate lovers, cookies, white chocolate

crunchy chewy bakery-style sugar cookies

August 28, 2015 by Butter Loves Company

An easy recipe for big, crunchy, chewy bakery style sugar cookies with beautiful crackle tops and rich flavor. They are not powdery or cakey and are perfect for everyday nibbling!

chewy-crunchy-bakery-style-sugar-cookies-8

It seems that sugar cookie recipes typically fall into two categories. There are those for the soft and thick sugar cookies like you find amply frosted at the grocery store, and then there are those for the thin, snappy, cutout sugar cookies you make around the holidays. But, what about that third sugar cookie? In my experience, you can’t find a recipe for that perfect, crunchy, chewy bakery style sugar cookie: the kind of sugar cookie that has a beautiful crackle top and a rich flavor. The kind of sugar cookie that is not powdery and not cakey and does not need frosting or icing to make it whole. This is the sugar cookie I adore, and this is the recipe I’ve been looking for.

After exactly seven recent attempts to create the sugar cookie of my dreams (and maybe yours), I finally cracked the code and am so excited to share it with you. There are a few of secrets to these.

chewy-crunchy-bakery-style-sugar-cookies-1

First, instead of using all granulated sugar like most sugar cookie recipes do, we’re swapping out for some light brown sugar: not enough to dramatically alter its core flavor, but enough so it benefits from the natural chewiness of brown sugar.

Second, we’re using a dash of cream of tartar in the batter. This will also help add chew, and the cream of tartar reacts with the baking soda which is what creates the crackled tops.

Third, we’re using bread flour and all purpose flour. Bread flour has a very high protein content and therefore will create more gluten in the final product. Gluten=chew.

Finally, we will let the cookie dough chill overnight. I promise you, I tested baking right away, chilling for a few hours, and chilling overnight and the winner without a doubt was the cookie made from dough that was chilled overnight. While the others tasted mighty fine and had a crunch and some chew, the ones chilled overnight had the perfect moist, candy-like chew in the center.

chewy-crunchy-bakery-style-sugar-cookies-2

Woof. That’s a lot of information, but I hope it helps explain how this cookie came about! You can add this cookie to round out the sugar cookie trifecta: soft and thick, snappy cutouts, and now, crunchy chewy. P.S. I’m pretty positive these cookies would be a dreamy as part of an ice cream sandwich. Just sayin’! ☺

My sweet friends over at Cheeky Home were kind enough to send me the adorable paper goods you see in the photos below. I can totally get down with pretty paper products especially ones that help fight hunger! These puppies are available at Target should they strike your fancy!

chewy-crunchy-bakery-style-sugar-cookies-3

chewy-crunchy-bakery-style-sugar-cookies-4

chewy-crunchy-bakery-style-sugar-cookies-6

blc-cheeky-cookie

chewy-crunchy-bakery-style-sugar-cookies-10

One month ago: Feta Scallion Buttermilk Biscuits

Six months ago: Brown Butter Cinnamon Sugar Pull Apart Bread

One year ago: Spiced Pumpkin Muffins

Print
crunchy chewy bakery-style sugar cookies

Prep Time: 15 minutes

Cook Time: 15 minutes

Servings: makes ten 5-inch cookies (or more smaller ones)

chewy-crunchy-bakery-style-sugar-cookies-10

This recipe for crunchy, chewy bakery-style sugar cookies yields cookies with beautiful crackle tops and rich flavor. They are not powdery or cakey and are perfect for everyday nibbling!

Ingredients

  • 1 cup all purpose flour
  • 1 cup bread flour
  • 1/2 teaspoon baking soda
  • 1/4 teaspoon baking powder
  • 1/4 teaspoon cream of tartar
  • 1/4 teaspoon table salt
  • 3/4 cup (1 1/2 sticks or 12 tablespoons) unsalted butter, at room temperature
  • 3/4 cup granulated sugar
  • 1/4 cup light brown sugar
  • 1 large egg plus 1 large egg yolk, at room temperature
  • 1 teaspoon pure vanilla extract or the beans from one vanilla bean
  • 1/8 teaspoon pure almond extract
  • extra granulated sugar, for rolling (about 1/4 cup)

Instructions

  1. In a medium bowl, sift together both flours, baking soda, baking powder, cream of tartar, and salt. Set aside.
  2. In the bowl of an electric mixer fitted with the paddle attachment, cream the butter until smooth, about 1 minute. Add both sugars and beat on medium speed until light and fluffy, about 4 minutes. Add the egg and the egg yolk, mixing to combine after each addition. Add the vanilla and almond extracts and combine.
  3. With the mixer on low speed, gradually add the flour mixture to the butter mixture and beat just until all the flour is incorporated. Scrape down the sides and bottom of the bowl to make sure there are no leftover dry flour bits. Wrap the dough tightly in two layers of plastic wrap and refrigerate for at least 4 hours, preferably overnight for maximum chewiness.
  4. When you’re ready to bake, preheat the oven to 350°F and line two cookie sheets with parchment paper. Fill a small bowl with the extra granulated sugar for rolling. Divide the chilled cookie dough into 10 pieces (Or, for smaller cookies, scoop out as desired.). Using your hands, roll each piece of dough into a ball and then roll each ball in the granulated sugar to coat. Place on the prepared baking sheets, leaving at least 4 inches between each. Using the palm of your hand or the flat bottom of a drinking glass, press down on each ball to flatten slightly (this will allow the cookie to bake more evenly). Bake for 15 to 17 minutes or until the edges are golden brown. Allow cookies to cool on the baking sheets for 5 minutes before transferring to a wire rack to cool completely.
6.1.0
https://www.butterlovescompany.com/2015/08/28/crunchy-chewy-bakery-style-sugar-cookies-recipe/
butter loves company | jenna larsson

chewy-crunchy-bakery-style-sugar-cookies-5chewy-crunchy-bakery-style-sugar-cookies-7

Filed Under: desserts and sweets, eat Tagged With: bakery style cookies, sugar cookies

angel food cupcakes with whipped cream topping

August 26, 2015 by Butter Loves Company

Recipe for pillow-soft, snow white, squishy jumbo angel food cupcakes topped with sweet and creamy whipped cream topping and fresh berries.
angel-food-cupcakes-recipe-7

Up until yesterday, I pretty much figured I would never make angel food cake at home. There has always been something about the snowy white sponge cake that just didn’t seem right to me. There’s no butter in the recipe, so it can’t taste that good, right?

I would see angel food cake at the grocery store and it often looked as if it would taste like Styrofoam. I would see it on every ‘healthy dessert’ list and my brain had permanently labeled it ‘diet cake.’ Diet cake is not something I’m interested in. When I have cake, I want it to count.

Enter: five leftover egg whites in my fridge. What’s a girl to do? I could use them for an egg white omelette, but that seemed too ‘meh’ for me (Sidebar: is meh an acceptable way to describe things?). I could make French macarons, but, then again, they are my baking kryptonite and I wasn’t in the mood for a mental breakdown.

Within an hour, I had decided to make angel food cupcakes and all but fell in love.

I think you’ll swoon over each pillow-soft, ultra spongy bite of these. The cake is as light as air with a definite chewiness and just enough golden brown crispiness on the outside to keep things interesting. Pair these with creamy, vanilla bean speckled whipped cream and berries, and you’ll forget all that ‘diet cake’ talk from earlier… unless you want to use it as an excuse to have two!

angel-food-cupcakes-recipe-1

This is what the batter should look like before you divide it among the muffin pan.

angel-food-cupcakes-recipe-2

angel-food-cupcakes-recipe-3

angel-food-cupcakes-recipe-10

angel-food-cupcakes-recipe-11

angel-food-cupcakes-recipe-6

I made this quick video to try to show you the squishiness of the cake… it’s so squishy!

https://www.butterlovescompany.com/wp-content/uploads/2015/08/angel-food-cake.m4v

One month ago: favorite m&m cookies
Six months ago: fluffy homemade marshmallows
One year ago: 6-inch super s’mores layer cake

Print
angel food cupcakes with whipped cream topping

Prep Time: 20 minutes

Cook Time: 16 minutes

Servings: makes 6 jumbo cupcakes (or 12 standard -- keep your eye on cooking time if making standard)

angel-food-cupcakes-recipe-9

Recipe for pillow soft, snow white, squishy jumbo angel food cupcakes topped with sweet and creamy whipped cream topping and fresh berries.

Ingredients

  • 1/2 cup minus 1 tablespoon all purpose flour
  • 1/2 cup powdered sugar
  • 1 tablespoon corn starch
  • 1/4 teaspoon table salt
  • 5 large egg whites, at room temperature
  • 1/2 teaspoon cream of tartar
  • 1/2 cup granulated sugar
  • 1 vanilla bean, scraped or 1 teaspoon vanilla extract
  • 1/2 teaspoon lemon zest
    Whipped Cream Topping
  • 1 cup heavy whipping cream, cold and well-shaken
  • 1 cup powdered sugar
  • 1/2 vanilla bean, scraped or 1/2 teaspoon vanilla extract
  • fresh berries, for serving (optional)

Instructions

  1. Center a rack in the oven and preheat to 350°F. Grease the holes of a jumbo muffin tin and set aside. You may use paper liners if you’d like, just spray the inside of each liner as well.
  2. In a medium bowl, vigorously whisk together the flour, confectioners' sugar, cornstarch, and salt so that there are no clumps. Set aside.
  3. In the bowl of an electric mixer fitted with the whisk attachment, beat the egg whites on medium speed until frothy, about 2 minutes. Add the cream of tartar and beat until soft peaks form, about 2 minutes. With the mixer running, add the granulated sugar—a little at a time until—you’ve added the entire 1/2 cup. Increase the speed to medium-high, and beat until the peaks are stiff and very shiny, about 5 minutes. (To check if it is ready: turn off the mixer and when the whisk pulls away from the mixture, the peaks should hold their form.) Beat in the vanilla and lemon zest. Remove the bowl from the stand.
  4. Add a third of the flour mixture to the egg mixture and gently fold together with a spatula until it is incorporated. With gentle motions, fold in another third of the flour until incorporated and then fold in the final third. Scrape the bottom of the bowl with the spatula to make sure all of the flour mixture has been incorporated.
  5. Divide the batter evenly among the muffin cups and bake until the cupcakes spring back when gently pressed and a toothpick inserted in the center comes out clean, 14 to 16 minutes. Let cool in the pan for a few minutes, then run a knife around the edges of the muffin molds to loosen the edges and transfer the cupcakes to a rack to cool completely.
  6. Make the whipped cream when you are ready to serve. In the bowl of an electric mixer fitted with the whisk attachment, beat the cold cream on medium speed until frothy. Add the powdered sugar and vanilla and whip until fluffy and thick. When you stop the mixer, the whipped cream should hold its form.
  7. Top the cooled cupcakes with the whipped cream and serve immediately.

Notes

adapted from Alton Brown

6.1.0
https://www.butterlovescompany.com/2015/08/26/angel-food-cupcakes-recipe/
butter loves company | jenna larsson

angel-food-cupcakes-recipe-9

Filed Under: desserts and sweets, eat Tagged With: angel food cake, cupcakes, healthier desserts, light desserts, whipped cream

brown butter cookie dough dip

August 21, 2015 by Butter Loves Company

brown-butter-cookie-dough-dip-8This brown butter cookie dough dip brings me right back to slumber parties as a kid and one of my greatest culinary triumphs…But I’ll get to that in a minute. During these epic sleepovers, my friends and I would watch scary movies, eat junk food, and film ourselves quoting our favorite movies and making comedy sketches with a camcorder the size of an toaster oven.

Our ‘short films’ were essentially all bloopers. We would watch the tapes back and howl into the early morning about how off our attempted-British accents were. We would write embarrassing things in journals (that I still have, thank goodness!) and mastered our ‘pretending to be asleep’ skills when my parents would tell us to go to bed. Sound familiar to anyone?

We were 90’s kids with no cell phones, limited Internet, and wild imaginations that led us to some great ideas. In my opinion, the most impressive idea we had (Here’s the promised culinary triumph.) was to dip chocolate bars into tubs of frosting. Yes, you read that right. And yes, we did it. We were living the life!

brown-butter-cookie-dough-dip-1

The minute I saw that cookie dough dip was a thing, I was transported right back to those frosting dip nights. Just as chocolate bars dipped in buttercream was, cookies dipped in cookie dough dip is decadence to the core: creamy, sweet, and (if you do it like I do) sprinkled with crunchy chocolate chips and buttery toffee bits. Whether you choose to serve this with cookies, graham crackers, sliced apples, or chocolate bars—for old times’ sake—there is no question that this dip is a perfect party treat.

To up the flavor profile, we’re browning the butter in this recipe first. It’s going to add a little more nutty, caramelized flavor to the entire dip. Is it obvious that I love brown butter? (See: brown butter cinnamon sugar pull apart bread and brown butter banana bread).

Anyways, if you start making this cookie dough dip now, you can have this dip on your table in 20 minutes. Just in time for the festivities you may have in store this weekend. How easy is that?

brown-butter-cookie-dough-dip-2

brown-butter-cookie-dough-dip-3

brown-butter-cookie-dough-dip-6

brown-butter-cookie-dough-dip-5

brown-butter-cookie-dough-dip-7

Print
brown butter cookie dough dip

Prep Time: 15 minutes

Cook Time: 5 minutes

Servings: makes about 3 cups of dip (serves 8 to 10)

brown-butter-cookie-dough-dip-6

Party perfect brown butter cookie dough dip: creamy, sweet, and sprinkled with crunchy chocolate chips and buttery toffee bits. Serve with cookies, graham crackers, sliced apples!

Ingredients

  • 1/4 cup light brown sugar
  • 1/2 cup unsalted butter, at room temperature
  • 1 teaspoon vanilla extract
  • 8 ounces (1 standard package) cream cheese
  • 1/2 cup powdered sugar
  • 1/4 teaspoon salt
  • 1/2 cup mini semisweet chocolate chips
  • 1/2 cup toffee bits
  • graham crackers, cookies, or apple slices, for dipping

Instructions

  1. Place the light brown sugar in a small, heatproof bowl and keep it nearby while you brown the butter.
  2. In a small saucepan over medium heat, melt the butter completely. Keep the melted butter on the heat as it starts popping and crackling. Once the crackling subsides, the butter will begin to brown—if you stir or swirl your pan, you can see little brown bits settle to the bottom. Continue swirling the butter around the pan until it is golden brown and gives off a nutty scent. Once this happens, immediately remove from the heat and carefully pour the butter into the small bowl with the brown sugar. Stir together to help dissolve some of the brown sugar. Stir in the vanilla extract. Set aside to cool to room temperature.
  3. In the bowl of an electric mixer fitted with the paddle attachment, whip the cream cheese until it is smooth. Add the powdered sugar and salt and mix on medium to high speed until it is fluffy, about 1 minute. Pour in the butter mixture and mix first on low speed and then increase to medium speed until incorporated, about 1 minute. With the mixer on low speed, add the chocolate chips and toffee bits and stir until distributed throughout. Transfer the dip to a bowl and, if not serving immediately, cover and refrigerate until 15 minutes prior to serving. Serve with cookies, graham crackers, chocolate bars, fruit slices, spoons—whatever you come up with!

Notes

inspired by lots of bloggers, including Brown Eyed Baker

6.1.0
https://www.butterlovescompany.com/2015/08/21/brown-butter-cookie-dough-dip-recipe/
butter loves company | jenna larsson

brown-butter-cookie-dough-dip-4


<a href=”http://www.bloglovin.com/blog/11682291/?claim=w9jcs38c7yq”>Follow my blog with Bloglovin</a>

Filed Under: desserts and sweets, eat Tagged With: brown butter, cookie dough, dip, toffee

chocolate marble loaf cake

August 18, 2015 by Butter Loves Company

chocolate-marble-loaf-cake-11 copyThis is the kind of simple loaf you see sliced thick and domino-stacked in bakery cases. It’s sturdy with a welcomed denseness and enough sweetness to count as a casual dessert, but not so much that you feel guilty about enjoying it as a weekday breakfast ‘al desko.’ The latter is really where this chocolate marble loaf cake shines.

As the bread bakes up in the oven it cracks slightly on top so you can peek into the loaf and see swirls of chocolate and vanilla batter. With crisped edges and a moist center, this loaf is a little of everything and not too much of anything.

While it looks like you are combining two different cake batters to make this, you really only make one base batter and then jazz up half of it with melted bittersweet chocolate. Semisweet would work too, but it inclusion would yield an overall sweeter cake. If you’re wondering how to create the two-toned marble look, have no fear! There are quite a few process photos below and it is all explained in the recipe instructions.

If you’re feeling frisky, you could add a little citrus zest to the vanilla batter before you scoop it into the pan. Serve as-is for breakfast or top with whipped cream or ice cream, and preferably hot fudge, for dessert!

chocolate-marble-loaf-cake-1

Here we have your two glorious batters!

chocolate-marble-loaf-cake-3

Making marble magic – first scoop the two flavors into the pan.

chocolate-marble-loaf-cake-5chocolate-marble-loaf-cake-4chocolate-marble-loaf-cake-6chocolate-marble-loaf-cake-7chocolate-marble-loaf-cake-8chocolate-marble-loaf-cake-10

Print
chocolate marble loaf cake

Prep Time: 15 minutes

Cook Time: 1 hour, 10 minutes

Total Time: 1 hour, 10 minutes

Servings: one 8-inch loaf (about 8 servings)

chocolate-marble-loaf-cake-11 copy

This is the kind of simple loaf you see sliced thick and domino-stacked in bakery cases. It’s sturdy with a welcomed denseness and a little sweetness on the vanilla side swirled with rich chocolate flavor.

Ingredients

  • 2 cups plus 2 tablespoons all-purpose flour
  • 1 1/4 teaspoons baking powder
  • 1/2 teaspoon salt
  • 3/4 cup (1 1/2 sticks or 12 tablespoons) unsalted butter, at room temperature
  • 1 cup granulated sugar
  • 4 large eggs, at room temperature
  • 3/4 teaspoon vanilla extract
  • 1/2 cup whole milk
  • 1/2 cup (4 oz.) bittersweet chocolate chips, melted and cooled

Instructions

  1. Preheat the oven to 325°F. Butter or grease an 8 1/2 x 4 1/2 inch loaf pan. Line the bottom of the pan with a rectangle of parchment paper and grease the parchment. Place the pan on the top of a cookie sheet and set aside.
  2. In a medium bowl, whisk together the flour, baking powder, and salt. Set aside.
  3. In the bowl of an electric mixer fitted with the paddle attachment, cream the butter on medium speed until smooth. Add the sugar and cream on medium speed until light and fluffy, about 5 minutes. Add the eggs, one at a time, and mix thoroughly after each addition. Beat in the vanilla extract.
  4. Reduce the mixer speed to low and alternate adding the flour and milk, beginning and ending with the flour and mixing only until each addition is just incorporated. Keep the empty bowl that the flour mixture was in nearby.
  5. Scrape down the bowl with a spatula and scoop half of the batter into the now empty flour bowl. Set aside. This will be the vanilla part of the marble loaf. We’ll make the chocolate part of the marble loaf out of the remaining half of the batter in the stand mixer. Add the chocolate into the bowl of your electric mixer and mix on low speed to combine.
  6. We are now ready to scoop the two batters into the prepared pan!
  7. Randomly drop spoonfuls of the vanilla and chocolate batters into the pan OR spoon the batters out into long alternating rows (this is what I did here: bottom row was vanilla-chocolate-vanilla and then the second row was chocolate-vanilla-chocolate). Then, grab a butter knife and plunge it into the batter at one end of the loaf. Drag the knife to the other side of the loaf pan in a zig-zag motion, careful not to exceed 6 zig-zags. Remember, marbling can take on a life of its own in the oven so don’t get too picky about a perfect marble, but it is best not to over-mix the doughs once they are in the pan.
  8. Bake the loaf, resting on top of a cookie sheet, for 1 hour and 10 minutes to 1 hour and 20 minutes, or until the top is lightly golden and a toothpick inserted into the center of the loaf comes out clean. Remove from the oven and let cool in the pan for about 15 minutes before inverting it onto a rack and flipping it right-side-up to cool completely.
6.1.0
https://www.butterlovescompany.com/2015/08/18/chocolate-marble-loaf-cake/
butter loves company | jenna larsson

chocolate-marble-loaf-cake-9

If you like this loaf, you should totally check out this Lemon Loaf with Lavender Glaze!

emon loaf with lavender glaze 5

While we’re on the loaf topic, this Brown Butter Cinnamon Sugar Pull Apart Bread is one of my favorite loaf shaped things!

brown-butter-cinnamon-sugar-pull-apart-bread-9


Filed Under: breakfast and breads, desserts and sweets, eat Tagged With: bread, breakfast bread, chocolate, marble cake

boston cream pie cake

August 13, 2015 by Butter Loves Company

boston-cream-pie-cake-11I often wonder if people outside of Boston are completely confused by the concept of Boston Cream Pie. I mean, it’s not a pie by any traditional standards. There is no crust or shell or crumble topping. It’s not made in a pie dish. Oh yea, and Boston Cream Pie is a CAKE!

Theory has it that Boston Cream Pie was created at the Parker House Hotel in Boston in 1856. This is the same hotel credited with the birth of the ‘Parker House’ roll; you know those delicious, buttery, addictive fold-over dinner rolls? Some magic was certainly happening in that kitchen in the 1800s…

The official dessert of Massachusetts, Boston Cream Pie is typically made up of vanilla cake filled with cream or custard and topped with chocolate. This version is a Boston Cream Pie Cake and consists of three layers of moist and tender vanilla cake layers, a classic pastry cream filling, white chocolate buttercream frosting, and finished with chocolate ganache. Think of it as a somewhat fancied up Boston Cream Pie. If you’d like a more traditional Boston Cream Pie, make only two layers of cake, use all the pastry cream in between those layers, and top with the ganache (skip the white chocolate buttercream).

P.S. In case you missed it, I shared some behind the scenes pics of this cake in process on my snapchat (butterlc), instagram, and Facebook. If you have any interest in seeing some dorky kitchen dancing and baking fails, hop over to the social icons in the right panel and follow along. There is guaranteed to be lots of that to come!!

boston-cream-pie-cake-1

boston-cream-pie-cake-3

BAKING INCEPTION

boston-cream-pie-cake-4

boston-cream-pie-cake-6

boston-cream-pie-cake-7


boston cream pie cake

vanilla cake recipe adapted from just a pinch

total time: 3–4 hours to make cake, frosting, and fillings, and assemble (includes chill time)
makes one 3-layer 9-inch frosted and filled cake (FYI: I made a 3-layer 8-inch cake using pans with high edges and the only adjustment was keeping my eye on the cooking time.)

vanilla cake layers

Ingredients:

1 cup (2 sticks) butter, softened
1/2 cup vegetable shortening
3 cups granulated sugar
5 eggs, room temperature
3 cups all-purpose flour
2 teaspoons baking powder
1/2 teaspoon salt
3/4 cup whole milk, room temperature
1/4 cup Greek yogurt, room temperature
2 1/2 teaspoons vanilla extract

Instructions:

  1. Preheat the oven to 350°F. Grease three 9-inch round cake pans with nonstick baking spray or butter. Line the bottom of each pan with parchment paper and then grease the top of the paper. Set the pans aside.
  2. In the bowl of an electric mixer fitted with the paddle attachment, cream together the butter and shortening on medium speed until light and fluffy, about 3 minutes. With the mixer on low speed, add the sugar—one cup at a time—mixing to incorporate after each addition. Add the eggs one at a time, mixing each egg until it is fully incorporated before adding the next.
  3. In a separate medium bowl, sift together the flour, baking powder, and salt. In a separate small bowl, stir together the whole milk, yogurt and vanilla until it is smooth. Alternate adding the flour mixture and the milk mixture to the butter mixture, beginning and ending with flour mixture. Stop the mixer and, with a spatula, give the bowl a scrape and stir to make sure all the ingredients are well combined.
  4. Divide cake batter between prepared cake pans. Pop them in the oven and bake for 25 to 30 minutes, or until a toothpick inserted in the center comes out clean. Remove from the oven and cool the cake in their pans for 5 minutes and then transfer to a wire rack to cool completely. Once they are cool, wrap each layer in plastic and place in the freezer until you are ready to assemble the cake.

Pastry Cream (makes about 2 cups)

Ingredients:

1 1/4 cups (300g) whole milk
1/2 cup (100g) sugar
1/4 cup (30g) cake flour
1/2 teaspoon salt
4 large egg yolks
1 teaspoon vanilla extract

Instructions:

  1. In a medium saucepan, scald the milk over medium-high heat (bubbles start to form around the edge of the pan, but the milk is not boiling). While the milk is heating, in a small bowl, stir together the sugar, flour and salt. (Mixing the flour with the sugar will prevent the flour from clumping when you add it to the egg yolks.) In a medium bowl, whisk the egg yolks until blended and then slowly whisk in the flour mixture (it will be pasty).
  2. Remove the milk from the heat and slowly add it to the egg-flour mixture, a little at a time, whisking constantly (you want to make sure that you only add a little at a time so the hot milk doesn’t cook the eggs in the mixture). When all of the milk has been incorporated, return the contents of the bowl to the saucepan and place over medium heat. Whisk continuously and vigorously for about 3 minutes, or until the mixture thickens and comes to a boil. At first, the mixture will be very frothy and thin; as it cooks longer, it will slowly start to thicken until the frothy bubbles disappear and it becomes more viscous. Once it thickens, stop whisking every few seconds to see if the mixture has come to a boil. If it has not, keep whisking vigorously. As soon as you see it bubbling, immediately go back to whisking for just 10 seconds, and then remove the pan from the heat. Boiling the mixture will thicken it and cook out the flour taste but if you let it boil for longer than 10 seconds, the mixture can become grainy.
  3. Pour the mixture through a fine-mesh sieve into a small heat-proof bowl. Stir in the vanilla, then cover with plastic wrap, placing it directly on the surface of the cream. This will prevent a skin from forming (Kind of like pudding!). Refrigerate for at least 4 hours, or until cold, or up to 3 days.

white chocolate buttercream (makes about 3 cups)

Ingredients:

3/4 cup sugar
4 large egg whites, at room temperature
1 1/2 cups unsalted butter (3 sticks), at room temperature
4 ounces white chocolate, melted and cooled to room temperature

Instructions:

  1. Fill a small saucepan with about 1/2 inch of water and heat it on the stove so the water is simmering. In a large heat-safe mixing bowl (the bowl from your stand mixer works perfectly here), add the sugar and egg whites and set the bowl over the the simmering water. Whisk constantly until the sugar melts and the mixture is thin and warm. Be careful not to let the bottom of the bowl touch the simmering water directly as it could cook the eggs! We just want the residual heat here.
  2. Remove the bowl from the heat and fit it back into your stand mixer (or pour the mixture into the bowl of your stand mixer). Using the whisk attachment, whisk on high speed until stiff peaks form, about 5 minutes. Adjust speed to low and continue beating until the mixture is cool, about 15 minutes.
  3. Keep the mixer on low speed and begin dropping in pieces of the butter, a tablespoon or two at a time. Wait until the butter is incorporated before adding the next piece. It is possible the mixture will look like it is curdling for a little while, but it will come together. Once you have added all the butter, beat in the white chocolate until the frosting is fluffy and smooth. The buttercream will freeze well for up to 6 months. Bring it back to room temperature and re-beat before using.

chocolate ganache (Makes about 2 cups)

Ingredients:

1 1/4 cup semisweet chocolate, roughly chopped (or use semisweet chocolate chips)
1 cup heavy cream
2 tablespoons butter

Instructions:

  1. Place the chopped chocolate in a medium-sized heatproof bowl. Set aside. Heat the cream and butter in a small saucepan over medium heat. You can also heat the cream and butter in the microwave. Bring just to a boil and immediately pour the boiling cream over the chocolate and allow to stand, without stirring, for a few minutes. Stir gently (as you do not want to incorporate air into the ganache) with a spoon or whisk until smooth.

Assemble:

  1. Place one layer of the cake on the center of a cake board or cake platter. With an offset spatula, evenly spread half of the pastry cream on the top of the first layer of cake. Top with another layer of the cake and spread the remaining half of the pastry cream on the top of the second layer. Top with the third and final layer of cake.
  2. Using and offset spatula and/or piping bag, frost the entire cake with the white chocolate buttercream as desired. At this point, I put the entire cake in the fridge for a few minutes to firm up before I topped with ganache. If you have room, it might be helpful, but not necessary.
  3. Pour the slightly cooled ganache in the center of the top of the frosted cake, a little bit at a time. Using an offset spatula, smooth the ganache over the top and push gently to the edges so that is drips over randomly. Let the ganache cool so it firms up and you’re all set!

boston-cream-pie-cake-12

boston-cream-pie-cake-10

Filed Under: desserts and sweets, eat Tagged With: boston cream pie, buttercream, celebration cake, chocolate ganache, vanilla cake

« Previous Page
Next Page »

Welcome!

jenna of butterlovescompany

Pull up a chair

Hi! I’m Jenna. Story seeker, food lover, recipe developer based in NYC. Firm believer in making every day delicious! Read more…

looking for something?

  • Email
  • Facebook
  • Instagram
  • Pinterest
  • RSS
  • Twitter

Latest Posts

  • Freezer Meals to Make Before Baby: How We Meal Prepped Before Baby
  • mom’s famous spiced pecans
  • funfetti cookie dough truffles (no-bake)
  • maple coconut cookies
  • snickerdoodle blondies

popular now

braised short rib pasta sauce (short rib ragu)
strawberry cinnamon rolls
rosemary honey buttermilk biscuits
bourbon banana bread
chocolate marble loaf cake
broyé (salted butter table cookie)

grammin’

Let’s get ready to bake throughout the holidays! Let’s get ready to bake throughout the holidays! I’ve teamed up with @lucky_leaf_fruit_filling, @diamondnuts and #Kids360 to give away some delicious baking ingredients to make your spirits bright this season. 

To enter:
-Follow @lucky_leaf_fruit_filling, @diamondnuts and @butterlovescompany
-Comment and tag a friend and the name of your favorite holiday dessert
-Enter by December 1. Winner will be selected at random and DM’d! 

You’ll win: 
•(1) Can of Lucky Leaf Premium Blueberry Filling
•(1) Can of Lucky Leaf Premium Apple Filling
•(1) Can of Lucky Leaf Premium Cherry Filling
•(1) Can of Lucky Leaf Premium Strawberry Filling
•(1) Can of Lucky Leaf Premium Peach Filling
•(1) Recipe Book
•(2) Dish Towels
•(1) Pot-Holder
•(1) Picnic Basket

#ad NO PURCHASE NECESSARY. Open to legal residents of the United States (including its commonwealths, territories, and possessions) who are legal age of majority. Enter by 11:59 pm ET on December 1, 2021. Odds of winning depend on # of entries received. Void where prohibited. This is not sponsored or endorsed by Instagram or Facebook.
This was the best photo we could get with an alway This was the best photo we could get with an always moving toddler. 🥸 Happy Thanksgiving to you and yours! ♥️
Something that the past year or so has taught me: Something that the past year or so has taught me: stock your pantry! Having a stocked kitchen has made it super easy to cook and bake without having to run out to the store. Crucial when you get a craving for an Apple Walnut Cake and need to make one stat. With @lucky_leaf_fruit_filling and @diamondnuts, you can put together a delicious cake SO easily with no peeling and slicing of apples. 🍎🌰You get all the beautiful warm spice flavor with sweet, tart apples, and crunchy, hearty walnuts. #ad Get the recipe below: 

Apple Walnut Cake

* 1 box (15.25 oz.) spice cake mix
* 1 can (21 oz.) Lucky Leaf® Premium Apple Fruit Filling
* 2 large eggs
* 1 tbsp. pure vanilla extract
* 1/4 cup whole milk
* 1/4 cup brown sugar
* 1 tsp. ground cinnamon
* 1/2 cup finely chopped Diamond of California® Shelled Walnuts
* 1 container (8 oz.) whipped topping, thawed

Instructions
1. Preheat oven to 350° F and grease 9x13-inch pan. 
2. Combine dry cake mix, apple filling, eggs, vanilla & milk in large bowl. Beat for 2 minutes. Spread half of the batter in the pan. 
3. Make the Walnut Cinnamon filling: Combine brown sugar, cinnamon and walnuts. Sprinkle half the mixture on top of batter. Top with remaining batter and then sprinkle remaining walnut mixture on top.
4. Bake cake for 28-33 minutes. Cool cake. Top with whipped topping and sprinkle with walnut pieces.

Don’t miss my upcoming chance to W I N with #kids360, Diamond and Lucky Leaf!
Spiced pecans, wedding cookies, chocolate turtles, Spiced pecans, wedding cookies, chocolate turtles, pecan pie, sticky buns…just a few of the treats on my standard holiday baking agenda. What do they have in common? NUTS! @diamondnuts are a staple around here for the holidays (and all year, let’s be honest) and I want to share the love. Thanks to Diamond and #kids360, we are giving someone ✨15 FREE product coupons for @diamondnuts ✨to help you bake your holiday treats this year. Go nuts!

To enter:
* Follow @diamondnuts and @butterlovescompany
* Comment and tag a friend who deserves a day off to go nuts! 
* Enter by end of day November 25th. Winner will be selected at random and DM’d! 

#ad NO PURCHASE NECESSARY. Open to legal residents of the United States (including its commonwealths, territories, and possessions) who are the legal age of majority. Enter by 11:59 pm ET on November 25, 2021. Odds of winning depend on # of entries received. Void where prohibited. This is not sponsored or endorsed by Instagram or Facebook.
No gimmicks, no “just for the ‘gram” razzle No gimmicks, no “just for the ‘gram” razzle dazzle here. Just really good chocolate chip cookies.🍪
Fun fact: Layered Magic Cookie Bars were one of th Fun fact: Layered Magic Cookie Bars were one of the first things I ever baked. Making them again with @diamondnuts makes me super nostalgic. Brought me directly back to middle school. Watch out or you may find me in butterfly clips doodling I <3 SOS on my binder soon. There is a reason this recipe is awesome: first, the cookie bars are incredibly delicious. And, second, they are SO easy to put together. Honestly, they are the PERFECT treat to make with your kids. Pecans and walnuts give the bars the best crunch, nuttiness, and heartiness. You could totally customize if there is a certain kind of jam you love, or a combination of nuts that the family loves. #ad Get the recipe below: 

Seven Layer Magic Cookie Bars

* 1/2 cup (1 stick) butter, melted
* 2 cups graham cracker crumbs
* 1 cup raspberry jam
* 1 cup shredded coconut
* 1 cup Diamond of California® walnuts
* 1 cup Diamond of California® pecans
* 1 cup semi-sweet or bittersweet chocolate chips
* 1 (14-ounce) can sweetened condensed milk

Instructions
1. Preheat oven to 350°F. To toast walnuts and pecans, spread evenly on a baking sheet or in a shallow pan. Bake, stirring once or twice, until lightly browned and fragrant, 7 to 10 minutes. Line a 9×13-inch pan with parchment paper.
2. In a medium bowl, combine the melted butter and graham cracker crumbs; mix well. Transfer the crumbs to the prepared pan and using your finger tips, or the flat bottom of a small measuring cup, press firmly and evenly on the bottom of the pan. Spread the raspberry jam evenly over the crumbs. Sprinkle coconut in an even layer over the jam, followed by the chocolate chips, walnuts and pecans. Drizzle the condensed milk evenly over the top.
3. Bake until bubbling and golden brown, 30-35 minutes. Let cool completely in the pan. If lined with parchment, lift out and place on a cutting board. With a sharp knife, cut into bars.

Look out for an upcoming chance to ✨ w i n ✨with @diamondnuts and #kids360!
Raise your hand if you could use a cup of coffee. Raise your hand if you could use a cup of coffee. 🙋 We are giving away some @timhortonsus coffee goodies so you can get your cozy cool morning on with Canada’s favorite cup of joe. Make my Pumpkin Coffee Coffee Cake for a buzzy morning snack or just brew a strong cup for a little pep in your step (as tired parents over here, we could surely use it). 🍂

To enter:
● Follow @butterlovescompany and @timhortonsus
● Comment and tag a friend you would love to grab coffee with ☕ (each comment=1 entry)
● Enter by midnight November 18. Winner will be selected at random and DM’d!
 
You’ll win:
•(1) Colombian Ground Coffee
•(1) Dark Roast Ground Coffee
•(1) Decaf Ground Coffee
•(1) Whole Bean Original Blend Coffee
•(1) Keurig Variety 30-Pack
•(1) Mug
•(1) Branded Notebook
•(1) Branded Baseball Cap
 
 
ad #timhortons #kids360 NO PURCHASE NECESSARY. Open to legal residents of the United States (including its commonwealths, territories, and possessions) who are legal age of majority. Enter by 11:59 pm ET on November  18, 2021. Odds of winning depend on # of entries received. Void where prohibited. This is not sponsored or endorsed by Instagram or Facebook.
Can’t beat a classic. 🥧 Apple streusel pie fo Can’t beat a classic. 🥧 Apple streusel pie for yesterday’s friendsgiving.🥰 Grateful for time with friends enjoying great food. Remy had so much fun playing that he slept until 7am so we are hopefully out of the 4am daylight savings nightmare (knock on wood). 

Sunday includes a farmers market bop, movies, and cooking for the week. Wouldn’t change a thing. 🥳
Cannot. Get. Enough. Fall. Baking. Who’s with me Cannot. Get. Enough. Fall. Baking. Who’s with me? 🍁  This coffee cake packs a punch because it is made with @timhortonsus brewed coffee in the batter and the glaze. A true *coffee* cake. The texture is dreamy and the coffee is perfectly balanced and smooth. It is goood. #ad Get the recipe below:
 
Pumpkin Coffee Coffee Cake
 
Topping
● 2/3 cup granulated sugar
● pinch of salt
● 2/3 cup flour
● 1 teaspoon cinnamon
● 4 tablespoons butter, melted

Filling
● 1/3 cup brown sugar, packed
● 1 teaspoon cinnamon
● 1 teaspoon unsweetened cocoa powder, optional

Cake
● 1/3 cup vegetable oil
● 2 large eggs, at room temperature
● 1 cup granulated sugar
● 1 cup pumpkin purée
● 1 teaspoon pumpkin pie spice
● 1 teaspoon salt
● 1 teaspoon baking powder
● 1/2 cup brewed @timhortonsus Coffee
● 2 cups flour

Glaze
● 1 cup powdered sugar
● 2 tablespoons brewed @timhortonsus coffee
 
Instructions
1. Preheat the oven to 350°F and grease an 8 inch square pan and line with parchment.
2. Make topping: Stir together the sugar, salt, flour, cinnamon, and melted butter until combined into pea sized lumps. Stirring just until well combined. Set aside.
3. Make filling: Mix together the brown sugar, spice, and cocoa powder. Set it aside.
4. Make cake: Beat together the oil, eggs, sugar, pumpkin, pie spice, salt, and baking powder until smooth. Add the brewed coffee followed by the flour, alternating in two additions, and stir until combined.
5. Spread half the batter into the prepared pan. Sprinkle the filling evenly on top of the batter. Top with the remaining batter. Sprinkle the topping over the batter in the pan.
6. Bake until a toothpick inserted into the center comes out clean, about 40 to 45 minutes. Let cool.
7. Make glaze: Combine the powdered sugar and brewed coffee until smooth and thick but drizzle-able. Using a fork, drizzle it over the cake.

Don’t miss our upcoming chance to ⚡️W I N⚡️ thanks to @timhortonsus and #Kids360!

#timhortons #kids360fanclub
One of the hardest parts about being a working mom One of the hardest parts about being a working mom is how little time you get to spend with your sweet bean during the week. Between wake up and getting to daycare, to pickup and bedtime it’s often an hour at best (which is also filled with making dinner, bath time, etc). I soak up ALL the minutes and the weekends are an absolute snuggle and play fest. It’s so tough though! If you are in the same boat, know that you aren’t alone and you’re doing a good job!! ♥️

This photo has nothing to do with this but I made the cookies for our neighbors and regretting not keeping one for myself right now. 😬🤣
✨W I N !✨ I’ve teamed up with @nielsenmassey ✨W I N !✨ I’ve teamed up with @nielsenmassey and #Kids360 to give away some seriously amazing ingredients to make your desserts sing. 🎶 I love their products and have been using them for years—the vanilla is 💯!!
 
To enter:
● Follow @nielsenmassey and @butterlovescompany 
● Comment and tag a friend you’d love to bake with
● Enter by Thursday November 11th. Winner will be selected at random and DM’d!
 
You’ll win:
•(1) Madagascar Bourbon Pure Vanilla Powder
•(1) Madagascar Bourbon Pure Vanilla Sugar
•(1) Ugandan Pure Vanilla Extract
•(1) Pure Coffee Extract
•(1) Pure Peppermint Extract
•(1) Rose Water
•(1) Pure Lemon Extract
•(1) Tahitian Two Vanilla Beans
•(1) Tahitian Pure Vanilla Extract
•(1) Mexican Two Vanilla Beans
•(1) Mexican Pure Vanilla Extract
•(1) Madagascar Bourbon Two Vanilla Beans
•(1) Madagascar Bourbon Pure Vanilla Extract
•(1) Madagascar Bourbon Pure Vanilla Bean Paste
•(1) Orange Blossom Water
•(1) Pure Orange Extract
•(1) Pure Almond Extract
•(1) Pure Chocolate Extract
.
#ad NO PURCHASE NECESSARY. Open to legal residents of the United States (including its commonwealths, territories, and possessions) who are legal age of majority. Enter by 11:59 pm ET on November  11, 2021. Odds of winning depend on # of entries received. Void where prohibited. This giveaway is not sponsored or endorsed by Instagram or Facebook.
Brainstorming dessert recipes for Thanksgiving and Brainstorming dessert recipes for Thanksgiving and it’s hard not to think about this Black Forest Pie. 🍒🍫 It was such an indulgent tart-sweet chocolate-y treat. It has a chocolate all butter pie crust, a layer of dark chocolate ganache, a layer of chocolate pudding, a cherry topping, and whipped cream. Oh, and a cherry on top! Recipe is from @emcdowell #thebookonpie! 

This one *might* be too rich for the menu but there WILL be pie (duh)🥧. What kind of pie do you need to have on your Thanksgiving table?
This error message is only visible to WordPress admins
Hi! I'm Jenna, founder of butter loves company. From holidays to Tuesdays, let's find a way to make every meal special.
  • Email
  • Facebook
  • Instagram
  • Pinterest
  • RSS
  • Twitter
a2f54ba1dcf0635e58c8be4aa2035ce84863a9d9606a428ab3

© 2013-2019 BUTTER LOVES COMPANY, LLC.

Copyright © 2025 · Foodie Pro Theme by Shay Bocks · Built on the Genesis Framework · Powered by WordPress