butter loves company

new york food blogger and lifestyle influencer

  • home
  • Recipes
  • travel
  • lifestyle
  • cookie orders
  • about
  • contact

dolce de leche cookies

September 4, 2017 by Butter Loves Company

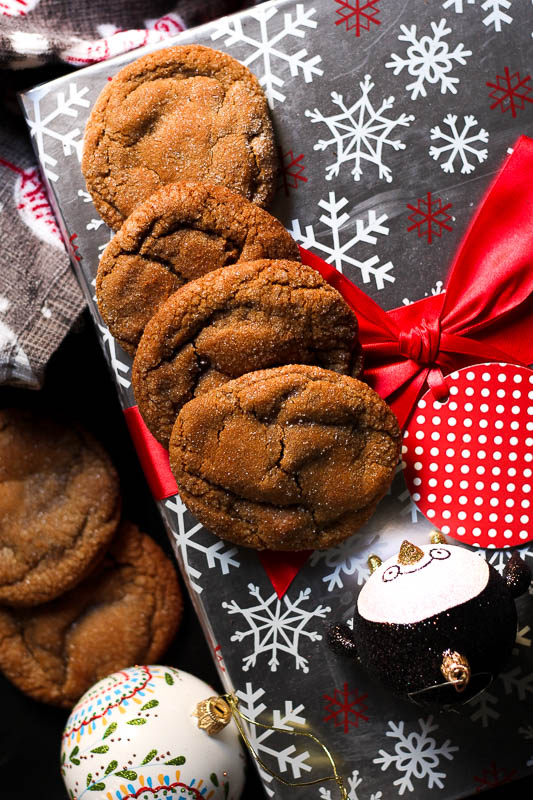
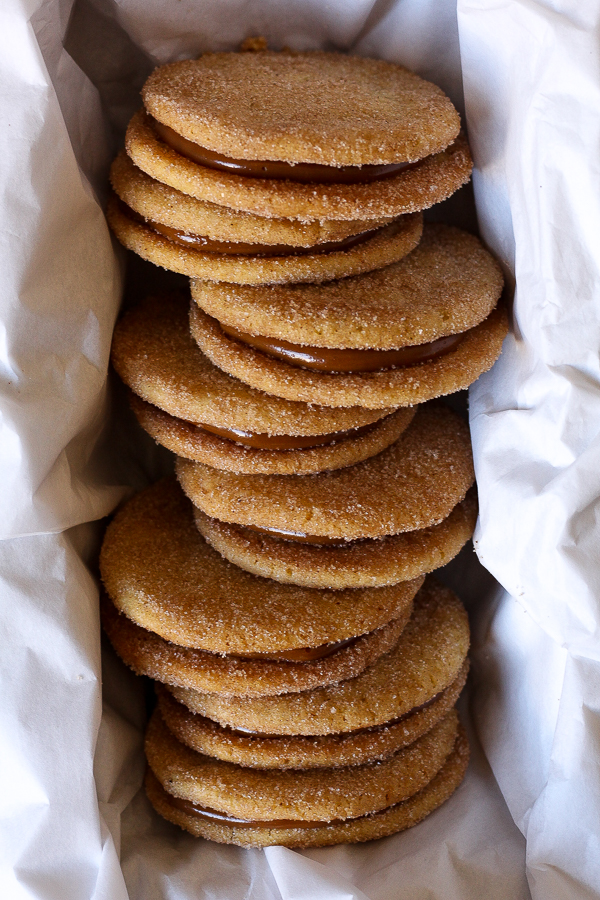
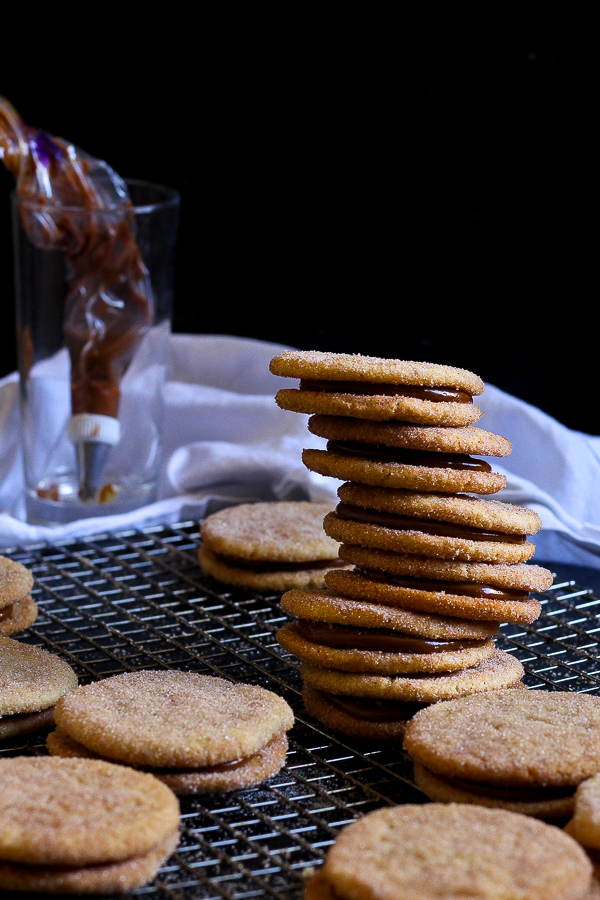
This recipe for cinnamon spiced Dolce de Leche Cookies from the America’s Test Kitchen cookbook, The Perfect Cookie, yields the perfectly sweet, decadent, warming, party-worthy sandwich cookie.

stack of dolce de leche cookies

Being from Boston, I have always been a fan of the Beantown based America’s Test Kitchen. Their recipes are tested and tested again, so you can feel confident diving into mixing and stirring, knowing your meal will be perfectly seasoned or your pastry will rise just as you imagined. When ATK reached out to me about their latest cookbook, The Perfect Cookie, I knew it was destined to be a new staple on my cookbook shelf.

dolce de leche cookies

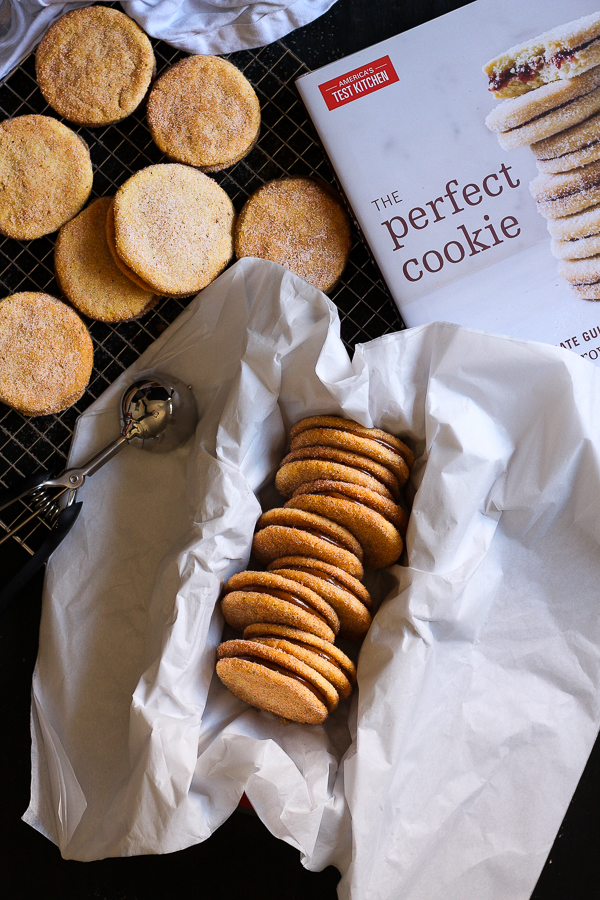
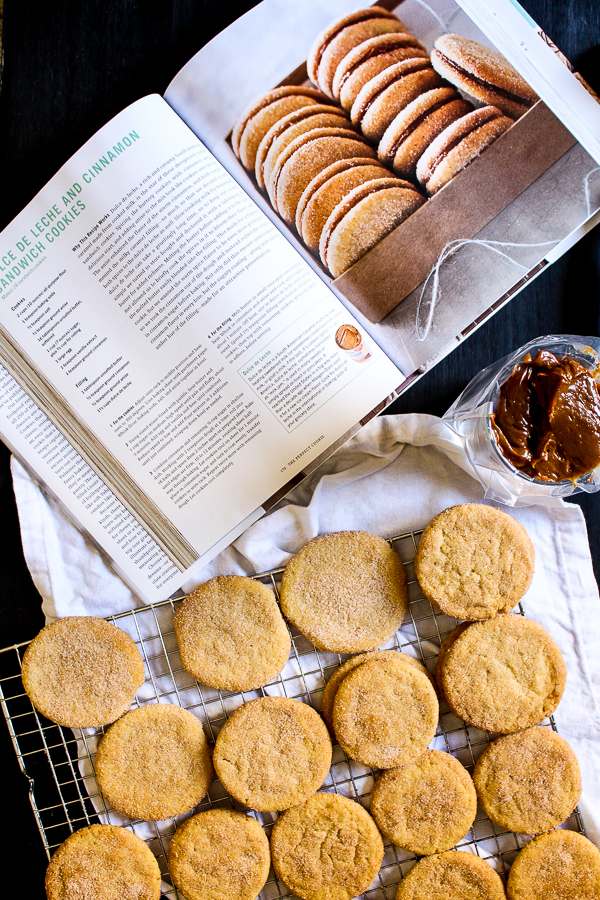
With dozens of recipes for classics like Snickerdoodles, Gingersnaps, Sables, and Palmiers, to new stunners like Peppermint Surprise Brownie Bites, Chocolate Peanut Butter Candies, and Cornmeal Olive Oil Cookies, each page of The Perfect Cookie is deliciously bookmark-able. There is even an entire section dedicated to Christmas cookies, which makes me pumped up for my annual holiday cookie baking marathon. In true America’s Test Kitchen fashion, in this cookbook you can expect detailed tips and tricks for achieving the best baking results. Each recipe also has a photograph so you can visualize the cookies you will soon be eating.

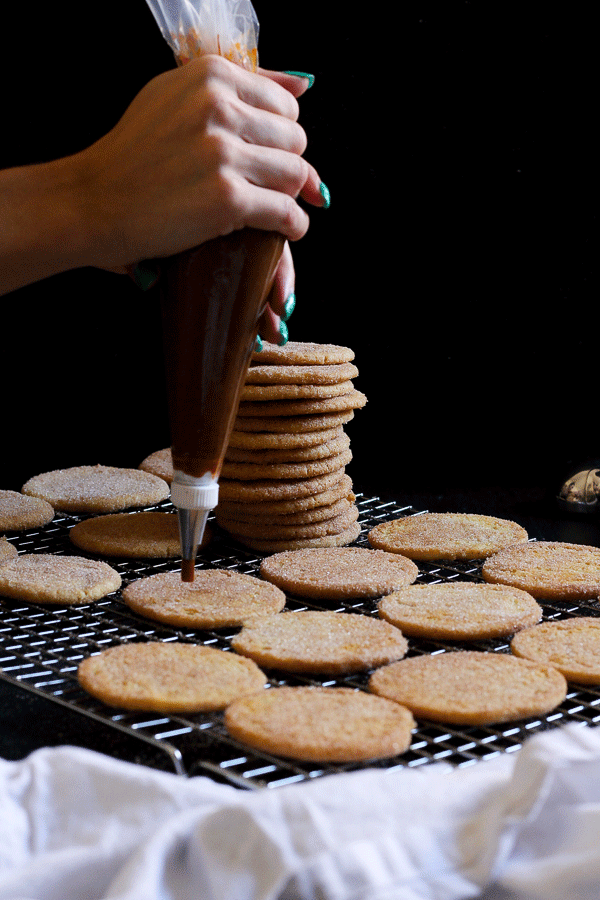
These Dolce de Leche cookies are comprised of two cinnamon sugar coated tender sugar cookies, wrapped around a rich, creamy, and caramel-like dolce de leche filling. Dolce de leche is a sweet spread made by boiling sugar with milk. You can certainly make your own or purchase it pre-made. This recipe calls for the latter. These cookies are definitely on the indulgent side—but in the absolutely best way possible!

dolce de leche cookies

There is a little ground anise both in the cookie dough and the filling, which lends a warm licorice flavor to the cookies. If you are so inclined, you could skip the anise for a different, yet still totally delicious, flavor profile. That said, like all the cookies I have tried so far in the book, the America’s Test Kitchen team definitely worked some magic on the recipe details to ensure ultra-tasty results, so I’ve listed the ingredients here exactly as they do.

dolce de leche cookies

Print
dolce de leche and cinnamon sandwich cookies

Servings: Makes 24 Sandwich Cookies

dolce de leche cookies

Dolce de Leche and Cinnamon Sandwich Cookies from America's Test Kitchen's The Perfect Cookie

Ingredients

    Cookies
  • 2 cups (10 ounces) all-purpose flour
  • 1 teaspoon baking soda
  • 1/2 teaspoon salt
  • 1/2 teaspoon ground anise
  • 16 tablespoons unsalted butter, softened
  • 1 cup (7 ounces) granulated sugar, plus 1/2 cup for rolling
  • 1 large egg
  • 1 teaspoon vanilla extract
  • 1 teaspoon ground cinnamon
    Filling
  • 1 tablespoon unsalted butter
  • 1/2 teaspoon ground cinnamon
  • 1/2 teaspoon ground anise
  • 1 1/2 cups dulce de leche

Instructions

  1. For the cookies: Preheat oven to 350°F and line a baking sheet with parchment paper. In a small bowl, whisk together flour, baking soda, salt, and anise. Set aside.
  2. Using a stand mixer fitted with the paddle attachment, cream together the butter and sugar on medium-high speed until light and fluffy, about 3 minutes. Add egg and vanilla extract and beat until combined. Reduce the speed to low and add the flour mixture in three additions, until just combined, scraping down the bowl as needed.
  3. Combine cinnamon and remaining 1/2 cup of sugar in a shallow dish. Scooping out the dough 2 teaspoons at a time, roll into 16 balls, roll around in the cinnamon sugar mixture to coat, and space them 2 inches apart on the prepared baking sheet. Bake until edges are firm, 10 to 12 minutes, rotating the sheet halfway through baking. Let cookies cool on the sheet for 1 minute and then gently place each warm cookie in the cinnamon sugar and turn to coat evenly. Transfer to a wire rack to cool completely. Repeat twice more with the remaining dough.
  4. For the filling: In a small saucepan, melt butter over medium heat. Whisk in cinnamon and anise and cook until fragrant, about 1 minute. Remove from the heat and stir in the dulce de leche until incorporated. Pipe or spread 1 1/2 teaspoons of the filling over the bottom of half of the cookies then top with the remaining cookies pressing lightly to adhere. Enjoy!
6.1.0
https://www.butterlovescompany.com/2017/09/04/dolce-de-leche-cookies/
butter loves company | jenna larsson

dolce de leche cookies

Filed Under: desserts and sweets Tagged With: cinnamon, cookies, sandwich cookies

simple berry ricotta cake

August 8, 2017 by Butter Loves Company

When you’re feeling like a slightly sweet, super moist, and surprisingly easy dessert or breakfast option this simple berry ricotta cake might be just what you’re looking for.

berry-ricotta-cake

It is the perfect answer for the plentitude of summer berries basking in the sun on your counter, or the florescent lights of your refrigerator. It is the answer to that extra ricotta left over from your weekend pizza. It is the magic solution to use the three eggs left over in the carton. And, while it is good for finishing up some ingredients that are begging to be used, it is also worthy of an extra trip to the farmers market or grocery store to grab the juiciest looking blueberries or the sweetest raspberries.

Ricotta cheese is a wonder worker in baked goods, yielding an almost guaranteed moist, soft result. This berry ricotta cake has the kind of crumb you can pick up with a light press of the back of your fork.


berry-ricotta-cake

Feel free to personalize this fluffy ricotta cake with your preferred berry combination. Strawberries and blueberries? Blackberries and raspberries? Just like the books you read as a kid, we’re choosing our own adventure here. I imagine a dollop of whipped cream or vanilla ice cream would be welcomed atop this cake for a little extra extra. In fact, I am sure it would be.

I consider this simple berry ricotta cake to be of the perfect summer dessert variety. It is welcoming of summer’s ease and highlights summer produce just right. Call it old fashioned, but this cake is mixed simply with a whisk and spatula. No stand mixer. No hand mixer. No problem!

Print
simple berry ricotta cake

Servings: Makes a one-layer 9-inch cake

berry-ricotta-cake

Ingredients

  • 1 1/2 cups all-purpose flour
  • 3/4 cup granulated sugar
  • 2 teaspoons baking powder
  • 3/4 teaspoon kosher salt
  • 3 large eggs
  • 1 1/2 cups whole milk ricotta
  • 1/2 teaspoon vanilla extract
  • 1/2 cup (1 stick) unsalted butter, melted
  • 1 1/4 cup mixed berries of your choice such as blueberries, raspberries, blackberries, washed and dried
  • A teaspoon or two granulated sugar, for sprinkling

Instructions

  1. Center a rack in the middle of the oven and preheat to 350°F. Grease a 9-inch -diameter cake pan, line the bottom with a circle of parchment paper and lightly coat with nonstick spray.
  2. In a medium bowl, whisk together the flour, sugar, baking powder, and salt and set aside.
  3. In a large bowl, whisk together the eggs, ricotta, and vanilla until smooth. Fold in the flour mixture with a rubber spatula until just blended. Pour in the melted butter and fold with the spatula until incorporated. Very gently fold in 1 cup of the berries until distributed.
  4. Scrape the batter into the cake pan and dot the remaining 1/4 cup berries over the top. Sprinkle with a little granulated sugar
  5. Bake cake until the top is golden brown and a toothpick inserted into the center comes out clean, about 50–60 minutes. Remove from oven and let cool in the pan for 30 or so minutes before transferring to a plate. Enjoy!

Notes

Adapted from Bon Appetit

6.1.0
https://www.butterlovescompany.com/2017/08/08/berry-ricotta-cake/
butter loves company | jenna larsson

I hope you find this recipe as tasty as we do. If you give it a try, please do let me know what you think in the comments, or hashtag your photo on social media with #butterlovescompany so I can see how it came out!

Looking for other cake recipes? Check out this Chocolate Marble Loaf Cake or this Lemon Loaf with Lavender Glaze!

berry-ricotta-cake

Filed Under: breakfast and breads, desserts and sweets, eat Tagged With: berries, blackberry, cake, loaf, rasperry, ricotta, strawberry

chocolate buttermilk cake with tangerine curd and toasted meringue

March 9, 2017 by Butter Loves Company

chocolate buttermilk cake

It has been far too long since I’ve broken out one of my favorite culinary tools: the kitchen torch. This is the little flamethrower of flavor that elevates crème brulée to more than custard and makes snowy meringue frosting golden-tipped and tasting of toasted marshmallows.

chocolate buttermilk cake

This recipe for Chocolate Buttermilk Cake with Tangerine Curd and Toasted Meringue has what may seem like a lot of steps, but you can easily split them up as to not feel overwhelmed. Bake the cakes and prep the curd one day, then make the meringue and assemble the next. The cake is super moist from the buttermilk and lusciously chocolate-y from the cocoa (I used special dark). The tangerine curd is tangy and quite citrus-forward, but also so smooth and creamy. If you prefer, you could use any kind of oranges or stick to a traditional lemon only curd. Top with fluffy meringue fired up with your kitchen torch and you have yourself a super fun and delicious cake!

chocolate buttermilk cakeTorched desserts always make me think of my mom. Along her love of crème brulée for its toasted tops, I inherited my mom’s style inclination for black clothes and tailored fashion. This watch from JORD watches is a perfect example of that and served as the inspiration for this recipe and its deep chocolate color and golden meringue tips. The band is made from ebony wood so it’s lightweight, but bold in style and I absolutely love the large watch-face and gold accents. JORD makes these gorgeous wood women’s watches and men’s watches with all different wood materials and in a variety of colors. I can’t wait to wear it all spring long. It goes perfectly with my wardrobe and with this fun chocolate buttermilk cake if I do say so myself!

chocolate buttermilk cakeThe wonderful JORD team is also offering a giveaway to help you to grab your very own! Enter to win a $100 Gift code to use towards your own JORD watch. Click here to enter!

To make things more fun, everyone will automatically receive a $25 code just for entering! The contest will close on 3/26 at 11:59pm. Both the $100 and the $25 codes will expire on 5/31/2017. Best of luck everyone!

chocolate buttermilk cake

Print
chocolate buttermilk cake with tangerine curd and toasted meringue

Servings: Makes a two-layer 9-inch cake

chocolate buttermilk cake

Ingredients

    For the cake:
  • 1 3/4 cups all-purpose flour
  • 2 cups granulated sugar
  • 3/4 cups unsweetened cocoa powder (I used Special Dark)
  • 2 teaspoons baking soda
  • 1 teaspoon baking powder
  • 1 teaspoon salt
  • 1 cup buttermilk, room temperature (shake and measure first)
  • 1/2 cup unsalted butter, at room temperature
  • 3 large eggs, at room temperature
  • 1 1/2 teaspoons pure vanilla extract
  • 1 cup freshly brewed coffee, hot
    For the Curd:
  • 4 large egg yolks (reserve whites for meringue)
  • 1 large egg
  • 2/3 cup granulated sugar
  • 1 1/2 tablespoons cornstarch
  • 1/4 teaspoon salt
  • 2 packed teaspoon grated tangerine zest (or sub orange)
  • 1/2 cup fresh tangerine juice (or sub orange)
  • 1/4 cup fresh lemon juice
  • 1/4 cup unsalted butter (4 tablespoons or 1/2 stick), room temperature, diced into tablespoons
    For the Meringue:
  • 8 large egg whites (1 cup)
  • 2 cups granulated sugar
  • 1/4 teaspoon salt
  • 2 teaspoons pure vanilla extract
    Special Equipment: Kitchen Torch

Instructions

  1. Make the Cake: Preheat the oven to 350°F. Spray two 9-inch x 1.5-inch round cake pans with non-stick baking spray. Line bottoms with parchment paper and spray the paper.
  2. In a medium bowl, whisk together the flour, sugar, cocoa, baking soda, baking powder, and salt.
  3. In the bowl of an electric mixer fitted with a paddle attachment, combine the buttermilk, butter, eggs, and vanilla (all room temperature!). With the mixer on low speed, slowly add the flour mixture to the buttermilk mixture until just combined. With mixer still on low, add the coffee and stir just until combined, scraping the bottom of the bowl with a rubber spatula. Divide the batter into the prepared pans and bake for 35 to 40 minutes, until a toothpick inserted into the center of the cake comes out clean. Cool in the pans for 30 minutes, then turn them out onto a cooling rack and cool completely.
  4. Make the Curd: In a small bowl, whisk together the 4 egg yolks and 1 egg. Set aside.
  5. In a medium saucepan, whisk together the sugar, cornstarch, salt, tangerine zest and juice, and lemon juice. Bring mixture to a boil over medium heat, stirring frequently, and allow to boil for 1 minute. The mixture will become shiny and almost translucent. Turn the heat off, and very slowly and gradually pour about 1/2 cup of the orange mixture into the egg mixture, whisking constantly to avoid the heat of the mixture from cooking the eggs. Then, pour the egg/orange mixture into the saucepan with the rest of the orange mixture, turn the heat on to low and, stirring constantly, allowing the curd to cook until thickened, about 4 minutes. Remove from heat and whisk in the butter. Scrape into a bowl and cover with plastic pressed to the curd’s surface. Refrigerate until cooled.
  6. Make the Meringue: Whisk together the egg whites, sugar and salt in the bowl of your stand mixer. Grab a saucepan that your mixer bowl will sit on top of to form a double boiler. Fill the saucepan with an inch of water and bring to a simmer over medium heat. Place your egg white/sugar filled mixture bowl on top of the saucepan (make sure the simmering water does not touch the bottom of the bowl—just the residual heat). Stir the mixture until all the sugar is melted into the eggs and you no longer feel any graininess when rubbed between your fingers, about 5 minutes. Be careful not to let the mixture get too hot as the eggs will cook—stirring constantly will help prevent this. If you’re worried that the mixture is getting too hot, remove from above the saucepan and stir without heat for a little bit before returning.
  7. Place the bowl onto your mixer, add the vanilla extract, and whisk on high speed until the meringue is thick and glossy and the bowl is just warmer than room temperature, about 8 minutes.
  8. Assemble: Place 1 cake layer, flat side up, on a flat plate or cake pedestal. With a knife or offset spatula, spread the top with curd, leaving about 1/2 inch perimeter as the curd will spread once you place the second cake layer on top. Place the second layer on top. Spread the meringue evenly on the top and sides of the cake. Don’t worry about making it smooth—the meringue is extra pretty when it forms random peaks. Torch the peaks with a kitchen torch.
6.1.0
https://www.butterlovescompany.com/2017/03/09/chocolate-buttermilk-cake/
butter loves company | jenna larsson

chocolate buttermilk cake

chocolate buttermilk cake

A big thank you to JORD Watches for partnering with me on this post. All opinions are my own!
Luxury Wooden Watch

Filed Under: desserts and sweets, eat Tagged With: buttermilk, chocolate, citrus, curd, meringue, orange, tangerine

thai chili coconut cream doughnuts

March 4, 2017 by Butter Loves Company

coconut cream doughnuts | butter loves company
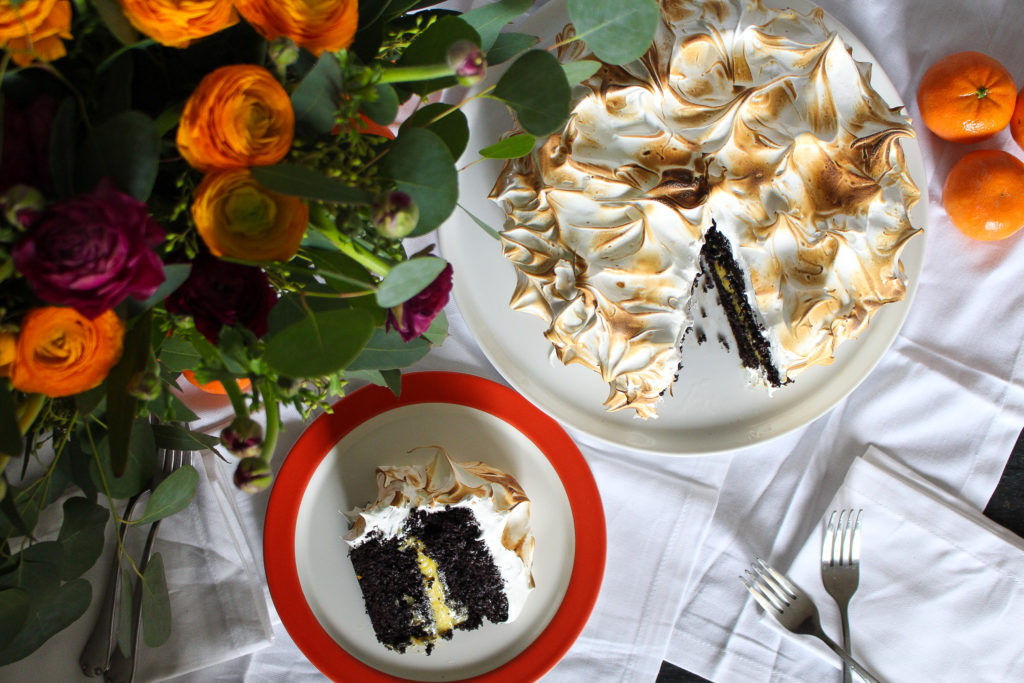
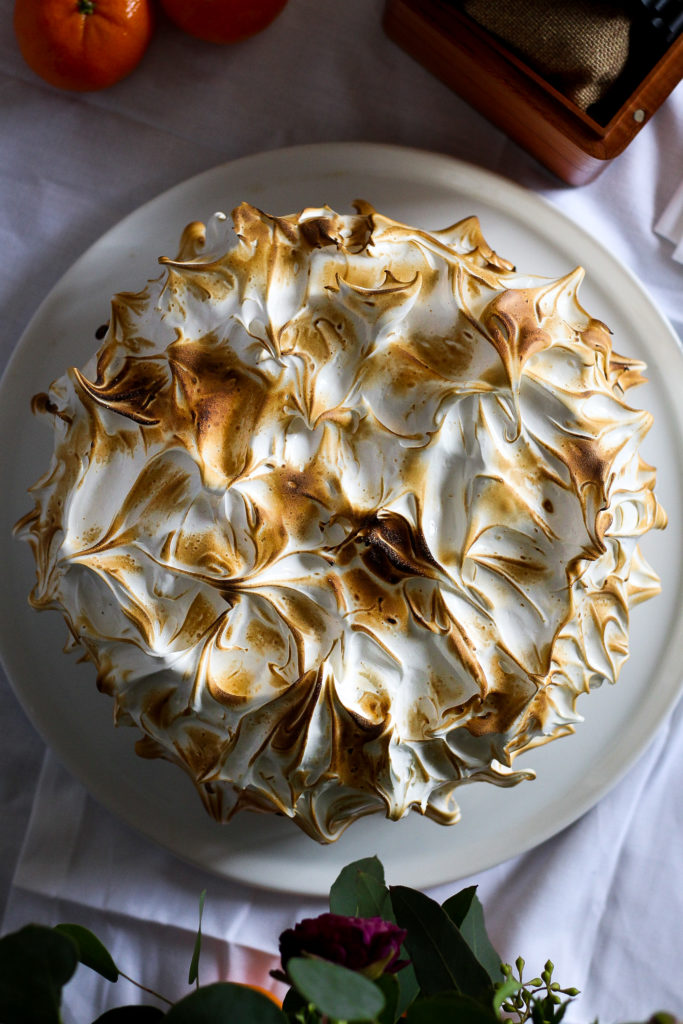
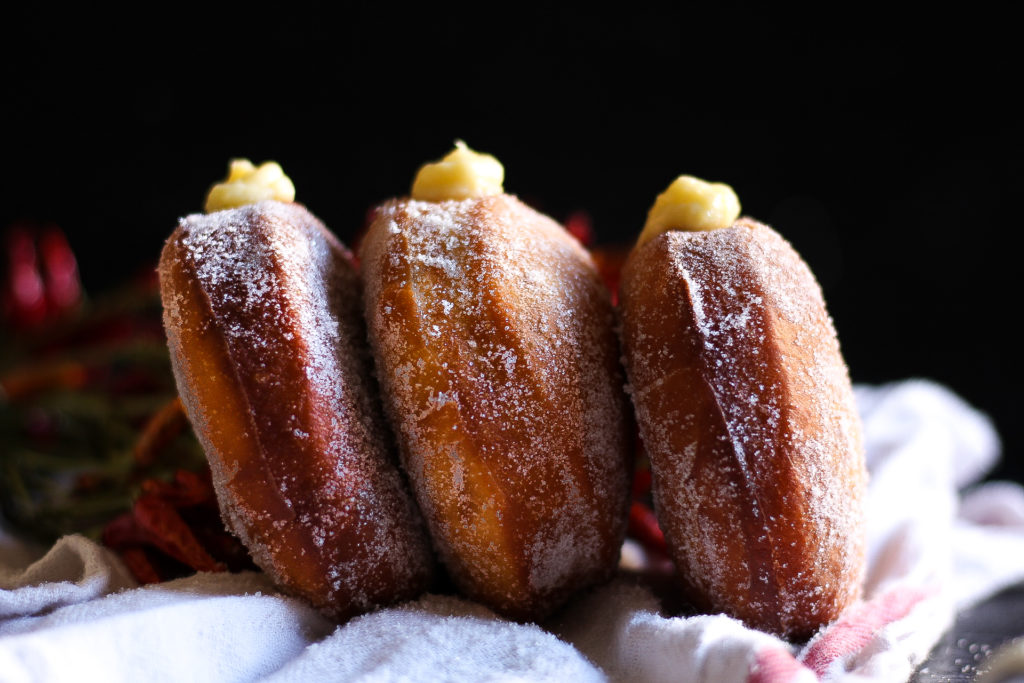
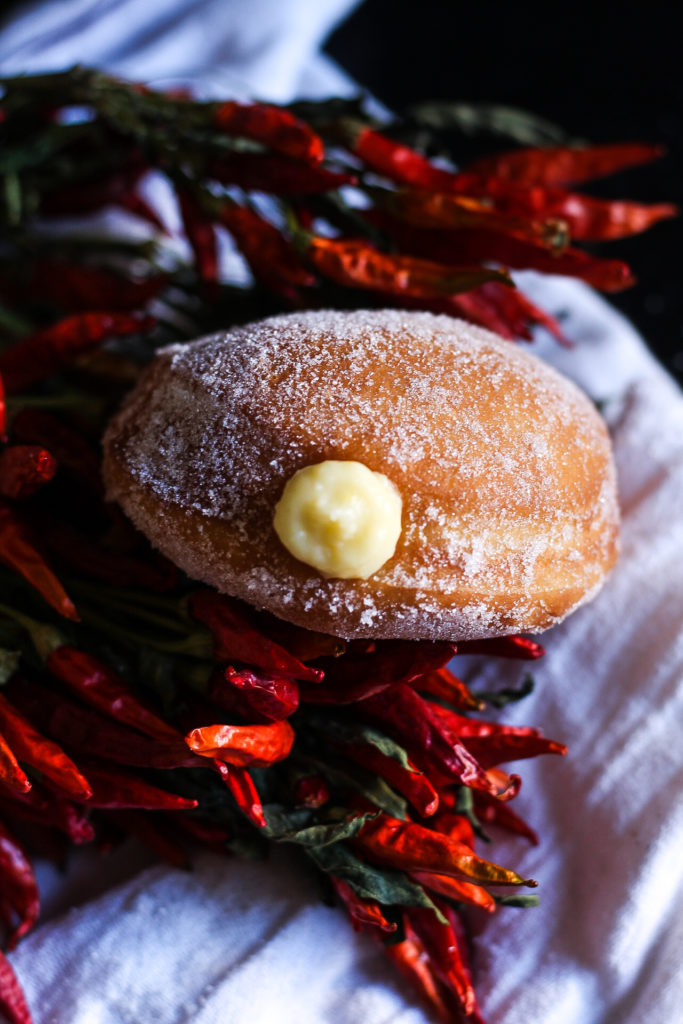
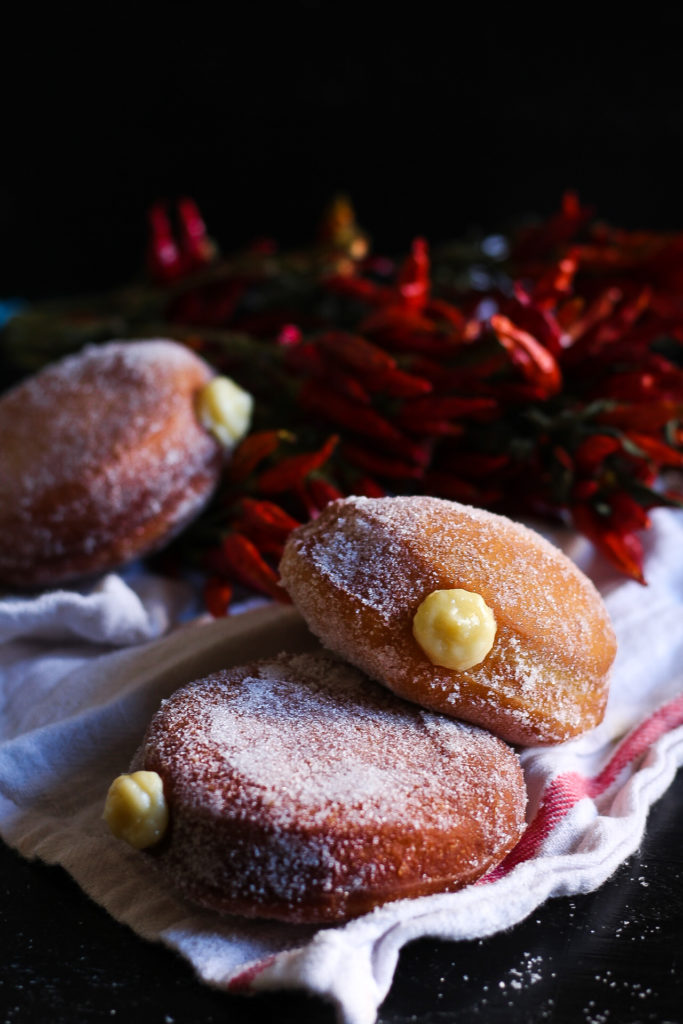
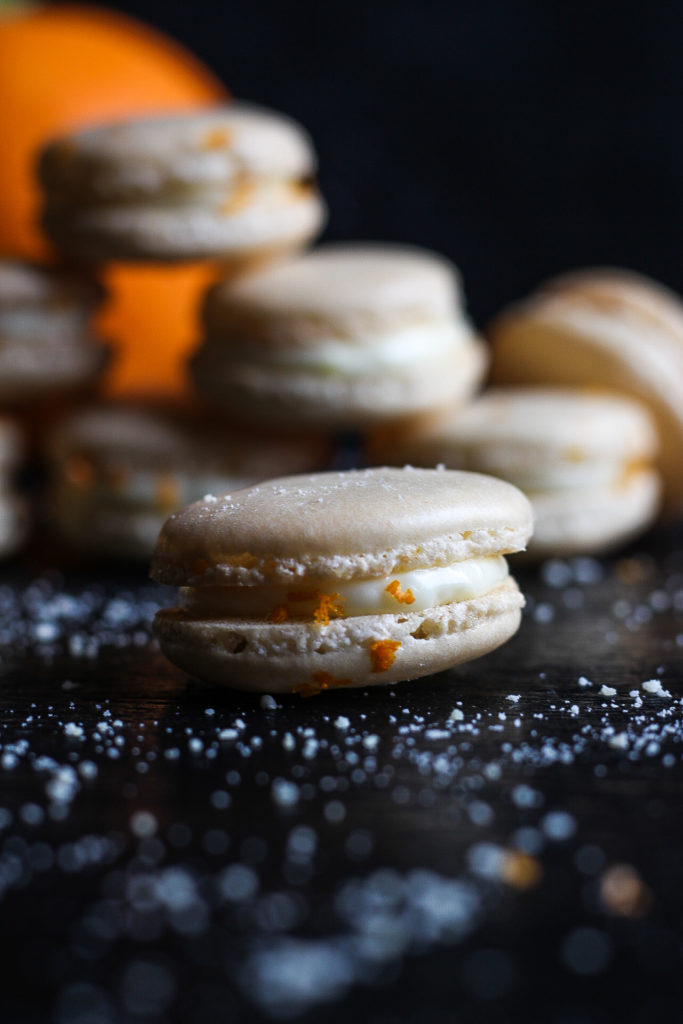
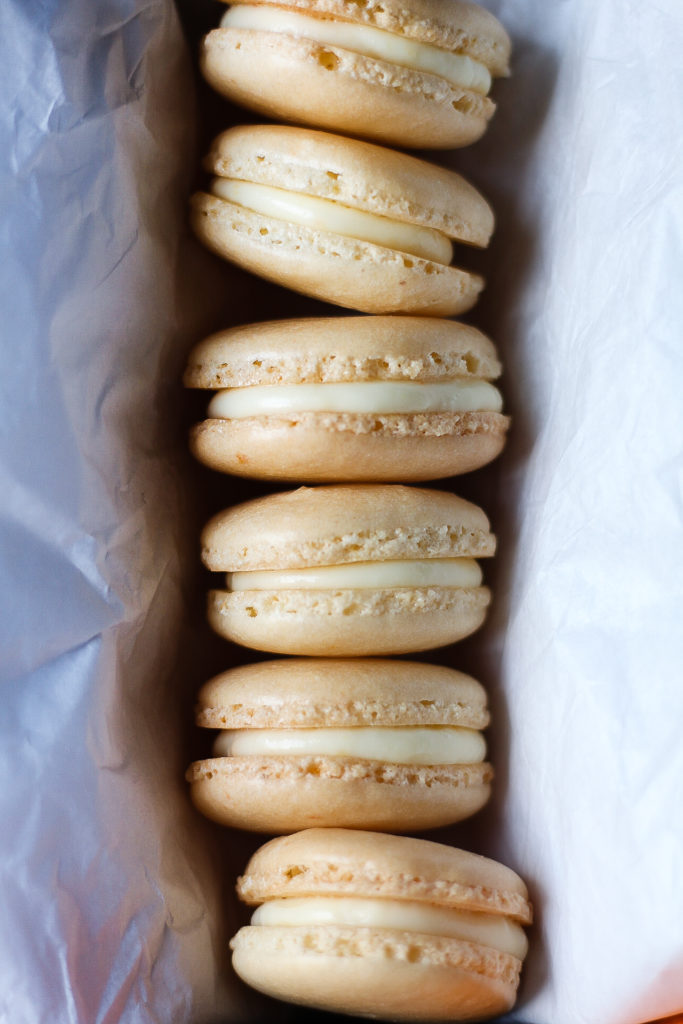
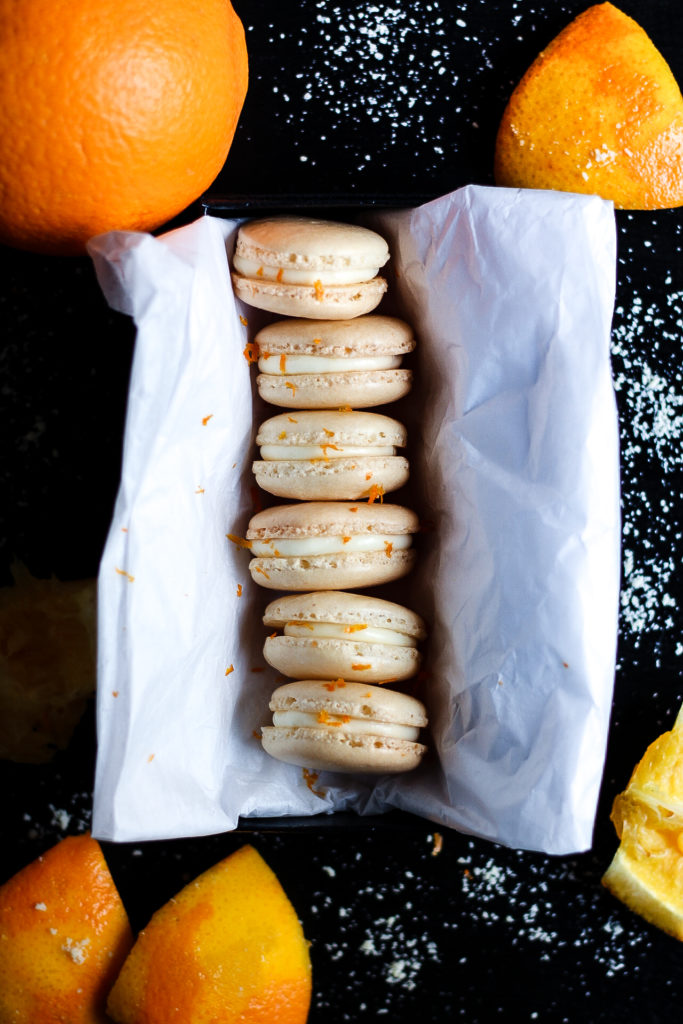
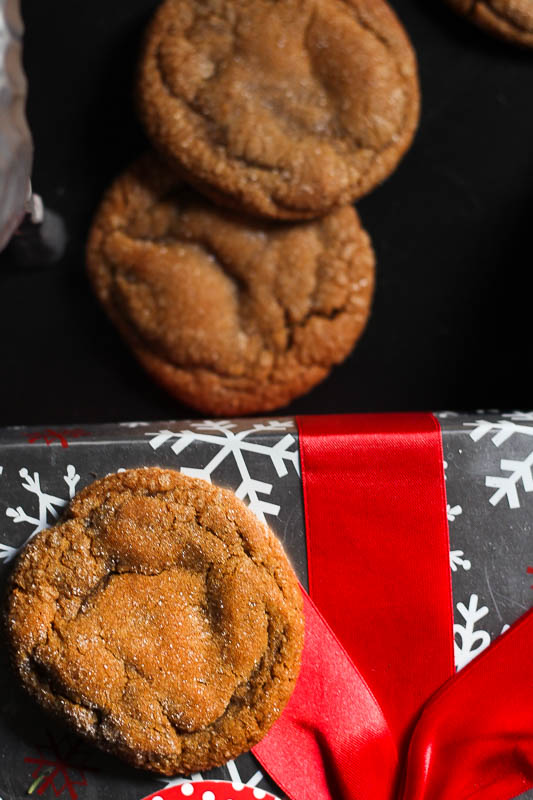
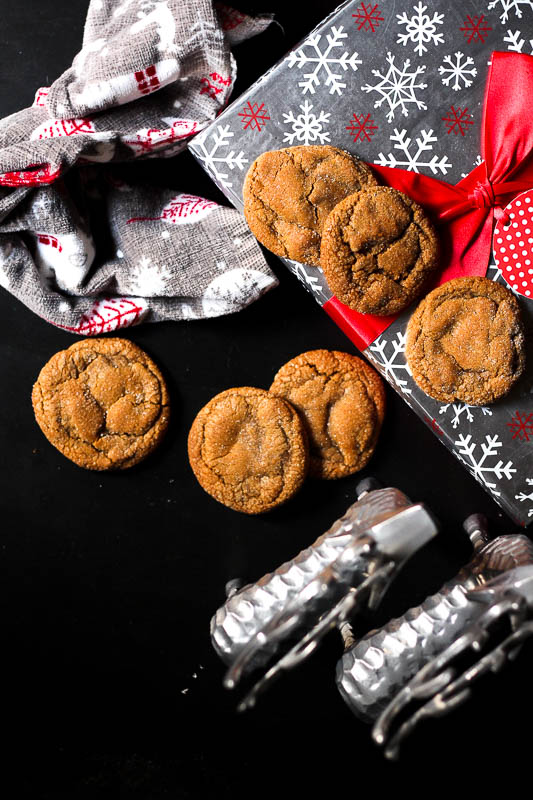
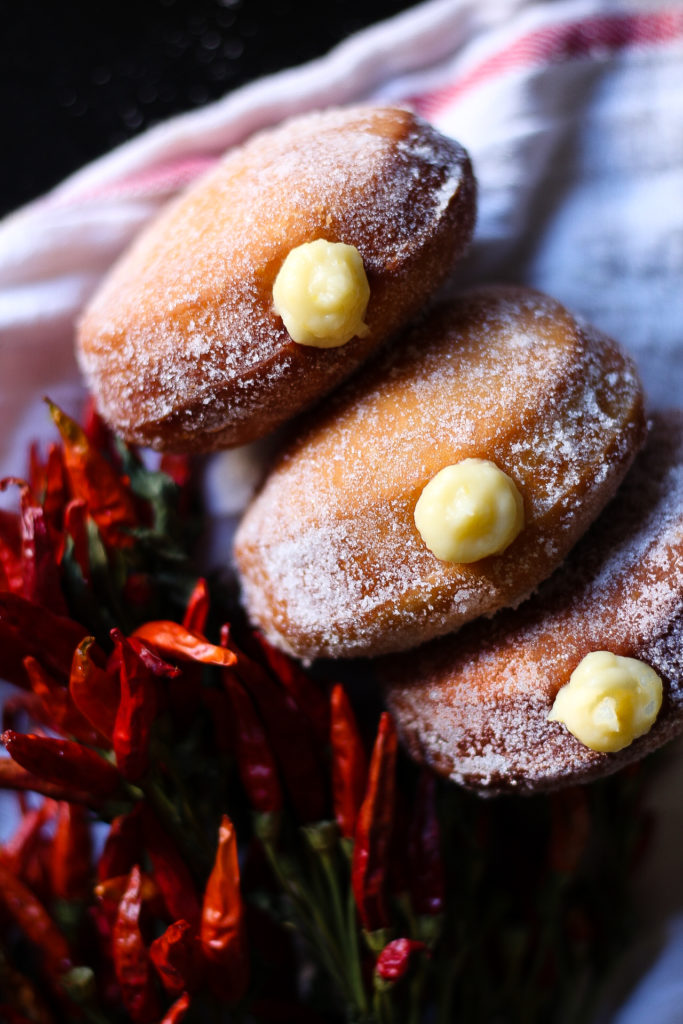
Sometimes you start the day with a nourishing smoothie, and end it with a doughnut. It’s all about that balance.

Ever since I made these brioche doughnuts, my mind has been swirling with reasons (excuses) to make them again. After one glance over my shoulder at the bushel of almost dried out Thai bird chilies hanging in our kitchen, I knew my next move. Herein, we have the Thai Chili Coconut Cream Doughnuts. As an ode to some of our favorite Thai curries, which are deep with heat, yet balanced by creamy coconut milk, we are steeping the Thai bird chilies in a milky cream of coconut mixture to create the coconut pastry cream that is piped into your freshly fried doughnuts.

The combination of buttery brioche dough rolled in vanilla sugar and the slightly spicy, creamy coconut filling is the one of the best excuses I could ever think of. For your filling, you’ll use some cornstarch to help your custard thicken up like a pastry cream. No Thai chilies? You could definitely omit and stick to a coconut cream. Alternatively, you could experiment with a jalapeno or serrano pepper—just be sure to test along the way to make sure your filling doesn’t end up too fire-y hot.

coconut cream doughnuts | butter loves company

These Thai Chili Coconut Cream Doughnuts are a great weekend project as the brioche dough is best prepped and shaped a day ahead, left to proof overnight in the refrigerator, and fried up on Sunday morning while you sip your coffee in your jammies.

Because the brioche doughnut dough takes a day to prepare (mostly inactive), it is great to prep the pastry cream the same day to mix the dough so it will be chilled and ready to use as soon as you you fry the doughnuts.

Here’s to a happy weekend!

coconut cream doughnuts | butter loves company

Print
Thai Chili Coconut Cream Doughnuts

Prep Time: 24 hours

Servings: Makes 8 large doughnuts

coconut cream doughnuts | butter loves company

Ingredients

  • 1 Recipe brioche doughnuts , making sure to use a round cookie cutter without a center hole, to shape.***Please See Note About Timing
  • 2 cups whole milk
  • 1/4 cup cream of coconut
  • 1/2 cup sweetened shredded coconut
  • 1/2 vanilla bean, seeds scraped or 1 teaspoon pure vanilla extract
  • 3–5 small red fresh or dried Thai bird chilies, with a small vertical slit cut into each
  • 4 large egg yolks
  • 1/4 cup granulated sugar
  • 1 tablespoon cornstarch
  • 1/4 teaspoon of salt

Instructions

  1. Prepare brioche doughnuts completely through frying and rolling in sugar. Set cooked doughnuts aside while preparing the filling.*
  2. In a medium bowl, whisk together the egg yolks, sugar, cornstarch, and salt. Set nearby.
  3. In a medium saucepan over medium high heat, bring the milk, cream of coconut, coconut, vanilla bean and seeds, and Thai chilies to a simmer. Stir until sugar dissolves and then reduce heat to a simmer. Turn off heat and steep for 5 minutes. Strain the liquid into a medium bowl to separate out the shredded coconut and Thai bird chilies. Discard the solids and return the liquid to the saucepan.
  4. Gradually pour about 1/3 of the warm milk mixture into the bowl with the eggs, whisking constantly to prevent the warm liquid from cooking the eggs. Pour the milk/egg mixture back into the saucepan with the rest of the milk mixture, turn the saucepan back to a low heat and whisk constantly until the mixture thickens enough to coat the back of a spoon without dripping off. Turn off heat and cool custard completely.
  5. Transfer the cooled custard to a piping bag fitted with a small pointy tip. Insert the tip of the piping bag into one of the prepared doughnuts and squeeze the filling into the doughnut until you can feel the sides of the doughnut puffing out slightly. Repeat with the remaining doughnuts.

Notes

*Alternatively, prepare the filling on the same day you prepare the doughnut dough. Chill while you fry the doughnuts and then fill the just-fried doughnuts with the chilled pastry cream.

6.1.0
https://www.butterlovescompany.com/2017/03/04/coconut-cream-doughnuts/
butter loves company | jenna larsson

coconut cream doughnuts | butter loves company

Filed Under: breakfast and breads, desserts and sweets, eat Tagged With: brioche, chili, coconut, cream, donuts, doughnuts, pastry cream, spicy, Thai

cara cara orange macarons

February 9, 2017 by Butter Loves Company

orange macarons - butter loves companyI recently came across a quote reading, “Cooks are superheroes with backwards capes.” It warmed my heart. As Supergreg begins a new professional venture in the world of superheroes, and I continue my adventures in the food world, I felt it comforting to read a line that so perfectly rounded out our home. One cape on the back, and one cape on the front!

Where Superman’s weakness is kryptonite, and Daredevil flounders amidst overpowering assaults of noise, this cook crumbles at the mere thought of French Macarons. Make no mistake though, I don’t consider it a weakness to love these fluffy-yet-somehow-crunchy little delights. In fact, I adore eating the pretty pastel pastries built of almond flour and meringue. The chewy, moist centers sandwiched within lightly crisped shells are basically an edible work of art. The problem is, you see, they can be a bit finicky in the making. I’ve lost many batches where the batter was too thick or too thin resulting in either empty shells or Hershey Kiss-shaped meringue drops. Stir the meringue too long, and risk a batter too runny. Too short, and you’ll end up with a tray of pastries resembling the poo-emoji (whoops!). I ogled at the beautiful macarons I hoped to make, complete with the signature “little feet”—those ruffle-y bottoms on the otherwise smooth shells.

orange macarons - butter loves company

If you’ve ever experienced a baking kryptonite of your own, I encourage you to keep trying. While I still have a ways to go, I was finally able to achieve feet with this recipe adapted from the base macaron instruction from Serious Eats. Because we are in the heart of citrus season, we brightened it up with a bit of Cara Cara oranges from the Hollywood Farmers’ Market. (If you follow along on Instagram, you know it’s my favorite weekly stop.) With orange zest in the shells and freshly squeezed juice swirled within a sweet and rich cream cheese filling, these Cara Cara Orange Macarons are ready to save your day!

orange macarons - butter loves company

Print
cara cara orange macarons

Servings: makes about 36 filled macarons

orange macarons - butter loves company

Ingredients

  • 125 grams almond flour
  • 225 grams confectioners’ sugar
  • 100 grams egg whites (from 3 to 4 large eggs)
  • 25 grams granulated sugar
  • 1/4 teaspoon cream of tartar
  • 1 tablespoon vanilla extract
  • 1 teaspoon Cara Cara orange zest (or other orange variety)
  • Filling:
  • 113 grams (1 stick) unsalted butter, room temperature
  • 113 grams (1/2 cup) cream cheese, room temperature
  • 125 ml (1/2 cup) fresh squeezed Cara Cara orange juice (or other orange variety)
  • zest of an orange
  • 66 grams granulated sugar
  • 1 teaspoon vanilla extract
  • Special Equipment: piping bag with round tip

Instructions

  1. In the bowl of a food processor, pulse together the almond flour and confectioners’ sugar for about 30 seconds. Sift into a clean bowl. (Re-pulse and re-sift any pieces that don’t fall through the sieve the first time. Toss any pieces that don’t fall through after the second round.) Set aside.
  2. In the bowl of an electric mixer fitted with the whisk attachment, whip the egg whites on medium speed until frothy. Add cream of tartar and then, with the mixer on low speed, gradually pour in the granulated sugar. Turn the mixer up to high speed and whip until the meringue forms firm, glossy peaks, about 5 minutes. (You can test this by turning off the mixer and lifting the whisk—meringue should stick on the whisk with sturdy peaks.). Add the vanilla and orange zest and whisk on high speed just to incorporate.
  3. Gently fold the almond mixture into the meringue with a rubber spatula, scraping around the sides and bottom. Continue folding until you can drop a dollop of batter into the mixture and it dissipates back into the mixture in between 30 and 60 seconds. Note: on each fold, the mixture will become runnier so be careful not to over mix.
  4. Center an oven rack in the middle of the oven, preheat oven to 300°F, and line 2 cookie trays with parchment. Using a pastry bag fitted with a small, round tip, pipe 1-inch circles of the batter onto prepared, leaving 1 1/2 inches between each. Tap the trays hard on the counter repeatedly to smooth out the tops and eliminate air bubbles. Bake trays one at a time for approximately 18–20 minutes each, until the tops are set and you can cleanly release a test cookie from the parchment. Cool completely on the trays before removing.
  5. Meanwhile prepare the filling by combining the sugar, orange juice, orange zest, and orange extract in a small saucepan over medium heat. Allow to simmer for about 5–7 minutes, until it becomes a thick syrup. Cool completely. In the bowl of an electric mixer, whisk together the cream cheese, butter, and vanilla extract. Add the cooled syrup mixture and mix to combine.
  6. Pipe or spread the filling onto the insides of half of the cooled cookies and sandwich it with the other half. Macarons keep well for a week-or-so in a sealed container in the freezer. They’re actually best after they’ve had a day or two to chill versus right when you make them. Bring to room temperature before serving.

Notes

Adapted from Serious Eats

6.1.0
https://www.butterlovescompany.com/2017/02/09/orange-macarons/
butter loves company | jenna larsson

Looking for another citrus season recipe? Check out this lemon loaf with lavender glaze.

orange macarons - butter loves company

Filed Under: desserts and sweets, eat Tagged With: citrus, french pastries, macarons, orange

chunky cookies and cream ice cream

February 1, 2017 by Butter Loves Company

Cookies and Cream Ice Cream

First of all, Mega Stuf Oreos exist. MEGA. STUFFED. Okay, now that that’s out of the way, let’s get to the ice cream. If you’re a cookies and cream person, I personally apologize that I cannot immediate scoop you a bowl.

This cookies and cream ice cream is pumped up with vanilla beans and loaded with the aforementioned Mega Stuf Oreo cookies. Since we’re leaving some of the Oreos in major chunks, you’ll get the speckled hints of chocolate cookies and cream distributed throughout the custard-based vanilla treat and you’ll also sink your teeth into crispy nuggets of the still intact cookies.

The past few times I’ve made ice cream, I’ve started with this base recipe from the New York Times. They claim it to be the only ice cream recipe you’ll ever need and the more time goes on, and the more cream and eggs I go through, the more I agree. It is a custard style ice cream with silky, creamy sweetness. It has never tasted “icy” or watery at all. It tastes like the best ice cream you’ve ever had from the little family owned shop you went to growing up. If you want to go a step further, you could even make Homemade Oreo Cookies to mix in!

Cookies and Cream Ice Cream

Print
chunky cookies and cream ice cream

Servings: Just over 1 quart

Cookies and Cream Ice Cream

Ingredients

  • 6 large egg yolks
  • 2 cups heavy cream
  • 1 cup whole milk
  • 2/3 cup sugar
  • 3/4 teaspoon salt
  • The beans scraped from 1 vanilla bean or 1 1/2 tablespoons vanilla extract or vanilla bean paste
  • 1 package of Oreo cookies or sandwich cream cookie of choice (I used Mega Stuf Oreos), crushed with some big chunks still remaining (you’ll only need to use about 3/4 of the package but the extra crushed cookies can be used for toppings, or feel free to only crumble up a portion of the package)
  • Special Equipment: Ice Cream Churner; I use this one from Cuisinart

Instructions

  1. In a small bowl, whisk together the egg yolks and set aside nearby. Also have a medium empty bowl or container and fine-mesh sieve nearby (we’ll strain the mixture into the container and allow it to set in the fridge).
  2. In a small pot, add the heavy cream, milk, sugar, salt, and vanilla and simmer together over low heat until sugar is dissolved, about 5 minutes. Remove from the heat and, whisking constantly, slowly whisk about a third of the cream mixture into the yolks (we’re tempering the yolks a little so they won’t cook when combined with the warm cream mixture). Then, whisk the full yolk mixture back into the pot with the rest of the cream. Over medium-low heat, gently cook the mixture, whisking constantly, until it is slightly thickened and coats the back of a spoon (about 170° on an instant-read thermometer).
  3. Strain into a container through the fine-mesh sieve. Cool to room temperature and then cover with foil and chill for at least 2 hours, or up to overnight. Churn in an ice cream machine according to the manufacturer’s instructions. Once churned, mix in the Oreos with a rubber spatula and transfer to a storage container. Freeze for at least 30 minutes before serving.

Notes

Adapted from the fabulous ice cream recipe from The New York Times

6.1.0
https://www.butterlovescompany.com/2017/02/01/cookies-and-cream-ice-cream/
butter loves company | jenna larsson

Cookies and Cream Ice Cream

Filed Under: desserts and sweets, eat Tagged With: frozen treats, ice cream, oreos

salty buttery popcorn cookies

January 22, 2017 by Butter Loves Company

Salty Buttery Popcorn CookiesIf you’ve spent any time in my parents’ house, at some point, you’ve certainly smelled or heard popcorn popping in the kitchen. It’s likely we’ve sat together on the couch, grabbing salty popcorn by the handfuls and nibbling on it for hours. You’ve probably seen big bowls of popcorn on the counter covered with tin foil for days, while almost everyone sneaks a couple kernels of stale popcorn on each trip to the kitchen.

My Mom—not one for sweets—has been popping popcorn multiple nights a week after dinner since before I can remember. Her popcorn pot is seasoned better than an antique cast iron skillet. Like I said, popcorn has just always been a staple in my parents’ house. Now, whenever I’m feeing homesick, I know making popcorn will give me a beautiful sense of comfort, and that’s a wonderful feeling.

These Salty Buttery Popcorn Cookies are inspired by my Mom’s popcorn but are appropriate for those who also do like sweets. They are distinctly salted with a mix of crunch and chew, thanks to the brown sugar and ample popcorn mixed in. I felt like white chocolate would be a natural addition, so ran with that, and had no regrets. I know white chocolate is polarizing so feel free to skip if you’re inclined.

The recipe is adapted from the recipe for popcorn cookies in Deb Perelman’s The Smitten Kitchen Cookbook. When I first flipped to the page and saw bits of popcorn poking out of golden brown cookie mounts, I knew they would be a favorite.

Salty Buttery Popcorn Cookies

Print
Salty Buttery Popcorn Cookies

Prep Time: 25 minutes

Cook Time: 12 minutes

Servings: Makes about 16 big cookies

Salty Buttery Popcorn Cookies

Ingredients

  • 2 tablespoons (30 ml) coconut oil or vegetable oil
  • 1/4 cup (45 grams) popcorn kernals (will be about 4 to 4 1/2 cups popped popcorn)*
  • 1/2 teaspoon salt
  • 3 tablespoons unsalted butter, melted
  • 1/2 cup (115 grams or 1 stick), unsalted butter at room temperature
  • 1/2 cup (95 grams) light brown sugar, packed
  • 1/3 cup (65 grams) granulated sugar
  • 1 large egg
  • 1 teaspoon vanilla extract
  • 1 1/4 cup (155 grams) all-purpose flour
  • 1/2 teaspoon baking soda
  • 1/4 teaspoon baking powder
  • 1/4 teaspoon salt
  • 1/2 cup white chocolate chips (optional)

Instructions

  1. Have a large bowl standing by. Pour the oil into a medium heavy saucepan (with a lid) and add the popcorn kernels shaking the pan a little so they lay in one layer. Cover and heat over medium-high heat, allowing the popcorn to pop (if your cover does not have a little steam hole, off-set the lid so there is a tiny crack of open air for the steam to come out). Keep over heat until the continuous popping subsides, turn off the heat and carefully pour the popcorn into the large bowl. Toss with the 1/2 teaspoon salt and 3 tablespoons melted butter to coat. Set aside to cool. You should have 4 to 4 1/2 cups of popped popcorn.
  2. Preheat the oven to 350° and line 2 cookie sheets with parchment paper. In the bowl of an electric mixer fitted with the paddle attachment, cream together the butter, light brown sugar, and granulated sugar until light and fluffy, about 5 minutes. Add the vanilla and egg and mix to combine.
  3. In a separate bowl, whisk together the flour, baking soda, baking powder, and salt. Gradually pour the flour, followed by the white chocolate chips (if using) into the butter sugar mixture and mix to incorporate. Remove the bowl from the mixer and, using a spatula, fold in the cooled popcorn, carefully so as not to mix in any kernels that did not pop. Continue folding it in until it is incorporated—it is okay if some of the popcorn breaks. Scoop heaping tablespoons of the dough onto the prepared baking sheets, leaving 2 1/2 inches between each mound. Bake for 10 to 12 minutes or until the edges are golden brown and the centers don’t look completely gooey. Let cool on the sheets a few minutes to set before transferring to a wire rack to cool completely.

Notes

Adapted from Deb Perelman's popcorn cookie recipe in The Smitten Kitchen Cookbook. *You could also use microwave popcorn if desired. Since they are typically buttered/salted, I would skip adding more butter and salt to the popcorn once popped.

6.1.0
https://www.butterlovescompany.com/2017/01/22/popcorn-cookies/
butter loves company | jenna larsson

Salty Buttery Popcorn Cookies

THIS POST INCLUDES ONE OR MORE AFFILIATE LINK; MEANING IF YOU CLICK ON THE LINK AND MAKE A PURCHASE, BUTTER LOVES COMPANY RECEIVES A VERY SMALL PERCENTAGE OF THE SALE AT NO EXTRA COST TO YOU. AS ALWAYS, ALL OPINIONS ARE MY OWN! 

Filed Under: desserts and sweets, eat Tagged With: cookies, popcorn, white chocolate

confetti broyé

January 15, 2017 by Butter Loves Company

broye | butter loves company

I could hear the shaking of the front entrance’s old doorknob as the key sought its place in the lock. A slight scrape as the uneven floor caught the door’s edge, energetic steps climbing to the next floor, a final jingle of keys as they opened up our little Boston apartment, and just like every day, he was home. But today, under his arm was a cookbook he brought home for me from his publishing job, Dorie Greenspan’s Around My French Table. I felt like the luckiest girl.

As I do with any cookbook I encounter, I read it cover-to-cover, inspired by the stories and food from Dorie’s time in France. One of the first recipes I tried was for Broyé. Hailing from the Poitou-Charentes region of France, it is a massive, buttery, distinctly salty cookie meant to be placed in the center of your table and shared. The concept was perfect to me and, immediately, I was in love.

A lot has happened since I first opened that book, and many a broyé have been baked. I feel grateful to have recently had the opportunity to meet Dorie in Los Angeles at an event for her latest book. Briefly talking with her and hearing her speak about food and her career almost brought me to tears on several occasions. I couldn’t help but imagine myself three years prior in that freezing cold apartment in Boston, snuggled into bed, flipping through the pages of her book, never imagining that taking a few steps (more like 3,000 miles) out of my comfort zone, failing, picking myself up, and trusting myself to pursue this food world further (with Greg’s unwavering support and encouragement), would lead me to sitting in that room. It was a moment where you feel like, despite its challenges, pursuing your passions is worth it. Even if you land somewhere in the middle, that can feel pretty darn good.

In honor of that feeling, we’re baking up a broyé, today. This time it’s getting the party treatment, with sprinkles, milk, vanilla and almond extracts. This cookie comes together in your food processor and is then chilled and rolled out (similar process to that of pie crust, for example). Don’t be afraid to let the edges reach a deep golden brown as the crispness contrasts the cookie’s soft center perfectly.

I’ll set this one out on the counter and we’ll break off pieces as soon as Greg swings through that door.

broye | butter loves company

Print
confetti broyé

Prep Time: 1 hour, 10 minutes

Total Time: 1 hour, 10 minutes

Servings: serves about 6

broye recipe

Ingredients

  • 1 3/4 cups unbleached all purpose flour
  • 2/3 cups granulated sugar
  • 3/4 teaspoon coarse salt
  • 1 teaspoon vanilla extract
  • 1/8 teaspoon almond extract
  • 9 tablespoons (1 stick plus 1 tablespoon) cold unsalted butter, cut into 18 pieces
  • 3–6 tablespoons cold whole milk
  • 3 tablespoons sprinkles of your choice (except non-pareils—they will melt too easily)
  • 1 egg yolk, for glazing

Instructions

  1. In the bowl of a food processer, pulse together the flour, sugar, salt, and both extracts to combine. Drop in the butter and pulse until the butter is in both pea-sized pieces and some in small flakes, about 8 to 9 one-second pulses. With the machine running, start gradually adding the cold milk; adding just enough for the mixture to produce a malleable dough. Pulse in the sprinkles until distributed.
  2. Scrape the dough onto large piece of plastic wrap. Pat it together into a disk and wrap tightly with plastic and refrigerate for about 1 hour (30 minutes in the freezer).
  3. When you’re ready to bake, preheat the oven to 350°F. Line a baking sheet with parchment paper. Place the chilled dough between 2 sheets of plastic wrap or wax paper and, with a rolling pin, roll it into a rectangle that’s about 1/4-inch thick and about 5 inches wide x 11 inches long. Keep in mind, it should be rustic looking! Don’t worry about exact size or even edges. Transfer the dough to the lined baking sheet.
  4. Beat the egg yolk with a few drops of water to create the glaze, and, with a pastry brush, paint the top surface of the dough with the glaze. Use the back of a fork to create a crosshatch pattern, if desired.
  5. Bake the cookie for 25 to 35 minutes, or until it is deep golden. It’s okay if the edges seem to get a bit darker, it’ll only add to the different textures when you break it up. Let the cookie cool to room temperature. Place the cookie in the center of your table and let your friends and family reach their hands in and crack off pieces.

Notes

adapted from Dorie Greenspan

6.1.0
https://www.butterlovescompany.com/2017/01/15/confetti-broye/
butter loves company | jenna larsson

broye | butter loves company

THIS POST INCLUDES ONE OR MORE AFFILIATE LINK; MEANING IF YOU CLICK ON THE LINK AND MAKE A PURCHASE, BUTTER LOVES COMPANY RECEIVES A VERY SMALL PERCENTAGE OF THE SALE AT NO EXTRA COST TO YOU. AS ALWAYS, ALL OPINIONS ARE MY OWN! 

Filed Under: desserts and sweets, eat Tagged With: cookies, funfetti, table cookie

drizzled chocolate peppermint cookies

December 12, 2016 by Butter Loves Company

chocolate peppermint cookies | butter loves company

I’m very aware that the “chocolate with mint” camp is a divided one. On the one side, there are those who treasure the combination of rich chocolate with refreshingly herbaceous mint and leap at the opportunity to lick mint chocolate chip ice cream or crunch on a Girl Scout Cookie Thin Mint. On the other side, there are those who believe mint should be reserved for things like toothpaste and gum—adding the fragrant herb is simply not something they cannot get behind.

That said, while these chocolate peppermint cookies are mainly for those who appreciate the flavor combination, I think naysayers would be pleasantly surprised with the subtly of the peppermint as a complement to this cookie’s rich chocolate flavor.

drizzled chocolate peppermint cookies | butter loves company

With melted bittersweet chocolate in the batter, along with chocolate chips, followed by chocolate drizzle on top, these cookies do not lack chocolate. There is just a dash of peppermint extract in the batter (which could actually be omitted) and festive candy cane crumbles on top resulting in just enough peppermint essence to give you a cooling freshness between bites of chocolate, but not too much to be overpowering.

These chocolate peppermint cookies keep well in the freezer (fully baked, sealed tightly, for up to 3 weeks); making them a perfect option for baking ahead around the holidays. They also look beautiful on a holiday dessert table—you may even see your uncle who hates chocolate and mint together grabbing for one.


drizzled chocolate peppermint cookies | butter loves company

Print
drizzled chocolate peppermint cookies

Prep Time: 30 minutes

Cook Time: 10 minutes

Servings: About 30 cookies

chocolate peppermint cookies | butter loves company

Ingredients

  • 2 1/2 cups bittersweet chocolate chips (60% cacao or below), divided
  • 1/2 cup (1 stick) unsalted butter, room temperature
  • 1 cup granulated sugar
  • 1 teaspoon vanilla extract
  • 1/4 teaspoon peppermint extract
  • 2 large eggs
  • 1 1/2 cups all purpose flour
  • 1/4 cup natural unsweetened cocoa powder (not Dutch-processed)
  • 1 teaspoon baking powder
  • 1 1/4 teaspoon instant espresso powder
  • 1/2 teaspoon salt
  • 4–6 peppermint candy canes (depending on size), crushed, for topping

Instructions

  1. Preheat your oven to 375°F and line 2 cookie trays with parchment paper. Set aside.
  2. In a medium microwave safe bowl, melt 2 cups chocolate chips in the microwave until just smooth—I like to do this in 15- to 30-second intervals as to avoid overheating the chocolate—stirring with a rubber spatula each time. Separate out 1/2 cup of the melted chocolate and reserve in a separate small bowl for drizzling on the cookies after they’ve baked. You should be left with 1 1/2 cups melted chocolate—this will be used for the batter.
  3. In the bowl of an electric mixer fitted with the paddle attachment, cream the butter and sugar together until light and fluffy, about 5 minutes. Beat in the eggs and both extracts until smooth. Beat in remaining 1 1/2 cups melted chocolate.
  4. In a separate medium bowl, whisk together the flour, cocoa powder, baking powder, espresso powder, and salt. Slowly add dry ingredients to the butter mixture, beating until just combined. Mix in the in remaining 1/2 cup un-melted chocolate chips. Scoop heaping tablespoons of dough, rolling to form balls, place on prepared baking sheets leaving 1 1/2 inches between each.
  5. Bake until the edges have set and the tops having some cracks, about 8 to 10 minutes. Cool cookies on baking sheet until room temperature before drizzling.
  6. Using a fork, drizzle the remaining melted chocolate over cookies (rewarm briefly in the microwave first, if needed). Sprinkle crushed candy canes over the top. Baked cookies can be made 3 weeks ahead. Store airtight in freezer and bring to room temperature before serving.

Notes

Adapted slightly from Epicurious

6.1.0
https://www.butterlovescompany.com/2016/12/12/chocolate-peppermint-cookies/
butter loves company | jenna larsson

drizzled chocolate peppermint cookies | butter loves company

More for your chocolate lovers:

triple chocolate cookies

homemade oreo cookies

chocolate marble loaf cake

chocolate pecan torte with strawberry buttercream

Filed Under: desserts and sweets, eat, recipe posts Tagged With: chocolate, christmas cookies, cookies, peppermint

molasses cookies

December 8, 2016 by Butter Loves Company

molasses cookies recipe 1If you’re like me, you’ve been humming “It’s the Most Wonderful Time of the Year” since the moment the cranberry sauce and mashed potatoes were cleared from your Thanksgiving table. The ‘it’s too early for Christmas decorations’ shame flew off, and the holiday jammies and baking mitts went on.

Molasses cookies have long been a favorite of mine because of their warming spiciness and their moist and chewy profile. The perfect molasses cookies, IMHO, are always rolled in granulated sugar before baking, and should be moist (almost wet) in their centers. They should hold their circular shape and have firm edges and crackled tops—the signature sign of flawless crunch to chew ratio.

It has taken me years to develop a molasses cookie recipe that embodied all the characteristics I was looking for. Many attempts resulted in cookies with too much spread and bend (too much moisture), or were too crunchy without that essential chew (too little moisture). This recipe yields a cookie that fits my long molasses cookie wish-list. I hope (and think) it will fit yours too. After all, I did make the list… and checked it twice. 😉

Bonus: baking these cookies will save some burn time on your favorite holiday candle. They fill your home with the most festive aroma!

Bonus Bonus: these cookies should not be limited to the holiday season alone. I’ve declared these cookies as the perfect texture for ice cream cookie sandwiches. If you try that, please let me know how they come out, and what ice cream flavor you chose for the middle!

Print
molasses cookies

Prep Time: 20 minutes

Cook Time: 15 minutes

Servings: Makes about 16 cookies—I usually double the recipe and save half in the freezer for a rainy day

molasses cookies recipe 1

Ingredients

  • 12 tablespoons (1 1/2 sticks) unsalted butter, at room temp
  • 1 cup (200 grams) sugar, plus 1/4 cup for rolling
  • 1/4 cup (90 ml) molasses
  • 1 large egg, at room temp
  • 2 1/2 cups (325 grams) all-purpose flour
  • 1 1/2 teaspoons ground cinnamon (don't be afraid to go a little heavy handed with these spices)
  • 3/4 teaspoon ground cloves
  • 3/4 teaspoon ground ginger
  • 1/4 teaspoon ground nutmeg
  • 1/2 teaspoon salt
  • 1 teaspoon baking soda

Instructions

  1. In the bowl of an electric mixer fitted with the paddle attachment, cream together the butter and 1 cup sugar on medium speed until really light and fluffy, about 5 minutes. Add the molasses and mix to combine. Add the egg and mix to combine.
  2. In a separate medium bowl, sift together the flour, spices, salt and baking soda. With the mixer on low speed, gradually add the flour mixture to the butter mixture and mix until all of the flour has been incorporated. Scrape down the sides and bottom of the bowl to make sure it has all been mixed together. Wrap the dough in plastic and chill in the refrigerator for at least 2 hours and up to 24 (or at least 30 mins in the freezer if you're itching to bake them asap!). Or leave the dough in the bowl and press a piece of plastic wrap across the dough’s surface and refrigerate in the bowl.
  3. When you’re ready to bake, preheat the oven to 350°F and line two baking sheets with parchment paper. Remove the dough from the fridge and fill a small bowl with the remaining 1/4 cup sugar. Scoop out a heaping tablespoon of dough and roll it into a ball with your hands. Roll the dough ball in the sugar so it is coated and then place on the prepared baking sheet. Repeat with the remaining dough, leaving 3 inches between each cookie on the sheets. Bake for 13 to 15 minutes or until the edges of the cookie have set and the center is puffed and beginning to crack slightly (they may look very puffy but will settle down as they cool). Remove from the oven and let cool on their trays.
6.1.0
https://www.butterlovescompany.com/2016/12/08/molasses-cookies/
butter loves company | jenna larsson

molasses cookies recipe 5

The cookies don’t have to end there! Here’s a few others you might enjoy:

white chocolate macadamia cookies

triple chocolate cookies

bakery-style sugar cookies

iced brownie thins

Filed Under: desserts and sweets, eat, recipe posts Tagged With: christmas cookies, cookies, holiday, molasses

« Previous Page
Next Page »

Welcome!

jenna of butterlovescompany

Pull up a chair

Hi! I’m Jenna. Story seeker, food lover, recipe developer based in NYC. Firm believer in making every day delicious! Read more…

looking for something?

  • Email
  • Facebook
  • Instagram
  • Pinterest
  • RSS
  • Twitter

Latest Posts

  • Freezer Meals to Make Before Baby: How We Meal Prepped Before Baby
  • mom’s famous spiced pecans
  • funfetti cookie dough truffles (no-bake)
  • maple coconut cookies
  • snickerdoodle blondies

popular now

braised short rib pasta sauce (short rib ragu)
rosemary honey buttermilk biscuits
strawberry cinnamon rolls
bourbon banana bread
chocolate marble loaf cake
chocolate pecan torte with strawberry buttercream

grammin’

Let’s get ready to bake throughout the holidays! Let’s get ready to bake throughout the holidays! I’ve teamed up with @lucky_leaf_fruit_filling, @diamondnuts and #Kids360 to give away some delicious baking ingredients to make your spirits bright this season. 

To enter:
-Follow @lucky_leaf_fruit_filling, @diamondnuts and @butterlovescompany
-Comment and tag a friend and the name of your favorite holiday dessert
-Enter by December 1. Winner will be selected at random and DM’d! 

You’ll win: 
•(1) Can of Lucky Leaf Premium Blueberry Filling
•(1) Can of Lucky Leaf Premium Apple Filling
•(1) Can of Lucky Leaf Premium Cherry Filling
•(1) Can of Lucky Leaf Premium Strawberry Filling
•(1) Can of Lucky Leaf Premium Peach Filling
•(1) Recipe Book
•(2) Dish Towels
•(1) Pot-Holder
•(1) Picnic Basket

#ad NO PURCHASE NECESSARY. Open to legal residents of the United States (including its commonwealths, territories, and possessions) who are legal age of majority. Enter by 11:59 pm ET on December 1, 2021. Odds of winning depend on # of entries received. Void where prohibited. This is not sponsored or endorsed by Instagram or Facebook.
This was the best photo we could get with an alway This was the best photo we could get with an always moving toddler. 🥸 Happy Thanksgiving to you and yours! ♥️
Something that the past year or so has taught me: Something that the past year or so has taught me: stock your pantry! Having a stocked kitchen has made it super easy to cook and bake without having to run out to the store. Crucial when you get a craving for an Apple Walnut Cake and need to make one stat. With @lucky_leaf_fruit_filling and @diamondnuts, you can put together a delicious cake SO easily with no peeling and slicing of apples. 🍎🌰You get all the beautiful warm spice flavor with sweet, tart apples, and crunchy, hearty walnuts. #ad Get the recipe below: 

Apple Walnut Cake

* 1 box (15.25 oz.) spice cake mix
* 1 can (21 oz.) Lucky Leaf® Premium Apple Fruit Filling
* 2 large eggs
* 1 tbsp. pure vanilla extract
* 1/4 cup whole milk
* 1/4 cup brown sugar
* 1 tsp. ground cinnamon
* 1/2 cup finely chopped Diamond of California® Shelled Walnuts
* 1 container (8 oz.) whipped topping, thawed

Instructions
1. Preheat oven to 350° F and grease 9x13-inch pan. 
2. Combine dry cake mix, apple filling, eggs, vanilla & milk in large bowl. Beat for 2 minutes. Spread half of the batter in the pan. 
3. Make the Walnut Cinnamon filling: Combine brown sugar, cinnamon and walnuts. Sprinkle half the mixture on top of batter. Top with remaining batter and then sprinkle remaining walnut mixture on top.
4. Bake cake for 28-33 minutes. Cool cake. Top with whipped topping and sprinkle with walnut pieces.

Don’t miss my upcoming chance to W I N with #kids360, Diamond and Lucky Leaf!
Spiced pecans, wedding cookies, chocolate turtles, Spiced pecans, wedding cookies, chocolate turtles, pecan pie, sticky buns…just a few of the treats on my standard holiday baking agenda. What do they have in common? NUTS! @diamondnuts are a staple around here for the holidays (and all year, let’s be honest) and I want to share the love. Thanks to Diamond and #kids360, we are giving someone ✨15 FREE product coupons for @diamondnuts ✨to help you bake your holiday treats this year. Go nuts!

To enter:
* Follow @diamondnuts and @butterlovescompany
* Comment and tag a friend who deserves a day off to go nuts! 
* Enter by end of day November 25th. Winner will be selected at random and DM’d! 

#ad NO PURCHASE NECESSARY. Open to legal residents of the United States (including its commonwealths, territories, and possessions) who are the legal age of majority. Enter by 11:59 pm ET on November 25, 2021. Odds of winning depend on # of entries received. Void where prohibited. This is not sponsored or endorsed by Instagram or Facebook.
No gimmicks, no “just for the ‘gram” razzle No gimmicks, no “just for the ‘gram” razzle dazzle here. Just really good chocolate chip cookies.🍪
Fun fact: Layered Magic Cookie Bars were one of th Fun fact: Layered Magic Cookie Bars were one of the first things I ever baked. Making them again with @diamondnuts makes me super nostalgic. Brought me directly back to middle school. Watch out or you may find me in butterfly clips doodling I <3 SOS on my binder soon. There is a reason this recipe is awesome: first, the cookie bars are incredibly delicious. And, second, they are SO easy to put together. Honestly, they are the PERFECT treat to make with your kids. Pecans and walnuts give the bars the best crunch, nuttiness, and heartiness. You could totally customize if there is a certain kind of jam you love, or a combination of nuts that the family loves. #ad Get the recipe below: 

Seven Layer Magic Cookie Bars

* 1/2 cup (1 stick) butter, melted
* 2 cups graham cracker crumbs
* 1 cup raspberry jam
* 1 cup shredded coconut
* 1 cup Diamond of California® walnuts
* 1 cup Diamond of California® pecans
* 1 cup semi-sweet or bittersweet chocolate chips
* 1 (14-ounce) can sweetened condensed milk

Instructions
1. Preheat oven to 350°F. To toast walnuts and pecans, spread evenly on a baking sheet or in a shallow pan. Bake, stirring once or twice, until lightly browned and fragrant, 7 to 10 minutes. Line a 9×13-inch pan with parchment paper.
2. In a medium bowl, combine the melted butter and graham cracker crumbs; mix well. Transfer the crumbs to the prepared pan and using your finger tips, or the flat bottom of a small measuring cup, press firmly and evenly on the bottom of the pan. Spread the raspberry jam evenly over the crumbs. Sprinkle coconut in an even layer over the jam, followed by the chocolate chips, walnuts and pecans. Drizzle the condensed milk evenly over the top.
3. Bake until bubbling and golden brown, 30-35 minutes. Let cool completely in the pan. If lined with parchment, lift out and place on a cutting board. With a sharp knife, cut into bars.

Look out for an upcoming chance to ✨ w i n ✨with @diamondnuts and #kids360!
Raise your hand if you could use a cup of coffee. Raise your hand if you could use a cup of coffee. 🙋 We are giving away some @timhortonsus coffee goodies so you can get your cozy cool morning on with Canada’s favorite cup of joe. Make my Pumpkin Coffee Coffee Cake for a buzzy morning snack or just brew a strong cup for a little pep in your step (as tired parents over here, we could surely use it). 🍂

To enter:
● Follow @butterlovescompany and @timhortonsus
● Comment and tag a friend you would love to grab coffee with ☕ (each comment=1 entry)
● Enter by midnight November 18. Winner will be selected at random and DM’d!
 
You’ll win:
•(1) Colombian Ground Coffee
•(1) Dark Roast Ground Coffee
•(1) Decaf Ground Coffee
•(1) Whole Bean Original Blend Coffee
•(1) Keurig Variety 30-Pack
•(1) Mug
•(1) Branded Notebook
•(1) Branded Baseball Cap
 
 
ad #timhortons #kids360 NO PURCHASE NECESSARY. Open to legal residents of the United States (including its commonwealths, territories, and possessions) who are legal age of majority. Enter by 11:59 pm ET on November  18, 2021. Odds of winning depend on # of entries received. Void where prohibited. This is not sponsored or endorsed by Instagram or Facebook.
Can’t beat a classic. 🥧 Apple streusel pie fo Can’t beat a classic. 🥧 Apple streusel pie for yesterday’s friendsgiving.🥰 Grateful for time with friends enjoying great food. Remy had so much fun playing that he slept until 7am so we are hopefully out of the 4am daylight savings nightmare (knock on wood). 

Sunday includes a farmers market bop, movies, and cooking for the week. Wouldn’t change a thing. 🥳
Cannot. Get. Enough. Fall. Baking. Who’s with me Cannot. Get. Enough. Fall. Baking. Who’s with me? 🍁  This coffee cake packs a punch because it is made with @timhortonsus brewed coffee in the batter and the glaze. A true *coffee* cake. The texture is dreamy and the coffee is perfectly balanced and smooth. It is goood. #ad Get the recipe below:
 
Pumpkin Coffee Coffee Cake
 
Topping
● 2/3 cup granulated sugar
● pinch of salt
● 2/3 cup flour
● 1 teaspoon cinnamon
● 4 tablespoons butter, melted

Filling
● 1/3 cup brown sugar, packed
● 1 teaspoon cinnamon
● 1 teaspoon unsweetened cocoa powder, optional

Cake
● 1/3 cup vegetable oil
● 2 large eggs, at room temperature
● 1 cup granulated sugar
● 1 cup pumpkin purée
● 1 teaspoon pumpkin pie spice
● 1 teaspoon salt
● 1 teaspoon baking powder
● 1/2 cup brewed @timhortonsus Coffee
● 2 cups flour

Glaze
● 1 cup powdered sugar
● 2 tablespoons brewed @timhortonsus coffee
 
Instructions
1. Preheat the oven to 350°F and grease an 8 inch square pan and line with parchment.
2. Make topping: Stir together the sugar, salt, flour, cinnamon, and melted butter until combined into pea sized lumps. Stirring just until well combined. Set aside.
3. Make filling: Mix together the brown sugar, spice, and cocoa powder. Set it aside.
4. Make cake: Beat together the oil, eggs, sugar, pumpkin, pie spice, salt, and baking powder until smooth. Add the brewed coffee followed by the flour, alternating in two additions, and stir until combined.
5. Spread half the batter into the prepared pan. Sprinkle the filling evenly on top of the batter. Top with the remaining batter. Sprinkle the topping over the batter in the pan.
6. Bake until a toothpick inserted into the center comes out clean, about 40 to 45 minutes. Let cool.
7. Make glaze: Combine the powdered sugar and brewed coffee until smooth and thick but drizzle-able. Using a fork, drizzle it over the cake.

Don’t miss our upcoming chance to ⚡️W I N⚡️ thanks to @timhortonsus and #Kids360!

#timhortons #kids360fanclub
One of the hardest parts about being a working mom One of the hardest parts about being a working mom is how little time you get to spend with your sweet bean during the week. Between wake up and getting to daycare, to pickup and bedtime it’s often an hour at best (which is also filled with making dinner, bath time, etc). I soak up ALL the minutes and the weekends are an absolute snuggle and play fest. It’s so tough though! If you are in the same boat, know that you aren’t alone and you’re doing a good job!! ♥️

This photo has nothing to do with this but I made the cookies for our neighbors and regretting not keeping one for myself right now. 😬🤣
✨W I N !✨ I’ve teamed up with @nielsenmassey ✨W I N !✨ I’ve teamed up with @nielsenmassey and #Kids360 to give away some seriously amazing ingredients to make your desserts sing. 🎶 I love their products and have been using them for years—the vanilla is 💯!!
 
To enter:
● Follow @nielsenmassey and @butterlovescompany 
● Comment and tag a friend you’d love to bake with
● Enter by Thursday November 11th. Winner will be selected at random and DM’d!
 
You’ll win:
•(1) Madagascar Bourbon Pure Vanilla Powder
•(1) Madagascar Bourbon Pure Vanilla Sugar
•(1) Ugandan Pure Vanilla Extract
•(1) Pure Coffee Extract
•(1) Pure Peppermint Extract
•(1) Rose Water
•(1) Pure Lemon Extract
•(1) Tahitian Two Vanilla Beans
•(1) Tahitian Pure Vanilla Extract
•(1) Mexican Two Vanilla Beans
•(1) Mexican Pure Vanilla Extract
•(1) Madagascar Bourbon Two Vanilla Beans
•(1) Madagascar Bourbon Pure Vanilla Extract
•(1) Madagascar Bourbon Pure Vanilla Bean Paste
•(1) Orange Blossom Water
•(1) Pure Orange Extract
•(1) Pure Almond Extract
•(1) Pure Chocolate Extract
.
#ad NO PURCHASE NECESSARY. Open to legal residents of the United States (including its commonwealths, territories, and possessions) who are legal age of majority. Enter by 11:59 pm ET on November  11, 2021. Odds of winning depend on # of entries received. Void where prohibited. This giveaway is not sponsored or endorsed by Instagram or Facebook.
Brainstorming dessert recipes for Thanksgiving and Brainstorming dessert recipes for Thanksgiving and it’s hard not to think about this Black Forest Pie. 🍒🍫 It was such an indulgent tart-sweet chocolate-y treat. It has a chocolate all butter pie crust, a layer of dark chocolate ganache, a layer of chocolate pudding, a cherry topping, and whipped cream. Oh, and a cherry on top! Recipe is from @emcdowell #thebookonpie! 

This one *might* be too rich for the menu but there WILL be pie (duh)🥧. What kind of pie do you need to have on your Thanksgiving table?
This error message is only visible to WordPress admins
Hi! I'm Jenna, founder of butter loves company. From holidays to Tuesdays, let's find a way to make every meal special.
  • Email
  • Facebook
  • Instagram
  • Pinterest
  • RSS
  • Twitter
a2f54ba1dcf0635e58c8be4aa2035ce84863a9d9606a428ab3

© 2013-2019 BUTTER LOVES COMPANY, LLC.

Copyright © 2025 · Foodie Pro Theme by Shay Bocks · Built on the Genesis Framework · Powered by WordPress